
 This is probably one of the most beautiful levels in the game and also one of the biggest. There are only a few enemies in this level including
a small squad of Russian soldiers near the end. Your main adversaries are Snakes and the Jaguars, which roam the lower floor of the canyon.
You cannot kill them so keep your pistol out and fire off a few rounds if they charge at you. There are also dozens of snakes - and Indy HATES
snakes so keep your pistol and Poison Kits ready at all times.
This is probably one of the most beautiful levels in the game and also one of the biggest. There are only a few enemies in this level including
a small squad of Russian soldiers near the end. Your main adversaries are Snakes and the Jaguars, which roam the lower floor of the canyon.
You cannot kill them so keep your pistol out and fire off a few rounds if they charge at you. There are also dozens of snakes - and Indy HATES
snakes so keep your pistol and Poison Kits ready at all times.Your main goal is simple. The narrow canyon has several bridges, which connect the mountains on each side together. You need to locate three giant stone heads and position them on pressure plates on the valley floor to extend the bridges and create a path leading to the pyramid and the final battle with Quetzalcoatl where you will obtain another machine part.
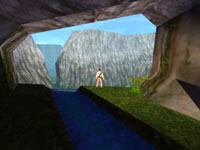
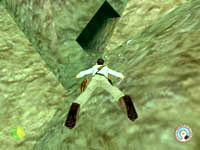
 After you are done enjoying the spectacular view of the valley you can turn around and enter the tunnel to the left. Follow the steps down to
the other ledges overlooking the valley. You will soon come to an area with a hole in the floor and steep steps leading down. Make your way down
these steps and slash through the vines to exit to the valley floor.
After you are done enjoying the spectacular view of the valley you can turn around and enter the tunnel to the left. Follow the steps down to
the other ledges overlooking the valley. You will soon come to an area with a hole in the floor and steep steps leading down. Make your way down
these steps and slash through the vines to exit to the valley floor.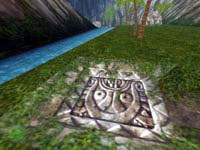 Kill the nearby snake and scare off the Jaguar when he charges you. Make your way over to the river and head downstream. If you look up at the
first narrow canyon you can see the doors opposite each other on the cliff wall. Continue between these cliffs and head toward the right and you
will locate the first pressure plate. If you stand on it you can watch the bridge connect across the river but it will retract as soon as you
step off. That's why we need to locate those large "heavy" stone heads.
Kill the nearby snake and scare off the Jaguar when he charges you. Make your way over to the river and head downstream. If you look up at the
first narrow canyon you can see the doors opposite each other on the cliff wall. Continue between these cliffs and head toward the right and you
will locate the first pressure plate. If you stand on it you can watch the bridge connect across the river but it will retract as soon as you
step off. That's why we need to locate those large "heavy" stone heads.Before we start worrying about stone heads we need to take care of the first treasure, which is located at the very end of this canyon. Follow the river through the narrow gaps making mental notes of the locations of the other bridges and ledges high above. There will be at least one more Jaguar up ahead. Scare him off if he bothers you. Continue until you reach the lake.
 The lake at the end of the river is very deep and is also the home of three hungry Piranhas. Grab your machete and dive in. Chase down the fish
and slash them into Sushi before you head for the treasure. When the fish are all dead you can turn back toward the mouth of the river and swim
down into the dark cave opening below. Grab the Gold Coins from inside then return to the surface. Make your way
back up the river to where you found the first pressure plate.
The lake at the end of the river is very deep and is also the home of three hungry Piranhas. Grab your machete and dive in. Chase down the fish
and slash them into Sushi before you head for the treasure. When the fish are all dead you can turn back toward the mouth of the river and swim
down into the dark cave opening below. Grab the Gold Coins from inside then return to the surface. Make your way
back up the river to where you found the first pressure plate.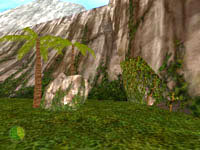 Turn to face the cliff wall and to the right of the giant rock and palm tree will be a vine-covered entrance. Use your machete to slash open
the entrance and go through the stone entry into the next area. Follow the grassy slope up and around to the narrow U-turn to the left and
you should come to a temple entrance.
Turn to face the cliff wall and to the right of the giant rock and palm tree will be a vine-covered entrance. Use your machete to slash open
the entrance and go through the stone entry into the next area. Follow the grassy slope up and around to the narrow U-turn to the left and
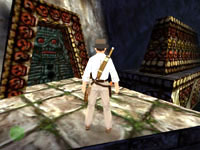
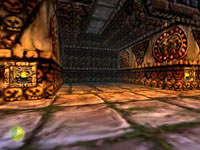
you should come to a temple entrance.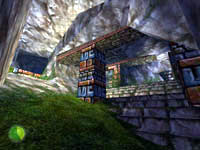 Steps lead up to the right and a grassy slope leads up to the left. You will be returning here a couple more times but for now you want to go
up the stairs on the right and enter the temple. Draw your pistol when you enter; there is a Jaguar stalking this area. To the right is a
giant statue in the middle of the room. Stairs lead up on the far side of the room and columns are directly in front of you.
Steps lead up to the right and a grassy slope leads up to the left. You will be returning here a couple more times but for now you want to go
up the stairs on the right and enter the temple. Draw your pistol when you enter; there is a Jaguar stalking this area. To the right is a
giant statue in the middle of the room. Stairs lead up on the far side of the room and columns are directly in front of you.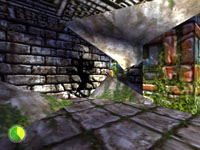 Head around these columns and to the left where you will find a crumbling wall. (see picture) Use the Urgon part to smash the wall and go into
the small nook to get the Silver Idol. Have your guns ready when you leave - the Jaguar doesn't stay away for very
long. Exit the room and head toward the statue then turn left.
Head around these columns and to the left where you will find a crumbling wall. (see picture) Use the Urgon part to smash the wall and go into
the small nook to get the Silver Idol. Have your guns ready when you leave - the Jaguar doesn't stay away for very
long. Exit the room and head toward the statue then turn left.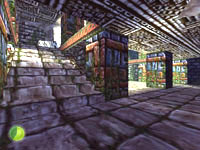 Take the steps up to the top then climb onto the broken piece of stone. Face the statue and use your whip to swing across to the opposite platform.
From here you can jump to the narrow ledge along the back wall then jump forward to the ledge on the opposite wall of where you started. Turn and
go up the steps into the next room.
Take the steps up to the top then climb onto the broken piece of stone. Face the statue and use your whip to swing across to the opposite platform.
From here you can jump to the narrow ledge along the back wall then jump forward to the ledge on the opposite wall of where you started. Turn and
go up the steps into the next room.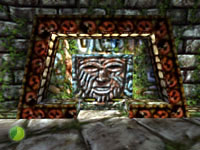 Locate the door with the Olmec face on it - actually it's just a block that looks like a door. Push the block forward and you will fall into a
tunnel below. Examine the shaft and you will note that a giant stone head is at the top and the bottom overlooks the area with the first pressure
plate. There is also a dark nook in the side of the tunnel near where you fell through.
Locate the door with the Olmec face on it - actually it's just a block that looks like a door. Push the block forward and you will fall into a
tunnel below. Examine the shaft and you will note that a giant stone head is at the top and the bottom overlooks the area with the first pressure
plate. There is also a dark nook in the side of the tunnel near where you fell through.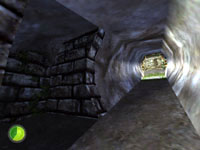 Head up the tunnel until you step on the pressure plate. An ominous click signals that the trap is sprung. Carefully turn around without stepping
off the plate and then run down the shaft and into the nook on the right. If you stumble or miss the nook you are dead so saving before you try
this may be a good idea. When you are successful the block will drop out of the chute to the canyon floor below. You can follow it, but first
head back to the top of the chute and get the Gold Coins from where the stone used to rest.
Head up the tunnel until you step on the pressure plate. An ominous click signals that the trap is sprung. Carefully turn around without stepping
off the plate and then run down the shaft and into the nook on the right. If you stumble or miss the nook you are dead so saving before you try
this may be a good idea. When you are successful the block will drop out of the chute to the canyon floor below. You can follow it, but first
head back to the top of the chute and get the Gold Coins from where the stone used to rest.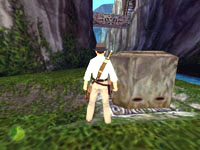 When you drop to the canyon floor you will find the block is sitting in a trench. Push the block forward until it rests on the pressure plate and
the bridge extends. Admire your handiwork then return through the entrance behind you back to the temple entrance. This time take the grassy
slope to the left and you will enter a cave that leads to the bridge you just extended. Cross the bridge and enter the next area.
When you drop to the canyon floor you will find the block is sitting in a trench. Push the block forward until it rests on the pressure plate and
the bridge extends. Admire your handiwork then return through the entrance behind you back to the temple entrance. This time take the grassy
slope to the left and you will enter a cave that leads to the bridge you just extended. Cross the bridge and enter the next area. This huge cavern has several stone totems. Approach them then drop down into the crevice at your feet. Make your way down to the right until
you are in a dark passage along the wall. Follow the wall back toward the dead end and grab those Gold Coins that
somebody left lying around. Turn and follow the path back the opposite way until it turns left and leads back outside.
This huge cavern has several stone totems. Approach them then drop down into the crevice at your feet. Make your way down to the right until
you are in a dark passage along the wall. Follow the wall back toward the dead end and grab those Gold Coins that
somebody left lying around. Turn and follow the path back the opposite way until it turns left and leads back outside. Outside you can admire the valley from a new view then turn and face the larger door leading back into the side of the cliff. As you enter and
head down the steps at least two of the three snakes in this chamber will attack. Kill them with your pistol making sure to keep a safe distance
from their poisonous bite. Continue deeper into the chamber and make sure all three snakes are dead.
Outside you can admire the valley from a new view then turn and face the larger door leading back into the side of the cliff. As you enter and
head down the steps at least two of the three snakes in this chamber will attack. Kill them with your pistol making sure to keep a safe distance
from their poisonous bite. Continue deeper into the chamber and make sure all three snakes are dead.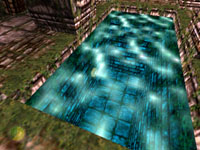 Locate the pool in the center of this room and jump in. Swim down and pull the switch out to open the door above. Surface and climb out and
enter this new area. A fresh pair of snakes wait for you in this area. One is directly ahead and he will try to bait you into coming forward
while his friend ambushes you from the right. Kill both of them and continue to the back of this room.
Locate the pool in the center of this room and jump in. Swim down and pull the switch out to open the door above. Surface and climb out and
enter this new area. A fresh pair of snakes wait for you in this area. One is directly ahead and he will try to bait you into coming forward
while his friend ambushes you from the right. Kill both of them and continue to the back of this room.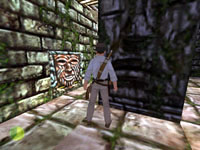 Locate the block with the Olmec face and push it forward as far as it will go. Save your game, as this next puzzle could possibly trap you alive
with no way out. Climb the block you just pushed and head up the ramp. The pressure plate is only a few steps away. Step on it then turn to face
your escape route. You need to run forward and jump before you reach the edge - your arc needs to land you on the lower floor. If you jump too
late you will grab the high ledge. If this happens you still may have time to drop down and continue forward. Run out the end and turn to the
right just as the rock slams into the column behind you.
Locate the block with the Olmec face and push it forward as far as it will go. Save your game, as this next puzzle could possibly trap you alive
with no way out. Climb the block you just pushed and head up the ramp. The pressure plate is only a few steps away. Step on it then turn to face
your escape route. You need to run forward and jump before you reach the edge - your arc needs to land you on the lower floor. If you jump too
late you will grab the high ledge. If this happens you still may have time to drop down and continue forward. Run out the end and turn to the
right just as the rock slams into the column behind you.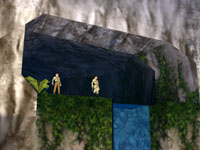 Push the Olmec Stone forward toward the opening on the other side and it will slide out to the valley floor. Follow it out the opening and drop
to the ground below. Push the stone onto the pressure plate to extend the next bridge. Don't forget about the Jaguar lurking in these parts and
now you also get to worry about Russian soldiers who have managed to pursue you from the previous level.
Push the Olmec Stone forward toward the opening on the other side and it will slide out to the valley floor. Follow it out the opening and drop
to the ground below. Push the stone onto the pressure plate to extend the next bridge. Don't forget about the Jaguar lurking in these parts and
now you also get to worry about Russian soldiers who have managed to pursue you from the previous level.Time to do a little backtracking. Head to the river and turn right. Return to the area with the first pressure plate and get your machine gun ready. At least three soldiers are patrolling the area near the entrance leading to the first bridge. Kill them all and take their ammo and weapons. Enter the tunnel and carefully enter the next area where two more soldiers will try to ambush you near the U-Turn leading to the temple entrance. Kill them then head up the grassy slope to the left and across the first bridge.
 You should now be back in the totem area. Head toward the totems and this time jump across the crevice and pull up to the totem plateau. Go
around the totems and past the fallen block and take the slope down to the vine-covered exit. Slash the vines and kill the snake on the other
side that is blocking your access to the bridge. Cross the bridge and enter the cliff on the opposite side.
You should now be back in the totem area. Head toward the totems and this time jump across the crevice and pull up to the totem plateau. Go
around the totems and past the fallen block and take the slope down to the vine-covered exit. Slash the vines and kill the snake on the other
side that is blocking your access to the bridge. Cross the bridge and enter the cliff on the opposite side.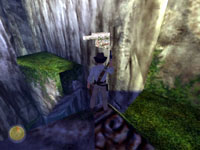 You arrive at a ledge overlooking the next chasm. Below is a ledge you can drop to then use your whip to swing across to the opposite side.
As soon as you land switch from whip to machine gun and spin around to kill the pair of soldiers that have just arrived on the previous ledge.
If you look over the side of the ledge you can see a treasure far below. Turn around and follow the steep steps leading down along the wall.
You arrive at a ledge overlooking the next chasm. Below is a ledge you can drop to then use your whip to swing across to the opposite side.
As soon as you land switch from whip to machine gun and spin around to kill the pair of soldiers that have just arrived on the previous ledge.
If you look over the side of the ledge you can see a treasure far below. Turn around and follow the steep steps leading down along the wall.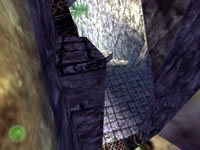 At the third step you can make a running leap to the stone ledge across the deep gap. Continue forward until you reach an angled piece of the
cliff that blocks you path. You will shimmy past this rock in a moment, but now you need to take the steep stone steps leading down to your
right to the floor below. Kill the snake down here and head back the way you came.
At the third step you can make a running leap to the stone ledge across the deep gap. Continue forward until you reach an angled piece of the
cliff that blocks you path. You will shimmy past this rock in a moment, but now you need to take the steep stone steps leading down to your
right to the floor below. Kill the snake down here and head back the way you came.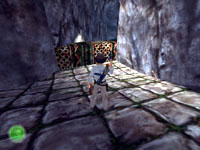 Cross the floor and climb over the fallen pillar and enter the dark chasm beyond. Follow it around to the back where you will find those
Gold Coins you spotted from the ledge high above. Now return to the steps and climb back to the very top. Ignore
the area beyond the steps - it is a dead end. When you reach the top you can back off and hang then shimmy to the right past the angled rock
then pull up on the other side.
Cross the floor and climb over the fallen pillar and enter the dark chasm beyond. Follow it around to the back where you will find those
Gold Coins you spotted from the ledge high above. Now return to the steps and climb back to the very top. Ignore
the area beyond the steps - it is a dead end. When you reach the top you can back off and hang then shimmy to the right past the angled rock
then pull up on the other side.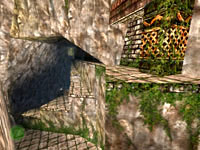 Make a running jump to the grassy ledge across the gap. Turn and look back toward the steps and it should look like the picture - you can see
the angle rock in the middle you had to shimmy past. Enter the cave ahead and follow it into the next room where the third and final Olmec
Stone awaits.
Make a running jump to the grassy ledge across the gap. Turn and look back toward the steps and it should look like the picture - you can see
the angle rock in the middle you had to shimmy past. Enter the cave ahead and follow it into the next room where the third and final Olmec
Stone awaits.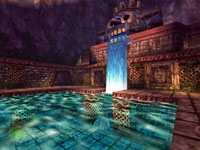 This room has a large pool and a beautiful waterfall spilling out of a statue's mouth. Dive into the water and swim under the falls into the
passage and surface. You are now in a tall vertical shaft with alternating ledges you can use to jump and climb to the top of the falls.
When you reach the top you need to go to the right side (facing) the statue and push the button on the wall to turn off the waterfall and drain
the pool below. Use the ledges to safely climb down to the dry pool area.
This room has a large pool and a beautiful waterfall spilling out of a statue's mouth. Dive into the water and swim under the falls into the
passage and surface. You are now in a tall vertical shaft with alternating ledges you can use to jump and climb to the top of the falls.
When you reach the top you need to go to the right side (facing) the statue and push the button on the wall to turn off the waterfall and drain
the pool below. Use the ledges to safely climb down to the dry pool area.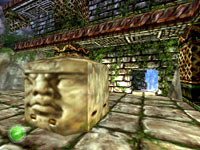 Locate the Olmec Stone and push it sideways once to line it up with the hole leading outside then push it forward into the hole. You can't
actually push the stone out so you will need the assistance of "water pressure". Head back to the inactive waterfall and locate the square
stone to the left of the falls. Push it over so that it is directly under the waterfall.
Locate the Olmec Stone and push it sideways once to line it up with the hole leading outside then push it forward into the hole. You can't
actually push the stone out so you will need the assistance of "water pressure". Head back to the inactive waterfall and locate the square
stone to the left of the falls. Push it over so that it is directly under the waterfall.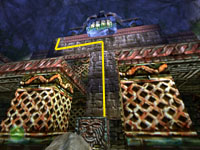 Climb onto the stone then climb the textured wall surface to reach the top of the falls again. Jump across to the opposite side of the head
and press the button to open the statue's mouth and fill the pool with water again. The pressure will build up and send the Olmec stone
shooting out to the valley floor for a perfect landing on the pressure plate. The third bridge extends across the river. Turn and take a
flying leap off the ledge and splash into the pool below. Head to the ledge over by where you were moving the Olmec stone earlier and climb
out of the pool.
Climb onto the stone then climb the textured wall surface to reach the top of the falls again. Jump across to the opposite side of the head
and press the button to open the statue's mouth and fill the pool with water again. The pressure will build up and send the Olmec stone
shooting out to the valley floor for a perfect landing on the pressure plate. The third bridge extends across the river. Turn and take a
flying leap off the ledge and splash into the pool below. Head to the ledge over by where you were moving the Olmec stone earlier and climb
out of the pool.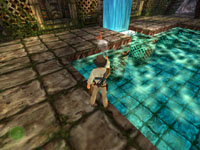 Head toward the falls and kill the snake you will encounter somewhere along this ledge. Then turn left and enter the short cave that ends in
the textured wall. Climb up to the top and continue forward across the third bridge and into the opposite mountain. Follow the passage
around and you will come to a deep chasm with tall grassy steps leading to the bottom. A blue and red snake are on the floor of this chasm
but there is nothing else down there. You can drop down and kill them if you are feeling violent otherwise continue forward.
Head toward the falls and kill the snake you will encounter somewhere along this ledge. Then turn left and enter the short cave that ends in
the textured wall. Climb up to the top and continue forward across the third bridge and into the opposite mountain. Follow the passage
around and you will come to a deep chasm with tall grassy steps leading to the bottom. A blue and red snake are on the floor of this chasm
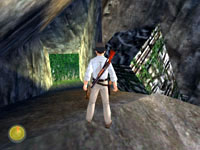
but there is nothing else down there. You can drop down and kill them if you are feeling violent otherwise continue forward.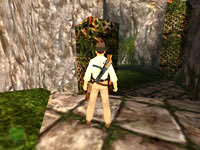 When you reach the green column in the picture you need to go to the left and follow the stone steps leading all the way to the bottom. At
the very bottom is a small dark cave with more Gold Coins inside. Climb back up the steps to the green column and
continue to the right of it. Jump the gap and use your machete to clear the vines so you can continue.
When you reach the green column in the picture you need to go to the left and follow the stone steps leading all the way to the bottom. At
the very bottom is a small dark cave with more Gold Coins inside. Climb back up the steps to the green column and
continue to the right of it. Jump the gap and use your machete to clear the vines so you can continue.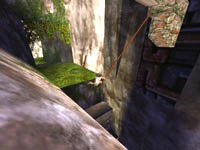 Just before you reach the next deep pit look over the edge to the left and you will find a medicinal herb you can drop down and get. Climb
back up and approach the pit. Use the whip to swing across and continue along the path into the next area. You will arrive outside on a high
ledge overlooking a deep valley with a statue and an entrance on the bottom level.
Just before you reach the next deep pit look over the edge to the left and you will find a medicinal herb you can drop down and get. Climb
back up and approach the pit. Use the whip to swing across and continue along the path into the next area. You will arrive outside on a high
ledge overlooking a deep valley with a statue and an entrance on the bottom level.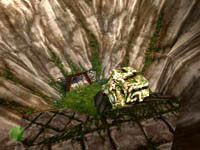 Start dropping down the ledges and kill the snake from the safety of one of the higher ledges. Drop to the ground and enter the huge cavern.
The Owl Temple is perhaps the most difficult puzzle you have encountered up to this point. A very precise timing sequence is required to
successfully exit this temple. But first you can go get a treasure.
Start dropping down the ledges and kill the snake from the safety of one of the higher ledges. Drop to the ground and enter the huge cavern.
The Owl Temple is perhaps the most difficult puzzle you have encountered up to this point. A very precise timing sequence is required to
successfully exit this temple. But first you can go get a treasure.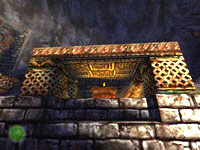 Drop down to the main floor of this area then approach the altar, which has the burning torch inside. Move around to the back of the altar to
find the Gold Coins. Now you can head across the floor area to the steps leading up to the door opposite this
altar. Press the button to open the door an go outside.
Drop down to the main floor of this area then approach the altar, which has the burning torch inside. Move around to the back of the altar to
find the Gold Coins. Now you can head across the floor area to the steps leading up to the door opposite this
altar. Press the button to open the door an go outside.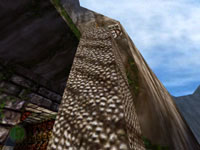 Back in the daylight you can spot the door across the gorge. Looking up you see the towering snake pillar which could possibly be used to
bridge this gap if you could push it over. A button back by the door triggers the next major sequence of events. Save your game and press
the button.
Back in the daylight you can spot the door across the gorge. Looking up you see the towering snake pillar which could possibly be used to
bridge this gap if you could push it over. A button back by the door triggers the next major sequence of events. Save your game and press
the button.When you press the button a door opens on a high ledge inside the owl chamber. You have less than a minute to get up to that door and go inside before it shuts and you get to start over. The length the door stays open is based on the difficulty setting you have chosen. There is also a treasure on the ledge to the right of the exit door. Chances are very good that if you go for the treasure you will not get inside the door on the same trip. You will have a much easier time if you just plan on making two trips.
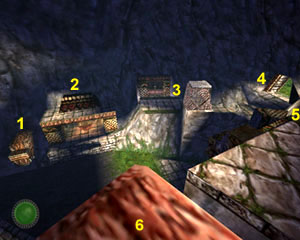
Run through the door and straight across to the ledge to the left of the torch-lit altar (1). Climb to the top and turn to the right and jump across to the roof of the altar (2) and run across making a running leap to the long ledge (3) leading back toward the entrance to this area. Jump/climb up to the next ledge (4) and run past the door and jump to the next series of small ledges (5). Jump to the top of the head then turn and pull up to the ledge and run along it making a running jump to the tongue (6).
 Jumping from the tongue toward the door will land you on this ledge where you can choose to get the treasure on the right or go through the
door. If the door has already shut then go for the treasure. Jump to the ledge and head between the cliff wall and the wall on the ledge
to get the Gold Coins in the niche in the middle of the wall on the right. To return to the bottom and restart
the puzzle is easy. Jump to the steep sloped surface between the tongue and the door ledge and you will slide safely down to the floor below
arriving at the base of the stairs leading up to the door where you can push the button and go back out to push the other button and reset the
puzzle.
Jumping from the tongue toward the door will land you on this ledge where you can choose to get the treasure on the right or go through the
door. If the door has already shut then go for the treasure. Jump to the ledge and head between the cliff wall and the wall on the ledge
to get the Gold Coins in the niche in the middle of the wall on the right. To return to the bottom and restart
the puzzle is easy. Jump to the steep sloped surface between the tongue and the door ledge and you will slide safely down to the floor below
arriving at the base of the stairs leading up to the door where you can push the button and go back out to push the other button and reset the
puzzle.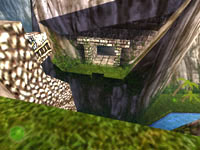 Once through the door turn right and head outside to the ledge overlooking the opposite mountain. You can now push the top of the snake
pillar and it will topple over creating a bridge to the opposite entrance. Back off this ledge and drop to the ledge below and cross the
fallen pillar. Enter the opening on the other side and go deeper into the mountain.
Once through the door turn right and head outside to the ledge overlooking the opposite mountain. You can now push the top of the snake
pillar and it will topple over creating a bridge to the opposite entrance. Back off this ledge and drop to the ledge below and cross the
fallen pillar. Enter the opening on the other side and go deeper into the mountain.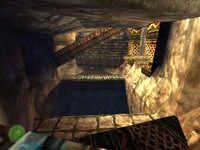 This next area has several fallen pillars. Start climbing down the pillars and head to the right wall. Use your whip to swing across the
gap and continue across the ledge and crouch to crawl under the lower pillar. You will enter a new area with even more fallen pillars forming
ledges and steps. High above to the rear of this room is the exit but a treasure lies on the top of the pillar right above you.
This next area has several fallen pillars. Start climbing down the pillars and head to the right wall. Use your whip to swing across the
gap and continue across the ledge and crouch to crawl under the lower pillar. You will enter a new area with even more fallen pillars forming
ledges and steps. High above to the rear of this room is the exit but a treasure lies on the top of the pillar right above you.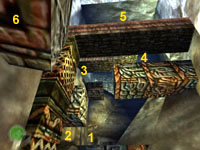 The next sequence of jumps and climbs is pretty easy. You just spiral your way to the top. Climb up to the first ledge (1) then turn left
and jump to the next ledge (2). Turn left and pull up to the top of the block (3) then jump back across to the left to land on the long pillar
(4). Pull up to the brown pillar (5) that spans the entire gap and look down toward the ledge below to the left (6).
The next sequence of jumps and climbs is pretty easy. You just spiral your way to the top. Climb up to the first ledge (1) then turn left
and jump to the next ledge (2). Turn left and pull up to the top of the block (3) then jump back across to the left to land on the long pillar
(4). Pull up to the brown pillar (5) that spans the entire gap and look down toward the ledge below to the left (6).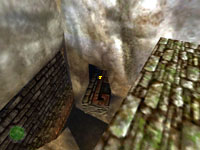 You should be able to spot the Gold Coins lying on the short ledge below. Angle yourself toward the ledge and
jump out so you arc and land on the ledge. Grab the coins then repeat the previous climb back to the top pillar (5). This time turn the other
way and angle your jump to the right to land on the large flat ledge.
You should be able to spot the Gold Coins lying on the short ledge below. Angle yourself toward the ledge and
jump out so you arc and land on the ledge. Grab the coins then repeat the previous climb back to the top pillar (5). This time turn the other
way and angle your jump to the right to land on the large flat ledge.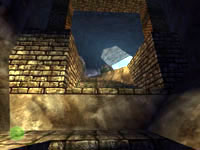 Walk around and pull up to the high ledge leading to the cave exit off in the distance. You should hear the snakes before you see them as you
climb the stairs leading into the sunlight. Kill them all as you make your way to the exit and a spectacular view of the valley and pyramid
beyond.
Walk around and pull up to the high ledge leading to the cave exit off in the distance. You should hear the snakes before you see them as you
climb the stairs leading into the sunlight. Kill them all as you make your way to the exit and a spectacular view of the valley and pyramid
beyond. Head across the valley and watch out for the Jaguar that roams this area. Shoot your gun to scare him away if he bothers you. Climb the steps
to the top of the pyramid and get the final treasure. When you take the Gold Idol the entire floor sinks taking
you deep into the pyramid where you must prepare to do battle with Quetzalcoatl and obtain another part of the machine.
Head across the valley and watch out for the Jaguar that roams this area. Shoot your gun to scare him away if he bothers you. Climb the steps
to the top of the pyramid and get the final treasure. When you take the Gold Idol the entire floor sinks taking
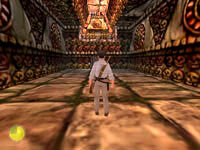
you deep into the pyramid where you must prepare to do battle with Quetzalcoatl and obtain another part of the machine.Since the final battle will not start until you initiate it you can take some time to search this room and plan your battle strategy. Once you know the key areas of this chamber and how they work this battle is not very difficult. There are two huge doors on opposite sides of the room. The snake pillar you rode down on is facing one door - this is the door that Quetzalcoatl waits behind. It will not open until you light the two torches on either side of the door and we're not ready for that yet.
 Go to the opposite side of the room and light the pair of torches to open the other huge door. Inside is a pressure plate that activates a
block in the room behind the other huge door. This block rises up for a short time and is needed to access the ledge with Azerim's Machine
Part. You have to get to this block and climb up quickly or you could be left trapped in the dead end passage.
Go to the opposite side of the room and light the pair of torches to open the other huge door. Inside is a pressure plate that activates a
block in the room behind the other huge door. This block rises up for a short time and is needed to access the ledge with Azerim's Machine
Part. You have to get to this block and climb up quickly or you could be left trapped in the dead end passage.Back in the main room there are also a few things to take note of. Locate the four blue gems glowing in the ceiling. Directly beneath each of these is a floor tile with a carving of an angel and a gap in the walkway above each carving. Also note the four spear pockets at each of the four corners of this chamber. These are triggered by the lift platforms in each corner of the catwalk above. Are you figuring this out yet?
BATTLE STRATEGY:
When you open the other large door Quetzalcoatl will come out into the main room and chase you around. Did I mention that he is a giant snake that can kill you in a single squeeze if he catches you. He also shoots other smaller poisonous snakes out of his mouth. You will have to dodge most of these, as you don't have time to kill them all. When you release the boss:
 Run to the pressure plate in the opposite alcove and activate the block back in the other side chamber. Run back into the main room and
figure out which way "Q" is coming at you and run the other way. Head down the long hall and climb the block and get the machine part. Indy
will read the runes and then you can run back down the hall into the main room. Now you have the power to fight back.
Run to the pressure plate in the opposite alcove and activate the block back in the other side chamber. Run back into the main room and
figure out which way "Q" is coming at you and run the other way. Head down the long hall and climb the block and get the machine part. Indy
will read the runes and then you can run back down the hall into the main room. Now you have the power to fight back.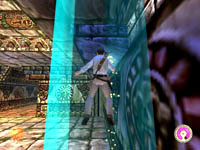 The Azerim Machine Part allows Indy to levitate whenever he stands on one of those Angel Stones. Run to the nearest stone and activate the
machine part. Press UP/DOWN to levitate and when you reach the top jump to either of the ledges. Run to the end but don't step on the corner
lift yet. Watch "Q" down on the floor and wait for him to pass over the spear pocket that matches the lift you are positioned by. You are
safe from "Q" while you are waiting here, but he will probably be spitting snakes at you so keep your pistol out and shoot anything he spits onto
the ledge.
The Azerim Machine Part allows Indy to levitate whenever he stands on one of those Angel Stones. Run to the nearest stone and activate the
machine part. Press UP/DOWN to levitate and when you reach the top jump to either of the ledges. Run to the end but don't step on the corner
lift yet. Watch "Q" down on the floor and wait for him to pass over the spear pocket that matches the lift you are positioned by. You are
safe from "Q" while you are waiting here, but he will probably be spitting snakes at you so keep your pistol out and shoot anything he spits onto
the ledge.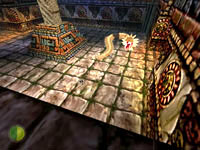 If you time it right you can send the spear through his head doing double the damage, otherwise just stab him by riding the lift down. Repeat
this process by going to either side of the room, levitating to the ledge and using any of the corner lifts. You will have to stab "Q" about
six times before he dies in a flaming explosion. When he dies a passage opens up by one of the blue gems near the back of the room.
If you time it right you can send the spear through his head doing double the damage, otherwise just stab him by riding the lift down. Repeat
this process by going to either side of the room, levitating to the ledge and using any of the corner lifts. You will have to stab "Q" about
six times before he dies in a flaming explosion. When he dies a passage opens up by one of the blue gems near the back of the room.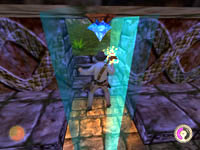 You can go on a snake hunt if you want and clean-up all those leftover snakes slithering around the floor. When you are ready you can go to
the Angel Stone near the back of the room and levitate up and jump toward the opening leading to daylight. As soon as you emerge from the
pyramid you are caught in a rope trap. As you hang upside down Dr. Volodnikov and a couple of his goons capture you and lock you inside the
V.I. Pudovkin.
You can go on a snake hunt if you want and clean-up all those leftover snakes slithering around the floor. When you are ready you can go to
the Angel Stone near the back of the room and levitate up and jump toward the opening leading to daylight. As soon as you emerge from the
pyramid you are caught in a rope trap. As you hang upside down Dr. Volodnikov and a couple of his goons capture you and lock you inside the
V.I. Pudovkin.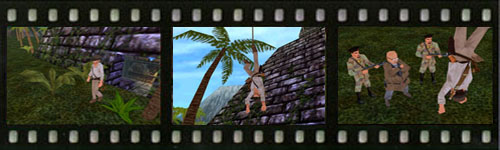
 Recommended Purchases:
(1) First Aid
(1) Rifle Clip
(1) Submachine Gun Clip