
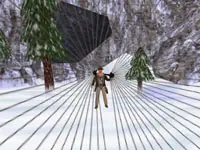
 You bail out of the plane and float gently to the snow covered mountains below. As soon as you ditch your parachute you need to
turn around and investigate the hole in the cliff behind you. Climb up and get the Gold Coins and the
Medicinal Herbs (plants) further back in the corner. Exit back to the landing zone and continue past your chute and the large
boulder and head toward the trees.
You bail out of the plane and float gently to the snow covered mountains below. As soon as you ditch your parachute you need to
turn around and investigate the hole in the cliff behind you. Climb up and get the Gold Coins and the
Medicinal Herbs (plants) further back in the corner. Exit back to the landing zone and continue past your chute and the large
boulder and head toward the trees.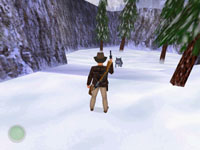 You should spot a lone wolf up ahead. Remember that you cannot kill these animals but gunshots will scare them off temporarily.
Wait for the wolf to charge at you then fire a few pistol rounds into the air and he will run off allowing you to proceed further
into the narrowing canyon.
You should spot a lone wolf up ahead. Remember that you cannot kill these animals but gunshots will scare them off temporarily.
Wait for the wolf to charge at you then fire a few pistol rounds into the air and he will run off allowing you to proceed further
into the narrowing canyon. The path soon ends at a deep crevice. A ladder leads up the opposite wall to a ledge with a tree and a treasure. You can do a
running leap across this chasm and grab the other side or just drop down then climb the ladder to reach the other ledge. Get the
Silver Coins from under the tree then return and either climb down the ladder or jump to the sloped
snow on the left and slide to the bottom.
The path soon ends at a deep crevice. A ladder leads up the opposite wall to a ledge with a tree and a treasure. You can do a
running leap across this chasm and grab the other side or just drop down then climb the ladder to reach the other ledge. Get the
Silver Coins from under the tree then return and either climb down the ladder or jump to the sloped
snow on the left and slide to the bottom.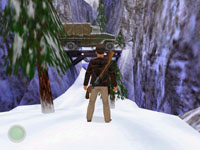 Turn and face the bridge. Head down the sloped path and notice the truck that crosses the bridge. Continue under the bridge and
climb up onto the first ledge. There is no need to climb any further than this. Turn and do a running jump and grab the bridge.
Pull up and turn left and follow the direction the truck was traveling.
Turn and face the bridge. Head down the sloped path and notice the truck that crosses the bridge. Continue under the bridge and
climb up onto the first ledge. There is no need to climb any further than this. Turn and do a running jump and grab the bridge.
Pull up and turn left and follow the direction the truck was traveling.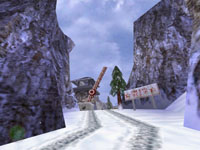 Follow the tracks through the canyon and you will eventually go around a left turn and find yourself facing the Russian Border Patrol.
The front entrance is too heavily guarded for a frontal assault. Indy will have to find a secret way into the base. Return down
the path and locate the narrow passage leading past a tree and winding through the mountains. Another wolf will be somewhere in
this narrow canyon. Scare it off then climb the ledge when you reach the dead end.
Follow the tracks through the canyon and you will eventually go around a left turn and find yourself facing the Russian Border Patrol.
The front entrance is too heavily guarded for a frontal assault. Indy will have to find a secret way into the base. Return down
the path and locate the narrow passage leading past a tree and winding through the mountains. Another wolf will be somewhere in
this narrow canyon. Scare it off then climb the ledge when you reach the dead end.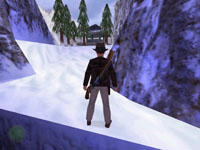 Up ahead you can see the top of a guard tower and a guard on duty at the left corner of the catwalk. Use your rifle and approach
the tower just far enough until Indy aims the gun then fire 2-3 rounds and the guard will crumple in a heap. There are several
other guards ahead that are now alerted to your presence but none of them can attack you yet.
Up ahead you can see the top of a guard tower and a guard on duty at the left corner of the catwalk. Use your rifle and approach
the tower just far enough until Indy aims the gun then fire 2-3 rounds and the guard will crumple in a heap. There are several
other guards ahead that are now alerted to your presence but none of them can attack you yet. As you near the tower a movie will play showing a truck passing through the checkpoint and then the camera will pan around the
base as it zooms in on your current location high on the ledge overlooking the base. Get a running start and leap to the tower.
Grab on and pull up and circle around until you can climb down the ladder. Don't bother shooting at the guards below.
As you near the tower a movie will play showing a truck passing through the checkpoint and then the camera will pan around the
base as it zooms in on your current location high on the ledge overlooking the base. Get a running start and leap to the tower.
Grab on and pull up and circle around until you can climb down the ladder. Don't bother shooting at the guards below.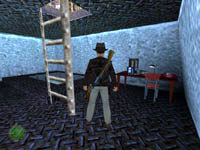 The ladder leads to a radio room. Another ladder leads deeper into the base and a large metal door leads outside. Do NOT open or
go through this door. If you go outside the door will close and you will be forced to exit via the main gate and return through
the canyon to reach the top of the tower again. There is nothing outside but several guards and a small shack with a lever that
opens the main gate arm blocking the road.
The ladder leads to a radio room. Another ladder leads deeper into the base and a large metal door leads outside. Do NOT open or
go through this door. If you go outside the door will close and you will be forced to exit via the main gate and return through
the canyon to reach the top of the tower again. There is nothing outside but several guards and a small shack with a lever that
opens the main gate arm blocking the road.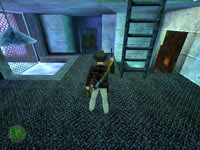 Climb down the ladder to the next area and things start to get interesting. A pool of water leads to the river outside but it is
blocked with a gate. The metal door to the right is locked so continue forward into the storage room and whip out your favorite
gun to kill the guard in this area. Peek through the hole in the door and notice another gunman is waiting inside.
Climb down the ladder to the next area and things start to get interesting. A pool of water leads to the river outside but it is
blocked with a gate. The metal door to the right is locked so continue forward into the storage room and whip out your favorite
gun to kill the guard in this area. Peek through the hole in the door and notice another gunman is waiting inside.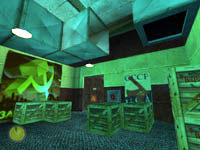 Push the button to open the door and quickly kill the gunman inside. Both the left and right doors are locked but if you look up
you should notice an open air duct. Climb the crates and jump to grab and pull into the duct. Make the first left turn and follow
the duct to the hole in the bottom and drop through into the next room. Grab the Money Chest from the
crate then open door and return to the previous room. Climb into the duct once more and go straight this time and around to the
right until you can drop into the other room.
Push the button to open the door and quickly kill the gunman inside. Both the left and right doors are locked but if you look up
you should notice an open air duct. Climb the crates and jump to grab and pull into the duct. Make the first left turn and follow
the duct to the hole in the bottom and drop through into the next room. Grab the Money Chest from the
crate then open door and return to the previous room. Climb into the duct once more and go straight this time and around to the
right until you can drop into the other room.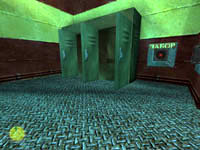 There are a pair of lockers and a pair of buttons in this room. Search the lockers to find an inflatable raft and a patch kit.
Press the button with the Russian writing on it to open the gate in the next room giving you access to the river. Press the other
button to open the door leading to that room and enter. Head toward the pool and activate your raft.
There are a pair of lockers and a pair of buttons in this room. Search the lockers to find an inflatable raft and a patch kit.
Press the button with the Russian writing on it to open the gate in the next room giving you access to the river. Press the other
button to open the door leading to that room and enter. Head toward the pool and activate your raft.Before you paddle out into the current let me give you a few tips on white water river rafting:
-
- Save your game RIGHT NOW (as a unique filename) and then QuickSave often
- Back-paddle to keep your speed down
- One patch kit can fix multiple punctures. If you puncture your raft do not use the repair kit right away. Keep your eye on the raft's air meter while you try to get past as many other rocks as you can
- If you are about to dock and exit the raft do not use a patch kit. When you re-inflate a damaged raft it will still be leaking but it will have a full air meter again and you can very likely make it to your next landing zone or at least past several more rocks before patching.
- Use your Map ("m" key) to see which direction the river is going to be turning up ahead
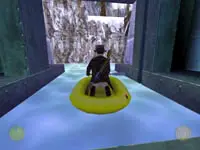
 Paddle out into the current and make your way downstream. There are no dangerous rocks yet so enjoy the ride as the river snakes
around to the right and then left. As you come around the bend you will see your first rocks ahead and a large waterfall to your
left. Paddle hard to fight the current and paddle through the waterfall and into the cave. Exit near the back and get the
Silver Idol before returning to the raft and exiting this cave.
Paddle out into the current and make your way downstream. There are no dangerous rocks yet so enjoy the ride as the river snakes
around to the right and then left. As you come around the bend you will see your first rocks ahead and a large waterfall to your
left. Paddle hard to fight the current and paddle through the waterfall and into the cave. Exit near the back and get the
Silver Idol before returning to the raft and exiting this cave.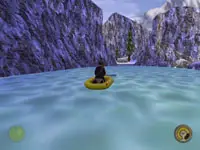 Turn left as you exit and steer to either side of the large rock. The river widens as you pass by a large metal bridge. Large
rocks block your passage ahead but there is a snowy ledge on the left bank that you can exit onto. Follow the trail through the
canyon. Note the large rocks and don't miss the Silver Coins stashed behind the third one you come to.
Turn left as you exit and steer to either side of the large rock. The river widens as you pass by a large metal bridge. Large
rocks block your passage ahead but there is a snowy ledge on the left bank that you can exit onto. Follow the trail through the
canyon. Note the large rocks and don't miss the Silver Coins stashed behind the third one you come to. Up ahead is a bridge leading over a bottomless pit. Cross this bridge and go through the small structure to the junction ahead.
To the left is an arched entrance leading to a prayer altar. Examining this altar reveals that you are in need of four candles
to operate this device and activate the bridge across the river. Return through the arch and continue forward until you reach the
top of the hill overlooking a guard shack.
Up ahead is a bridge leading over a bottomless pit. Cross this bridge and go through the small structure to the junction ahead.
To the left is an arched entrance leading to a prayer altar. Examining this altar reveals that you are in need of four candles
to operate this device and activate the bridge across the river. Return through the arch and continue forward until you reach the
top of the hill overlooking a guard shack.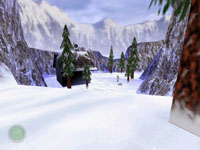 This shack is occupied by a pair of deadly guards. Use any rifle rounds you have left and if you run out simply charge the guards
with guns blazing. When both guards are dead you can relieve them of their weapons and ammo and search the house. Inside is another
locker. The left door has an UNLIMITED supply of patch kits for your raft. You can carry up to three at a time and you can always
come back for more. Get the Trauma Kit from the right locker then exit the house and continue toward the waterfall.
This shack is occupied by a pair of deadly guards. Use any rifle rounds you have left and if you run out simply charge the guards
with guns blazing. When both guards are dead you can relieve them of their weapons and ammo and search the house. Inside is another
locker. The left door has an UNLIMITED supply of patch kits for your raft. You can carry up to three at a time and you can always
come back for more. Get the Trauma Kit from the right locker then exit the house and continue toward the waterfall.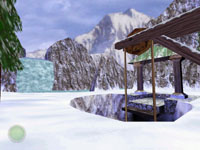 When you reach the falls you will notice a structure off to the right. This is an elevator that you will use to return to this
area after you ride down the river in your raft. The river forks in several places but all forks converge far below at the bottom
of this elevator shaft. You cannot operate the elevator from up here - not that you'd even want to.
When you reach the falls you will notice a structure off to the right. This is an elevator that you will use to return to this
area after you ride down the river in your raft. The river forks in several places but all forks converge far below at the bottom
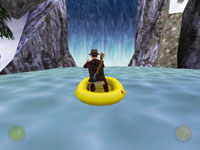
of this elevator shaft. You cannot operate the elevator from up here - not that you'd even want to.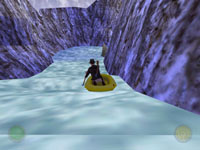 The current is much stronger in this section of the river and there are a lot more rocks. Always stay close to the bank as the
rocks that are part of the shore will not hurt your raft; only the jagged rocks in the middle of the river can puncture your boat.
You are in search of the four missing candles and I will tell you the shortest way to find all four using only two trips down the
river. There are several alternate routes through the various forks and all of them are a lot of fun so try not to use this portion
of the solve unless you really get stuck.
The current is much stronger in this section of the river and there are a lot more rocks. Always stay close to the bank as the
rocks that are part of the shore will not hurt your raft; only the jagged rocks in the middle of the river can puncture your boat.
You are in search of the four missing candles and I will tell you the shortest way to find all four using only two trips down the
river. There are several alternate routes through the various forks and all of them are a lot of fun so try not to use this portion
of the solve unless you really get stuck.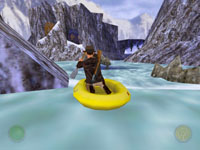 When you come to this first fork (major forks are designated by the yellow and blue towers) you need to tightly hug the left bank
and stay to the left of the rocks and white water in the middle of these rapids. Follow the river around to the left fork and
continue down this very fast portion of the river. Note: If you were to take the narrow fork to the right it is a shortcut that
takes you directly to the second candle, but you would still have to go back for the first candle and make a third elevator trip.
When you come to this first fork (major forks are designated by the yellow and blue towers) you need to tightly hug the left bank
and stay to the left of the rocks and white water in the middle of these rapids. Follow the river around to the left fork and
continue down this very fast portion of the river. Note: If you were to take the narrow fork to the right it is a shortcut that
takes you directly to the second candle, but you would still have to go back for the first candle and make a third elevator trip.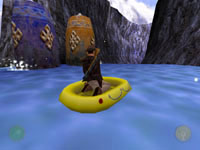 Your next major decision point is when you reach the second pair of blue and yellow towers. The fork straight ahead leads to a
pair of candles and the fork to the right past the yellow tower leads to another pair. You can take either fork in any order and
when you get the candles you will take the lift to return to the top of the river and return to this point and take the other path
to get the remaining candles. I'm turning left so read the following paragraphs in the order you follow the river.
Your next major decision point is when you reach the second pair of blue and yellow towers. The fork straight ahead leads to a
pair of candles and the fork to the right past the yellow tower leads to another pair. You can take either fork in any order and
when you get the candles you will take the lift to return to the top of the river and return to this point and take the other path
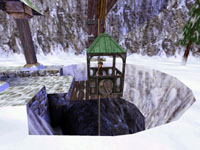
to get the remaining candles. I'm turning left so read the following paragraphs in the order you follow the river.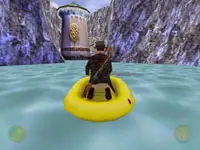 The LEFT FORK will take you down a narrow stretch of river then open into a wide turn with a tower off to the left. Paddle against
the current to get into the small cove and get out on the stone dock. Circle around to the back of the tower and find the steps and
ledges leading to the top. Looking through the slit in the wooden door reveals your first candle but the door seems to be locked.
The LEFT FORK will take you down a narrow stretch of river then open into a wide turn with a tower off to the left. Paddle against
the current to get into the small cove and get out on the stone dock. Circle around to the back of the tower and find the steps and
ledges leading to the top. Looking through the slit in the wooden door reveals your first candle but the door seems to be locked.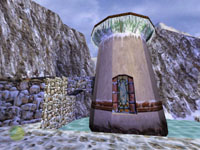 Go back down the steps and face the back of the tower. Use your pistol to shoot out the large window then do a running leap into
the window. Inside is a lever you can flip to open the door above. Climb into the window and back up just enough so you can get
a one-step running start and leap back to the stone ledge. Head up the steps and get Candle #1.
Go back down the steps and face the back of the tower. Use your pistol to shoot out the large window then do a running leap into
the window. Inside is a lever you can flip to open the door above. Climb into the window and back up just enough so you can get
a one-step running start and leap back to the stone ledge. Head up the steps and get Candle #1.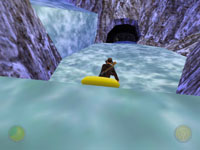 Back in the raft, exit the cove and head down the river past a waterfall on the left. This waterfall is actually the end of
the shortcut I mentioned earlier that I told you not to bother with. Continue into the cave and through a short underground
passage and you will spill over a small waterfall landing in a calm portion of the river next to an almost storybook picture
location.
Back in the raft, exit the cove and head down the river past a waterfall on the left. This waterfall is actually the end of
the shortcut I mentioned earlier that I told you not to bother with. Continue into the cave and through a short underground
passage and you will spill over a small waterfall landing in a calm portion of the river next to an almost storybook picture
location.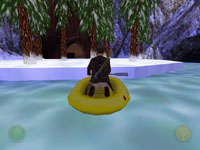 Exit the raft and search inside the hollow tree to find Candle #2. On your way out you will want to circle
around to the back of the tree and locate the Gold Coins lying on the stump. You can now return to the
river and get back in the raft.
Exit the raft and search inside the hollow tree to find Candle #2. On your way out you will want to circle
around to the back of the tree and locate the Gold Coins lying on the stump. You can now return to the
river and get back in the raft.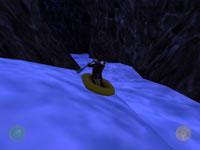 The next underground passage is very long and very fast. You may even lose sight of Indy and his raft from time to time. The only
rocks you need to worry about are near the end of the tunnel when it spills out into the lake. Make sure you are hugging the right
wall when the tunnel opens up into the large cavern.
The next underground passage is very long and very fast. You may even lose sight of Indy and his raft from time to time. The only
rocks you need to worry about are near the end of the tunnel when it spills out into the lake. Make sure you are hugging the right
wall when the tunnel opens up into the large cavern.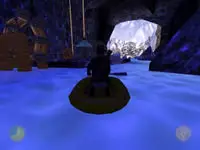 This cavern is lit fairly well from the large opening ahead. A large mechanical device on the shore operates the lift taking you
back to the top of the river. Go to the shore and exit the raft. Find and flip the lever to engage the gears then turn and get
onto the lift. It will take you to the top and you can get ready for your second trip down the river. If you need more patch
kits, now is a good time to go back to the house and get them.
This cavern is lit fairly well from the large opening ahead. A large mechanical device on the shore operates the lift taking you
back to the top of the river. Go to the shore and exit the raft. Find and flip the lever to engage the gears then turn and get
onto the lift. It will take you to the top and you can get ready for your second trip down the river. If you need more patch
kits, now is a good time to go back to the house and get them.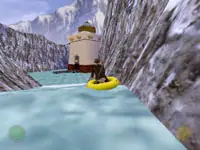 Ride the rapids back down the river following the same path as before. This time when you get to the second pair of towers you will
want to continue straight past the blue tower. The river will wrap around and you will see another tower in the distance. Pull up
and exit onto the wooden dock in front of this tower and go inside. Up the stairs is Candle #3. Take it
and quickly return outside and get in you raft. If you linger in this area for too long a pair of poisonous spiders will show up.
Ride the rapids back down the river following the same path as before. This time when you get to the second pair of towers you will
want to continue straight past the blue tower. The river will wrap around and you will see another tower in the distance. Pull up
and exit onto the wooden dock in front of this tower and go inside. Up the stairs is Candle #3. Take it
and quickly return outside and get in you raft. If you linger in this area for too long a pair of poisonous spiders will show up.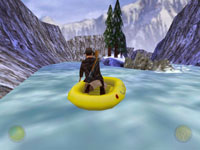 As you pull away from the dock you will see a large rock in the middle of the rapids ahead. Go to the left of this rock so you can
paddle hard and shoot across to the right of the next rock (see picture). The second rock is the beginning of a fork in the river.
The left fork is a worthless stretch of river that takes you back to the lift without the final candle. Make sure you take the
right fork and you will spill over another short waterfall into a wide portion of the lake with a cave ahead.
As you pull away from the dock you will see a large rock in the middle of the rapids ahead. Go to the left of this rock so you can
paddle hard and shoot across to the right of the next rock (see picture). The second rock is the beginning of a fork in the river.
The left fork is a worthless stretch of river that takes you back to the lift without the final candle. Make sure you take the
right fork and you will spill over another short waterfall into a wide portion of the lake with a cave ahead.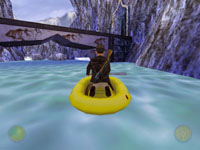 Turn right and paddle hard toward the bridge. The current is strong here but you need to get to that patch of snow on the other
side of the bridge. Once you get past the large rock on the left the current will stop pulling at you. Exit the boat and go up
the steps into the cave.
Turn right and paddle hard toward the bridge. The current is strong here but you need to get to that patch of snow on the other
side of the bridge. Once you get past the large rock on the left the current will stop pulling at you. Exit the boat and go up
the steps into the cave.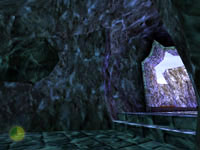 The stairs lead up and circle around to the bridge leading back over the river. Look carefully in the left wall before exiting
onto the bridge and you should spot a dark ledge hidden in the wall. Climb up on this ledge and you will find some Medicinal Herbs
and some Gold Coins.
The stairs lead up and circle around to the bridge leading back over the river. Look carefully in the left wall before exiting
onto the bridge and you should spot a dark ledge hidden in the wall. Climb up on this ledge and you will find some Medicinal Herbs
and some Gold Coins.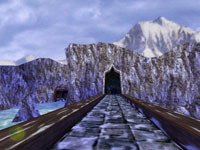 Drop down and continue out to the bridge. Cross over and go into the opposite door and through a short passage leading down to a
large mechanical room with giant pistons and a huge cam shaft. Your objective is to get to the opposite upper ledge. Turn right
and go to the section of broken railing and wait for the piston to reach the bottom. Jump out to the wooden ledge then turn and
face the ledge behind you. Back up for a running start and just as the piston starts to move up, run and jump to the ledge. Now
jump over the short gap to the middle section of catwalk and go around the barrels. You should be lined up with the left piston.
Drop down and continue out to the bridge. Cross over and go into the opposite door and through a short passage leading down to a
large mechanical room with giant pistons and a huge cam shaft. Your objective is to get to the opposite upper ledge. Turn right
and go to the section of broken railing and wait for the piston to reach the bottom. Jump out to the wooden ledge then turn and
face the ledge behind you. Back up for a running start and just as the piston starts to move up, run and jump to the ledge. Now
jump over the short gap to the middle section of catwalk and go around the barrels. You should be lined up with the left piston.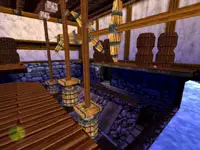 Turn 45 degrees and line up with the middle piston and when it goes down do a running jump to land on the square wooden ledge. Now
square up with the opposite ledge and jump and grab onto it when the middle piston rises. Turn left and jump across the wider gap
and you should now be at the opposite doorway. Turn back and get a good view of this puzzle (see picture).
Turn 45 degrees and line up with the middle piston and when it goes down do a running jump to land on the square wooden ledge. Now
square up with the opposite ledge and jump and grab onto it when the middle piston rises. Turn left and jump across the wider gap
and you should now be at the opposite doorway. Turn back and get a good view of this puzzle (see picture).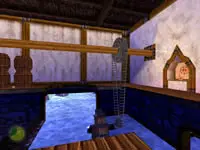 Before going into the door there are a few more items out here you will want to get. Looking out toward the waterwheel you can see
a Trauma Kit hiding behind some barrels and a Gold Idol set inside a niche on the far wall. Jump the
gaps in the catwalk to get the treasure and the med kit then return to the door. You will also want to note the door at the river-level
directly under the treasure niche (see picture - bottom right corner). I will refer to it in a few minutes.
Before going into the door there are a few more items out here you will want to get. Looking out toward the waterwheel you can see
a Trauma Kit hiding behind some barrels and a Gold Idol set inside a niche on the far wall. Jump the
gaps in the catwalk to get the treasure and the med kit then return to the door. You will also want to note the door at the river-level
directly under the treasure niche (see picture - bottom right corner). I will refer to it in a few minutes.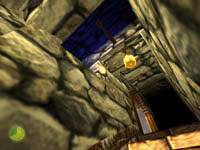 Go through the door and head up the steps. You may (or may not) notice the high ledge about halfway up the steps on the left. One
of the steps will be slightly darker than the others. Stand on this step and get against the wall and use your whip to climb up and
get the Silver Bar from the nook above. Drop back down and continue up the stairs.
Go through the door and head up the steps. You may (or may not) notice the high ledge about halfway up the steps on the left. One
of the steps will be slightly darker than the others. Stand on this step and get against the wall and use your whip to climb up and
get the Silver Bar from the nook above. Drop back down and continue up the stairs.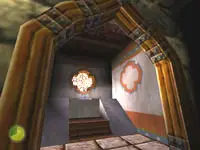 Turn the corner and enter an almost temple-like alcove where you will find Candle #4 waiting for you on a
pedestal. Take the candle and return down the steps to the ledge overlooking the machinery. Go left and drop down then head toward
the river and turn left. There is a narrow strip along the right that you can take safely through the bottom of the piston area and
climb up to the other side. Go through the door and up the steps, across the bridge and back to the snowy bank where you can get
in your raft once again.
Turn the corner and enter an almost temple-like alcove where you will find Candle #4 waiting for you on a
pedestal. Take the candle and return down the steps to the ledge overlooking the machinery. Go left and drop down then head toward
the river and turn left. There is a narrow strip along the right that you can take safely through the bottom of the piston area and
climb up to the other side. Go through the door and up the steps, across the bridge and back to the snowy bank where you can get
in your raft once again.Paddle back under the bridge and head into the cave with the waterwheel. The current is very strong here and it is hard to get into that doorway to the left that I mentioned earlier. You may want to go through the narrow gap to the left in front of the waterwheel although you will probably puncture your raft. If you try to go past the waterwheel and then turn left you will need to back-paddle very hard to slow down then spin around and paddle hard into the door. Exit onto the ledge and get the Blue Gem from the niche. Get back in the raft and ride out the rest of the rapids as you travel through a long underground passage before arriving at the lift.
 Take the lift back to the top and head back toward the cabin and up the hill. A wolf is probably lurking around this area so you
will need to fire a few rounds to scare him off. Head past the bottomless pit on the left and go around the corner up ahead and
you should be facing the door to the final area.
Take the lift back to the top and head back toward the cabin and up the hill. A wolf is probably lurking around this area so you
will need to fire a few rounds to scare him off. Head past the bottomless pit on the left and go around the corner up ahead and
you should be facing the door to the final area.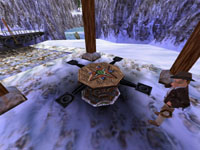 Go through the door and up the steps to the table. Indy can translate some writings (if you didn't do this earlier giving you a clue
as to what must be done. Place each of the four candles on each of the receptacle arms. There is no specific order they must be
placed. When all the candles are resting on the altar you can activate the lighter in your inventory.
Go through the door and up the steps to the table. Indy can translate some writings (if you didn't do this earlier giving you a clue
as to what must be done. Place each of the four candles on each of the receptacle arms. There is no specific order they must be
placed. When all the candles are resting on the altar you can activate the lighter in your inventory.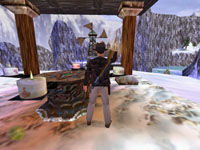 Make one final circle around the altar lighting each of the candles. When the fourth and final candle is lit the wind will start
to blow and the windmill will start to spin turning a complex series of gears to swing the bridge out and across the river. You
will regain control of Indy for just a brief moment to actually make him cross the bridge and enter the Shambala Sanctuary.
Make one final circle around the altar lighting each of the candles. When the fourth and final candle is lit the wind will start
to blow and the windmill will start to spin turning a complex series of gears to swing the bridge out and across the river. You
will regain control of Indy for just a brief moment to actually make him cross the bridge and enter the Shambala Sanctuary.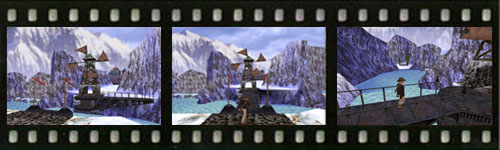

 Recommended Purchases:
(2) Rifle Clips
(1) 9mm Clip