
 Welcome to the island paradise of Palawan. During WWII this island served as a Japanese outpost but now the only thing left
is a deserted camp and a bunch of hostile marine life. Much of this level will be spent in and under the water and the deadly
sharks and annoying piranha won't make things any easier. You will also get to explore the sunken wreck of an old Japanese
freighter, an underwater temple, and other exciting locales as you make your way toward the volcano entrance.
Welcome to the island paradise of Palawan. During WWII this island served as a Japanese outpost but now the only thing left
is a deserted camp and a bunch of hostile marine life. Much of this level will be spent in and under the water and the deadly
sharks and annoying piranha won't make things any easier. You will also get to explore the sunken wreck of an old Japanese
freighter, an underwater temple, and other exciting locales as you make your way toward the volcano entrance. When you have control of Indy, turn around and face inland. Ignore the sand crabs; they are just decoration and won't attack
or harm you. The path splits immediately. The left path goes up a few steps and ends at a spider web you cannot get through
just yet. Take the right path and follow it to the interior of the island.
When you have control of Indy, turn around and face inland. Ignore the sand crabs; they are just decoration and won't attack
or harm you. The path splits immediately. The left path goes up a few steps and ends at a spider web you cannot get through
just yet. Take the right path and follow it to the interior of the island. You will soon arrive at a spiked pit. The bridge has collapsed long ago but a vine stretches across the middle of the pit.
You can use your whip to swing across but first you may want to deal with that giant lizard basking in the sun over by that
rock. Use your rifle and try to kill him from here if you can. If you must, swing across and deal with him close-up but
don't accidentally shoot the dynamite. These lizards take 2-4 hits and you will be encountering several more before this
level is over.
You will soon arrive at a spiked pit. The bridge has collapsed long ago but a vine stretches across the middle of the pit.
You can use your whip to swing across but first you may want to deal with that giant lizard basking in the sun over by that
rock. Use your rifle and try to kill him from here if you can. If you must, swing across and deal with him close-up but
don't accidentally shoot the dynamite. These lizards take 2-4 hits and you will be encountering several more before this
level is over. Search the deserted camp to the right. There is a Trauma Kit under the tent and a very useful Machete next to the skeleton.
Finally, get the Silver Coins from behind the crate then swing back across the pit and return to
the beach. This time take the left path.
Search the deserted camp to the right. There is a Trauma Kit under the tent and a very useful Machete next to the skeleton.
Finally, get the Silver Coins from behind the crate then swing back across the pit and return to
the beach. This time take the left path.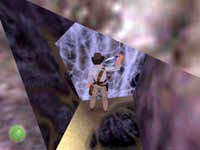 Approach the entrance and use your machete to slash the web away. A spider will drop from the ceiling so whip out your pistol
and kill him quickly. You can always retreat to the previous ledge and kill him from there - he won't follow you down. Just
inside the cave on the right is a light colored cracked wall. If you examine it Indy will say it looks like it's ready to
crumble. Use your Urgon Machine Part to collapse the wall and locate the Blue Gem inside. Now
you can head out the back exit and climb the ledges.
Approach the entrance and use your machete to slash the web away. A spider will drop from the ceiling so whip out your pistol
and kill him quickly. You can always retreat to the previous ledge and kill him from there - he won't follow you down. Just
inside the cave on the right is a light colored cracked wall. If you examine it Indy will say it looks like it's ready to
crumble. Use your Urgon Machine Part to collapse the wall and locate the Blue Gem inside. Now
you can head out the back exit and climb the ledges.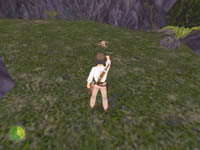 When you climb to the top another giant lizard will attack. Kill him before heading over to the vine-covered cave entrance
to the right. Slash the vines with your machete to access the cave and get the entrenching tool, which
is a fancy name for a shovel. Exit the cave.
When you climb to the top another giant lizard will attack. Kill him before heading over to the vine-covered cave entrance
to the right. Slash the vines with your machete to access the cave and get the entrenching tool, which
is a fancy name for a shovel. Exit the cave.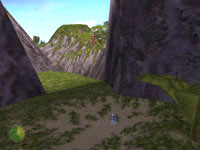 Continuing around this grassy area, Indy will find a patch of ground that looks "odd". Use your new shovel to dig and you
will uncover a Silver Idol. Continue forward into the next canyon. If you look up and to your
right you will see a large stone head. Actually, reaching this is your final goal of this level and you won't believe what
you have to do to get there. Head to the back of the rock in this canyon and get the medicinal herb then make your way back
to the beach.
Continuing around this grassy area, Indy will find a patch of ground that looks "odd". Use your new shovel to dig and you
will uncover a Silver Idol. Continue forward into the next canyon. If you look up and to your
right you will see a large stone head. Actually, reaching this is your final goal of this level and you won't believe what
you have to do to get there. Head to the back of the rock in this canyon and get the medicinal herb then make your way back
to the beach. There is a sandy ledge leading several yards out into the ocean. You can safely walk out this far and survey the water and
surrounding landmasses. As soon as you move forward and actually submerge you will have to deal with all those fish you see
swimming around. You will probably also notice many WWII anti-ship mines anchored by chains from the ocean floor. You will
obviously need to avoid these. I'd recommend saving your game and just swimming around the water exploring the area and
learning how to dodge or kill fish with your machete. You can even check out that Japanese fighter plane resting on the
ocean floor.
There is a sandy ledge leading several yards out into the ocean. You can safely walk out this far and survey the water and
surrounding landmasses. As soon as you move forward and actually submerge you will have to deal with all those fish you see
swimming around. You will probably also notice many WWII anti-ship mines anchored by chains from the ocean floor. You will
obviously need to avoid these. I'd recommend saving your game and just swimming around the water exploring the area and
learning how to dodge or kill fish with your machete. You can even check out that Japanese fighter plane resting on the
ocean floor.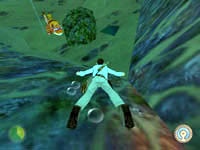 Ultimately your objective is to swim across to the opposite beach. Wait until the water is relatively free of sharks and fish
then dive in and swim like crazy. The sharks will arrive shortly and will probably get a few bites on you. You could try to
kill the Piranha but it's not worth it really - you will take more damage than you would if you just swam away. When you reach
the beach turn left and walk as far as you can go then turn back and face the water. Look down and you should spot a rock
with a square hole behind it (see picture). Take a deep breath and dive toward this hole.
Ultimately your objective is to swim across to the opposite beach. Wait until the water is relatively free of sharks and fish
then dive in and swim like crazy. The sharks will arrive shortly and will probably get a few bites on you. You could try to
kill the Piranha but it's not worth it really - you will take more damage than you would if you just swam away. When you reach
the beach turn left and walk as far as you can go then turn back and face the water. Look down and you should spot a rock
with a square hole behind it (see picture). Take a deep breath and dive toward this hole.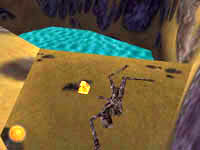 Swim into the hole and through the underwater tunnel. A shark lurks around this cave about halfway through so you will need
to do some evasive swimming as you reach the end. Swim up and reverse direction to reach the ledge you can use to pull out
of the water. Climb up the next higher ledge to find a skeleton and the Gold Idol. Jump back in
the water and return through the underwater passage to the beach.
Swim into the hole and through the underwater tunnel. A shark lurks around this cave about halfway through so you will need
to do some evasive swimming as you reach the end. Swim up and reverse direction to reach the ledge you can use to pull out
of the water. Climb up the next higher ledge to find a skeleton and the Gold Idol. Jump back in
the water and return through the underwater passage to the beach.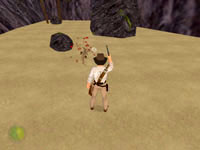 Off to the right is a pair of rocks and another giant lizard. Approach the reptile and kill him when he charges you. Then
go behind the large rock on the right and collect the Gold Coins. Now head further inland and go
into the cave on the left. Use the machete to cut the first web then kill the spider that drops from the ceiling. Go in
further and cut the next web and kill another spider that attacks from the ground. Head out of the cave to the beach ahead.
Off to the right is a pair of rocks and another giant lizard. Approach the reptile and kill him when he charges you. Then
go behind the large rock on the right and collect the Gold Coins. Now head further inland and go
into the cave on the left. Use the machete to cut the first web then kill the spider that drops from the ceiling. Go in
further and cut the next web and kill another spider that attacks from the ground. Head out of the cave to the beach ahead.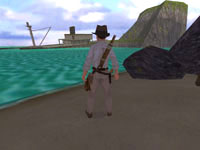 More water and definitely a lot more angry fish are waiting for you here. Across the water is a sunken Japanese freighter
that seems to have crashed into a small island with some cool Tiki Statues on the plateau. Just on the other side of the rock
on this beach (see picture) is a non-functioning torpedo that has washed ashore. Remember its location for later.
More water and definitely a lot more angry fish are waiting for you here. Across the water is a sunken Japanese freighter
that seems to have crashed into a small island with some cool Tiki Statues on the plateau. Just on the other side of the rock
on this beach (see picture) is a non-functioning torpedo that has washed ashore. Remember its location for later.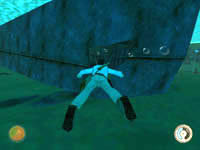 Let's go diving for treasure. Jump in and head for the stern of the ship (left) making sure to avoid those sharks and fish.
As you round the stern you should spot a hole in the hull. You may need to surface and get some air before entering the ship,
but when you do you can find the Gold Bar down in the back corner. Exit back through the hole and
surface to climb out onto the shallow water on the rear deck.
Let's go diving for treasure. Jump in and head for the stern of the ship (left) making sure to avoid those sharks and fish.
As you round the stern you should spot a hole in the hull. You may need to surface and get some air before entering the ship,
but when you do you can find the Gold Bar down in the back corner. Exit back through the hole and
surface to climb out onto the shallow water on the rear deck.
 Ignore the stairs and doors on the ship for now. They are all locked or rusted shut. You need to head to the bow (front) of
the ship and circle around the crane to get to the large crate. Next to the large crate is a small box with a
torpedo arming device inside - hmmm...I wonder where that could go? Time to take a swim.
Ignore the stairs and doors on the ship for now. They are all locked or rusted shut. You need to head to the bow (front) of
the ship and circle around the crane to get to the large crate. Next to the large crate is a small box with a
torpedo arming device inside - hmmm...I wonder where that could go? Time to take a swim.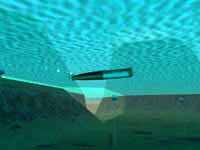 When you reach the beach you need to position yourself so Indy is facing the torpedo with the ship in the background. Use
the arming device to send the torpedo across the bay and into the side of the ship blasting a new entrance for you. Swim back
across to the ship and dive down and go through the hole. You are safe from the sharks in this area but the piranha will
follow you inside.
When you reach the beach you need to position yourself so Indy is facing the torpedo with the ship in the background. Use
the arming device to send the torpedo across the bay and into the side of the ship blasting a new entrance for you. Swim back
across to the ship and dive down and go through the hole. You are safe from the sharks in this area but the piranha will
follow you inside.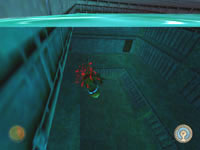 Swim to the surface and back yourself into a corner so the piranha can only come at you from one angle. Then start swinging
that machete like a mad sushi chef and watch the fishies die and float away. There are two open doors below. Assuming you
are in a similar position to that of the picture you need to swim down and reverse direction to face the purple door.
Swim to the surface and back yourself into a corner so the piranha can only come at you from one angle. Then start swinging
that machete like a mad sushi chef and watch the fishies die and float away. There are two open doors below. Assuming you
are in a similar position to that of the picture you need to swim down and reverse direction to face the purple door. Swim into the small room beyond this door and locate the hammer. Exit back to the large hold and swim
across to the opposite door on the left and go through. Ignore the door on the right and swim straight through the next door
and turn right to locate the Silver Coins. Return to the hold and get some air before we finish
off this underwater section.
Swim into the small room beyond this door and locate the hammer. Exit back to the large hold and swim
across to the opposite door on the left and go through. Ignore the door on the right and swim straight through the next door
and turn right to locate the Silver Coins. Return to the hold and get some air before we finish
off this underwater section.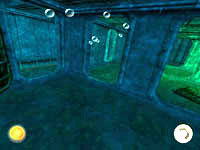 Dive back down and enter the door leading to the treasure but this time turn right and go through the side door. One, maybe
two piranha are in this area so have your machete ready. Swim forward until you can turn left and go through the door then
turn left through the first door you come to then swim straight through the next two doors until you reach the area shown
in the picture. Make a U-Turn to the right then go through the door on the left. You enter this area from the door on
the right edge of the picture and you need to make a U-Turn and go through the door in the middle of the picture then enter
the light-blue door shown in the middle of the middle door.. Swim straight up this shaft and use the hammer to crack open
the lock and open the hatch. Now is a good time to breath!
Dive back down and enter the door leading to the treasure but this time turn right and go through the side door. One, maybe
two piranha are in this area so have your machete ready. Swim forward until you can turn left and go through the door then
turn left through the first door you come to then swim straight through the next two doors until you reach the area shown
in the picture. Make a U-Turn to the right then go through the door on the left. You enter this area from the door on
the right edge of the picture and you need to make a U-Turn and go through the door in the middle of the picture then enter
the light-blue door shown in the middle of the middle door.. Swim straight up this shaft and use the hammer to crack open
the lock and open the hatch. Now is a good time to breath!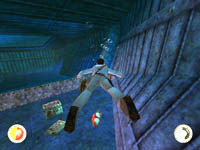 Don't climb out yet. Swim back down and turn right then right again (left door in previous picture). In this next room is a
hole leading down into a deeper area of the ship. Two more piranhas guard the box at the very front of the ship. Kill (or
dodge) them and get the bridge key from the box. Return to the shaft and exit onto the deck.
Don't climb out yet. Swim back down and turn right then right again (left door in previous picture). In this next room is a
hole leading down into a deeper area of the ship. Two more piranhas guard the box at the very front of the ship. Kill (or
dodge) them and get the bridge key from the box. Return to the shaft and exit onto the deck.
 Head down the right side of the ship and go up the metal steps (see picture). Use the bridge key on this door and enter.
Get the winch crank from the left wall then go through the door behind the steering wheel. A section
of the floor is missing and a ladder leads down below. Climb down and get the Trauma Kit from the skeleton then head around
the corner and get the Gold Coins.
Head down the right side of the ship and go up the metal steps (see picture). Use the bridge key on this door and enter.
Get the winch crank from the left wall then go through the door behind the steering wheel. A section
of the floor is missing and a ladder leads down below. Climb down and get the Trauma Kit from the skeleton then head around
the corner and get the Gold Coins. Head up the ladder and back through the bridge and return to the bow of the ship. Walk around the large square base of the
crane until you find the socket for the crank (see picture). Insert crank and turn it to swing the crane around to face the
island with the Tiki statues. Time for some more whip action. Climb the sloping board behind you to the top of the crate
then face the island and whip-swing across.
Head up the ladder and back through the bridge and return to the bow of the ship. Walk around the large square base of the
crane until you find the socket for the crank (see picture). Insert crank and turn it to swing the crane around to face the
island with the Tiki statues. Time for some more whip action. Climb the sloping board behind you to the top of the crate
then face the island and whip-swing across.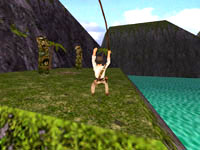 When you land on the island you can head toward the twin Tiki statues and investigate the ground between them. Whip out that
shovel and do a little excavating to reveal a pressure plate under the dirt. Step on the plate and watch the movie that reveals
the location of a hidden stairs and large stone door. If you explored the first water area around the fighter plane then you
may already know where this is. Get the medicinal herb from behind the right statue then do a little cliff diving.
When you land on the island you can head toward the twin Tiki statues and investigate the ground between them. Whip out that
shovel and do a little excavating to reveal a pressure plate under the dirt. Step on the plate and watch the movie that reveals
the location of a hidden stairs and large stone door. If you explored the first water area around the fighter plane then you
may already know where this is. Get the medicinal herb from behind the right statue then do a little cliff diving.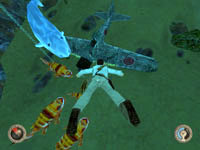 Swim back to the "torpedo" beach and go through the spider cave and back to where you killed the giant lizard earlier. Locate
that sunken fighter plane and dive down toward it. Approach the nose of the craft and use your hammer to remove the
bent propeller blade. The picture doesn't lie - this plane is heavily guarded by a bunch of hungry
fish.
Swim back to the "torpedo" beach and go through the spider cave and back to where you killed the giant lizard earlier. Locate
that sunken fighter plane and dive down toward it. Approach the nose of the craft and use your hammer to remove the
bent propeller blade. The picture doesn't lie - this plane is heavily guarded by a bunch of hungry
fish.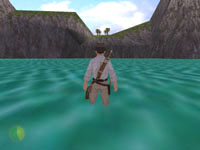 Surface back on the same beach and start making your way right (facing cliff) around the bay. Locate and line yourself up with
the four trees on the high cliff ledge (see picture) and you should be able to look down through the water and see the temple
doors you revealed back on Tiki island. There are more sharks and hungry fish waiting to greet you as well.
Surface back on the same beach and start making your way right (facing cliff) around the bay. Locate and line yourself up with
the four trees on the high cliff ledge (see picture) and you should be able to look down through the water and see the temple
doors you revealed back on Tiki island. There are more sharks and hungry fish waiting to greet you as well. Swim down and use the bent propeller blade to pry the large stone doors open. Inside is another shark waiting to greet (or
rather EAT) you. Quickly swim down and to the right of the stairs where you will find a button on the side wall. Press it to
open a door above where you can swim up and get some air. When your lungs are full, dive back down and go to the left of
the stairs this time (or right if you are facing them) and get the Silver Bar. Return to the
surface through the door you just opened with the button.
Swim down and use the bent propeller blade to pry the large stone doors open. Inside is another shark waiting to greet (or
rather EAT) you. Quickly swim down and to the right of the stairs where you will find a button on the side wall. Press it to
open a door above where you can swim up and get some air. When your lungs are full, dive back down and go to the left of
the stairs this time (or right if you are facing them) and get the Silver Bar. Return to the
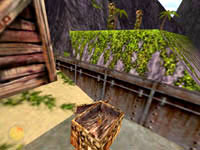
surface through the door you just opened with the button. This next small lake is very deadly. It is full of piranha. Quickly swim to the opposite shore near the white column that
has fallen over. Get out and enter the dark cave ahead. When you are standing on the step shown in the picture you can
turn right and get the final treasure of this level; the Gold Coins. Go deeper into the cave
and kill the giant lizard prowling these parts. Cross over the sandy area and climb the step toward the door.
This next small lake is very deadly. It is full of piranha. Quickly swim to the opposite shore near the white column that
has fallen over. Get out and enter the dark cave ahead. When you are standing on the step shown in the picture you can
turn right and get the final treasure of this level; the Gold Coins. Go deeper into the cave
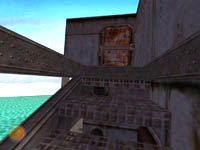
and kill the giant lizard prowling these parts. Cross over the sandy area and climb the step toward the door. Climb up to the stone railing on the right then grab the ledge and shimmy to the right until you can pull up. You should now
be on the ledge this picture was taken from. Turn and climb up the next ledge and walk to the right until you can
jump and grab the next crack then shimmy to the right again. Climb up to the top ledge and follow the steps leading out into
the sunlight.
Climb up to the stone railing on the right then grab the ledge and shimmy to the right until you can pull up. You should now
be on the ledge this picture was taken from. Turn and climb up the next ledge and walk to the right until you can
jump and grab the next crack then shimmy to the right again. Climb up to the top ledge and follow the steps leading out into
the sunlight. Once outside, follow the path along until you spot the statue. Looking over the edge you can see the dead end canyon from
much earlier in the game (remember that statue I told you to remember). Walk up the steps leading to the face of the statue
and press the button. The large doors open back by the previous lake leading inside to the volcano. Retrace your path back
through the cave and out to the lake.
Once outside, follow the path along until you spot the statue. Looking over the edge you can see the dead end canyon from
much earlier in the game (remember that statue I told you to remember). Walk up the steps leading to the face of the statue
and press the button. The large doors open back by the previous lake leading inside to the volcano. Retrace your path back
through the cave and out to the lake. If there are any piranha nearby you can shoot them with your pistol. When the path is clear (or you get tired of shooting
fish) jump in and swim the short distance to the entrance to the next level. Enter the pitch-black darkness beyond the door
to end this level and start your adventure inside the Palawan Volcano.
If there are any piranha nearby you can shoot them with your pistol. When the path is clear (or you get tired of shooting
fish) jump in and swim the short distance to the entrance to the next level. Enter the pitch-black darkness beyond the door
to end this level and start your adventure inside the Palawan Volcano.
 Recommended Purchases:
(2) First Aid Kits
(1) Trauma Kit
(1) Auto-Pistol Clip