

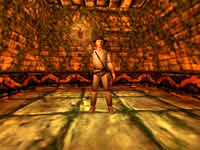
 This level is about as close as Indy gets to looking and playing like Tomb Raider. This level is very vertical and very complex and you
will be required to do a lot of jumping and rolling and puzzle solving including a devious gear puzzle in the central chamber. Your ultimate goal
is to open the iris on each floor to allow sunlight to reach the bottom of the pyramid. There will be plenty of small and deadly creatures to
get in your way along with a special appearance by Dr. Volodnikov and his Soviet Special Forces unit.
This level is about as close as Indy gets to looking and playing like Tomb Raider. This level is very vertical and very complex and you
will be required to do a lot of jumping and rolling and puzzle solving including a devious gear puzzle in the central chamber. Your ultimate goal
is to open the iris on each floor to allow sunlight to reach the bottom of the pyramid. There will be plenty of small and deadly creatures to
get in your way along with a special appearance by Dr. Volodnikov and his Soviet Special Forces unit.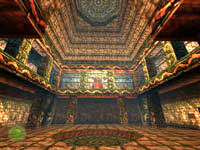 Move ahead from your starting location and enter the large chamber. Go through the door on the left and get the Trauma Kit from the skeleton.
Exit back to the main room and climb over the rubble as you make your way to the door in the opposite wall. Press the button to open the door
then step back and draw your pistol. A giant spider drops from the ceiling. Kill it then continue down the passage.
Move ahead from your starting location and enter the large chamber. Go through the door on the left and get the Trauma Kit from the skeleton.
Exit back to the main room and climb over the rubble as you make your way to the door in the opposite wall. Press the button to open the door
then step back and draw your pistol. A giant spider drops from the ceiling. Kill it then continue down the passage. Go down the slope and slice through the web with your machete. Continue around the passage until you arrive at the floor trigger and the obvious
trap in the wall. Approach the trigger then do a forward roll over the pressure plate and walk past the trap. Draw your machete and hack through
another spider web that blocks your path. Continue down the sloped passage until you arrive at the next area.
Go down the slope and slice through the web with your machete. Continue around the passage until you arrive at the floor trigger and the obvious
trap in the wall. Approach the trigger then do a forward roll over the pressure plate and walk past the trap. Draw your machete and hack through
another spider web that blocks your path. Continue down the sloped passage until you arrive at the next area. In the niche in the wall is the stone Water Key. A web blocks the passage out of here and the dark floor looks suspicious.
Hack the web to clear your escape route then take the key. Immediately do a side roll into the passage to the right as the floor lowers into a
pit with two deadly scorpions. Walk to the edge of the pit and kill the first then angle your jump to the left and jump into the pit. Quickly
turn toward the skeleton and kill the second scorpion who enters through the low hole in the wall. When it is safe you can get the
Silver Coins from the skeleton. Climb out of the pit and continue down the spiral sloped passage.
In the niche in the wall is the stone Water Key. A web blocks the passage out of here and the dark floor looks suspicious.
Hack the web to clear your escape route then take the key. Immediately do a side roll into the passage to the right as the floor lowers into a
pit with two deadly scorpions. Walk to the edge of the pit and kill the first then angle your jump to the left and jump into the pit. Quickly
turn toward the skeleton and kill the second scorpion who enters through the low hole in the wall. When it is safe you can get the
Silver Coins from the skeleton. Climb out of the pit and continue down the spiral sloped passage.Slash the next two webs that block your way then kill the pair of angry spiders that drop from the ceiling. Continue down the slope until a door slams shut. Turn around and a second door shuts to block your way. A door behind you in the corner now opens revealing a treasure and another spider. Kill the spider and take the Silver Coins then press the button on the back wall to open the doors blocking your way.
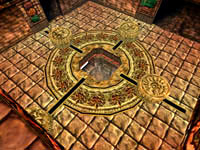 Exit onto the balcony above the impressive Gear Room. This is the main puzzle for this level. It's not too complicated once you know what to do.
There are four doors (Bird, Fish, Jaguar, 3-Heads) which need to be opened by moving the gears into the proper position. Drop to the floor and
head toward the Bird door. Push the gear away from the door towards the center of the room. Now head to the Jaguar door and push that gear up
against the door.
Exit onto the balcony above the impressive Gear Room. This is the main puzzle for this level. It's not too complicated once you know what to do.
There are four doors (Bird, Fish, Jaguar, 3-Heads) which need to be opened by moving the gears into the proper position. Drop to the floor and
head toward the Bird door. Push the gear away from the door towards the center of the room. Now head to the Jaguar door and push that gear up
against the door. As you are walking around this area moving the gears you should be able to spot the web-covered passage down inside the central hole. After you
move the second gear walk toward the 3-Headed door and then back into the hole. Drop then quickly grab to pull up onto the ledge. Use your
machete to slash the web and enter the dark passage.
As you are walking around this area moving the gears you should be able to spot the web-covered passage down inside the central hole. After you
move the second gear walk toward the 3-Headed door and then back into the hole. Drop then quickly grab to pull up onto the ledge. Use your
machete to slash the web and enter the dark passage.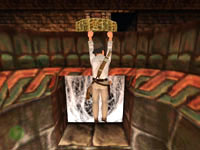 At the end of this passage is a hole. A short ledge across the way has a niche in the wall with a treasure in it. Get a running start and leap
across to the ledge and claim the Red Gem. Drop into the room below and check this new area out. There is a large
central statue with a giant gear at its base. Your objective is to get this statue to rise into the room above where you have positioned those
other smaller gears.
At the end of this passage is a hole. A short ledge across the way has a niche in the wall with a treasure in it. Get a running start and leap
across to the ledge and claim the Red Gem. Drop into the room below and check this new area out. There is a large
central statue with a giant gear at its base. Your objective is to get this statue to rise into the room above where you have positioned those
other smaller gears.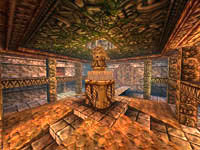 A large sealed door is in one wall - this is the exit to the level and your main objective. The other three walls in this room have dark gray
columns with angled tops. You need to pull these columns out away from the wall until they are position on the carved squares in front of each.
As you move each column the center statue will slowly rise through the hole in the ceiling and into the room above.
A large sealed door is in one wall - this is the exit to the level and your main objective. The other three walls in this room have dark gray
columns with angled tops. You need to pull these columns out away from the wall until they are position on the carved squares in front of each.
As you move each column the center statue will slowly rise through the hole in the ceiling and into the room above. Locate the column opposite the door. This is the only column of the three you can climb up to the top. Jump to the nearby ledge (see picture)
and continue around the upper walkway. Enter the door leading to the blue-tinted passage and head up the passage. When you step on the floor
trigger you will hear a click - STOP! Now back up and a block will come crashing down in front of you. Run across the block and get the
Gold Idol. The block will have reset so jump back across the pit and trigger the floor plate once more. Step back
and when the block comes down walk onto the block and wait for it to lift you to the upper level. Head up the ramp here and get the
Red Gem. Press the button to open the door and exit.
Locate the column opposite the door. This is the only column of the three you can climb up to the top. Jump to the nearby ledge (see picture)
and continue around the upper walkway. Enter the door leading to the blue-tinted passage and head up the passage. When you step on the floor
trigger you will hear a click - STOP! Now back up and a block will come crashing down in front of you. Run across the block and get the
Gold Idol. The block will have reset so jump back across the pit and trigger the floor plate once more. Step back
and when the block comes down walk onto the block and wait for it to lift you to the upper level. Head up the ramp here and get the
Red Gem. Press the button to open the door and exit.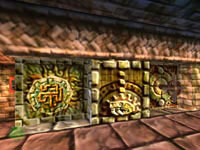 You are now on the balcony overlooking the slotted gear room below. Head left toward the wall with the two wheels and get ready to open some
doors below. Turn the right wheel and the gears will align with the Fish door. Now turn the left wheel to open that door. Turn the right
wheel two more times to line-up the gears with the Jaguar door. Turn the left wheel to open that door. Now turn the right wheel once more to
separate the gears then drop to the floor.
You are now on the balcony overlooking the slotted gear room below. Head left toward the wall with the two wheels and get ready to open some
doors below. Turn the right wheel and the gears will align with the Fish door. Now turn the left wheel to open that door. Turn the right
wheel two more times to line-up the gears with the Jaguar door. Turn the left wheel to open that door. Now turn the right wheel once more to
separate the gears then drop to the floor.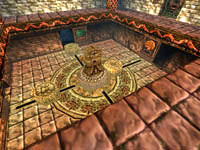 Push the one gear toward the 3-Headed door and then pull the other gear away from the Fish door. Head toward the Jaguar door and pull the gear
away from it then get on the other side and push it toward the statue in the middle of the room. Pull the gear by the Bird door away from the
statue and then get on the other side and push it against the Bird door.
Push the one gear toward the 3-Headed door and then pull the other gear away from the Fish door. Head toward the Jaguar door and pull the gear
away from it then get on the other side and push it toward the statue in the middle of the room. Pull the gear by the Bird door away from the
statue and then get on the other side and push it against the Bird door.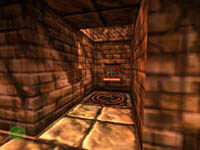 Locate the small alcove in the wall on the same side as the wheels on the upper balcony. Enter and press the button to activate the elevator and
ride back to the top where you can once again use the pair of control wheels. Use the right wheel to line-up the gears with the Bird door then
use the left wheel to open it. Now use the right wheel twice to line-up the gears with the 3-Headed door and then turn the left to open that door.
All four doors should now be open. Use the right wheel once more to separate the gears then drop to the floor and enter the Fish door.
Locate the small alcove in the wall on the same side as the wheels on the upper balcony. Enter and press the button to activate the elevator and
ride back to the top where you can once again use the pair of control wheels. Use the right wheel to line-up the gears with the Bird door then
use the left wheel to open it. Now use the right wheel twice to line-up the gears with the 3-Headed door and then turn the left to open that door.
All four doors should now be open. Use the right wheel once more to separate the gears then drop to the floor and enter the Fish door.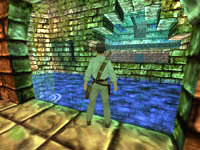 When you reach the water you will see statues in alcoves to either side. You want to head to the right statue. When you jump in the water you
will be attacked by some Piranha. Get out your machete and kill all three of them before exiting near the statue on the right. Behind the statue
is a slot which is a perfect match for the Water Key you obtained earlier in the level. Use the key to open the underwater bars. Dive back in and
swim through this new opening.
When you reach the water you will see statues in alcoves to either side. You want to head to the right statue. When you jump in the water you
will be attacked by some Piranha. Get out your machete and kill all three of them before exiting near the statue on the right. Behind the statue
is a slot which is a perfect match for the Water Key you obtained earlier in the level. Use the key to open the underwater bars. Dive back in and
swim through this new opening.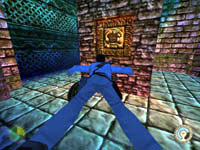 When you enter this next area you will see a central column. Swim around to the back and locate the gold skull switch. Activate this switch and
a middle section of the column will slide up revealing slots in the base of the outer shell. You cannot get inside this column so swim to the
surface and get some air and exit onto the narrow ledge around the central column.
When you enter this next area you will see a central column. Swim around to the back and locate the gold skull switch. Activate this switch and
a middle section of the column will slide up revealing slots in the base of the outer shell. You cannot get inside this column so swim to the
surface and get some air and exit onto the narrow ledge around the central column.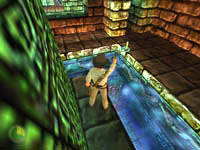 Walk around this narrow ledge and kill the two snakes on the outside ledge then jump across and go into the door leading to the small room. The
wall on the left is textured and you can climb up to the ledge above. Turn and face the top of the central column and do a running jump to land
on it. You can now walk to the far side of the pillar and jump and pull up to the passage above.
Walk around this narrow ledge and kill the two snakes on the outside ledge then jump across and go into the door leading to the small room. The
wall on the left is textured and you can climb up to the ledge above. Turn and face the top of the central column and do a running jump to land
on it. You can now walk to the far side of the pillar and jump and pull up to the passage above.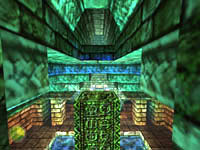 Continue to the end of this corridor. You should now be overlooking the pool from earlier. Back off the ledge and shimmy to the right and pull
up into the alcove. Turn and do a running jump to reach the opposite alcove and follow the passage back and around to the right. The passage
ends at a textured wall with an opening to the right overlooking the same pool of water.
Continue to the end of this corridor. You should now be overlooking the pool from earlier. Back off the ledge and shimmy to the right and pull
up into the alcove. Turn and do a running jump to reach the opposite alcove and follow the passage back and around to the right. The passage
ends at a textured wall with an opening to the right overlooking the same pool of water.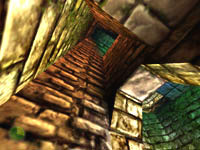 Climb the textured wall to the ledge above and turn right to face the dark blue square ledge across the way. Do a running jump to this ledge then
turn left and face the statue. Do a running jump toward the space between the statue and the wall and be prepared to grab the edge in case you
hit and bounce off the statue. Go behind the statue and get the Silver Bar then make the jump back to the previous
square ledge.
Climb the textured wall to the ledge above and turn right to face the dark blue square ledge across the way. Do a running jump to this ledge then
turn left and face the statue. Do a running jump toward the space between the statue and the wall and be prepared to grab the edge in case you
hit and bounce off the statue. Go behind the statue and get the Silver Bar then make the jump back to the previous
square ledge.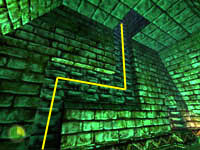 Locate the alligator head on the left wall above you and use your whip to swing across to the far ledge. Cross the stone bridge to the other side
and climb the wall up and sideways and up again through the ceiling. Follow the long dark passage leading toward the light in the distance.
When you enter the room you should spot the Fish Idol on the pedestal just inside the door.
Locate the alligator head on the left wall above you and use your whip to swing across to the far ledge. Cross the stone bridge to the other side
and climb the wall up and sideways and up again through the ceiling. Follow the long dark passage leading toward the light in the distance.
When you enter the room you should spot the Fish Idol on the pedestal just inside the door.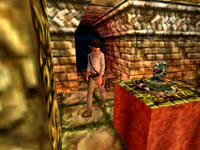 As you approach the pedestal a movie will play showing Dr. Volodnikov instructing his team of Russian Special Forces soldiers. When you are in
control you can take the idol from the pedestal then take out your rifle and begin to snipe the soldiers below. Many of them will hide under the
ledge you are standing on, so you will have to walk along all sides of this upper area to target them. Try to kill them all from here so you
don't have to face them on the same level.
As you approach the pedestal a movie will play showing Dr. Volodnikov instructing his team of Russian Special Forces soldiers. When you are in
control you can take the idol from the pedestal then take out your rifle and begin to snipe the soldiers below. Many of them will hide under the
ledge you are standing on, so you will have to walk along all sides of this upper area to target them. Try to kill them all from here so you
don't have to face them on the same level.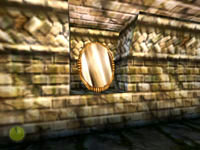 While you are shooting the soldiers you will also want to grab the Silver Mirror from the wall to the left of the
pedestal and the Red Gem from the opposite wall. When you have all the items and have killed all the guards you need
to return to the Gear Room. Return down the long hall leading back to the ledge overlooking the pool far below....and jump! That was fast and
easy.
While you are shooting the soldiers you will also want to grab the Silver Mirror from the wall to the left of the
pedestal and the Red Gem from the opposite wall. When you have all the items and have killed all the guards you need
to return to the Gear Room. Return down the long hall leading back to the ledge overlooking the pool far below....and jump! That was fast and
easy.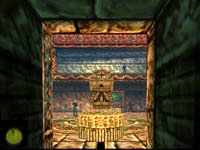 Exit onto the low ledge and make your way into the dark tunnel leading back to the Gear Room. Two guards patrol this area; one is on the upper
catwalk and the other is on the floor. Kill them both and make sure to get the Shotgun that the one on the ledge is carrying. This should be the
first pick-up for this new weapon. Head for the Bird door.
Exit onto the low ledge and make your way into the dark tunnel leading back to the Gear Room. Two guards patrol this area; one is on the upper
catwalk and the other is on the floor. Kill them both and make sure to get the Shotgun that the one on the ledge is carrying. This should be the
first pick-up for this new weapon. Head for the Bird door.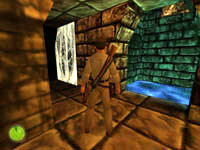 Enter the passage and follow it until you reach the opening leading to the water. To the left is a web-covered entrance that you will take in a
moment. For now, jump into the water and swim down and into the tunnel ahead. If you swim to the end you will surface in a dead end chamber, but
about halfway through the passage is another vertical shaft leading up to a small air pocket. Inside this room is the Silver Idol.
Swim back down and exit to the entrance by the web. Slash the web away with your machete and use your lighter to investigate the ramp.
Enter the passage and follow it until you reach the opening leading to the water. To the left is a web-covered entrance that you will take in a
moment. For now, jump into the water and swim down and into the tunnel ahead. If you swim to the end you will surface in a dead end chamber, but
about halfway through the passage is another vertical shaft leading up to a small air pocket. Inside this room is the Silver Idol.
Swim back down and exit to the entrance by the web. Slash the web away with your machete and use your lighter to investigate the ramp. The obvious floor plates trigger spear traps in the wall. Do a forward roll over the first then immediately take out your pistol and kill the
spider that drops from the ceiling. Repeat the forward roll over the second trap and turn right to continue down the passage. You will pass an
arched entrance that is sealed with bricks. Head past this for now and turn right at the corner and kill the spider that attacks.
The obvious floor plates trigger spear traps in the wall. Do a forward roll over the first then immediately take out your pistol and kill the
spider that drops from the ceiling. Repeat the forward roll over the second trap and turn right to continue down the passage. You will pass an
arched entrance that is sealed with bricks. Head past this for now and turn right at the corner and kill the spider that attacks.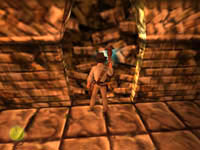 Head up the ramp and turn right and follow the passage to the end. Forward roll over the floor trigger and get the Blue Gem
then turn around and return to the sealed archway. Use the Urgon part to crumble the bricks and enter the crypt beyond. The walls have coffins
with skeletons inside but your objective is the climbable surface on the back of the vertical wall in front of you.
Head up the ramp and turn right and follow the passage to the end. Forward roll over the floor trigger and get the Blue Gem
then turn around and return to the sealed archway. Use the Urgon part to crumble the bricks and enter the crypt beyond. The walls have coffins
with skeletons inside but your objective is the climbable surface on the back of the vertical wall in front of you. 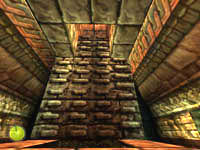 Hop on the edge of the well and climb the wall. Shimmy over and go up through the hole in the ceiling. Follow the passage up here until it ends
at a hole broken through the wall. Jump across the deep pit and land on the opposite ledge to get the Green Gem.
Turn to either side wall and climb up the textured surface to the ledge above. Walk to the middle and turn to face the opening in the opposite
wall.
Hop on the edge of the well and climb the wall. Shimmy over and go up through the hole in the ceiling. Follow the passage up here until it ends
at a hole broken through the wall. Jump across the deep pit and land on the opposite ledge to get the Green Gem.
Turn to either side wall and climb up the textured surface to the ledge above. Walk to the middle and turn to face the opening in the opposite
wall.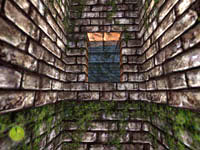 Do a running leap back across the pit and grab and pull up into the opening. Draw your pistol and look around each corner. A large spider hangs
from the ceiling in both directions. Try to line-up a shot with the spider on the left and kill it first. Then quickly run into that dead end
portion of the passage and turn to shoot the spider who is already pursuing you down the hall. When both are dead you can follow the passage up
and around to the top.
Do a running leap back across the pit and grab and pull up into the opening. Draw your pistol and look around each corner. A large spider hangs
from the ceiling in both directions. Try to line-up a shot with the spider on the left and kill it first. Then quickly run into that dead end
portion of the passage and turn to shoot the spider who is already pursuing you down the hall. When both are dead you can follow the passage up
and around to the top. At the top are a pair of spider webs. Cut through the brown web and get the Poison Kit then slash the white web with your machete and run down the
ramp behind you to avoid the pair of deadly scorpions that come rushing through the open passage. Turn and kill them both then enter their area
and press the button to open the door leading to the Bird room.
At the top are a pair of spider webs. Cut through the brown web and get the Poison Kit then slash the white web with your machete and run down the
ramp behind you to avoid the pair of deadly scorpions that come rushing through the open passage. Turn and kill them both then enter their area
and press the button to open the door leading to the Bird room.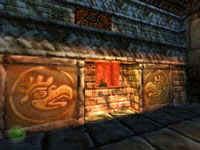 Drop down to the main floor and take the Bird Idol, which opens the iris in the ceiling and floods the room with sunlight.
Now climb back up to the ledge and press the button to open the door. Retrace your path back down the ramp to the opening overlooking the pool
very far below and jump. When you surface, exit the water and return to the Gear Room and enter the Jaguar door.
Drop down to the main floor and take the Bird Idol, which opens the iris in the ceiling and floods the room with sunlight.
Now climb back up to the ledge and press the button to open the door. Retrace your path back down the ramp to the opening overlooking the pool
very far below and jump. When you surface, exit the water and return to the Gear Room and enter the Jaguar door.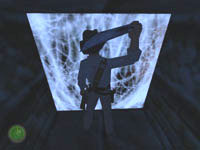 Climb over the ledges through the dark passage and follow it to the left until you reach the thick web blocking your way. Use the machete to cut
through the web and then switch to one of your better pistols. Sidestep into the next passage and shoot the guard in the next room. Be careful
not to step on the floor trigger or you will be crushed into the wall. Enter the room and turn to the right to kill another guard at the far end
of this area.
Climb over the ledges through the dark passage and follow it to the left until you reach the thick web blocking your way. Use the machete to cut
through the web and then switch to one of your better pistols. Sidestep into the next passage and shoot the guard in the next room. Be careful
not to step on the floor trigger or you will be crushed into the wall. Enter the room and turn to the right to kill another guard at the far end
of this area.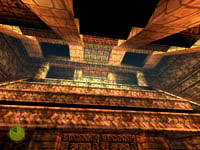 When both guards are dead you can take their ammo then start climbing up the tall steps leading up the pyramid. When you reach the top you can
enter the short passage leading into the next room. Take the Jaguar Idol from the niche and another iris open allowing
the sunlight to reach the next level.
When both guards are dead you can take their ammo then start climbing up the tall steps leading up the pyramid. When you reach the top you can
enter the short passage leading into the next room. Take the Jaguar Idol from the niche and another iris open allowing
the sunlight to reach the next level.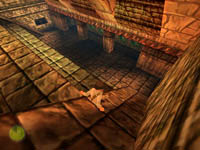 Time to return to the Gear Room one final time. Exit back down the hall and turn right. Jump to the sloped area along the wall and take the
"express-slide" to the bottom. Head past the trap and the cut spiderweb leading back to the main room then enter the 3-Headed door. Inside are
three shrines with symbols on the floor in front of each.
Time to return to the Gear Room one final time. Exit back down the hall and turn right. Jump to the sloped area along the wall and take the
"express-slide" to the bottom. Head past the trap and the cut spiderweb leading back to the main room then enter the 3-Headed door. Inside are
three shrines with symbols on the floor in front of each.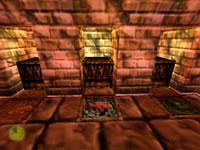 Put each of your three idols on the shrine indicated by the matching floor symbol. When all three are in place the large central statue in the
Gear Room will lower back to its original room. You can now exit back to the main room and back off into the hole and drop to the ledge you
previously took to get below. Quickly grab and pull up and go to the end of the dark tunnel and save your game.
Put each of your three idols on the shrine indicated by the matching floor symbol. When all three are in place the large central statue in the
Gear Room will lower back to its original room. You can now exit back to the main room and back off into the hole and drop to the ledge you
previously took to get below. Quickly grab and pull up and go to the end of the dark tunnel and save your game.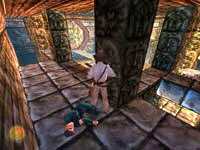 The room below is filled with deadly soldiers. Get out your machine gun and drop to the stone beam below. Quickly turn and take out the guard
on the ledge next to you then jump over to his ledge and hide behind a column. Take his ammo then drop to the floor and kill the guards down
here. More guards are up on the higher ledge so always stay behind columns whenever possible.
The room below is filled with deadly soldiers. Get out your machine gun and drop to the stone beam below. Quickly turn and take out the guard
on the ledge next to you then jump over to his ledge and hide behind a column. Take his ammo then drop to the floor and kill the guards down
here. More guards are up on the higher ledge so always stay behind columns whenever possible.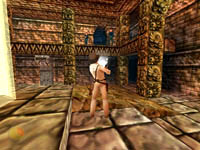 Make your final charge toward the center of the room and aim up toward the remaining two guards. Fire your machine gun in short bursts until they
are both dead. One of these soldiers will take cover behind the corner column so you may have to move to the left to line-up a shot. Always try
to keep moving so they can't lock onto you.
Make your final charge toward the center of the room and aim up toward the remaining two guards. Fire your machine gun in short bursts until they
are both dead. One of these soldiers will take cover behind the corner column so you may have to move to the left to line-up a shot. Always try
to keep moving so they can't lock onto you.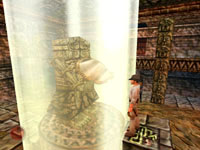 When everyone is dead you can approach the statue from the front. The sunlight now shines directly on the statue. Climb the block and go between
the outstretched arms and use the Silver Mirror from your inventory. It fits perfectly into the statue's arms and the light bounces onto the
door across the room and triggers the opening mechanism. When the door opens you can walk into the tunnel and continue on to Olmec Valley.
When everyone is dead you can approach the statue from the front. The sunlight now shines directly on the statue. Climb the block and go between
the outstretched arms and use the Silver Mirror from your inventory. It fits perfectly into the statue's arms and the light bounces onto the
door across the room and triggers the opening mechanism. When the door opens you can walk into the tunnel and continue on to Olmec Valley.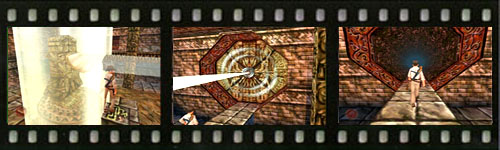

 Recommended Purchases:
(2) Rifle Clip
(2) First Aid
(1) Submachine Gun Clip