J'nanin - The Lesson Age

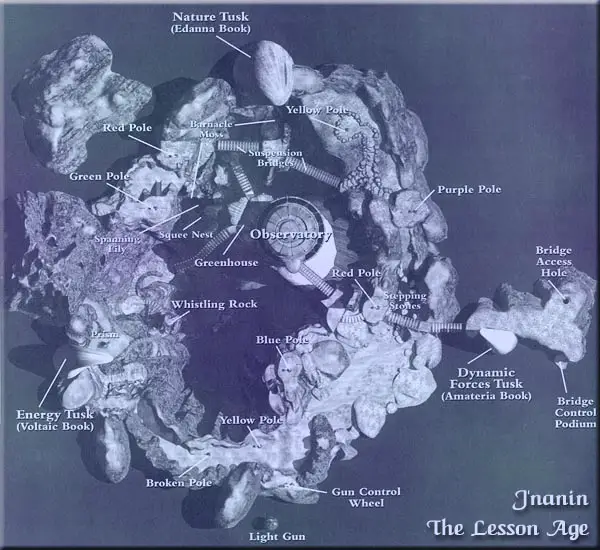
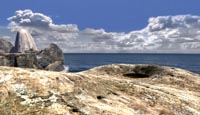
Welcome to the Lesson Age. J'nanin is a ring of cliffs formed from an extinct volcano that surrounds a beautiful lake. There are three large towers in the shape of giant tusks. Each of these towers contains a linking book that leads to another Age. You are free to explore the island and solve the puzzles to unlock these towers in any order you choose.
Since J'nanin is essentially a hub to all the other Ages you will explore in this game you will most likely be returning to this page in the future. This chapter is divided into four sections. The first deals with your first visit to J'nanin and getting inside the Observatory. The other three sections give instructions for getting into each of the tusk towers and accessing the linking books. On future visits to the island simply refer to the section you are playing at the time.
 After your fly-by around the island you land near a Red Pole just as that crazy man from the study runs across a catwalk. Follow him across the walkway and turn right to face a cliff with a ladder leading up. Climb the ladder and see the man enter the door leading into the top of the Observatory. You can cross the bridge and try to get in but the door is locked. The crazed man (who you will later learn is called Saavedro, so we may as well start calling him by his name) is pacing inside the Observatory. It looks like we need to find an alternate entrance into this building.
 Return back across the catwalk and climb down the ladder. As you head to the curved catwalk leading back to the Red Pole you will notice rungs leading down the nearby rock to the beach below. Climb down these rungs and turn right Follow the path past the Yellow Pole then another reflection pole with the top broken off and you will arrive at a large rock with a railing to your right. Steep stairs lead down the cliff to a curved catwalk that spirals down through the rocks. The blowing wind creates some creepy sounds as you make your way to the surface of the lake.
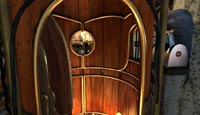
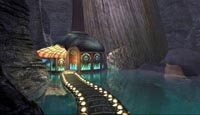 A long straight catwalk leads across the water towards the greenhouse situated at the base of the Observatory. Cross over to the door and click on it to open the door and enter the first chamber. Pull the lever on the left to open the gate then enter into the next area. Look to the left to spot a gold colored button amongst the plants. Press this button to open the gate behind you allowing you to enter the Observatory.
 Enter and turn to the right to examine the hammock and various items nearby. Make sure to get Saavedro's Journal from the hammock. You will want to read this journal thoroughly for clues to many puzzles. This newest journal has several pages missing so be on the lookout for the missing pages as you explore. Zoom in on the table to examine the three hanging figures. This is a valuable clue in how weight distribution can be equally distributed by adjusting the balancing point.
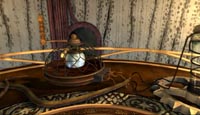 Circle around the room and examine the workbench. A portable generator is on the table and you can turn the crank to send power to the magnet on the right, which causes some metal shaving to float in the air. Clicking on the loose wires in the middle of the table will attach the wires to the Venus flytrap plant growing in the shell on the left. Turn the crank again to make the plant open up and release the fly then eat it again when you stop cranking. Search the items to the left of the desk. There are many spheres placed in balances to show the weight ratios of various materials such as metal, wood, and crystal. Another balance on the workbench shows additional weight ratios.
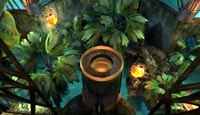
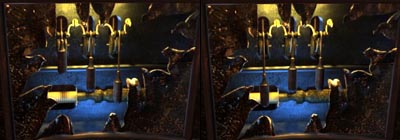
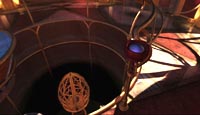
 Circle around the elevator (wooden cylinder) behind the workbench. You can open the door and ride to the top to observe Saavedro doing something, but you cannot enter so return to the bottom. You first need to make some repairs as indicated in the journal. Go ahead and zoom in and pull the lever to the right of the elevator to send the car up to the top. This allows you access to the elevator pit. Climb down into the pit where you will find four exposed pieces of the elevator controls. We'll start our repairs with the one directly in front of you.
 Observatory Elevator Puzzle - Difficulty: Easy
Your objective is study the diagrams in Saavedro's Journal and make the necessary repairs to the four devices so the elevator car is locked into the spinning cage mechanism allowing the car to rotate 180 degrees. This will give you access to the top floor of the observatory.
First we will adjust the lever weights shown on the left. Click the left weight twice and the right weight twice to position. Leave the middle weight where it is at and it should now look like the diagram in the journal and the image on the right.
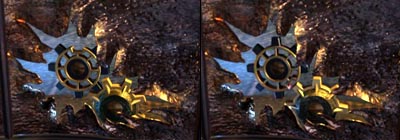
Pivot to the right and make the necessary adjustments to the crank-wheel. Note the bolt with the threads on the right shown on the left. Click on the bolt to flip it over so the threads are now on the left as shown on the right. Now click above the bolts on the wheel to rotate it once. Flip this bolt just like you did the previous one. Now rotate the wheel once more to the third and final bolt only this time do NOT rotate the bolt. You are done with this section.
Turn to the next opening and make the setting on the gear switch. This is a simple modification. Just place the mouse over the device and click once to pull the switch toward you until it looks like the image on the right.
Turn to the final opening and examine the top-left gear. Note the gap in the cog as shown in the left image. Click and hold as you rotate this cog until the gap is lined up with one of the teeth on the other gear as shown in the right image.
 You can now climb out of the pit and flip the lever on the wall to bring the lift back down. Open the door and enter the lift and turn to the right where you can access the lever through an opening. Flip the lever to spin the car around and ride to the top of the Observatory. As you open the door you catch a glimpse of Saavedro as he accesses a linking book and vanishes. A cage closes around the book and it is lowered out of your reach. Exit the elevator and head to the left. When you reach the gap in the rail turn and press the blue button to start a holographic message from Atrus. When the message is over approach the first telescope on the left.
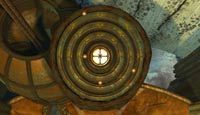
Linking Book Telescopes Puzzle - Difficulty: Easy
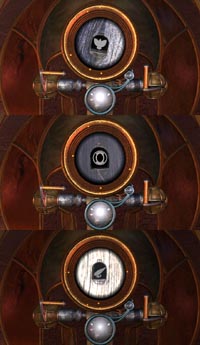
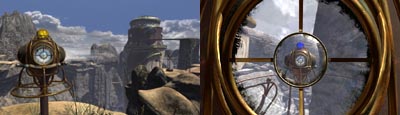
Your objective is simple. Each telescope has a symbol on the lens, which matches up with that same symbol on a tusk tower. You need to align each telescope so that the lens image is perfectly overlaid on the tower symbol and also make sure the image is in perfect focus. When everything is just right the marbles set into the concentric circles will reveal a code that allows you to access the linking books in each tower.
 Operating the telescopes is easy. By clicking and holding anywhere in the lens area you can pan around. By moving the left lever you control the zoom and the right lever adjusts the focus of the current image.
The first thing you want to do at each new telescope is zoom all the way out so you can easily locate the tower. Then make your adjustments and continually move in tighter and focus until the image is nice and crisp. As you make these adjustments the marbles will rotate around the lens creating the unlocking code. The image on the right shows the pattern of the marbles in their proper position when each symbol is properly aligned on each telescope.
As you make your way around the room do not overlook some missing journal pages on the floor between the first and second telescope. These will be added to Saavedro's Journal when you pick them up. When you have aligned all the telescopes and learned the codes you can exit the Observatory. Return to the elevator and pull the handle on the right to lower the lift. Now you can enter the small room and unlock the outer door by first clicking on the left handle to open the lock then click on the outer door to exit to the catwalk. You are now back outside where you were when you first arrived.
From this location you can now choose to go to any tusk you want and use the codes you have learned to access the linking books and travel to the other Ages. If you choose not to go to Voltaic next then simply skip to any of the sections below to learn how to access the tusk of your choosing. I will use the catwalk leading away from the Observatory as the common starting point for all paths.
Journey to Voltaic - The Energy Puzzle
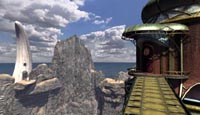
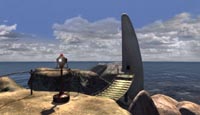
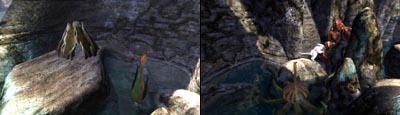
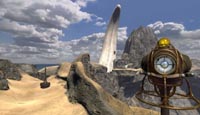 If you look to your right as you exit the Observatory you can see the tusk you are going for. Cross the catwalk and climb down the ladder. Return to the beach using the rungs and turn right and follow the sandy path around and up the hill until you reach the Yellow Pole. When you reach the area shown in the picture turn left to spot a pair of devices over by the ocean. Head over in that direction and examine the two devices and notice a third device out in the water.
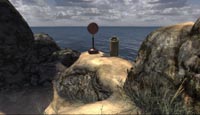 The object on the left is a focusing lens and the object on the right is a control wheel that rotates the light gun out in the water. Turn the wheel until you can visibly see the sunlight reflecting off the light gun. You should now be able to see a beam of light shooting from the focusing lens over to the Yellow Pole. Leave this area and return to the Yellow Pole. Now that you have a light source you can begin one of the more challenging puzzles in J'nanin.
Reflection Poles Puzzle - Difficulty: Medium
Your objective is to bounce the light from pole to pole creating a continuous beam from the light gun all the way to the prism at the Voltaic tower. You will need to keep track of the order of the colors of each pole to solve the final locking puzzle. You will also need to work around the broken pole that Saavedro has sabotaged. Each pole can be rotated three times in increments of 120 degrees.
Standing at the Yellow Pole and looking in you can see that you are currently aimed for the broken pole further down the path. Rotate the pole ONCE to redirect the light toward the Blue Pole. You can always check your aim by looking into the lens that the light is shining into and see which direction/pole you are aiming at.
Head back toward the beach two click then turn left and climb the rungs leading up the rock to the Blue Pole. Turn this pole ONCE to aim for the Green Pole on the other side of the lake, and then verify your setting by looking into the lens.

Climb back down the rock and turn left to return to the beach from the beginning of the game. Continue forward this time and you will come to some stepping-stones leading across the water to a slope leading up. Pass the Purple Pole and angle left to some stairs leading down to a pair of suspension bridges. Cross both bridges then head up the steep steps to the left and turn right at the top to see both a green and red pole, each on their own plateau. Climb the steps leading to the Green Pole and turn the pole ONCE to aim the light toward the Red Pole. The light will most likely be shining in your face when you do this.

Head down these steps and go over to the steps leading up to the Red Pole. Turn this pole TWICE to aim for a second Yellow Pole. This is not the same pole as the first one you turned. This pole is closer and right next to the Purple Pole you passed earlier. Check your aim before leaving.

Now head back down the steep stone steps to the pair of suspension bridges and cross back over. As you head up the stone steps you will notice that the path forks. Take the left path leading up to the Yellow Pole you just targeted. Now you can turn this pole TWICE to direct the beam across to the Purple Pole just behind you.

Head down the steps and up the other fork to the next set of steps to reach the Purple Pole. Turn it ONCE to aim for the second Red Pole. This is the pole on the ledge where you first arrived in J'nanin. Now climb down the steps and head down the slope across the stepping-stones and back to the beach. Turn right and climb the rungs to the curved catwalk near the Observatory and go right to the Red Pole. Turn this pole ONCE and look through. You should now see the light striking a prism near the tower causing a spectrum of light to shine on the locking mechanism.

Return to the beach and turn right following the same path you took when you went to the greenhouse earlier. This time when you reach the steps leading down to the catwalk turn left at the fork and climb up toward the tusk tower.
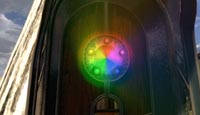 You should now see a circular spectrum of light. Each color falls on a different button and to open the door you need to press the buttons in the same order as the colored poles you used to get the light redirected to this prism. Press the buttons in the following order to unlock the door: yellow-blue-green-red-yellow-purple-red. The door unlocks and you may now enter the tower.
The linking book is suspended in a locked cage. Move over to the pedestal and note the familiar pattern of the marbles. Click and hold each marble as you move it into the proper position for this tower. This is the same pattern you learned by aligning the telescopes or you can just match the pattern in the middle image. When you position each of the four marbles correctly the cage will lower and open allowing you to access the Voltaic book.

Touch the panel to be whisked away to Voltaic - The Age of Energy.
Journey to Amateria - The Dynamic Forces Puzzle
 Starting from the upper catwalk, cross over and climb down the ladder then follow the curved walkway around to the left to the Red Pole where you first entered J'nanin. Cross over the suspension bridge to the small island with the tusk tower. Keep heading around the left side of the tower in the direction of the ocean. When you have gone as far as you can turn right and look down to spot rungs leading down to a ledge. Climb down.
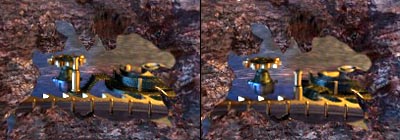
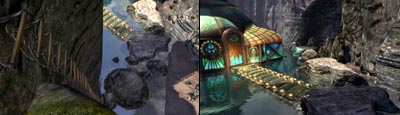
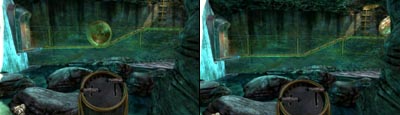 Turn right and you will see a pedestal with a pair of levers. Across the water is a bridge built into the side of the cliff with a large spherical object blocking your path to the tower. By moving the levers you can raise or lower certain sections of the bridge. Your goal is to move the sections of the walkway to roll the sphere to the far right and also keep the right section elevated so you can access the ladder when done. Move the levers in this order: left-right-left-right to accomplish your goal.
 Turn and climb up the rungs and turn left. Take a few steps forward then turn right to find the hole with the ladder leading down to the walkway. Cross the bridge and click on the door to open it. The linking book is suspended in a cage high above, but your access to the control panel is blocked by a huge hole smashed into the floor. Retrace your path back to the previous levers and flip them in this order: left-left-right and the sphere will roll into the door and crash into the hole. Pull the right lever once more to position the ladder under the hole then retrace your route back to the tower door.
 The sphere now fills the hole making a bridge allowing you to access the control panel for the linking book cage. Position the four marbles to match the code you learned from the Observatory. If you forgot to write them down then just match them to the ones in this image. The cage lowers and opens. Click on the Amateria book to open it then click on the linking panel to being your journey to Amateria - The Age of Dynamic Forces.
Journey to Edanna - The Nature Puzzle
 Once again we start from the upper catwalk. Out destination is the tusk tower behind the Observatory. The quickest way there is to go to the other end of the catwalk and climb down making your way back to the beach. Turn left and cross over the stepping-stones then head up the slope past the Purple Pole and turn left. Continue down the steps to the left and head across the first suspension bridge. Turn right to face the final tower.
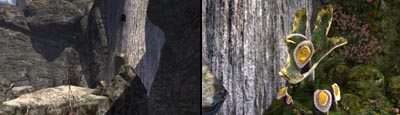
Look closely and you will see more rungs leading down to a ledge below. Climb down and examine the plants in this area. There are two types of plants you need to be concerned with. The first is the Barnacle Moss with the round, red buds. Also check out the large Hearken Fern. If you stand behind this plant you can aim it around like those dish-amplifiers/microphones and hear all sorts of interesting sounds. You should be able to pick up the creaking of the bridge above, the sound of water from the lake below, and the haunting sounds from Whistling Rock on the opposite side of the lake.
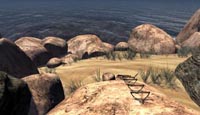
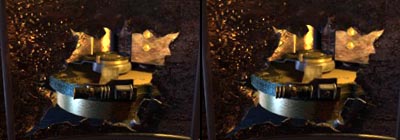
 When you are done listening to the sounds of nature, locate the ladder leading down and climb down to the lakeshore far below. From here you can see the greenhouse and the alternate walkway leading to it, but your goal lies ahead. Move forward across the rocks toward the far cliff and you will spot a small tent-like structure and a large plant in the small pool.
 When you get close to the tent you can touch the plant on the top and the small bunny-like Squee pokes his head out. Now turn and touch the plant in the pool and it will open up its large leaves creating a bridge. While it won't support your weight it could hold something as light as a Squee perhaps. Touch the plant on the tent again and the Squee scurries out and goes across the plant. His chirping noise seems to make the Barnacle Moss grow quite rapidly. Hmmmm...
 Head back across the rocks and up the ladder. Get into position behind the Hearken Fern and aim it toward where the Squee is munching. His chirps will be amplified and when you exit the fern-view the Barnacle Moss on the wall behind you will start to grow. Now you can climb back to the top and use the new bulbs as a bridge to reach the tower.
 Cross the bulbs and open the door to enter the tower. Once inside, cross over to the pedestal and position the marbles in the pattern you learned from the Observatory. If you forgot you can match them to this image. The cage will lower and open allowing you to access the Edanna linking book. Open the book and touch the linking panel to being your journey to Edanna - The Nature Age.