Walkthrough by
MaGtRo
March 4,
2001
_________________________________________________
Game Play: The game
is keyboard controlled. The movement controls are the directional arrows.
The Control (Ctrl) key is used for interacting with objects and
characters. The Z key is for run, X key for crouch, Enter key for
inventory and the Left Shift is for sidestep. The default controls can be
reconfigured using the Options menu. The Escape (Esc) key is for pause and
the Main menu. All items that can be interacted on pulses. In some
parts of the game, selecting the other character in inventory can do a
transfer from one character to the other.
________________________________________________
This is the story of
the adventures of two friends, Tulio, a man full of ideas who craves for
gold and Miguel, a kindhearted, strong man who cares for glory. A story of
friendship that survive the perils of intrigue, danger and
luck.
Spain
Square
Tulio: We find
the two friends looking at their wanted poster. Get the poster
(ctrl) to add to the inventory of one peseta. Looking around the square,
find a guard standing watch by the exit, a roaming chicken behind the corn
seller, a chicken seller and a taxman guarding the exit to the docks. The
taxman wants 20 pesetas for men and free for women for entry to the docks.
The chicken seller wants 20 pesetas for his chicken. On the side of
the chicken seller is a tavern. Enter and meet a gambler who invites them
for a game of dice but one peseta is not enough to get in the game.
Talking it over, the friends decide to find 2 chickens for the dock tax.
Buy one bag of corn from the corn seller. While facing the pulsing
corn seller, press enter, select one peseta from inventory and press ctrl.
Give (ctrl) corn to chicken. Give the chicken to the chicken seller
and get 5 pesetas for it. Talking it over, they think of a way to turn 5
pesetas to 40. Go to the gambler and show him the 5 pesetas. The game is
to select if the second throw of the dice is higher or lower than the
first throw. The amount of wager is selected after the first throw. In the
end, the friends win a map to The Road to El Dorado. Inigo, a guard calls
away Pablo, the guard standing watch. Now, the two friends can go to
town.
Town
Tulio: Go
forward through the arched entryway on the left and meet the "Great
Malezo", toreador of great repute and conqueror of El Diablo, the
bull. Pablo, the guard blocks the road to the left of the screen. Go back
to the first intersection after the square. Climb the white steps and
enter the first doorway on the left. At Via Alfredo, talk to the man
guarding the big gate of El Diablo, who has never been defeated and
never forgets a face. "So don't make him mad at you!" Go back through the
door, climb the steps and enter the second door on the left. Meet Don
Mocoso, who blocks the exit with his slingshot. Look at the barrel
on the left and get an idea. Move Miguel towards the 6-year-old kid. Pick
up the slingshot. Enter the archway and come out on the tower
rampart. The guards are now called to cover the docks. Back to the 2
friends, walk to the other archway exit and come upon the formerly guarded
area. Check the gate and get another bright idea. Talk to Miguel
again. Go back to talk to the man guarding the gate to El Diablo. Talk to
the Great Malezo again and follow him to the El Diablo's gate. A lively
discussion between the toreador and the gateman ensues. The gateman
departs. Talk to Great Malezo to gain an audience. Unlock the gate of
El Diablo. Go back to the fountain area and see the bull has trapped
the toreador in the fountain. Standing very close to the bull, use the
slingshot on El Diablo. Go to the gate in front of the green dress by way
of the tower ramparts and place the poster on it. Pick up the green
dress. The kid, Don Mocoso and his father had a lively discussion with
our two heroes.
Go back to the
square. Tulio wears the dress. Nice way of walking! Check the disguise
with the corn seller and chicken seller. Tulio converses with the taxman.
When he loudly states that Miguel sneaks by, use x key and directional
arrows to creep to the open doorway to the
docks.
Docks
Tulio: The
heroes see Cortes' ship and Tulio gives the map to Miguel. In front of a
donkey on a platform, a string is hanging from a beam. Move forward
and turn right, see the guards and a barrel of carrots. After
convincing Miguel to get in the barrel close to the heroes, move
Miguel pass the guard by timing each forward action with the turning of
the guards and get carrots. Talk to Tulio to get out of the barrel.
Miguel or Tulio: Place the carrot on the beam in front of the
donkey. Climb the platform on the right of the screen and get an idea on
how to get to the ship. Notice that the conveyor belt closest to the ship
is moving away from the ship. Go down and move under the conveyor belt,
read the Peligro (Danger) sign. Move the lever on the wall downward,
changing the direction of the last conveyor. Climb back up on the platform
and climb in on the barrel. Do the same for the other
hero.
Ship
Brig and Cannon
Room
After getting on
the ship and being discovered by the sailors, our heroes find themselves
in the brig. They discuss the situation and hear Altivo, Cortes' horse on
deck of the ship. Tulio: Pick up the apple. Move close to
the center beam and climb it. Give the apple to Altivo. Altivo
drops a boat hook down the hatch and hits Miguel, knocking him out. Pick
up the boat hook. Use the boat hook on the ladder on the top
right of the screen on the platform. Climb the
ladder.
Look around and see
an overhead handhold that leads to the other platform across the
way. That platform leads to a grill gate that has 2 locks. Turn
around and look at the grill gate on your side of the platform. See
a sleeping monkey and sailor, 5 colored keys on the
wall and a stack of biscuits on the table beside the gate. The
monkey only responds to her name. Pick up the biscuits, causing the sailor
to use the monkey's name - Josephine. Call the monkey and try to get her
to play a game with the boat hook and keys. Josephine throws the boat hook
away. Call her again, select biscuits from inventory and choose a colored
key. Do the same as before and select another colored key. The monkey will
only let you carry 2 keys at one time. If you carry more than 2, she
screeches and wakes the sailor up and you get thrown back on the brig. Go
to the grill gate across the way via handhold and try the keys
individually on both locks. This colored key puzzle is a random puzzle.
Return the wrong key/s to Josephine and get new one/s until you get the
right one/s. Enter the cannon room and see a sailor polishing the cannon.
Whatever is done, Tulio gets thrown back on the
brig.
Miguel: Miguel wakes
up and Tulio pounds his head on a beam (thinking), ouch! And each time he
"thinks", the pulled rope ladder sways. Look at rope ladder. Talk
to Tulio to get him to think harder and unrolls the rope ladder, also
knocking Tulio out - too much thinking! Climb up the ladder, use the
handhold and enter the open gate to the cannon room. Turn to the left
facing the screen, move forward, decide to get a disguise and then creep
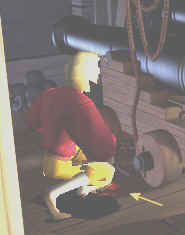
(X key) forward, turn to the left of screen towards the red
bandanna close to the first cannon. When close to bandanna, release
X key and immediately use Ctrl key to pick the pulsing bandanna
up.

Miguel, now disguised
sailor gets cannon polishing detail and is given a pair of socks to
use. Might as well polish a cannon for a while and when his done, he will
be given a biscuit and swig of rum. Get a biscuit and find out that
the sailor is scared of rats. Look at door and find out that they
are locked in and the only way out is to blow a hole on the side of the
ship using a cannon. Go back to brig. Pull up the grate on the
floor. Altivo throws another boat hook. Pick up boat hook and use it prop
the grate up. Place cookie in bilge/grate and trap the rat. Use sock on
grate to pick up rat. Go back to cannon room. Standing close to sailor,
give him the sock with the rat. Use sock on lamp oil on crate. Use sock
soaked in lamp oil on lantern. Watch what Miguel does. BOOM!! That woke
Tulio up. Go to the outside of the ship. Miguel asks Tulio to climb up to
the deck.
Deck
Tulio: Talk to
Altivo. Tulio will untie him and picks up the rope. Use rope on metal
ring by the side of the ship. Miguel climbs up. Try to lower the
lifeboat by turning the wheel. Ask Miguel to lower the lifeboat.
Miguel: Pick an apple. Give it to Altivo and that gives
Tulio an idea. Tulio places the apple on the plank and watch what
happens.
Jungle
Bird Rock and
Raven
Miguel: At the
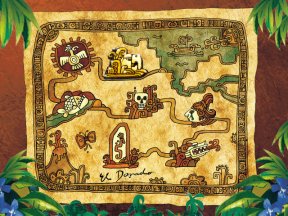
beach, Miguel notices that the first marker on the map of the road to El
Dorado is there - the bird rock. They are on their way to El
Dorado!!

Pull the sword
from the skull. Look at bird rock. Climb the bird rock from the
back of the bird. Turn around and use sword on vine. Tulio picks up
the rope. Use sword on the dense foliage behind the bird rock. They
leave Altivo on the beach and enter the opening. They find a poor
armadillo threatened by a snake. Moving deeper into the jungle, they see
the second marker on the map - the Raven, a shadow cast by the sun on the
cliff opening. They have to climb up. Pick up reed/flute from the
ground. Go back to the trapped creature and play the flute on the snake.
Tulio gave the name, Bibo to the creature. Tulio: Use the vine on Bibo.
Look at the tree at the center of the clearing. Ask Miguel to bend
the tree. Move Miguel to bend the tree. Look at tree again. Tulio places
Bibo, holding the vine on the frond of the tree and Miguel releases the
tree. Bibo shoots up and wraps the vine on a tree and drops the other end
to the 2 heroes. Climb vine.
Stepping Stone
Puzzle
Pick
stick off the dead tree. Go to opening at right of screen. Jam
stick on pile of rocks by river's edge. Look at rocks again. Tulio
asks Miguel to pull on the stick. Move Miguel onto the pile of rocks. Loud
Rumblings got our heroes to run away. Later back at the river's edge, the
rocks are on the river forming step stones. Move Tulio in front of the
step stones and use ctrl key. Tulio jumps on step stones. He now faces big
step stones on the river with jumping fishes and turtles in between them.
Be sure that the hero faces the stone or turtle he wants to jump on, then
use ctrl key. Time the jump right after the jumping fish begins to descend
into the water. Now do the puzzle again with Miguel. Get Tulio to move the
boulder in front of him to help Miguel. Bibo does the same thing and makes
the puzzle look so easy.
Skull
Maze
Miguel removes
the dense foliage from the skull, the fourth marker of the map and enters.
Tulio follows. Miguel, standing on the bridge with Bibo wonders about the
lever. Tulio: Pull down the lever. Miguel and Bibo disappear
in the river. Go through the open doorway. Pull down the lever under
the snake and fish drawing. Enter through the snake door. Pull down
the lever under the owl and snake. Enter through the owl door. Pull
down lever under the owl and bird. Go out through the bird door.
Pull down the snake and fish lever again. Enter through the snake door
again. Enter through the fish door and out. Use ctrl key upon standing on
the platform inside the skull mouth. Miguel: Now it is
Miguel's turn to do the maze. Pull down the fish and bird lever.
Enter through the fish door. Pull fish and snake lever down. Go
through snake door. Pull owl and fish lever down. Go out through
owl door. Pull fish and bird lever down again. Enter through owl door.
Exit through bird door. Use the platform n skull mouth. Together
again!
Skull Platform
Puzzle
Tulio and
Miguel: Either hero can do this puzzle and coordination of action is
needed. Walk to top of right skull. Ask the other hero to pull down the
lever. Transfer control by selecting the other in inventory. Hero
on skull moves off the skull. Transfer control. Other hero moves to top of
left skull. Transfer control. Pull down lever. Transfer control. Move out
off skull. Transfer control. Move to top of right skull and transfer
control. Pull lever and get the other hero to the left skull to join the
other. Go down the stairs and pull lever. Find Bibo and look at the wall
mould at the end of the hallway. Go outside through the left side
opening.
Weeping Woman
Puzzle
Move to the left
side of the screen towards the left side of the weeping woman marker. Step
on the stone platform. Talk to Bibo. Move Bibo behind the stacked
rocks. Push rocks. Move Bibo behind statue. Push statue out
through the opening. Pick up statue. Go back inside to the wall mould.
Place statue on wall mould, the skull closes his mouth. Outside, the
weeping woman stops her flowing tears. Climb up the stairs into the eye
and find another marker, the Dragon's head and Altivo.
The heroes, riding
Altivo travel through mist and falls down to the canyon bottom and hit a
stone marker - the engraved drawing of 2 men riding on an animal - the
last marker, El Dorado. Natives capture them and a native girl, Chel. They
go through a waterfall and a hidden river under the mountains to EL
Dorado.
El
Dorado
Golden
butterflies, colorful amphibians, golden pyramids and awestruck natives
greet them. They were mistaken for Gods and treated accordingly. They were
having the best time of their life until Tzekel Khan released the terrible
stone jaguar. The jaguar controlled by Khan chased the heroes (Gods), Chel
and Altivo. Altivo kicked the eye of the stone jaguar, also blinding Kahn
and the company got separated. We find the heroes inside a cave trying to
cross a bridge.
Bridge of Doom
Puzzle
The bridge
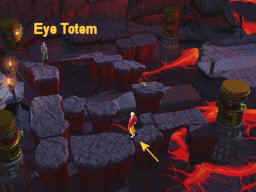
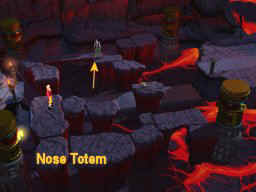
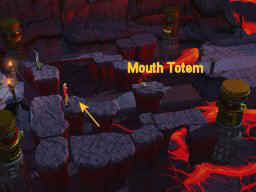
descends and the four totems at each corner demand tributes to let them
pass. Transfer of control is again passed from one hero to another. Talk
to the totems before a tribute can be given. Give tributes to the totem
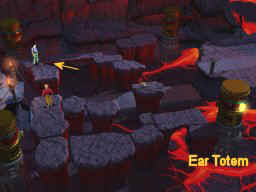
when they are lit up. Stepping on specific places, shown by arrows in the
graphics, light up a totem. Move Tulio close to Eye Totem to light up the
Ear Totem. Move Miguel to Ear Totem and plays the flute as his
tribute. The second part of the bridge comes up. Move Miguel to middle
area between Nose and Ear Totem to light up Eye Totem. Move Tulio to pick
up the shiny plate from the skeleton in the middle of the screen.
Give plate to Eye Totem. The third part of the bridge is raised.
Move Tulio to middle position at the top of screen to light up the Nose
Totem. Miguel gives the sock to the Nose Totem. The first part of
the bridge moves up. Move Miguel to position close to the entrance. Tulio
goes to Mouth Totem by using ctrl key to jump the gap and gives it
the biscuit. The last part of the bridge rises
up.
Julio followed
by Miguel leaves the bridge of doom and enters the River of Lava
chamber.
River of Lava
Puzzle
Our heroes must
cross the river of lava by stepping on the rock islands to get to the
other side in order and to enter a temple with 2 doors separated by the
river of lava. Timing is necessary to prevent being caught by spouting
lavas. Again face the heroes to look at the island they want to reach
before jumping. Upon reaching the other side, a hero pulls down the
lever beside the one closed door to the temple, opening the other
door. He holds the lever down to keep the other door open. The other hero
crosses the river of lava to get to the open door of the temple, enters
and pulls the lever by the wall to open the other door for his
partner. Climb the ladder and face the Temple of
Skulls.
Temple of Skulls
Puzzles
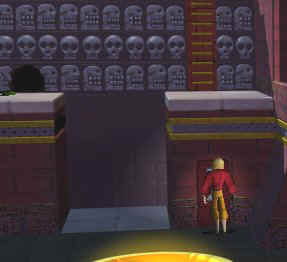
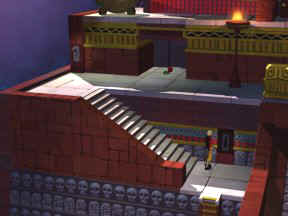
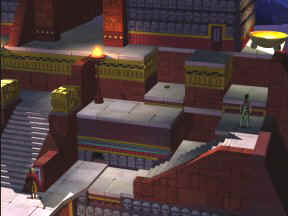
Our heroes must
now try to get to the top of the temple. They have to coordinate to do the
puzzles. The puzzles involve dodging/killing poisonous spiders,
raising/lowering platforms and definitely timing. Save your
game after finishing each stage.
|
First
spider
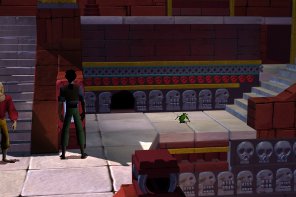
Wait for the
green spider to move to the right side of the platform and then push
down on lever, in order to isolate the spider. The spider should
enter the hole on the wall before raising the platform with a hero
on it.Walk to the other side of the temple and on the way pick up a
fruit. |
 |
 |
Second
Spider
Isolate the
spider on the left part of the platform by timing the push down of
the lever. Wait until the spider goes in the hole and then pull the
lever up, raising the platform up with the other hero to join
you. |
|
Third
Spider
A hero now goes
up to the next level, climb the stairs and pulls the lever raising
the platform on the upper level. He places the fruit under the
raised platform, run back down to the lever on the level below and
lower the platform - squashing the spider. Climb the stairs and push
lever to bring other hero up. |

|
 |
Fourth
Spider
Walk to the
middle of the temple and down the stairs. Pull lever to raise the
platform so that the spider can crawl to it. Lower the platform and
when the spider enters the hole, raise the platform. Climb up the
stairs to the next
level. |
|
Fifth
Spider
Wait for the
spider to get to the middle platform and ask the other hero to pull
the lever to lower the platform with the
spider.
|
 |
 |
Enter the lowered platform then ask other hero to
raise it when spider goes out to the landing, trapping the spider in
the lower
level. |
| Transfer control to the hero at the bottom level and
he pulls the lever raising the platform beside him and lowering the
platform on the middle level when the spider is on the left side of
the platform. He climbs the stairs and enters the recessed
platform. |
 |
 |
Time the
pulling of the lever on the top level to raise the platform and trap
the spider. Walk to the center of the temple and get chased by the
stone
jaguar. |
The stone jaguar
corners the heroes but they get away by punching Tzekel Kahn. Dazed, Kahn
lies under the stone jaguar and they both fall into the whirlpool.The
problems of the heroes are not over. Tulio wants to go back to Spain with
gold and Miguel wants to stay in El Dorado. Cortes' coming to look for El
Dorado spoils their plans. They have to seal the city from the outside
world by filling the water entrance to El Dorado. To do so, they have to
start the flow of water in the Water Temple and as the young girl guide
points out, only Tzekel Kahn knows how. Aside from that, there are
monsters in the temple. The partners split up inside the water
temple.
Water
Temple
Tulio: Turn left
and enter a room with a trap door on the floor. The lever to open and
close it is on the wall on the top left of the screen. Go to the next room
and see a water gate with an open archway behind it. Go forward to
the next room and see a closed door at top of the screen that says, "Only
the bearer of the Sun Gem may pass". To the right of that, a door says, "
Only the bearer of the Evil Eye may pass". To the left of the sun gem
door, is a contraption that is missing some cogs. To the left of
that is a Jaguar Pump. Go back to the entrance of the temple and turn to
the right archway, where Miguel entered. On the right side of the screen
is another water gate and right across that is a cog lying on a
cloth. Pick it up. Enter the next room and find the second trap door on
the floor. The lever to open and close it is on the opposite side of the
room at the bottom right of the screen. At the top part of the room is a
face with a gem as an eye. Enter the room at the top and pick up another
cog lying on the floor by the wall between the two openings. Enter
the next room and under the wall mosaic on the top part of the room, pick
up the third cog. Go back to the Jaguar pump room at the other side
of the temple and place the 3 cogs individually on the contraption. Pick
up the Sun Gem that falls from above. Go through the Sun Gem door
and find a stone jaguar on a pedestal. Tulio sees a lever behind the grate
on the top part of the room. When Tulio tries to pull the grate off, the
stone jaguar comes to life................
Miguel: Look at the
water gate and use sword to lower it. Move forward to the room on
the right and pry the eye from the face on the wall with sword. Go
to the evil eye door at the opposite end of the temple. Enter and
lower the other water gate with the sword. Enter through the
archway and see the third water gate. Try lowering it and the stone
jaguar comes to life.......
Stone Jaguar
Puzzle
The main objective of
the puzzle is to get the stone jaguar on top of a trap door and to pull
the lever to open it. The best strategy, I found is to run to the other
trap door, in the room where the evil eye was obtained. Go across the
other side of the room, making the stone jaguar cross the trap door on the
floor and pull the lever. Or lure the jaguar to the entrance area, run
back to the room to the left, across the trap door and pull lever. Both
heroes do this puzzle. Tulio runs from the sun gem room, traps the jaguar
and the grate back at the sun gem room opens. Miguel runs from the evil
eye room, traps the jaguar, goes back to the evil eye room and uses his
sword on the water gate. Now all three water gate are opened. Look
for Tulio back at the sun gem room.
Together again!!
Miguel pulls the lever in the sun gem room. We're going to die!!! Walls
groans, cogwheels turn and water pours from the Jaguar pump. They did it!!
On the way out of the temple, see water flowing in all
reservoirs.
Tulio with Chel
leaves El Dorado in a boat full of tributes of gold. Miguel stays behind
as a God. The tower, being pulled to block the entrance to the city to
stop Cortes and his troops, is going down too fast and is going to smash
Tulio's ship. The ship's mast is stuck and would not unroll to provide
speed. With the help of the Chief, the natives try to hold back the tower.
Miguel jumps on Altivo, rides to the ship, soars through the air
(reminiscent of an ancient Inca legend) and catches the mast and unrolls
it. Together again, they ride the giant waves caused by the tower that
crashed on the river. The boat overturns and the gold tributes spill out.
The company gets swept out through the entrance of El Dorado. Falling
rocks seal the entrance behind the waterfall. The still optimistic Miguel
is joyous while Tulio grumbles about lost fortune. The friends, partners
in adventure, sail on the barge while Chel washes clothes and Altivo is
pulled in a boat behind.
And that is the
story of Tulio and Miguel!
_________________________________________________
This
walkthrough will be updated frequently.
This
document may not be distributed without express written permission of the
author
MaGtRo
The
content may not be altered in any way and all reference/links must be
provided to this site:
GameBoomers
For
Questions or Comments on this Walkthrough,
Please
write to: MaGtRo
Copyright © 3/2001 GameBoomers
 GameBoomers
Walkthroughs and Solutions GameBoomers
Walkthroughs and Solutions
 GameBoomers
Discussion
Board GameBoomers
Discussion
Board
|
