
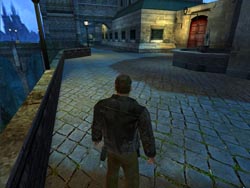
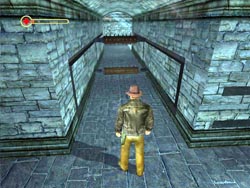
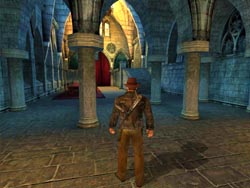
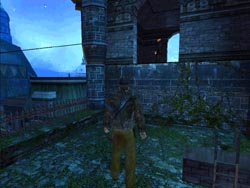
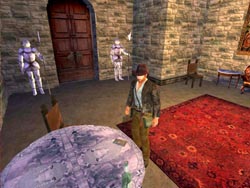
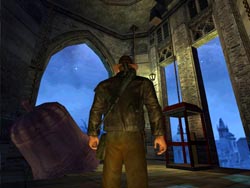
Welcome to Prague. Your objective is to infiltrate the nearby castle but you first must get past the guard who is having a smoke near the Water Fountain ahead. He's armed with a silenced Lugar, but you can probably sneak up on him and beat him up before he knows what hit him. If you wait long enough he will wander further down the street and join a second man, so it's better to defeat him before he has help. Make sure to take his Lugar and check all future guards for more ammo.
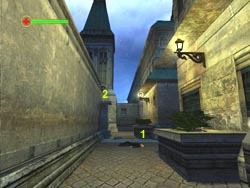
Continue down the street under the arch and defeat the second guard patrolling near the planters. Climb onto the second planter box (1) and jump across to the ledge (2) and pull up to the top of the wall. Follow the path around as it crosses back over the street you were just on and defeat another armed agent before going up a set of steps leading into the building.
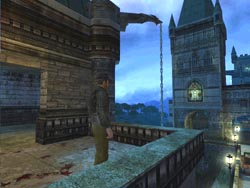
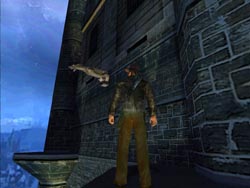
Follow the path around until you reach a balcony with another guard. After you have amused yourself by listening to him practice his "intimidation voice" you can beat him up and throw him off the balcony. Climb onto the railing and jump to the chain.
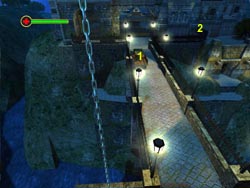
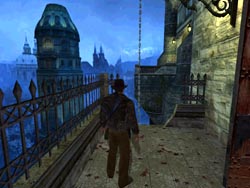
Cross the bridge and smash the crate in the back of the truck (1) to get a Medkit. Continue toward the castle and defeat another guard. Check out the area to the right (2) for some Revolver Ammo lying out in the open. Return to the other side of the bridge and go down the stairs (4).
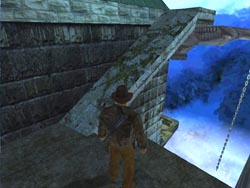
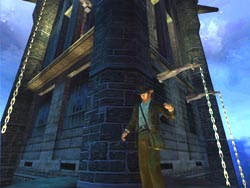
Walk around to the left until you reach the gap in the railing. Whip the statue (1) and swing across to the ledge. Climb down the ladder (2) and take the stairs down until you hear voices. Peak over the railing and line-up a headshot with the man on the right - the one with the gun.
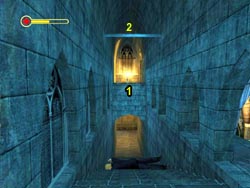
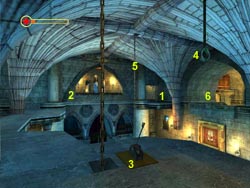
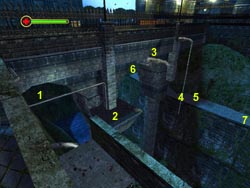 Making a running leap and grab the pipe (1) then shimmy to the right and drop down to the small ledge (2). Whip the lion head statue (3) and swing out releasing and grabbing the chain (4). You may have the momentum and angle to swing to the ledge (5) or you may need to stop and line-up your swing before making the jump. Take your time since a fall results in death and doing everything all over again. Search the dead end to the left (6) for a Lugar and Lugar Ammo then follow the path (7) around to the door and enter the castle dungeon.
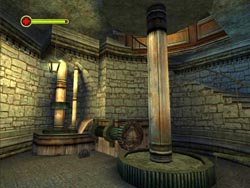
PRAGUE - The Dungeon

When he dies the other man will start moving so don't waste ammo trying to hit him. Simply run down the stairs and meet him head-on. He will likely be using a chair or table leg as a weapon. You can disarm him with your whip or just pummel him with punches until he goes down. Don't forget to get the Lugar/Ammo from the body of the first guard.
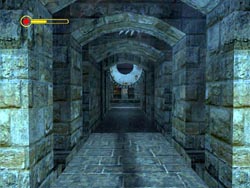
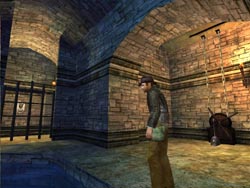
The path to the right leads to a dead end dungeon cell so cautiously move down the passage to the left until the first of several traps is set into motion.

The first trapped hall is pretty easy to get past. It helps if you adjust your camera angle so you are looking at Indy from the side. This way you can judge your distance to each swinging blade. Simply time the swing and dash past the danger zone for the first two blades. The crisscrossing blades are a bit more difficult. Simple stand in the middle and when they swing past do a forward roll into the corner.
In the next corner there is a blade coming out of the wall. This is very easy and doesn't require anything more than you waiting for the blade to enter the wall and then you running up the stairs. Nothing fancy required here.
This next section is a bit more dangerous and requires precise timing, running, and tumbling, and even then you will probably get hit at least once. Stick to the right side of the passage and wait for the first blade to retract into the wall then run down the hall. As the second blade is coming at you roll forward and then keep rolling under the remaining blades until you are safely in the next corner room. Heal if necessary.
The next section is very simple when you know the secret. When the trap first starts a single spiked log will start rolling toward you. You can either run forward and jump OVER the log if it is in the lower position or roll UNDER the log if it is in the upper track. If you wait too long a second log is added to the puzzle and it gets a bit harder, but you can still solve it by rolling under one and jumping over the other.
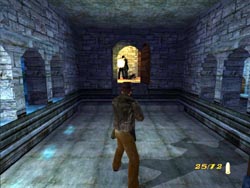
 This next puzzle is scarier than it looks (even though it makes Indy wish he was back teaching class). There are several sets of giant blades that slice through the hall then retract into the walls and ceiling. They are spaced pretty far apart and move slowly so you can easily take your time and walk through each section of this trap then wait for the next blade to retract before going through the next section. The end of this hall requires a forward roll to get through the three blades that converge from the top and the sides. Pull the ring at the end of the hall to open a gate back in the main room.
 Continue to the right to find a Water Fountain on your way back to the main room. Whip-swing across to the previous ledge where a gate is now opened allowing you to pull another ring (1) that opens the large doors (2) at the bottom of the stairs. Another man emerges to join the one who is probably already climbing the ladder behind you. Kick him off or let him up then beat on him or shoot him. Watch out for the other guard who will shoot at you from the ground floor. If you move back into the alcove with the ring they are forced to climb up and fight you on the ledge.
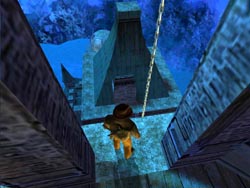
 When both men are dead and you have relieved them of their weapons and ammo you can go down the stairs and through the doors. Follow the passage until you reach the doorway leading to a bottomless shaft. A cage with a hook is suspended over the shaft but it is out of range of your whip. You need to make a daring leap into the shaft then immediately swing your whip in mid-jump to grab the hook and swing across to the far ledge. Now wall hug and follow the narrow ledge around to the opening on the right (facing the shaft).
 Head up the ramp and flip the lever to lower the cage behind you then return to the shaft. The cage falls into the abyss but you can still leap out to the chain and climb up. Climb up until Indy's hands are just above the arched opening. This should give you enough swing to reach and grab the ledge below the window. Any higher and the chain won't swing enough and any lower and you will miss the ledge.
Climb through the window and prepare to fight three hostile guards. They will take cover in the various alcoves making it hard to manually target them. Auto-targeting takes too long, so I recommend just going berserk on them. Pummel them with punches and kicks and they will drop their weapons. You can then pick them up and shoot them with their own guns using the auto-target.
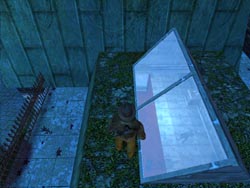
Pull the ring in the alcove on the right to open the iron gates on the cells then take the next passage leading to the right. This leads to a large room with high ceilings and a very wet floor. There are plenty of rats scurrying about as well. Head to the far end of the room and wade through the water to use the Water Fountain if necessary. Then you can do a running jump to grab the middle bridge and pull up. Flip the lever on the right to lower some chains in the right half of the room.

Turn and jump to the first chain then swing to the second and climb up so you can swing once more and grab the high ledge. Pull up and throw the lever by the torch to lower a giant counterweight that opens the gate in the opposite end of this room. You can drop down to the top of this giant stone then drop to the floor or swing back to the bridge. Throw the left lever to lower some new chains to the left and do a running jump to the first. Climb up and swing to the second chain then climb and swing to the far ledge. Grab and pull up to the ledge then pull the ring on the wall to open the exit and leave this level.
There are two ways to approach the courtyard. You can use stealth and speed or waste a lot of ammo killing dozens of guards. I highly recommend using the method I am about to describe because it will save a lot of ammo for use later in the game when you "really" need it. You may take some minor damage but don't get baited into fighting back. Simply stay on the move and you will be fine.
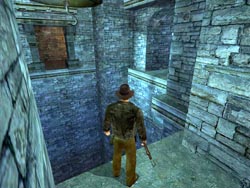
Indy finds himself in a room with a partially open curtain to the right and a door on the far wall. A guard is coming down the hall about to enter that door. If you hurry you can run forward and hide against the wall and surprise him when he enters.
PRAGUE - The Courtyard
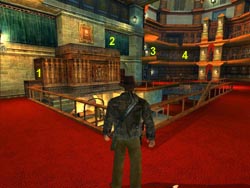
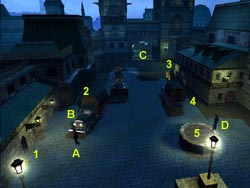 There are four guards to deal with in the courtyard when you first appear in the door (1). Guard A walks between the door (1) and the well (5) and will pause at the well to talk and share a smoke with Guard D. Guard B patrols along the left wall pausing at each end of his route. Guard C patrols between the main gate and the far side of the truck (3), which happens to be your immediate goal. WARNING! If you alert the guards or exchange gunfire more guards will pour out of the three trucks parked in the courtyard.
 Now that you know where everyone is going wait for Guard A to walk toward the well and Guard B to walk away from you. Slowly, make your way to the second corner (2) along the wall then quickly dash across the courtyard and hide between the crates and the far wall. Wait for Guard C to walk toward the gate (away from the truck) then slip around the corner between the truck and the wall. Climb over the side of the truck and get the Explosives then drop off the back and get the MP-40 from the top of the crate along with the 3 packs of ammo.
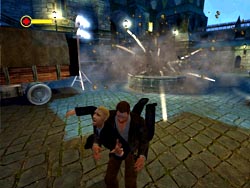
 Make your way along the wall between the truck (4) until you have a view of the well. There will be at least one guard depending on the position of Guard A. Use the silenced Lugar and try to shoot Guard D with a single headshot. Rush forward and climb onto the well and place the explosives then run to a safe distance before it blows - hopefully taking a few guards with it. Run back to the well and climb over the side into the water below. Swim into the new area and climb out of the water where you can spin the wheel to raise the gate and pull the ring to exit this level.
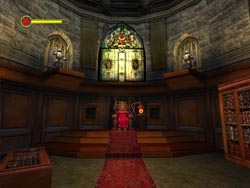
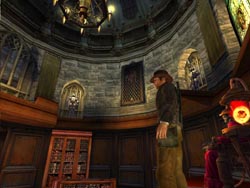
PRAGUE - The Great Hall
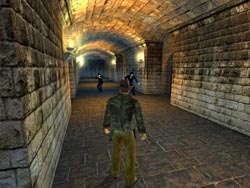
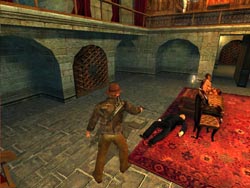
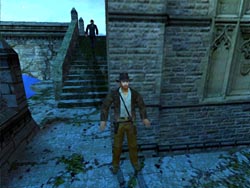
Exit this room and go down the stairs. Go through the large doors and enter the dining hall. As you move into the room a guard will come down the stairs in the far corner. You can hide behind the columns on the right and try to ambush him. Another guard is further up the stairs and will come to assist if your fight gets loud.
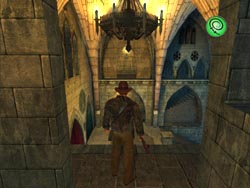 Head up the stairs and finish off the second guard if you didn't already then take the upper walkway to the other side of the dining room. Another guard is at the bottom of the stairs but he is walking away so you can ignore him if you want. Use your whip to swing to the upper ledge (1) using the beam (2) across the stairs. Turn and face the dining room. You need to do a running leap into the room and whip the chandelier then swing to the far ledge. Go around the corner until you hear voices below and a cutscene reveals several guards below.
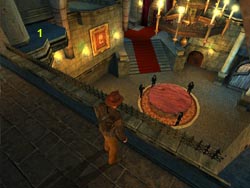
Move out onto the small ledge (1) to get another small cutscene that gives you a visual clue of what to do next. Stick to the low wall (2) and shimmy to the far side of the room then make your way to the chains and flip the lever (3) to send the giant chandelier smashing down onto the group of men. Move to the right and use your whip to swing from the ring (4) and grab onto the chain (5). Climb down the chain (about one body length) and swing to the balcony ledge (6). You need to be at the perfect height to get enough arc and distance just to grip the ledge and pull up. If you miss and fall to the main floor there is a ladder to the right of the carpeted stairs you can use to try again.
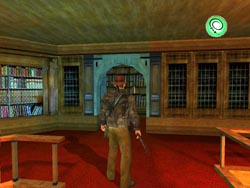
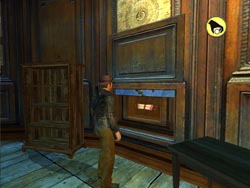
Move past the fireplace and go through the door on the right. This leads back to the main floor where the chandelier and dead guards have mysteriously vanished leaving behind several Lugars and a Throwing Knife. Gather these items then go back up the stairs and through the door. Enter the other door and prepare to fight three guards. There isn't a lot of room to move around so you may just want to use some of that free ammo you just picked up.
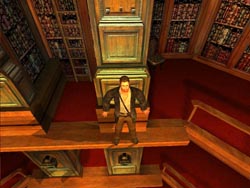
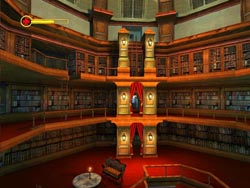
As you enter the library a guard will be approaching from the right. Hang back in the entryway and ambush him when he passes. Move around the carpeted area to the left and climb onto the wooden structure (1). Keep pulling up until you reach the top (2) then whip-swing over to the far balcony (3). A guard emerges from the side room, so beat him up before you climb the ladder (4) leading up to the next level.
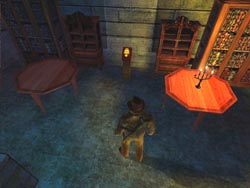
When these guys are dead you can grab the Lugar Ammo and Throwing Knife from the bookshelf and any other weapons the guards may have dropped. Make sure to grab the Library Key from the table then leave this room and go back through the other door and down the stairs. Open the door on the left (where the red carpet splits) and enter the Library.
PRAGUE - The Library
At the top of the ladder you can sneak up on another guard who has his back turned and beat him up. Ignore the lever in the side room. This lever and the one below control the height of the chandelier out in the main part of the library. Move to the break in the railing (5) and do a running jump and swing from the chandelier to the far side (6).
Turn to the left and move to the end of the catwalk where you can wall-hug and shimmy around the protruding sections that border the ladder leading up to the ledge where you can pull the ring. This opens a large section of a secret wall at the opposite end of the library. You now need to make your way to this new area and fight a pair of new guards along the way.
Pull up into the secret area and get the Book from the table. Now retrace your previous path along the top of the wooden structure and swing back to the far balcony. Move past the ladder and hug the wall then shimmy around into the newly opened area between the red curtains. Resting on a table in the back of this secret room is the Hidden Artifact: Medallion of Lebuse.
You now need to reach the bookshelf on the left side of the library (as you exit) . There are two ways to do this when leaving the artifact room. You could wall-hug and shimmy to the right, go past the ladder and pull the lever to lower the chandelier down a level then swing across to the other side. But why not simply wall-hug and shimmy to the left as you exit, and you are right there in front of the bookcase with the obvious gap. Insert the book to spin the bookshelf around and enter a new room.
Collect the Prague Castle Map from the table to the left then reinsert the book to spin the bookcase and return to the library. When you do this another secret bookcase spins open down on the main floor and another pair of agents enter the library.
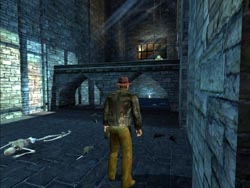
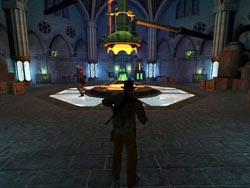
Things don't quite feel right when you enter this next room. Perhaps it's the rats or perhaps it's the numerous skeletons. The Gold Crown is just too tempting, but as soon as you take it poison gas starts filling the room and the far door starts to shut. Make a dash and tumble under the door just as it slams shut. You are now in the clock room, which serves as the "hub" for the next four levels.
 From your current position you are all set to snipe these guys using your manual aim, or you can drop down to the floor below and beat them up. Watch out for a third agent who is down behind the stairs. As you head toward the half-open bookcase you should spot an arched wooden door in the left wall. Open this door and find the first Water Fountain since the Dungeon level. Freshen up your health and top off your canteen then leave this area before you disturb another guard back behind the wine barrels. Head through the secret door and leave this level.
PRAGUE - The Astrologer's Clock: Part 1

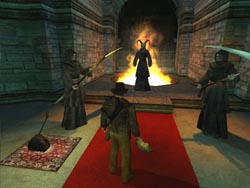
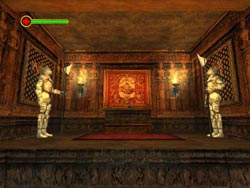
Follow the red carpet past the four doors with mysterious symbols and approach the grim reapers. Flip the lever on the left to summon a strange creature from the fire. It apparently wants something so give it the Gold Crown. Your act of kindness is rewarded with a set of three levers that appear in the floor behind you.
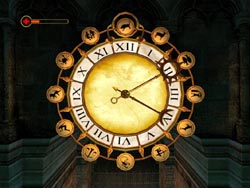
The clock puzzle is pretty simple to figure out when you know the secret. Each door has a symbol and some reference to the Sun and Moon and a time of day, usually represented with a Roman numeral. The images above show the first door, which has the Bull with a IV and a II on the horns over a moon and sun symbol. With this information you can then approach the levers and set the clock to open that door. In this case you want to spin the outer ring until a Bull is in the ring. Then set the Sun hand to the II position and the Moon hand to the IV position. The door opens and you can enter the Armory.
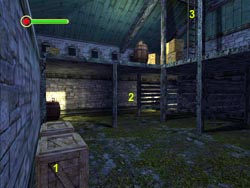
Smash the boxes (1) on the ground floor and get the Medkit then climb the ladder in the far stall (2) to reach the loft. Climb the next ladder (3) to reach the roof.
PRAGUE - The Armory
From your new perch you can observe several guards below you in the courtyard. Traverse the ledge (4) that leads behind the tower until you reached the locked door. Climb up the wide ladder (5) leading up to the top level.
Locate the window that leads to the chain and jump out and grab it. Climb down until you are level with the stained-glass window then start swinging until you crash through. If you are lucky you will knock down the guard inside otherwise you will need to recover quickly and beat him into submission. Exit through the small door into the dark room and climb the ladder in the corner. From here you can spot a lone guard above you in the next tower smoking a cigarette. Climb up and defeat this guard. Make a note of the zip line leading back to the roof where you started then drop out of the opposite windows to the sloped ledge below.
Move to the rooftop on the left where a skylight offers a view into the room below. A guard patrols this room but when you smash through the skylight you land on him and take him out without a fight. Smash the glass on the display case and
take the Broken Sword. This triggers a pair of guards who enter through the doors ahead. When they are dead you can take the steps behind you to leave the armory and enter a dark corridor. The far door is flung open and three agents storm in. Now is a good time to use that MP-40 ammo you've been saving. Make sure to pick-up the leftover weapons and the Medkit.
Let's start off this level with an artifact. As you exit the first room go around the corner to the fence and climb up on the narrow ledge. Hug the wall and shimmy around to the back of the tower until you reach the far corner. Release the wall-hug and quickly jump forward to the ledge on the opposite tower. Enter and get the Hidden Artifact: Stochov Fragment.
 Climb the familiar ladder and then vault up to the tower and use the zip line to return to the roof of the first building. Climb down the ladder to the loft and prepare to battle one last agent who barges in below with a fully loaded MP-40 of his own. Get out of his line of fire and wait for him to climb the ladder. Kick him off (or shoot him) as he reaches the top. He will fall and drop his gun and then you can jump down and get it. Finish off the guard and exit through the door to return to the clock room.
PRAGUE - The Astrologer's Clock: Part 2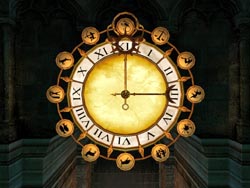 Flip the lever by the pair of grim reapers to summon the creature from the fire and give him the Broken Sword. The levers will appear behind you and you can solve your next door puzzle. This time we're solving the Scorpion door. Visit the door to get the visual clues then return to the levels and position the outer ring so the Scorpion is in the circle. Set the Sun hand to XII and the Moon hand to III. The door will open and you can enter the observatory. HINT: When solving the clock puzzles you can toggle the view between the clock and the door for easy reference.
PRAGUE - The Observatory
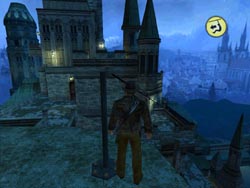
Return to the ledge and jump back to the narrow ledge and shimmy back around to the area where you began this level. Enter the arched entrance on the left and go up the stairs. Approach the door on the left and it will open leaving you face to face with a guard. Defeat this guard then enter the room and exit out onto the balcony where another guard is in need of some personal attention.
Jump out to the chain and climb up until you can swing and jump to the lowest ledge. Vault up onto the next higher ledge and follow the ramp up to the top of the roof. Follow the flat ledge around to the other side of the roof and take note of a pair of guards who meet up around the corner and engage in a friendly conversation. You can fight them now or later. It doesn't really matter. Either way, you need to head up the ladder in the corner.
When you reach the top of the ladder you have a few things to pick-up. Head to the top of the tower and look for an MP-40 tucked between two of the square stones. Come back down the steps and drop down near the round tower and circle behind it to find a Medkit. Keep on going until you can drop down to the lower level.
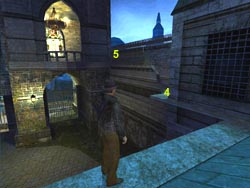
 You are now in the area at the bottom of the stairs where the guards were earlier. If you didn't deal with them earlier you need to finish them off now. The door leading into the observatory is locked so return to the bottom of the steps and turn to face the observatory tower. Look to your left and you will see a small ledge with some Revolver Ammo that you can jump to. Jump back and get alongside the bridge and whip the statue head to swing across to the wooden catwalk. Follow the catwalk around to the right and enter the large tower door.
In the lower section of the tower you will find all the gears and mechanisms that operate this observatory. The control lever seems to be mission so there isn't much you can do here.

Head up the steps and locate the table with the Control Lever. Take this back downstairs and insert it into the control box to activate the machinery that opens the dome and rotates the telescope. Return to the top floor and look through the telescope to admire the constellation of Orion. Now examine the painting on the wall and it will open up revealing
Vega's Manifesto.
As soon as you take this scroll enemy agents will start knocking down the door. Quickly climb the ladder on the telescope then walk out to the rim of the dome. Circle around to the left and use the zip line to slide down to the ledge from earlier. The doors will open as you land and you get to fight another guard. Enter and head down some stairs where you will find a Water Fountain and another agent you can either avoid or defeat on your way out of this level.
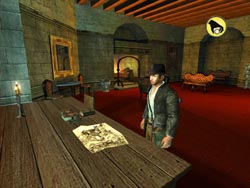
Things start off slowly enough. You are in a quiet room with a Medkit just lying there on the table. Head through the large double doors when you are ready to tackle the rest of the level. The cutscene reveals your destination; the only question is, "How are you going to get there?".
PRAGUE - The Astrologer's Clock: Part 3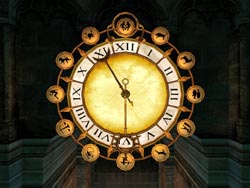 You know the routine by now. Flip the lever to summon the creature from the fire and give him Vega's Manifesto. The levers rise from the floor and it's time to unlock the third door with the two knights. This one is slightly more cryptic as the swords actually point to the proper time settings. Set the outer ring to the symbol with the Twins and the Sun hand to VI. Finally, set the Moon hand to XI and the door will open allowing you to explore Vega's Tower.
PRAGUE - Vega's Tower
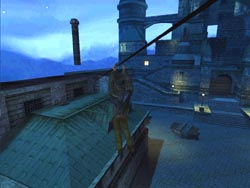
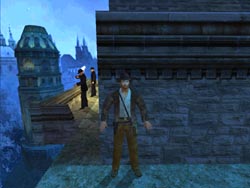
A guard patrols the opposite ledge that you need to swing over to. Your best tactic is to stay hidden behind the door and wait for him to enter the tower to the right. Quickly run out and line up your jump to the chain as shown in the image so that when you catch the chain your momentum will carry you over to the ledge and you can complete the swing in one very fast movement.
Head into the tower and fight the guard down on the lower level then head up the spiral stairs and sneak up on the other guard and finish him off. If you are fast enough you can punch or kick him out the window and save some time. Make a running leap out the window to the next ledge and circle around until you hear a pair of guards chatting. These guys are armed so whip our a pistol or your MP-40 and charge the balcony. DO NOT fight them from the corner. One bullet hit can send you flying off the ledge to your death.
A third guard will join the fight from inside. Depending on how long it takes you to finish off the first two you may fight him on the carpeted steps or he may make it all the way out to the balcony. When all three guards are no longer a problem you can head up the stairs and jump out the next window to the ledge.
Circle around to the left and whip the statue to swing across to the next corner ledge. Continue moving around the corner and jump out to the first of a pair of chains. Climb up a bit and jump to the next chain then swing over to the next corner ledge. Move around to the final chain and jump on. Climb up until you are high enough to swing and land on the ledge just outside the bell tower.
Time to make a little detour. Go to the window with the chain dangling down and jump out to it. Climb down and spin around so you are facing the tower and swing through the window. Inside this room you will find a pedestal with the Hidden Artifact: Cistercian Mask. Add this treasure to your collection then jump back to the chain and climb back to the top of the tower.
Locate the elevator and step inside. Push the button to rise up to the clock tower in the upper level. Here you will find a lever you can throw to open the clock face. Now, climb the ladder leading to the elevated platform and flip another lever to launch the giant glider. Hop on and go for a ride to the final tower.
When the ride is over you are left hanging on the ledge. Pull up and enter the circular chamber. Survey the area and plan your escape. When you take the Soul Crystal from its stand the room is sealed and poison gas starts pouring in. You must quickly climb the toppled bookshelves to the upper ledge then make a running leap toward the chandelier and whip-swing to the opposite side smashing through the stained-glass window to the ledge outside.
As soon as you enter the lab the giant mutant breaks out of the container in the center of the room and charges toward you. This boss is pretty easy to beat as long as you can manipulate the camera so you always have him in your view. This monster moves pretty slow so the trick is to lure him from where you want to go then run away.
Jump to the chain and climb down to the level below then jump to another chain and climb down until you can swing through the open window. You will now be on some spiral stairs. Go down the stairs to the double doors and exit this level.
PRAGUE - The Astrologer's Clock: Part 4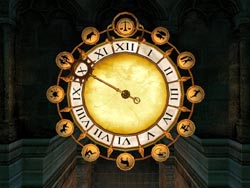 Give the Soul Crystal to our mysterious friend in the pit. He will summon the levers and you can open the final door. This one has a symbol for Scales and only one numerical reference. Set the outer ring so that the Scales are in the top circle and set both the Sun and Moon hands to the X position. The door opens and you are free to enter the Laboratory and face the final boss and recover the second piece of the Mirror of Dreams.
PRAGUE - The Laboratory
In this particular battle you will want to pick-up the beakers full of green acid that are found in two locations along the far wall. These beakers replenish over time and you only have to hit the monster four times to advance to stage two. You will need to get pretty close to actually hit the mutant with the acid. Watch out for his fireball attacks and be sure to dodge any items he might decide to throw at you.
 After you have hit the monster with four beakers of acid he will go into a rage and smash the machine that dispenses the acid. Search the debris for a large pipe that is coated in glowing green acid. Use this as a club to beat on the mutant repeatedly until Indy finally stabs the monster and kills him. Pick up the Dragon Shard and head for the exit to trigger the cutscene and the end of your adventures in Prague.
Congratulations! You've completed Prague!
