
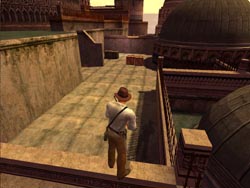
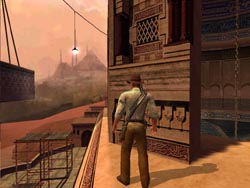
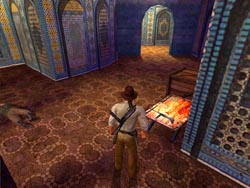
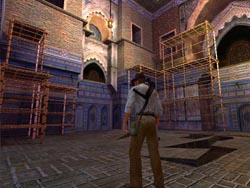
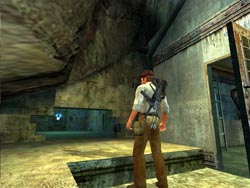
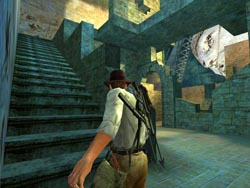
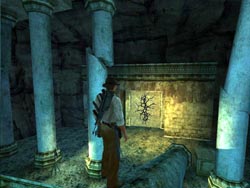
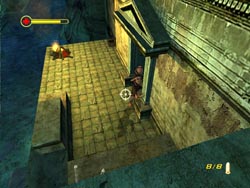
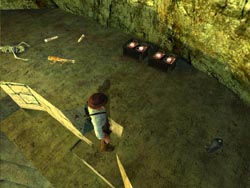
You wake up from your "nap" chained to a wall in a prison cell in Istanbul. The ninja you spotted back in Prague drops in for another visit, this time revealing herself as Mei-Ying. She sets you free and vanishes just a quickly as she arrived. Stripped of all your adventuring gear, you are left with only your fists to fight off a pair of guards who storm through the door to investigate.
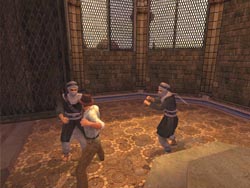 Hopefully you've been practicing your fist fighting, combos and grab moves, but even so it can be difficult fighting these two in the cramped quarters of your cell. You can use the elevated section to your advantage or you can try a strategy that worked pretty well for me. When the guards enter run past them to the outer area and cut to the left where you will meet a third guard coming up the stairs. This one is armed with a Scimitar. Knock him down then pick up his weapon and use it to finish off all three guards.
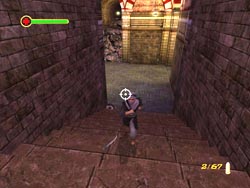
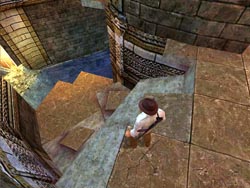
 Go to the bottom of the stairs and through the gate. This gate will not open until the first three guards are dead. Peek around the corner and watch the guard moving back and forth through the striped arches. Wait for him to walk away from you then hug the nearest wall and wait for him to return. When he walk past ambush him and beat him up or use your sword. Try not to get noticed by the other guard standing on the high ledge at the end of this area. Slowly make your way through the arches. There are some Grenades behind the crate on the left but without your satchel you can't carry them right now.
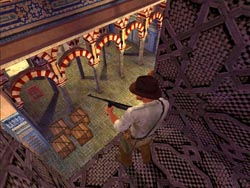
 Continue to the end and get the MP-40 from the table. If the guard above still hasn't spotted you then climb onto the table and pull up to the ledge and ambush him. Use your new weapon to take out the other guard across the way and grab the MP-40 Ammo from the box. You'll have to leave the Medkit until you rescue your satchel. Go down the stairs behind you to find another long hall with a pair of patrolling guards. A box of Grenades is below the stairs but you won't need them right now.
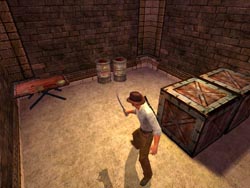 Use your manual aim to shoot the explosive barrels when the guards pass by. The explosion should kill them or at least stun them long enough for you to run up and kick them. A third guard is lurking in the room at the end. You can either get the drop on him with your MP-40 or wait for him to investigate the explosions and blow-up another barrel. Locate the table in the corner of the final room and take back your Satchel, MP-40 Ammo, and the Medkit. Make your way back out side.
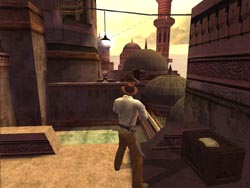
Now that you have your satchel you can grab that Medkit back on the patio then use your whip to swing across to the far ledge where the other armed guard was earlier. Another Medkit can be found here.
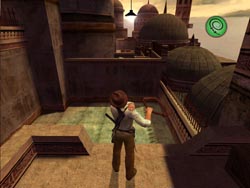
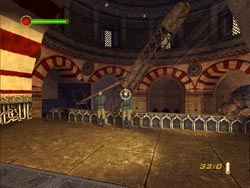
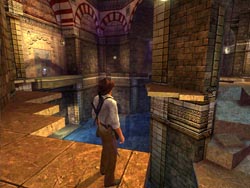
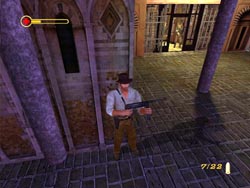
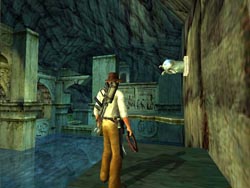
Drop down into the courtyard and be ready for a pair of armed guards that try to surprise you. One drops from behind you and another comes from around the far corner. Defeat them with fists or bullets but try not to go too far towards the machine gun turret on the far ledge. When you get about halfway across the compound a guard will man this turret and open fire. Run toward the wall tumbling if necessary and climb up to where he is. He won't be able to use the gun at close range, so you can easily beat him up.
Use the machine gun to enter a manual aiming mode and spin around 90-degrees to the left and shoot the pair of guards rushing toward your position. If you want to be really cruel you can wait for them to climb up to your ledge and blast them up close. There is also another guard in the window at the end of this area.
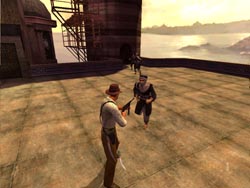
Climb down and head in the direction you were just firing. Go down some stairs leading to a large open area where several guards circle you. Mei-Ying drops in to assist you in this battle then vanishes just as quick.
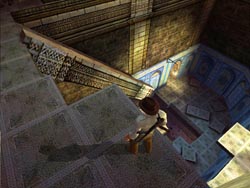
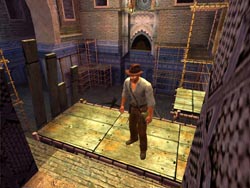
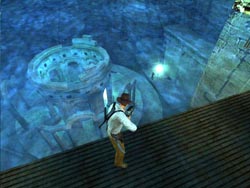
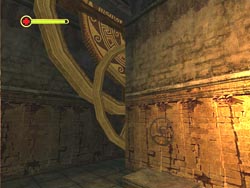
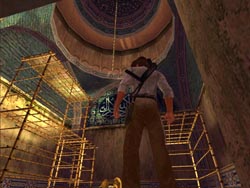 Go through the door in the corner to find a room with a domed ceiling, lots of scaffolding, and a rope leading up the center. Climb the lowest section of scaffolding and pull up to the higher section then jump out to the rope. Climb up until you are about level with the narrow ledge that circles the dome. Swing and jump to the ledge. I recommend swinging toward the wall with the high scaffold beneath it so if you miss you will not take damage. Circle around to the opening leading outside.
Turn to face the suspended crates on the adjacent tower and then hug the wall so you can shimmy along the narrow ledge to the next corner section. Jump to the scaffolding surrounding the tower.
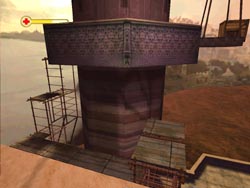
Drop down to the lower planks then vault up onto the next two sections and get on the tower ledge and circle around to the lift. Push the large box off the lift and it will rise taking you to the top level of the tower.
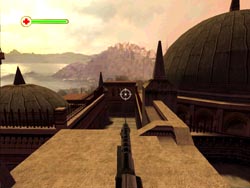
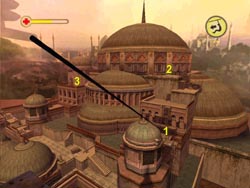
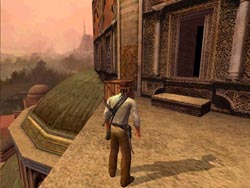
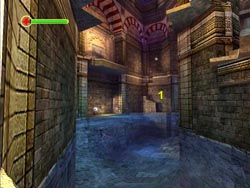
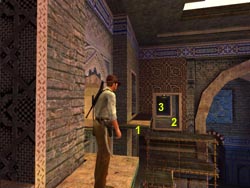
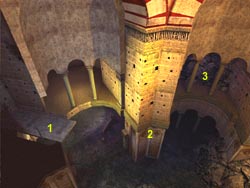
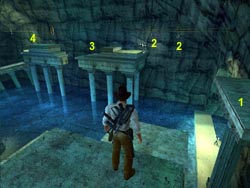
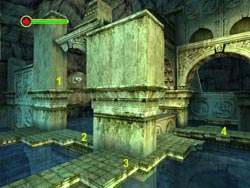
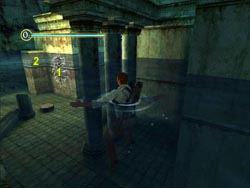
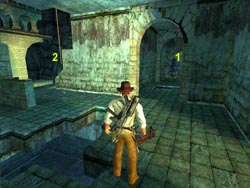
Circle around to the zip line and survey your next destination; the large domed building across the way. From here you can spot several key locations you need to visit as you leave this level. The scaffolding (1) will take you up to the exit (2) at the top of the dome, and you can also spot a small structure (3) to the left that contains a hidden artifact. For now, slide down the wire.
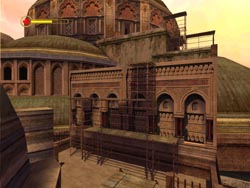
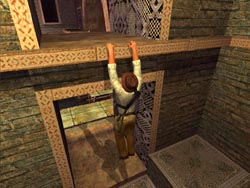
You'll land on some scaffolding. Drop down to the ground and a pair of guards will slide down after you. Defeat them before making the climb up the next section of scaffolding to a landing with another armed guard. If you surprise him you can kick him off the ledge, otherwise try for a grab and a throw move. Climb up the last section of scaffolding to reach the top of the dome.

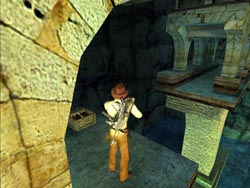
Before entering the dark doorway you may want to get the artifact on this level. Jump out to the green dome on the left and slide down to the narrow flat ledge leading around the dome. I highly recommend keeping the "walk" button held down as you traverse this narrow ledge. It would be a shame to die so close to the end of the level.
Make your way around and drop down to the fenced area and enter the doorway. Inside this dark room is Hidden Artifact: Piri Reis Manuscript and the comforting blue glow of a healing Water Fountain. Fountains will become increasingly scarce as the adventure continues so I recommend finding and using them all. Retrace your steps around the domed ledge and jump down to the lower level and repeat the climb over the last section of scaffolding. Once back at the top you can finally enter the dome.
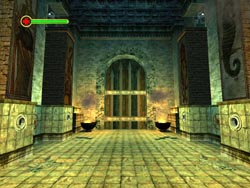
Follow the ledge to the left and go through the door until you come to a large room that is partially destroyed. Whip-swing across the first gap then do a running whip-swing to get across to the far ledge.
ISTANBUL - The Secret of the Mosque: Part 1
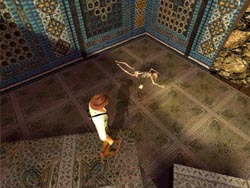
Move around the ledge until you are at the top of the toppled column then step on and slide down. As you near the bottom, jump and whip-swing to clear the deadly pit at the bottom. Make your way around the perimeter of this room until you reach the back corner where you will find a skeleton. Pick-up the Medkit and the MP-40 Ammo then retrace your steps back around and exit through the door.
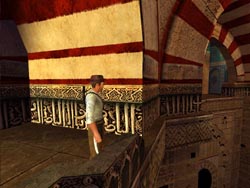
Follow the passage until you reach a large balcony with a pair of Nazis standing dangerously close to the rail. Step from around the corner and unload a few short bursts from your MP-40 and send them both flying to their doom. If they manage to stay on the balcony you can rush them and go for a grab and throw move. Check for any guns lying around. This is your first chance to get a Mauser.
Locate the gap in the railing and hug the wall. Shimmy around the narrow ledge until you can survey the next room around the corner. There is one robed guard and several armed Nazis patrolling this large room. Get as close as possible without being spotted and wait for the robed guard to break away from the uniformed officers.
Make your move and strike quickly then tackle the remaining guards as the rush to investigate. Gather up any pistols and ammo from the battle then search the table for a MP-40 Ammo, Explosives, and a Medkit.
Move through the arched exit and start down some stairs. A pair of guards jump down from the high ledge in the far corner and advance up the stairs. Deal with them before heading down another short flight of steps to the right.

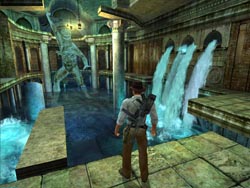
This huge room has plenty of interesting things to do plus there is a giant shark swimming around the water below just to make things more interesting. Turn to the left and whip-swing across the gap where you can face off against a pair of guards. Keep going until you come to a broken section of floor. You could do a running whip-swing across this gap or you can simply walk around the section of floor that is still intact along the wall.
When you reach the next column you have a decision to make. If you haven't already noticed, there is a Water Fountain on the far right wall. Unless you really need water and/or health I suggest skipping this one and simply drop down the crumbled stones to the low ledge down by the water.
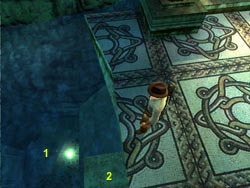
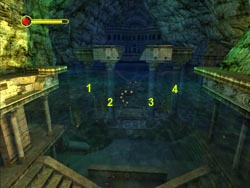
If you do decide to go for the fountain you need to hug the column and shimmy around to the far side. Whip-swing to the large jagged ledge then hug the wall and shimmy around until you reach the fountain. The easiest way to get back on track after refilling your canteen is to jump into the water below and swim quickly to the low ledge (1). Climb out then vault the two low ledge and climb the ladder. Hug the wall and shimmy around to where you first entered this room. Now, make your way back to the low ledge by the water.

You now need to whip-swing into the arched opening across the water. You will need to get a running start and land inside the hall. If you hit the slope you will slide back into the water and will have a long swim back to that low ledge. Continue forward until the passage branches to the right. A pair of guards patrol this section of hall. Defeat these men then enter the large room.
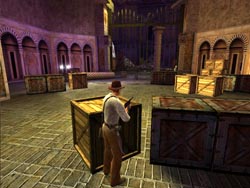
This room has many more Nazis and several large crates you can use to take cover. Take out all the guards and collect any weapons they drop then smash any boxes that weren't destroyed in the fight. You should find a Grenade, MP-40 Ammo, and a Medkit. Locate the table along the right wall and get the Explosives.
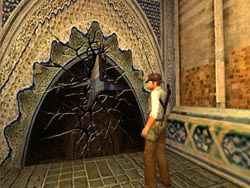
Head back down the hall and turn right at the junction. Continue to the black cracked wall and place the explosives then run back to a safe distance and wait until the explosion creates your exit from this level.
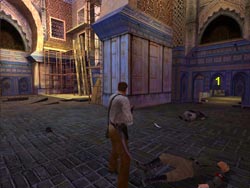
After the dust settles you need to deal with a swordsman and a Nazi who enter from the large room on the left. Before going into this room you need to continue to the low opening (1) and roll through the broken wall to find the Hidden Artifact: Ottoman Seal. Roll back out and go into the large room (now on the right) with all the scaffolding.
ISTANBUL - The Secret of the Mosque: Part 2
As you enter, climb up the lowest section of scaffolding to your left then pull up to the top level and do a running jump and whip-swing across to the far corner. Continue to circle around the planks and make another daring leap to the scaffolding in the third corner. Continue across this new section of scaffolding until you can enter the opening in the wall.
Once through, turn to Indy's left and jump and pull up to the narrow ledge. Shimmy to the left and pull up so you can pass through the opening in the wall just above the one you came through a moment ago.
Back in the main room, turn left and make a running leap to the next ledge (1) then climb into the opening (2) to get back to the passage where you started this level. Swing across to the opening (3) on the other side and follow this short tunnel into the next room.
You are now perched high above a large room with four boxes below, and two guards just out of sight past the striped arches. Hang and drop then use the boxes for cover and open fire on the Nazi's in this area. You can smash the boxes if you want but they are all empty.
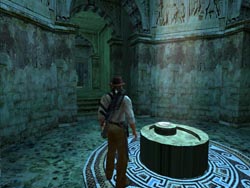
The large fountain in the middle of this next room is actually a Water Fountain that you can use to fill your canteen and your health. You need to stand in the inner ring to activate it.

As you approach the wall with the red lever three more Nazis arrive on the scene; one from the corner and two exit from the elevator. All three are heavily armed and dangerous so make use of cover or possibly use your whip to disarm them before attempting to defeat all three at once. Revisit the fountain if necessary after the encounter then enter the lift and use the lever to reach the next level.
You are now in a huge cavern with a giant crane. As you enter you can head for the control booth for the crane (1) but you may also want to make note of a hidden Water Fountain (3) that you can access by wall-hugging and shimmy around the narrow ledge (2). Since you probably don't need water now just keep this in mind after the upcoming encounter.

Climb the ladder to get inside the crane. Make a note of the raised ladder to your right then head up the steps to the left to access the controls. Use the directional commands and the firing button to move the claw to the left and pick-up the giant statue head. Now move it back to the right over the pit. About this time two guards come down that ladder behind you. Exit the control booth and kill these two before climbing the ladder to the roof of the crane.
SPLASH! Swim to the surface and get your bearings. Locate the low ledge and swim over to it and climb out. Search the boxes to the right for a Medkit and an Oxygen Tank.
Climb up the tall ledges to reach the main arm of the crane then walk up the arm until you are given the prompt to use your whip. You need a running start to whip-swing out to the statue head. Once you land a third Nazi releases the claw and sends you and the head plunging into the abyss below.
ISTANBUL - The Sunken Palace
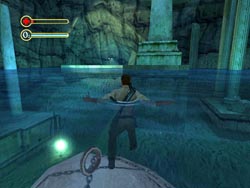
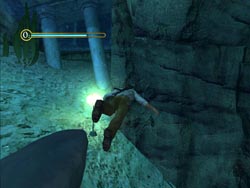
Look into the water on the other side of this ledge and locate the arched opening leading to an underwater passage. You need to dive in and swim through this passage, but be warned; there is a giant shark prowling the waters in the next area. Since you have no underwater weapons you are going to have to swim fast and evasive to avoid becoming chum.
Once you are through the first tunnel angle to the left and swim through any of the three arches. The shark is probably in pursuit by now so swim fast and look for the pair of columns flanking the path leading to the surface. There are underwater lights that help to lead the way.
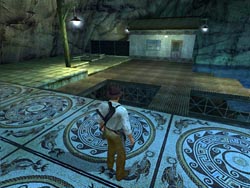
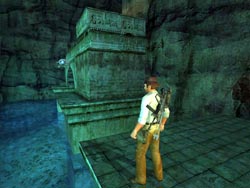
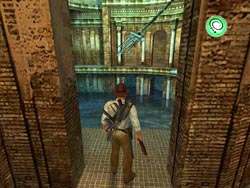
Exit the water and scan this new area. A new body of water lies ahead and to the right and there is a shack directly ahead with a guard patrolling out front. There is also a fenced storage area to the left of the shack and a ladder that leads down to a pier.
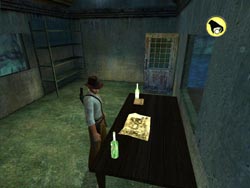
Eliminate the guard and enter the shack. Collect the Istanbul Map and MP-40 Ammo from the table. A Spear Gun is on one shelf and there are three bundles of Spear Ammo on the other. You can only carry two for now.
Exit the shack through the side door to reach the fenced area and smash the boxes to reveal a hidden passage. Roll into this hidden area and find a Water Fountain. Roll back out and return to the main area outside the front of the shack.
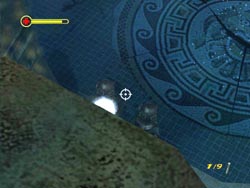
Climb down the ladder to the pier and locate the two men working underwater. Use your manual aim and target them with the spear gun from the pier. Two headshots each should put these guys down and they won't even fight back.
Dive in and swim to the area where they were working. Locate their box of demolitions and get some Explosives. Check your air and surface if necessary before exploring the sandy bottom under the pier.
Swim towards the lights and locate the skeleton to collect the Machete before surfacing and climb out of the water. This weapon will be of critical importance in obtain the hidden artifact in this level. Make sure you get it.
You are about to leave this area so you may want to visit the shack and grab that last bundle of spears or possibly get a drink from the hidden fountain if you took any damage recently. Otherwise, head through the broken columns and descend into the water. The shark is still on the prowl and you do have the means to stop him now that you have a spear gun. Even so, I recommend simply avoiding the shark. Even if you do get bitten once it only takes about 25% of your health away. Swim through the triple arches on the left then turn right and swim through the long tunnel and pull out on the low platform.
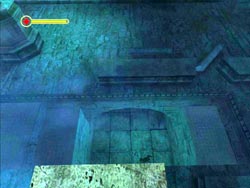
You should now be facing the pool of water where you splashed in with the giant head. Locate the column with the cracked base and swim over to it. Climb onto the low ledge then pull up to the small ledge just below the crack and place the explosives. Dive into the water and swim to a safe distance to watch the show.
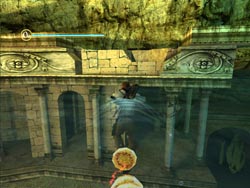
The tower topples creating a convenient ramp leading up to the tops of several column structures. Follow the ramp to the top and jump across to the left to reach the large ledge and survey the upcoming challenge that lies ahead. First jump to the large ledge (1) to the right then prepare to make a running whip-swing to the first of two hooks (2). This is a combo swing that requires precise timing between the two hooks to make it all the way to the next ledge (3). Do a running jump and grab the far ledge (4) and pull up to face the next challenge.
From this position you need to make a running whip-swing on the single hook and you will land on the suspended crate. Use your machete to slice the rope sending you and the crate into the floor below. The crate smashes open revealing the Hidden Artifact: Delian Proclamation.
Climb into the crane and use the controls to pick-up the giant head and swing it to the right so that it crashes through the broken wall. Exit the crane and follow the path around until you can enter this newly opened area. Go to the far left corner and climb the stairs. Follow the ledge around until you can make a running whip-swing to the next ledge followed by a running jump and grab to reach the exit to this level.
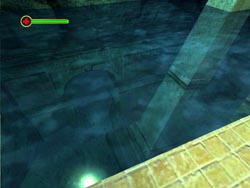
There are several sharks in the waters of this level so make sure to swim fast or be prepared to use that spear gun. Looking down at the ruins from your high ledge you can survey the various ledges but only one of them is low enough to actually climb out of the water. It is near the back of this cavern in the middle of the structure.
ISTANBUL - The Gates of Neptune
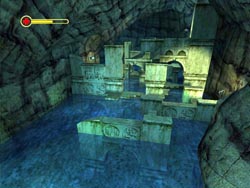
When you are ready dive in and swim quickly through the ruins and locate this ledge. There is only one shark in this area and you can outswim him by twisting through the ruins and turning sharply. Climb onto the low ledge and make your way to the nearest wall with the dolphin head statue.
Use your whip to grapple the statue and swing across to the other side. Follow the ledge to the left until you can go no further then pull up to the narrow ledge and wall-hug.
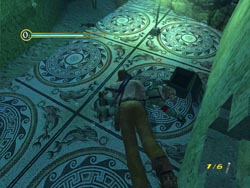
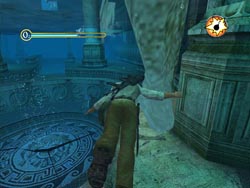
Shimmy around one corner of the column (1) and drop onto the ledge (2) below. Make an angled jump to the next section (3) and carefully walk around or wall-hug to get to the next wide area where you can jump to the next section of tile (4).

From here, make another leap to a ledge at the base of two circular carving in the wall. Pull up to the high ledge and head up the stairs. Turn left and jump across the large gap, grabbing and pulling up on the far side. A swordsman will be in this area with another around the corner. Defeat them both or try luring them out onto the ledge and throwing them to the shark.
Head down the stairs to the cave-in and collect the Wine Coin and some Spear Ammo. Retrace your steps back to the main room, leaping across the large gap and going back down the stairs.
When you reach the bottom of the steps wall-hug the left wall and shimmy around the narrow ledge. This takes you back to the ledge where you first climbed out of the water, which is where you need to be to start the next section.
Look straight out toward the large arch and spot the underwater lamp behind some columns. This is where you need to go and there is a new shark swimming around that area. Dive in and swim toward the light. You will find some Spear Ammo behind the columns and a staircase in the corner leading up out of the water.
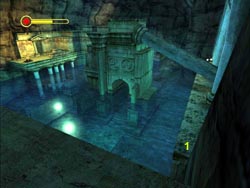
Climb these stairs and follow the path around to the ledges above the water. Jump across the first gap then whip-swing across the next. When you round the corner you will have a great view of a huge cavern with a partially sunken temple.
Locate the protruding ledge next to you and use it to vault up to the top section with the ruins and columns. Go through the ruins and through the arch leading deeper into the cavern. Find the narrow ledge leading to the right and follow this until it ends.

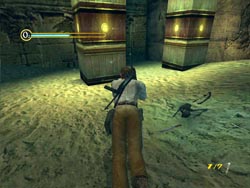
You now need to make a tricky angled jump to the flat ledge (1). Aim to the right so you hit the angled portion of the sloped rock and slide down to the ledge. Make a note of the cracked wall. You'll be returning here with some explosives very soon. For now, climb onto the toppled column and follow it out to the center of the cavern and keep climbing up to get a great view of the entire area.
From your central perch climb down one ledge then jump to the ledge across the way with the twin lights. Climb up the steep ledges and cross over the arched structure to drop down to the area with the campfire. Locate the box of explosives and grab two Demo Charges before making the series of jumps back to the far side of this cavern where the cracked door was.
Head down the sloped column and plant the charge on the door then head for a safe distance as you blast your way into this new area.
Enter the blue-tinted passage and follow it to a small chamber lit by a heavenly glow from the ceiling. Remove the Trident Coin from the pedestal then exit back to the main cavern.
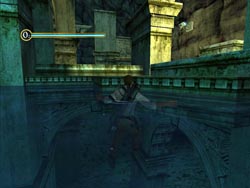
Climb the pillar and return to the central perch. Make your way back across as if you were going to the campfire but this time climb down the right side of the large arched section to a long flat walkway leading toward the back of this cavern. Looking down into the water and through the next large arch you should see a light. Another shark is also swimming laps around this area. Jump into the water and swim through the arch and turn left at the back wall to slip in behind some columns.
Surface and catch your breath while you survey the situation. You are safe from the shark so breathe easy. Locate the cracked section of wall (1) ahead of you. You will need to blow this open with your remaining demo charge. Inside is the Seahorse Coin. Exit this tiny room and climb out of the water on the low ledge (2) just left of the blast area.
Climb up the various steps and ledges and make your way back to the campfire. You may or may not encounter a pair of swordsmen at this time. If not, you will meet them shortly; otherwise they could be standing in the doorway making easy targets for a manual aim from the top of the ledge. Drop down and get the remaining Demo Charge from the box and head through the door.
In the next room avoid the gaps in the floor and place the final charge on the cracked wall section (1) at the end of the hall on the right. After the dust settles you will have access to a Water Fountain. Stock-up before the upcoming battle. When you are ready, head out to the ledge and jump to the rope (2) and climb up until you can swing to the upper ledge.
Turn to face the bridge in the distance with the arched openings. There are several guards in this area and boxes of grenades spaced along the way that they will use against you. Try sniping as many as you can from a distance then use the grenades against any that remain. Leap across the gaps in the bridge and follow the path as it leads into a large cave.
Continue to the tiled floor and when it breaks away revealing water below, look for the light at the bottom. Next to this light (1) is the final Kraken Coin. There is also a very hungry shark in this area, so make sure to surface and climb out onto the low ledge (2) just below the broken tiled floor where you jumped in.
Jump across the gap in the tiled floor and continue to the large door. To either side are two receptacles for coins and a wheel. Insert the proper coin into each receptacle based on the image shown on each column then spin the two wheels to open the massive locking device on the door and exit this level.
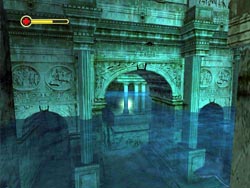
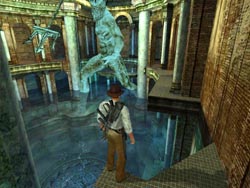
Enter the amazing chamber of Poseidon; complete with cascading waterfalls and a leaky cracked floor, which is also your ticket to the final boss. The movie clues you in that you need to topple that statue of the sea god so it smashes through the floor, but first you need to get to it. The obvious path is along the right wall but the plumes of water prohibit you from swinging across the gap.
ISTANBUL - The Fall of the Sea King
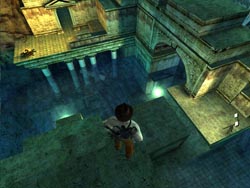
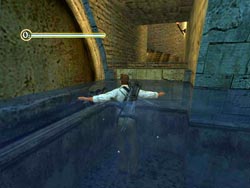
For now, walk out along the narrow ledge to your left and hop down to the small square ledge and look down to your right (under the falls). You should see an arched underwater passage leading out of this room. Dive in and swim through.
Surface in this next room and you will find yourself on the other side of the semi-circular grating. Swim to the back of the room and locate the curved stairs leading up. Climb out and ascend the stairs into the next area.
This next room looks fairly simple. You arrive on a high ledge in a room with a massive aqueduct. Three narrow tunnels lead to dead-ends under the giant water bridge and a control valve is on the wall to your immediate right. Drop down and turn the wheel to stop the flow of water into the main room. This also triggers an explosion in the tunnel behind you and two armed guards rush into the room. These guys can be tough in the close-quarters of the tunnel. If you have enough time simply climb back to the ledge where you arrived and shoot them from above or kick them as they try to follow you.
Return to the main room and exit the water on the small square ledge then jump and pull up to return to where you entered this room. Follow the ledge along the right wall and whip-swing across the large gap. Pause for a moment when you land so the ledge ahead can collapse without dumping you back into the water. You need to make a running leap across this gap. Use the extended angled section closest to the wall to achieve maximum distance.
Turn right through the archway then spin around to face Poseidon and do a running whip-swing on his trident to reach the far side. Turn right and jump over the hole in the floor then make your way around until you are behind Poseidon. Jump down to the lower stone ledge. From here you can spot the corner room with a Water Fountain. Use as needed. Now it's time to get sneaky.
 While standing on the low ledge behind Poseidon turn and jump to the high ledge behind you and hang. Now drop from this ledge and you will spin and hang from the ledge you were just standing on. This triggers an explosion behind you that sends two Nazi divers into this room armed with nasty spear guns. Quickly pull up to the ledge and move so they cannot target you. Wait for the divers to reach the edge of the cracked circular floor. They will stop here and keep trying to hit you with spears, which will be deflected by the ledge you are standing on. Now you can carefully use your crosshairs to snipe each diver in the head until dead.
 Dive into the water and swim toward the back where the divers appeared from. You should find a box of explosives. Grab two of the Demo Charges then swim back to the statue. Place the first charge on Poseidon's right ankle and swim to safe distance to observe the blast. Return to the square ledge and climb out of the water. Retrace your path swinging from the dolphin head and the trident until you are back on the small stone ledge behind Poseidon. Place the final explosive on his left leg and dive into the water to reach safe distance.
After the second explosion a column topples giving you a new circular ledge you can use to exit the main pool. Stand on this ledge and jump, grab, and pull up to the next higher ledge. Turn to the right and climb the vine-covered wall (1) to reach the top walkway and circle around behind Poseidon.
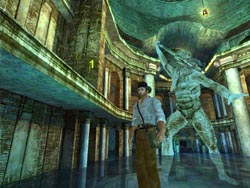
Use the lamp above Poseidon to whip-swing out and kick over the giant statue sending it crashing through the floor. The suction pulls you to the bottom of the pool and into the chamber below where you must face the final boss.
This boss looks much harder than it really is, but once you know the secret you will finish this stage in less than two-minutes. The Kraken attacks by sending out waves of jellyfish that latch onto you and pull you back to the waiting tentacles. The more jellyfish stuck to you the less mobile you become. You can avoid these creatures by swimming in tight circles or shooting them before they even reach you.
ISTANBUL - The Kraken's Lair
Your first objective is to get out of the water and get some important items. Turn to the left and locate the low ledge. Swim over and climb out of the water.
Grab the Oxygen Tank (if you need it), the Super Spear Gun and two of the four Explosive Charges. More super spear gun ammo is located underwater but you shouldn't need any of it.
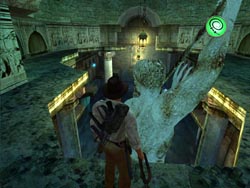
Your goal is to place charges on each of the four cracked columns. This is the only way to defeat the Kraken and it knows it since whenever you get close enough to plant a charge it sends out a forceful stream of water pushing you away. What you have to do is swim as close as possible to the Kraken using the auto-target lock of the super spear gun to kill the jellyfish that spiral forth from the beast. When you are close enough and there are no jellyfish ready to grab you switch to manual targeting and shoot for any of the Kraken's eyes. You don't have to hit them all, just one or two several times and the beast will retreat for a few seconds. This gives you just enough time to plant at least one - hopefully two charges on the pillars. Make sure to swim away to a safe distance.

Now repeat the process for all the pillars. Depending on how quick you are you may be able to do this in two rounds of Kraken combat or take your time and do the columns one at a time. You'll have to return to the ledge and get the remaining two charges for the final two columns. You have over 200 rounds of super spear gun ammo, which should be plenty to keep the jellyfish off you and the Kraken suitably annoyed.
When all four columns have been destroyed the entire structure crumbles and the water drains from the room allowing you access to the Mirror of Dreams Fragment. Make a quick trip around the newly dried floor to find several bundles of Super Spear Gun Ammo and a Medkit. Collect your prize from the golden dais to end this level and trigger the movie that will take you to Hong Kong.
Congratulations! You've completed Istanbul!
