
Even though Indy is in disguise you can still get noticed by the other guards if you are acting suspiciously or get close enough to be recognized. The best strategy is stealth and avoidance. Keep your distance and you can avoid a lot of alarms and encounters with flamethrowers.
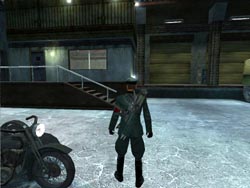
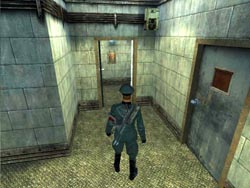
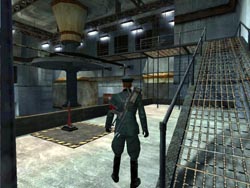
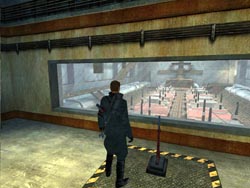
Start the level by going up the stairs to the left of the bike. Look through the window or open the door and wait for the pair of guards to exit out the side door.
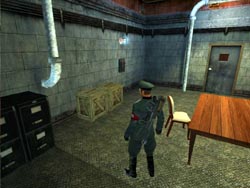
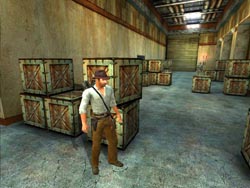
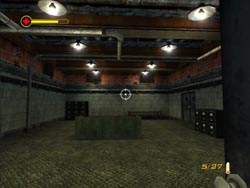
Inside, you can smash the boxes but they are empty. Flip the switch on the wall to open the middle garage door outside then exit this room through the same side door the guards walked through earlier.
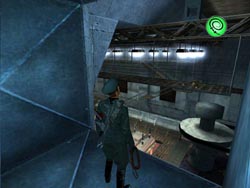
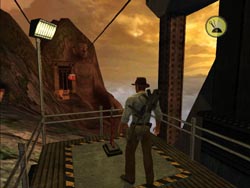
Carefully approach the open garage making sure to keep your distance from any guards up on the dock. Climb the crates inside the garage and go through the opening in the wall into the next bay. Climb the crate and them jump and grab to pull up onto the roof.
Head towards the office door but note the opening with the grate partially removed. Drop into this area and smash the wooden crate to get the
Hidden Artifact: Zhao Mo Rhyton. Check the floor in the back corner for some Mauser Ammo then climb back out and go to the office.
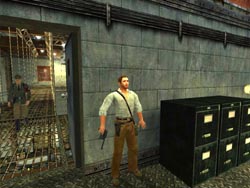
When you enter the office turn right and open the door leading to a small room with a switch. Flip this switch to cut the power to a ventilation fan on the other side of the compound. Return to the main room and get against the wall near the other door. A guard is about to enter and if you are fast you can surprise him and knock him out with little resistance.

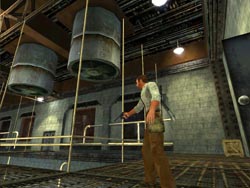
Go through the door and flip the red lever to move the overhead crane. This lines up the crane so you can use if to a whip-swing to reach the other side.
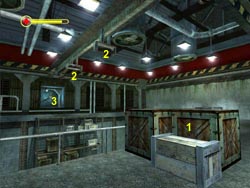
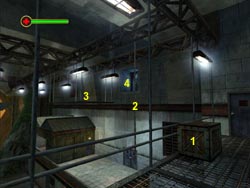
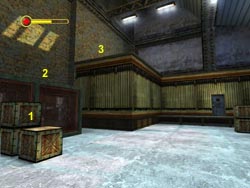
Head in the direction the crane moved and climb the boxes (1). Get your whip ready and make a running leap toward the crane (2) and do a double whip-swing to reach the far side and enter the ventilation shaft. Take your time on this whip-swing. Falling from this height is instant death.
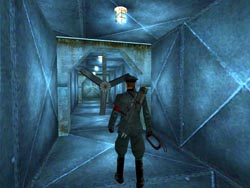
Roll under the fan and continue around the corner where two more fans are slowly spinning. You need to time these rolls carefully. If you get hit by a fan blade you will lose about a third of your health bar. When you roll under the third fan you will start sliding down a chute. Have your finger on the jump button and jump at the very bottom of the shaft to grab the far side and pull up. If you miss this jump you will die and restart the level.
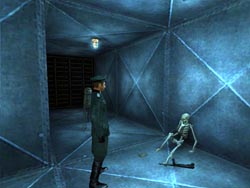
Follow this new section until you reach the vertical shaft with the red glow. Turn right and roll under the fan then follow the passage back around to the dead end where you will find a skeleton with an MP-40 and a Medkit.

Retrace your path and roll back under the fan then prepare for a dangerous leap across the red glowing shaft. Pull up on the far side and continue down the passage.
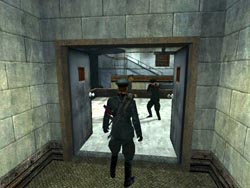
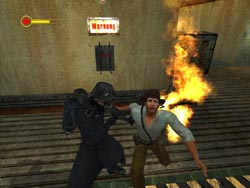
When you open the double doors you will surprise the two Nazis on the other side, but only for a moment. One guard will likely make a break for the control room to the right to sound the alarm. If this happens then flamethrowers will arrive shortly. The best strategy here is to simply open the doors and open fire with the MP-40. Even if you don't kill them in the initial blast you will knock them both down and can finish them off without the alarm going off.
 When you come to the fan with the white mist blowing toward the right be careful. If you step into the airflow it will blast you down the shaft and into a vertical shaft that will kill you. Note the passage that branches off across from you at a slight angle and make a run towards this new section. Angle left as you dash across the shaft to fight the wind and you should have no problem. Drop into the lower section and follow the passage around to a vent. Drop into the room and smash the box along the wall for a Medkit then exit the level through the double doors.
PENG LAI MOUNTAIN - The Infiltration
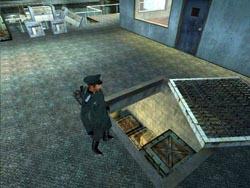
Whether the alarm sounds or not, you still need to visit the control room and throw the red lever so Indy can realize that he needs to restore power from another location. Exit the control room and climb down the ladder to the left of the double doors you entered a moment ago.
Follow the wall with the ladder around to the right and enter the storage room under the area where you fought the two guards. Smash the box to the left behind the larger crates to get a Medkit. Exit this room and keep following the wall around the corner to the right where a lone box holds Hidden Artifact: Gui Jian Scroll.

Now go back the other direction and follow the large room around to the other side. Enter the double blue doors to find another storage room with more boxes you can smash to get a Medkit.
Climb the stairs at the other end of the room and head through the door to reach the landing. Flip the lever to your left to shut down another fan then climb the metal ramp to the right to reach the top catwalk.
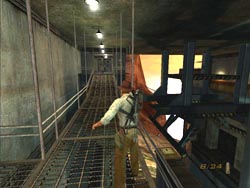
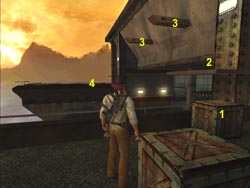
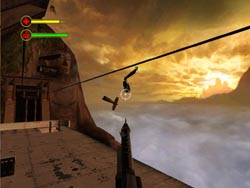
Cross the catwalk and climb onto the crate (1) then jump out to the chain (2). Your momentum should be enough that you can jump from the first swing of the chain and land onto the suspended ledge (3). From here you can whip the hook above and swing over to the ventilation shaft (4). Grab onto the edge and pull up to get inside.
Roll under the fan and follow the passage around until you reach the giant generator room. There is a guard patrolling the catwalk you need to swing over to, so you need to either shoot him before you swing or wait for him to be walking away (to the left) before making the swing. Run down the catwalk and shoot/punch the guard if you didn't kill him before the swing.
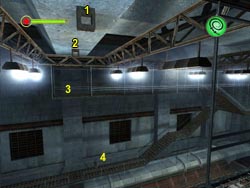
At the far end of the catwalk you need to make a daring double whip-swing. Whip the hook (1) and then quickly release and whip the next hook (2) to land on the far catwalk (3). If you miss you die and have to it all over again so take your time and be careful. Follow the catwalk around and down the stairs and defeat the guard (4) that patrols the lower level.
Go through the single blue door and enter the control room that overlooks the massive array of generators. Flip the lever to restore power and summon a whole new batch of Nazis. Behind you, a ramp leads down to the main level and a guard is already on his way up. Wait around the corner and ambush him as he enters the control room then go down the ramp.
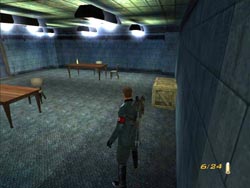
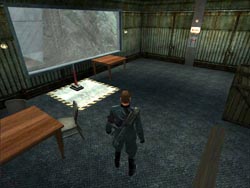
You are now in a break room with several tables and a pair of boxes along the right wall. Smash them to get a Medkit then exit through the large doors to the main floor.
Carefully make your way around the generators that are overloading and creating deadly arcs of blue electricity. If you touch any of these you die and get to replay the level. The energy surges create a maze that you must follow to reach the far side of the room. To make things difficult there are several soldiers firing at you from the far end of the room. Keep your eye on that health bar as well as the random arcs of energy as you make your way to the lever in the middle aisle between the last two generators. Flip this lever (1) to reduce the overload and create a path to the door in the corner (2). The safe path leads behind you and around the outer perimeter of the generator floor.

Go through the double doors (2) and follow the series of halls and stairs leading back to the first room. You will need to kill several guards along the way. When you arrive you will be at the base of the ladder leading to the control room from earlier. Climb the ladder and enter the control room to flip that lever one more time. More guards are alerted to your presence, so prepare to fight your way to the other side of the room. Enter the cable car to end the level.
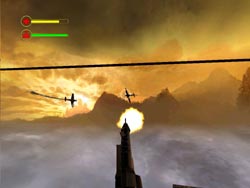
This level is much like the chase in Hong Kong from the last chapter. You start off on the roof of the cable car with planes flying all around shooting at you. Your cable car is taking damage and you need to get off of it as soon as possible. Your only escape it the cable car that pulls alongside you, but you will first have to shoot a few Nazi gunmen off the roof.
PENG LAI MOUNTAIN - Terror at 2,000 Feet
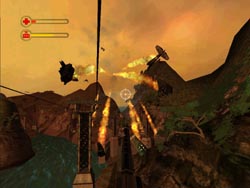
When you have cleared the roof make a running leap to this new car and get behind the gun turret located at the back. Start firing at the planes as they come in from all directions. You have unlimited ammo so keep the trigger down and unload into all the planes as they strafe your cable car. You must survive all the way to the top.
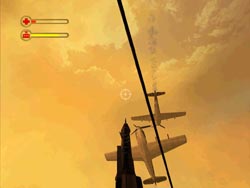
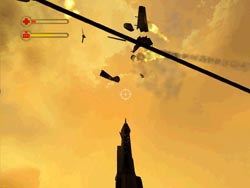
Start firing as soon as you can see a plane. You can often destroy planes before they even get close to you, but if they do make a successful pass your car will take damage and you will then have to worry about planes coming in from multiple directions at the same time.
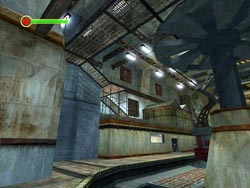
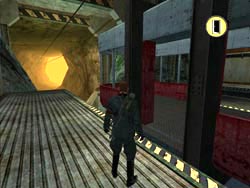
PENG LAI MOUNTAIN - The Airbase When the cable car pulls into the station you will see several guards patrolling the perimeter. When it's safe quickly exit the car to the right and duck into the side room. You will want to take out the guard before he can sound the alarm. You can wall-hug the end section of wall and ambush this guard when he goes by. Also search the room to the right where you will find three boxes you can smash - each contains MP-40 Ammo. Make your way to the far side of this huge room and you will find another guard patrolling a narrow path with more rooms to the right.
 Kill this guard then follow the walkway around to the far end and around the corner where you can smash a box and get some Grenades. About this time a metal door will open and more guards will enter the area. From your position near the grenade crate you have a good vantage point to take on the guards one at a time as they come at you. If the alarm sounds try to switch it off before more flamethrowers arrive. Watch for more Nazis hiding in the stacked crates near the newly opened door.
When you have cleaned up this area you can go through the large metal door into a long storage room. Two more guards are behind the crates ahead. When you have killed them both a movie will highlight the switch on the wall. You can flip this switch to open the metal door on the far wall leading to the next area. Before you leave this first long room check out the double blue doors and get the Medkit in the box.
As you enter this new area you will hear the voices of guards above. In the far left corner is a box you can smash for some MP-40 Ammo and another box in the right alcove has a Medkit. As you collect these items two guards come down the stairs and a third one shoots at you from the top. Kill these guards and head up the stairs. Smash another crate to the left when you reach the top and get some Mauser Ammo.
Two more guards appear along the side and will take cover behind the square columns. Kill them as you make your way to the other end of this floor. The blue door is locked so climb the boxes (1) then climb to the high ledge (2) and jump to the roof (3) then drop through the hole in the roof.
Go through the next door to surprise a guard in the next room. You should be able to shoot him before he can reach the far door and warn his friends. Now position yourself at the next door and open it then quickly go into manual aim mode and shoot the two guards that take cover behind the overturned table.
Open the next door and spot the last guard in the level patrolling the catwalk leading to the exit. Hug the wall and wait for him to enter the room then you can ambush him.
Go through the door and smash the crate along the wall to your right to get the Hidden Artifact: Changan Stone. Follow the catwalk across to the single door and exit this level.
Head through the doors and get ready to fight the pair of guards at the end of the catwalk. They are armed and dangerous so avoid hand-to-hand combat with these guys. Go through the next room and out the double doors to the long walkway leading to the gun turret.
PENG LAI MOUNTAIN - Ascent to Adventure
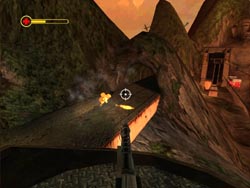
Watch for planes taking off on the runway down to your left. Shoot these planes before they make it to the next cave and launch. The first plane is hard to shoot and you may have to finish it off in the air, but the others are easy. You have unlimited ammo so lay down on that fire button.
Exit the turret view and start back toward the double doors. They will open and a new pair of guards will take cover behind the doorframe. Quickly return to the turret and spin it around to shoot the guards when they peak around the corner to shoot at you.
Your next objective is to reach the opposite landing. Climb the box (1) then jump up to the ledge (2) and do a double whip-swing from the protruding beams (3) to reach the far landing (4). Smash the box near the turret to get a Medkit then activate the turret. Spin around to face the double doors that will be opening about now to reveal a flamethrower coming at you. Shoot him then leave the turret.
Go through the room and smash the box in the right corner to get some MP-40 Ammo then follow the walkway to the elevator and use the lever to descend to the bottom level. Here, you will need to fight three gunmen and a flamethrower. Kill the flamethrower first as he does the most damage, but watch out for the guards who throw grenades. You can try to pick them up and throw them back if they land close enough or simply run away from the blast.
Smash the four boxes (two on each wall) to get a Medkit and Grenades then flip the lever on the central platform to summon the cable car.
While you wait for the car to arrive you will need to fight several more guards that are heavily armed and throwing more grenades. Use the boxes for cover and kill them all. Get in the car when it reaches the docking station to trigger the final sequence.
You are now back on the roof of the cable car, so use the turret to fight off several waves of enemy fighters. Keep shooting them down as they make their strafing runs and eventually the level will end with you arriving at the Black Dragon Fortress.
Congratulations! You've completed Peng Lai Mountain!
