
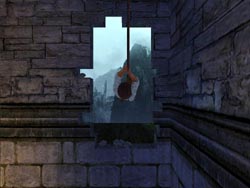
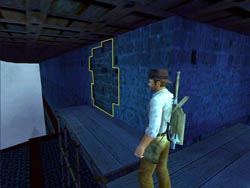
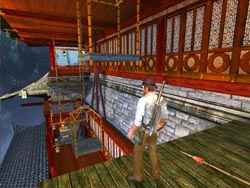
You find yourself on a wooden walkway surrounding the entrance to the Black Dragon Fortress high above the clouds. Continue forward until you see the amazing view of the mountains then turn left and take the narrow walkway to the far end.
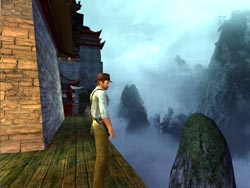
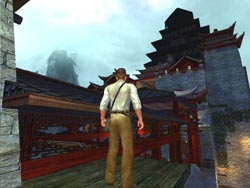
Pull up onto the waist-high roof edge and a movie will give you a panoramic view of this challenging level. Follow the peak toward the fortress and climb up onto the next higher section then angle to the right.
Drop down to the wooden platform then angle back to the left and drop down two more wooden platforms to reach the stone bridge leading back under the roof you just walked across.
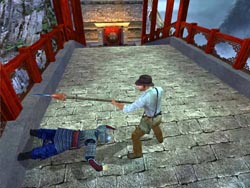
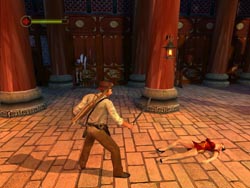
There is a lone guard patrolling the bridge. He is armed with a spear and quite deadly until you can disarm him. Feel free to use his own spear against him. The primary fire stabs while the secondary fire does large sweeping blows great for multiple attackers. Spears will eventually break so be ready to switch to a new weapon or pick up a fresh spear when you current one shatters.
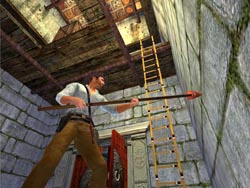
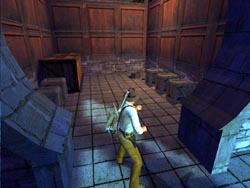
You can also avoid this guard entirely and run past him to enter the double doors at the other end of the bridge. There is a tricky action sequence coming up that may have you dying and replaying this part of the level several times, so you might get tired of fighting this spearman. Once inside the tower, climb the ladder leading up to your left. Push the large crate through the hole and it will smash through the floor below.

Climb back down the ladder and drop through the floor, hanging to prevent taking damage, then drop down from the ledge and go through the hole in the wall.
Now comes one of the hardest swinging puzzles in the game so far; a dangerous triple-swing across the bamboo grid under the stone bridge. Remember, you don't have to do all three swings in succession. Take your time and you will eventually make it across alive.

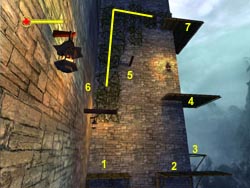
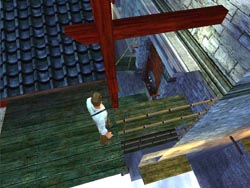
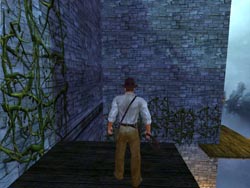
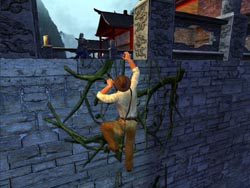
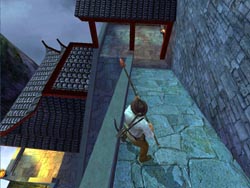
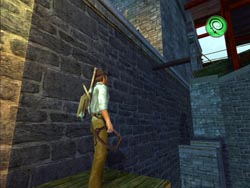
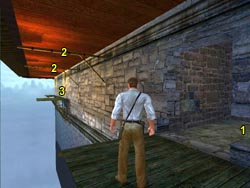
Go around the corner to the right and out onto another wooden platform and turn left to face a vine-covered stone wall. Whip-swing to the far ledge (1) then make a running jump to the corner ledge (2). Pull up onto the next ledge (3) and climb the vines up and left to reach the high ledge (4). Note the crumbling wall (6) then grapple the post (5) and whip-swing across kicking the wall (6). It may take several attempts to knock out the stones enough that you can land inside. Defeat the two spearmen inside then slowly step out of the hole and grab the vines to climb up to the top ledge (7).
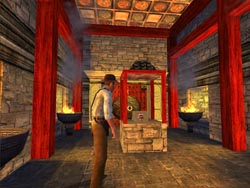
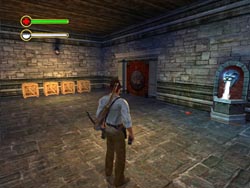
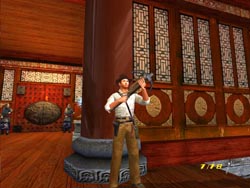
Go through the opening in the wall and through the door into the small room with red columns and flaming braziers. Collect the Hidden Artifact: Mask of Cambulac from the central pedestal then retrace your path back down the vines. You will need to drop the last few feet to reach the bottom ledge (1) then take the same path back until you can swing through the wall (6) and reenter the room where you defeated the spearmen.
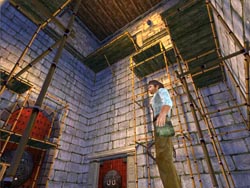
Starting with the lowest climbable ledge, start pulling up and climb the various scaffolding structures. Jump to new section as necessary until you reach the locked door high above.
Turn to face the wall opposite the door and note that it is crumbling. Whip the beam and swing into the wall kicking down the loose stones until you smash through and land on the wooden ledge outside.
From this ledge you could jump to the far vines and go for the previous secret artifact, but then you would have to climb all that scaffolding again. Hopefully, you've already obtained the artifact so you can simply climb the vines to your left.
 When you reach the top of the vines don't climb over the edge just yet. Watch the pattern of the guards and wait for him to be walking away from you before you pull up. If you time it right you can get in a surprise attack and disarm your opponent. Take his spear and use it to defeat him and the other guard who quickly arrives with a crossbow. Disarm the archer to avoid taking extra damage from random fire. If possible, you can try to lead them back to where you climbed the vines then kick or throw them off the ledge.
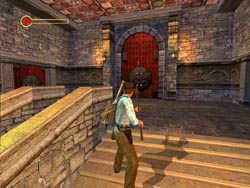
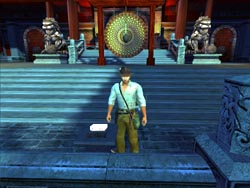
During your fight with these guards make sure not to stray too far past the large pair of stairs leading up to the entrance. If you go too far past the stairs another pair of guards will come out of the far door and join the existing battle. Fighting three or four guards at a time is nearly impossible. When all the guards are dead go up the stairs and go through the left door.
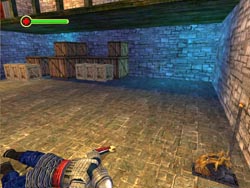
Use the Water Fountain to heal and fill your canteen then start smashing the boxes along the wall for many useful items including; Throwing Knives, Tiger Strength Potion, Crossbow Ammo, and a Canteen. When you are ready, go through the next set of doors and fight the pair of spearmen, unless you fought them earlier back outside.
Exit back outside and start down the series of ramps. You may encounter a guard along the way or he could be waiting for you in the next room. All the doors are locked until you reach the level just before the bottom.
Open these doors and if the spearman is inside, kill him before pulling the gold ring on the right wall. This opens a floodgate and water shoots out of the wall below you. The doors open on the level below and a spearman charges up the ramp and attacks you as you exit this room.
Defeat this warrior then go down the ramp and enter the door from where he came. You will find yourself on a wooden balcony overlooking a room below with another pair of guards. Try to lure them up the stairs one at a time and defeat them individually. Smash the crates on the upper level and collect the Crossbow Ammo x2, Throwing Knives x2, and an Iron Skin Potion.
Go down the stairs and smash all the crates on this level to find even more Crossbow Ammo then flip the lever to shut off the flow of water back outside.

Now that the water is no longer shooting out the wall you can climb down onto the wooden walkway and then whip-swing to the opening. Enter the tunnel to end the level.
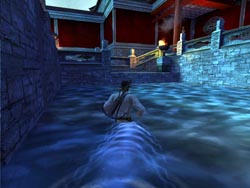
Start wading through the waist-high water and turn either left or right at the junction. This area is symmetrical so it doesn't really matter which way you go. Climb out of the water at the low ledge by the brazier and prepare for a huge battle.
BLACK DRAGON FORTRESS - Call to Battle
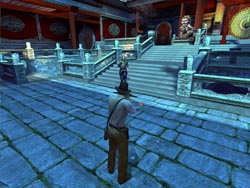
Try to kill the first group of guards quickly. One will try to run up the stairs and sound the giant gong, which will summon even more troops. These soldiers will come at you with spears and crossbows, and even if you disarm them they are experts at martial arts. They will do flying kicks and low sweeps to knock you off your feet and even attack you while you are down.
Depending on whether the gong was sounded or not, you can face anywhere from 4-8 guards in this area. If you need a break from the action to heal or consume a potion you can retreat to the wading pool where you entered. The guards will not follow you into the water but they will shoot at you if they still have their bows.

When the last guard is defeated you can head into the storage room to the left of the stairs (facing the gong). This was the room you saw in the previous cutscene and there will be one last spearman guarding the items inside. When he is dead you can get the Demo Charge, Crossbow Ammo x4, Healing Potion, and the Throwing Knives.
On your way to the other side of the courtyard make a quick detour toward the gong. Face away from the gong and you will see a podium with the Hidden Artifact: Qi Marble Stela under some glass. Shatter the glass and take the artifact then continue to the far right side of the courtyard with all the scaffolding.
Pay a visit to the Water Fountain in the back room then start climbing up the scaffolding. Make some long jumps to make your way to the roof then double back toward some more scaffolding.
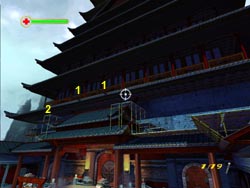
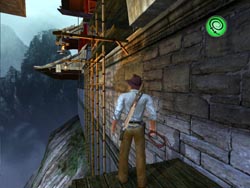
Target the crossbow sniper on the tallest platform and shoot him before climbing up to that ledge. From here you can make a double whip-swing from the beams (1) to reach the far section of scaffolding (2). There is one final guard to deal with on this side. Shoot him from above rather than risk a physical encounter and getting thrown off the roof.
Go around the corner and look for a section of discolored wall. Use the demo charge to blast a hole in the wall - make sure to hide around the corner to avoid the blast - then go through the smoking hole to exit the level.
Check out the small room inside the broken wall for a pair of boxes you can smash. Collect the Crossbow Ammo and the Tiger Strength Potion then return to the ledge outdoors and do a double whip-swing across to the far ledge. Hug the wall and shimmy along the narrow ledge (3) then go around the corner.
BLACK DRAGON FORTRESS - The Tower of Storms
Walk to the edge of this platform and make another double whip-swing and grab the rope. Pivot to face the wall and climb up until your feet are above the ledge then swing forward and jump to the ledge. If the guard are nearby or have spotted you quickly get into the corner to your right.
This is a potentially dangerous battle as the ledge is small and the guards can easily knock you off to your death. If you get into the corner or against the wall the guards will drop down from above and land between you and the edge. A quick punch or grab will send these soldiers sailing over the edge with little or no fighting. Just make sure you don't get in their position or they can do the same to you.


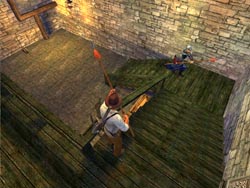
Climb up to the higher level and work your way around the corner defeating any guards that remain. There will be at least one more spearman near the scaffolding. Climb the scaffold and push the blocks off the edge to make the elevator rise.
If you pivot the camera around while the lift is going up you can spot a pair of boxes behind you on a secret ledge. Inside one of these boxes is the Hidden Artifact: Yuan Xiang. You can get this before, during, or after the battle with the new guards you encounter at the top of the lift. If you drop to this ledge during combat some of the guards may try to follow and fall all the way to the bottom, and you won't have to even fight them.
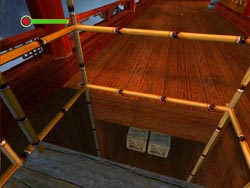
Go around the corner and make a running jump to grab the nearest lift. Your weight will lower this lift and raise the next one. Make another running jump and pull up onto this left then use your whip on the lantern to swing across to the far ledge.
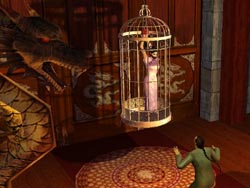
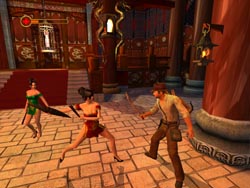
Enjoy the lengthy opening movie that shows Mei-Ying chained and shackled in a giant bird cage. When you are finally in control of Indy the two sexy Feng Twins will be advancing on you. These girls aren't as hard as you might think but you shouldn't try to fight them in hand-to-hand combat without using a potion or two for enhancement.
 Cautiously approach the corner and make note of the two spearmen that guard the exit to this level. There is also a Water Fountain on the wall to the right that you can use after the battle. The best tactic for this battle is to simply get your crossbow ready and peek around the corner to shoot the guard on the left. By the time the one on the right is alerted one will be dead and you can finish off the last guy with the first guard's spear. Drink up at the fountain and go through the door to exit this level.
BLACK DRAGON FORTRESS - The Rescue

Your best tactic is to sprint for either side of the room and grab a Scimitar from the weapons rack. If the girls start to gang-up on you simply roll out of the way to put some distance between you and them.
Try to concentrate on one girl or the other. Once you have defeated one of the twins you can devote all your attention to the remaining one. If you fight them equally the battle will last longer and you will take more damage than necessary. Keep an eye on your health and use your canteen or health potions if needed.
When the final sister falls the movie will take over showing Indy approaching the cage with Mei-Ying. The floor opens up and you both plummet into the next level.
Congratulations! You've completed the Black Dragon Fortress!
