
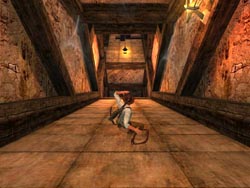
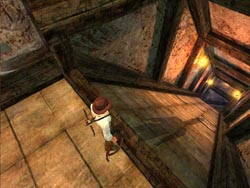
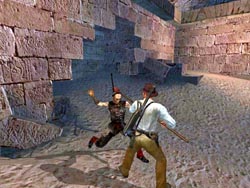
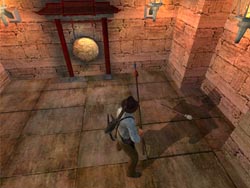
The level starts with you falling through several floors of rotten boards then sliding down a very steep slope toward a bottomless pit. You need to jump then whip the lantern to swing over the pit. The trick here is to jump earlier than you might think to get the height and the arc to reach the lantern with your whip. Just jump about 1-2 seconds earlier than you think you should.
When you have landed on the other side of the pit you can visit the Water Fountain to fill up that canteen and heal yourself after that battle with the twins.
The next section of broken floor is easier than it looks. No surprises. Just navigate around the gaps until you reach the far end then whip-swing across the large gap to the far side.
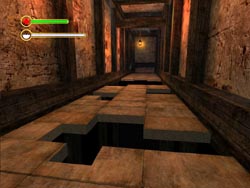
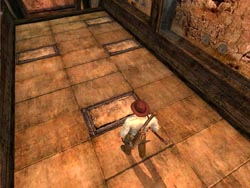
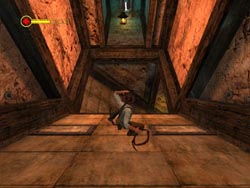
Move across this next section of floor and avoid stepping on the raised tiles. These trigger poison darts in the walls that take about an eighth of your health bar away.
Continue to the edge of the long sloping section and survey the situation. If you look closely you can spot raised sections of tile along the ramp. These will all trigger poison darts so you will need to either steer around them or jump over them. Try jumping at the very last minute to make sure you clear the tiles and not land on them. Once you start this ride there are only two chances to stop along the way. You may want to read ahead before you take the plunge.

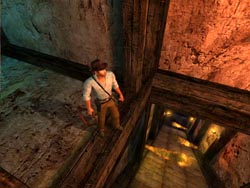
After you slide down the first ramp you will drop onto a second ramp with more raised tiles. Navigate these and drop onto a third ramp. Stay in the center as you near the bottom of this slope and whip the lantern and swing through the boarded up section of wall. You will smash through and find a pair of boxes, one of which contains the Hidden Artifact: Yuyao Pan. You may want to take this time to heal yourself if you took any dart damage.
You can survey the next section of ramp from the safety of the ledge then drop down and navigate the tiles. Drop onto the next section of ramp and start sliding down. Again, keep to the middle and whip the lantern at the end to swing over to the alcove with the Water Fountain. Fill up your health and canteen then check out the next section of ramp.
The final two sections of ramp contain fire jets and raised tiles. You will have to zigzag as you slide down the ramps making sure to stay on the far side of the fire and jump over any raised tiles in your path. When you reach the bottom you will fall into a sandy pit and the level will end.
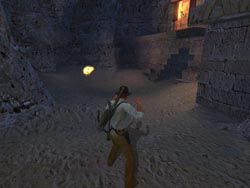
When you pull yourself out of the sand you will see a fireball burst from the ground on the far side of this cavern. This is an evil spirit that will start inhabiting the bodies of the deceased Triad warriors that are in the various crypts. Run past the warrior and through the hole in the wall to get the Chinese Spear.
TEMPLE OF KONG TIEN - The Catacombs
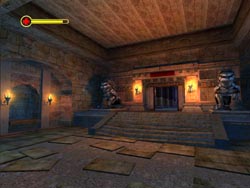
Kill the first Triad warrior and the spirit will fly into a crypt above and a new warrior emerges. Defeat this second warrior and things will calm down for a minute. Climb the stones to the right of the hole and enter the long hall.
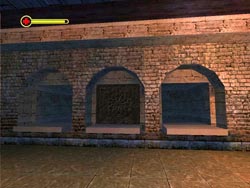
Immediately search the crypt on the left and get the Sword. Use it to fend off the first Triad that attacks. More warriors will burst from the crypts. Defeat them all and search the second crypt on the right for a Tiger Strength Potion.
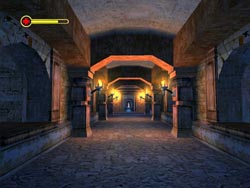
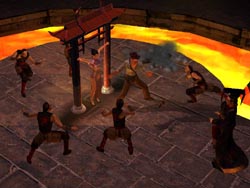
Use the Water Fountain at the end of the hall then pull the ring on the left to open the door and enter the next long passage. This room is full of Triad warriors that attack two and three at a time. Another Sword is in the first crypt to the right in case you broke or lost your first one and there are two more blades further down on the left. I highly recommend drinking a Tiger Strength potion. This will let you kill these warriors with only two hits each.
Pull the ring and go through the door at the end. Three more Triad fighters attack from the stairs to the right. Quickly run to the left and get a Spear from the statue. Use the secondary attack for sweeping strokes that will take down multiple enemies. Make a note of the unlit brazier in this area for future reference and use the Water Fountain if needed then go down the stairs and head to the right.
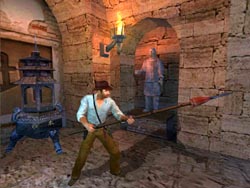
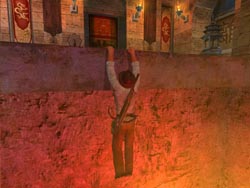
Approach the gong and trade your spear for the Hammer lying on the floor to the right of the gong. Strike the gong, and the floor will open up and Indy will plunge into a pit then starting sliding down a ramp. Angle to the left and prepare to jump the fiery pit at the bottom. Grab the other side and pull up to safety.
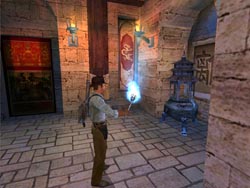
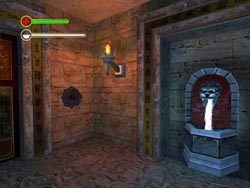
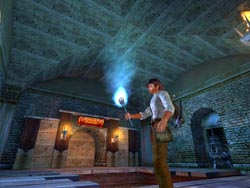
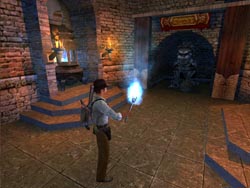
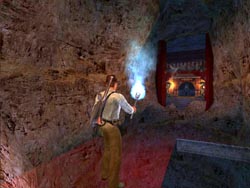
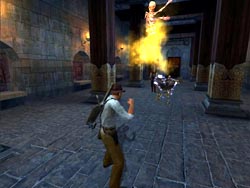
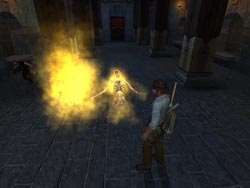
Go to the left and trade your hammer for the Blue Torch stuck on the wall. This will become your new "best friend" for the rest of this level as it not only solves a major puzzle but serves as a deadly weapon against the Triads. Light the brazier at the opposite end of this room and a door will open leading to a large central hub.
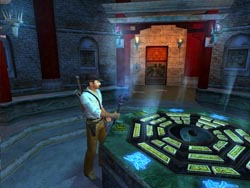
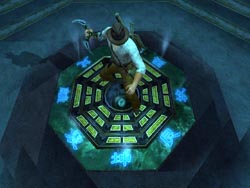
The central dais contains a 3-ring puzzle, but you cannot solve this until you have lit all of the torches which in turn light the symbols surrounding this puzzle. A pair or torches light-up indicating the only possible exit (other than the way you entered), so go pull the ring and enter the first area.
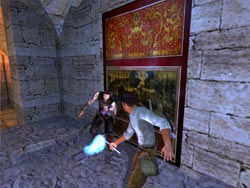
Go through the short hall and pull the next ring to open the door leading to a large room where two Triads attack. It only takes a few hits with the torch to light these guys up. Search the two crypts these guys burst out of. The one on the left contains a Healing Potion and the one on the right has the Hidden Artifact: Liaoning Mianjin.
Go through the circular door and up the ramp. The passage splits either left or right. Both direction wrap around and lead to the same area but the path to the left has a Water Fountain that you might want to visit now or later. When you reach the upper level avoid falling through the hole in the floor and light the two braziers on either side of the room. This opens the door in the archway.
Go through the new door and up the ramp. Note the raised section of tiles. These will glow orange ONLY if you have the blue torch out. Stepping on them will trigger deadly lightning from the ceiling that will stun and hurt you. Navigate around the various raised tiles and pull the ring to open the door.
The raspy growls indicate more Triads are nearby and two more attack as you leave the lightning passage. Defeat these and look around. You are now back in the large cross-shaped room from earlier. Head to the right (as you leave the lightning hall) and light the brazier then go to the far opposite side of the room and light the matching brazier. This is the one I told you to remember earlier. Get a drink if necessary and prepare to fight more Triads.
You now need to return to the hub room with the puzzle. Retrace your path through the lightning hall and down the ramps into the lower room where you found the artifact. More Triads will attack, some even stick to the ceilings. Use your blue torch to light them up and return to the puzzle room to end the level.
Pull the ring and take the next door to the left. Walk across the narrow stone bridge and note the blue glowing circles. These only appear when you have the torch out. On the other side of the chasm you can light the pair of braziers and watch what happens to the bridge. Things are about to get tougher.
TEMPLE OF KONG TIEN - The Dragon's Claw
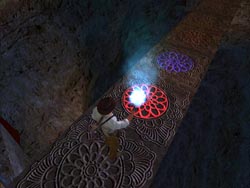
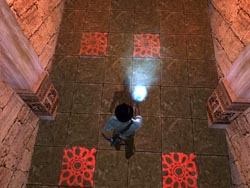
Actually, this isn't too bad. Just make sure you only step on blue circles and avoid the red circles. You will need to jump over red circles and when you step on some blue circles other tiles will flip over and you will need to reverse direction and step on blue tiles behind you. Watch the movies that show you which tiles are flipping over. Your goal is to flip all red tiles back to blue and step on EVERY blue tile to get access to an artifact later in the level. Its location is revealed through a cutscene when you step on the final blue tile.
Return to the puzzle room and take the next door to the left. This leads to a dark chamber with a bottomless pit. Carefully approach the edge and your torch will illuminate a red transparent bridge. Slowly make your way across the bridge and try to remember the general path you take, as the return trip won't be this easy. Light the final two braziers to activate the puzzle dais back in the central hub.

The bridge behind you has now broken into three large sections that are going up and down at various speeds. Carefully walk onto the first section and time your walk onto the larger middle section. There is no need to jump to any of these sections. Just wait for them to line-up and walk from one to the other. The final section is tricky. Every other time it goes up it will drop very rapidly. Wait for it to come down slowly before stepping on then walk to the other side and drop down into the passage before it drops.
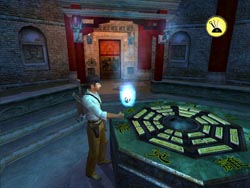
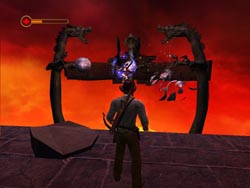
Solving the puzzle in the main room is your next task. Use the directional keys to select a ring then rotate all the rings until the gold patterns in the center match the blue patterns in the outer section. The only tricky part is you cannot see the target pattern when spinning the rings so you have to memorize the pattern just long enough to rotate each ring. Of course, if you don't want to figure it all out simply move the OUTER ring LEFT one click, then move the MIDDLE ring RIGHT two clicks, then move the INNER ring LEFT three clicks.

Once the puzzle is solved the Pa Cheng will appear above the dais. Take this deadly weapon and exit through the open door. You are now back in the room with the ramps that lead to the lightning hall. Fight several more Triads using your new throwing star weapon. When used at close range the Pa Cheng is a deadly edged weapon or you can throw the star and it will seek out enemies and hit as many as possible before returning to your hand.
When you exit the lightning hall turn left and go to the center of the cross-shaped room. Head to the right. This is the only area of this large room you haven't searched yet. If you stepped on all the blue circles earlier back on the bridge then the arched wall to the left will have crumbled revealing the Hidden Artifact: Henan Bei. Collect this item then go through the door between the giant statues.
Indy now finds himself sealed in a long dark room with several Triad warriors and their spirits. You must destroy the human form and the glowing spirits. The Pa Cheng will return to Indy no matter where he goes, so it is easy to throw the weapon at a group of enemies then run to a safe place and wait for it to return.
Fortunately, the Pa Cheng is just as effective on the floating spirits. Keep moving and throwing the deadly weapon until the room is clear. Locate the passage in the final crypt on the right and follow it to exit this level.
Crawl forward and peer over the edge to witness an ancient ritual that involves Mei-Ying. All of the action is handled by the in-game movies as you watch Mei-Ying transform into a huge winged creature. When everything is over Indy must now engage in a deadly boss battle.
TEMPLE OF KONG TIEN - The Shadow of Kong Tien
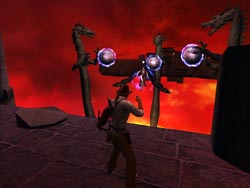
The battle plan goes something like this. You must use the Pa Cheng to destroy the three silver orbs starting with the right, then the left and finally the middle. This isn't as easy as it sounds. Mei-Ying is protecting these orbs with an energy shield. She will attack with three different attacks, always in the same order.
She will first launch several Triad spirits that will swarm around you. Swipe them with your Pa Cheng but be careful not to throw it too far away. If the throwing star is flying around you will take great damage from the Triad spirit's electrical attacks.
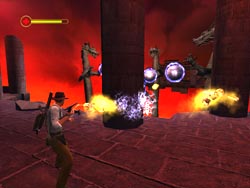
Mei-Ying will then toss a few lightning balls at you. These will seek you out so try to hide behind a column to avoid their electrifying blast. After these two attacks you will see her charge up a very deadly lighting attack. The first attack is shown through a cutscene and Indy will automatically hide behind a column that gets destroyed in the blast. Immediately after firing this blast Mei-Ying is temporarily defenseless. Quickly fire your Pa Cheng to stun her and the silver spheres will now become vulnerable. Now throw your Pa Cheng again to destroy the silver sphere.
Now the entire sequence starts over. Defeat the Triad spirits and avoid the lighting attacks. Attack Mei-Ying then the spheres until all three are blown to bits and the winged creature plummets into the fiery abyss.

The movie will take over and Indy will drop to the floor below and rescue Mei-Ying. With the Mirror of Dreams back in your possession it's time to head for Shanghai and the Emperor's Tomb.
Congratulations! You've completed the Temple of Kong Tien!
