
- Feel free to LINK to this page.
- Please DO NOT copy this walkthrough to any other site.
- Please do not email me for specific hints. Everything you need to know is here.

Introduction
Welcome to Nosgoth. You are Raziel, a once proud soldier and Lieutenant to Kain and his vampire army.
But after Kain betrayed you and had you thrown into the Vortex things have changed. A long time has
passed and you are now reborn into a deformed undead creature. In your new form you must defeat Kain
and his army of Vampires and release their souls to restore balance to Nosgoth and Redeem Your Soul.
Legacy of Kain: Soul Reaver features a vast world to explore and you are free to explore it as you
wish. While there are certain goals and quests you must complete, the game is very nonlinear for the most
part. You will often have to backtrack to previous areas after acquiring skills and abilities necessary to
do certain things in those areas.
Another thing to remember is that as Raziel, you are already dead and therefore cannot be killed during your
quest. However to exist in the physical universe you must feed on the souls of your slain enemies and keep
your health coil filled at all times. This meter will slowly go down over time and will also be lowered when
you take damage in combat. Souls only linger over their previous owners for a short time so feed quickly. If
your health coil goes totally dark you will be returned to the Spectral Plane. If your health coil ever goes
dark while on this plane you will be returned to the Underworld.
You will save much time in your travels through Nosgoth once you learn how to effectively use the Warp Gates.
There are fourteen gates scattered across the world of Nosgoth which allow you to quickly travel across long
distances. Additionally; whenever you are killed or resume a saved game you will always start in the Underworld.
There is a Warp Gate very close to this location but you can only warp to previously activated receiving gates.
The more gates you have activated the less backtracking you will have to do.
Since Raziel is undead you exist on the Spectral Plane. This is the plane of existence where you being the game
and where you return when your health coil is depleted. There are some times when it is to your advantage to travel
in this plane rather than the Material Plane (Physical Universe). Both planes have plenty of enemies to fight,
which will allow you to replenish your health coil. Your health coil must always be at full strength before you can
return to the Material Plane. Portions of this walkthrough that deal with the Spectral Plane
will be colored in this spectral-blue tint.
Since shifting back to the Spectral Plane is out of my control this walkthrough can only cover necessary trips back
to this plane. If you are on the Material Plane and for some reason (damage in combat, depleted health coil, etc.) are
returned to the Spectral Plane, simply feed on the nearby Sluagh to restore your meter to full strength and find the
nearest Portal back to the Material Plane where you can resume your adventure. If your health coil is ever depleted
while you are on the Spectral Plane you will return to the Underworld and have to use the Warp Gate to return to a
nearby Warp gate near your previous location.
Remember that you are fighting other undead creatures that cannot be easily harmed or killed. Your best allies in
this game are sunlight, water, fire, or any weapons that you can impale your enemy with. But remember, these same
powers of destruction will also harm you, so be careful. There are also several "bosses" which are very deadly and
require special tactics to defeat - don't worry; I will tell you exactly how to beat them. Defeating these bosses will
give Raziel additional powers to aid him in his quest for vengeance.
Weapons are varied. You will start with your claws which will do the job on the smaller creatures and the Sluagh
that inhabit the Spectral Plane. Spears, torches, and even rocks will serve as useful weapons in your travels
through the Material Plane. Often you will stun your enemy and you can then pick him up and toss him into any
nearby water or fire, or you can impale them with a spear or set them on fire with a torch. Make sure to pick
up any weapons after the enemy has dissolved. Torches can be lit by any nearby flame if they go out on you.
Raziel will also acquire special abilities during his adventure. You will learn about these as you play and I
will tell you when to use them. Swimming is perhaps the most desired ability. Once you can swim water is no longer
a threat to your existence on the Material Plane.
There are also a limited number of power-ups scattered across Nosgoth. There are fifteen Health
Crystals which will increase the length of your health coil. There are also five Eldritch
Energy Crystals, which help you store the Eldritch Energy you can collect to power the Glyph Spells. The locations
for all these power-ups is detailed in the following walkthrough. I have also provided an index at the end of this solve
where you can quickly find any of the power-up crystals.
Enough of all the background information. You have been reborn and now have a new purpose. Go forth and defeat
Kain and his army of Vampires. Become the Angel of Death; the Soul Reaver; and Redeem Your Soul...
UNDERWORLD
This level is your introduction to Nosgoth and a tutorial on how to play the game. Listen to the voice as you are
instructed on how to move around and perform various actions. When you are ready, move forward through the first door.
Continue through the twisting passage until you arrive at the Underworld Gate.
 Approach the Gate and stand on the symbol to activate it and also lower a force field blocking the next door you need to
go through. Ignore the Gate for now and continue on down the passage until you reach the altar. Drink five Souls to fill
your health coil. Proceed down the passage until you arrive at the giant stone steps. Jump/climb the stairs and jump over
the gaps. Continue up the next larger steps and use your wings to float across the larger gap.
Approach the Gate and stand on the symbol to activate it and also lower a force field blocking the next door you need to
go through. Ignore the Gate for now and continue on down the passage until you reach the altar. Drink five Souls to fill
your health coil. Proceed down the passage until you arrive at the giant stone steps. Jump/climb the stairs and jump over
the gaps. Continue up the next larger steps and use your wings to float across the larger gap.
The next room has Sluagh wandering around the lower area. The passage leading out is across this large chamber and is
blocked with a force field until you eliminate and feed on the Sluagh. Drop down and claw the beasts. They will try to
run so chase them down. When they turn transparent you can feast on their essence and they will be drawn into your body.
Climb up the opposite side of the room and exit through the door.
When you reach the area with the pillars and the Portal you will learn how these portals work and that you must have
a fully charged health coil to shift to the Material Plane. However, you can shift back to the Spectral Plane anytime
you wish. Feed on any nearby souls if necessary then use the portal to shift planes.
Continue on through the next opening and down the tunnel. You will arrive at a small patch of water which you will learn
is quite deadly. Do a running jump and glide over the water then continue through the door. You will arrive on a ledge
overlooking a pair of Fledgling Vampires feeding on a corpse. Glide over the water below and begin your first combat on
the Material Plane.
You have several methods of killing this deadly duo. You will first need to stun them by beating on them with your claw
attack. Try to stun them both otherwise the other will attack you while you attempt to kill the other. Pick up your
stunned opponents and throw them into either the water, the shaft of sunlight, or onto the spikes on the wall. Don't
forget to feed on their souls quickly. When both Vampires are gone you can push/drag the huge stone block over to the
wall and use it to climb up to the next passage.
When you get to the door take the torch and enter the next room. You will get more background info and then you can hunt
down some more Vampires. Use the torch to set Vampires on fire or grab spears off of the wall and attack them. When a
creature is stunned you can deliver the fatal impaling blow, which releases the soul. You can also pick up the large rocks
in the area - a single hit with one of these will stun the Vampires and you can then toss them into the fire.
When the area is cleared you can head down the rocky passage and use your sneak approach to get close to the
Vampire and kill him. Continue down this path and turn left to find a Gate Symbol. Go through the door and follow the
passage back to the Lake of the Dead Gate where you can stand on the symbol to activate the
portal. Return back to the previous junction and head to the right this time to arrive at the Vortex Bridge.
Cross the bridge to the central spire. Jumping or falling into the Vortex will KILL you so try and be careful. Your
destination lies to the left of the Vortex so run and jump and glide across to the passage leading to the next area. If
you miss your jump you will not die (unless you land in the Vortex). Just fill up your health coil and return to the bridge
and try again.
RAZIEL'S CLAN TERRITORY
Continue along the passage and kill the Vampire using the torch on the wall if you want. Go through the door and head
left going through more doors that will shut behind you locking you in the room with a pair of nasty Vampires. Use
your torch or the nearby spears to deal with these guys. Remember to try to stun both opponents so you can finish off
the first and drink his soul without being attacked by the other.
Another pair of Vampires need your attention at the top of the stairs and when they are both gone the door will open
allowing you to enter the next area. Two more Vampires are at the top of some more steps. Deal with them using your
weapons or the nearby pottery then head to the door on the right. Continue down the passage and down some stairs leading
to the Raziel Clan Warp Gate . Activate the gate by standing on the symbol then return to
the room upstairs and head to the left door.
Head down the short passage to the junction and look left where another Vampire stands on some steps leading down into
the water. Kill him then drop any weapons so you can retrieve them when you get back from your first planned visit to
the Spectral Plane. Shift to the Spectral Plane where water has no substance and cannot harm you.
Go down the stairs and enter the water and explore the room down here. Once you have explored this area you can return
to the stairs, exit the water and return to the Material Plane using the nearby portal.
The previous paragraph may seem pointless, but I just wanted to get you in the habit of exploring ALL bodies of water.
There is almost always something valuable under the water, but most of it is inaccessible to you at the beginning of the
game. Make a mental note of each body of water as you will be returning to them later in the game after you acquire
certain powers.
 Retrieve your weapons (if you left any) then continue along the passage and up the ramp where another Vampire is eating
a corpse. Use your weapon or the nearby campfire to roast him. Open and go through the nearby gate. A spear hangs on
the wall if you need it. Continue ahead and kill another pair of Vampires then enter the large chamber with the central
column and spiral stairs. Another Vampire may be hiding behind this column on the ground level. If so, kill him then
head up the stairs and enter the central room. Watch out for the sneak attack by another bloodsucker just inside the
door to this room.
Retrieve your weapons (if you left any) then continue along the passage and up the ramp where another Vampire is eating
a corpse. Use your weapon or the nearby campfire to roast him. Open and go through the nearby gate. A spear hangs on
the wall if you need it. Continue ahead and kill another pair of Vampires then enter the large chamber with the central
column and spiral stairs. Another Vampire may be hiding behind this column on the ground level. If so, kill him then
head up the stairs and enter the central room. Watch out for the sneak attack by another bloodsucker just inside the
door to this room.
Flip the switch on the back wall to lower the drawbridge and cross over to the next passage. Continue until you reach an
overlooking ledge to a chamber below. Glide down and take the stairs up. There is another spear at the base of these
steps if you need it. At the top of the steps you will get a great view of the Melchahim Clan Territory and a cut scene
showing a pair of Melchahim Vampires killing and eating a fresh victim. Swoop down and kill them and reave their souls
then head through the door on the right.
Up ahead there is a Vampire Hunter wearing armor and armed with a crossbow. If he doesn't attack you then ignore him.
There are many of these Vampire Hunters scattered about Nosgoth and they seem to know if you have killed any of their
partners. If you kill too many of these guys then others will attack you on-sight. If he does attack you then I
recommend throwing your spear from a distance then moving in while he is stunned and finishing him off. If necessary
you can retreat to the higher ledges. At the top of the ledges you will come to a cemetery where a Vampire is feeding
on a corpse. After the cut scene, kill him and take the larger staff-weapon from the back corner. Move off to the
right and climb the ledge and enter the cave to the right.
Move the stone to the left and pull it back a few spaces so you can use it for a step to get to the next higher ledge.
You will need to crouch-jump to reach this ledge before you can follow it back out to the upper area. A pair of ramps
lead up to the next room. Take either and when you reach the top kill the pair of Vampires waiting for you. The shaft
of sunlight makes a useful weapon in this area. When both are dead and you have feasted on their souls open the door
to the left of the sunlight and go down the spiral stairs to find and activate the Melchahim Warp
Gate.
Continue through the passage beyond this gate and go through the door on the left and out into the open area. A lake
is to your right and several mounds of dirt area ahead of you. Each time you visit this area a Vampire will pop out of
one of the piles of dirt until they are all gone. Sometimes they will disappear only to tunnel up behind you so keep
your eye on them. If you move directly to the first square stone slab in the water you may be able to avoid stirring
them up.
There is a good chance you will miss one of your jumps across the water on your first try, which will force you to the
Spectral Plane and put you beneath the surface of the lake. If you are low on health it may be in your best interest
to go ahead and shift to this plane and kill some Sluagh to replenish your meter.
Whether you go to the Spectral Plane by accident or on purpose once you are down here you need to explore both passages.
One leads to an apparent dead where you can jump to a ledge leading to dry land with a portal back to the Material Plane.
A flat cliff-like surface blocks any further progress but you need to remember this location as you will be returning
once you have the Wall-climbing ability.
Jump back in the water and follow the passage back to the main body of water and investigate the other tunnel on the
opposite side. While you are down here you can either kill or avoid the Sluagh as you see fit. Remember that you
will have to have a full health coil to transport back to the Material Plane. It twists back to a pair of gates which
you cannot get past yet but once more you need to know where these are for future reference. Return to the main lake
and climb up the large stone steps on the left. Use the portal to return to the Material Plane and you should be on
the entrance-side of the lake.
Jump to the first stone slab and then to the next. Do a running jump and glide to the next furthest slap and one more
jump and glide to the beach on the opposite side of the lake. Kill the Vampire then climb the steps and enter the next
door. A pair of Vampires are lurking in this crypt. Kill them both before proceeding through the door at the back
wall. Follow the passage down and around to the right until you arrive at an apparent dead end with some rubble and a
corpse. A gate blocks your progress and it appears you are stuck.
NECROPOLIS
Shift to the Spectral Plane and watch a pair of stone slabs extend from the wall back by the entrance hall. Also watch
the quick movie about the Vampire Wraith - this creature is really hard to kill and if he damages you enough he can send
you back to the Underworld. You need to defeat him quickly and absorb his spirit (much like the Sluagh). When he is
defeated you can proceed with relative safety. Climb up the ledges and use the portal to return to the Material Plane.
From up here you need to do a jump and glide to the ledge along the back wall. If you fall you will have to return to
the Spectral Plane to get back up top. From this ledge you will notice a moveable block to your left and an opening to
your right. Move the stone along the ledge to the right then flip it up to the higher ledge and push it into the opening
to raise the upper gate. Enter the next huge room and carefully jump and pull up to the archway above. Move to either
end (near the fire) and look down into this room. On either side is a platform suspended by a cable. You need to jump
to one of these platforms (it doesn't matter which one) causing it to lower and the other to raise.
Now go to the far side of this room where you will find another moveable block is already stuck in the wall. Pull it out
and push it into the pit below. Your destination is the opening on the opposite wall to the right of the gate. You need
to push the stone across the lower floor and flip it up the series of stepped platforms to accomplish this but several
Vampires will try to stop you. Several piles of dirt will randomly turn into Vampires. There is also a body with a spear
stuck in it. Remove the spear and the Vampire will spring to life. This Vampire will have blue sparkles and is very
deadly so kill him quickly. When all the Vampires are dead and you have put the stone in the opening the lower gate will
open allowing you back into the previous room.
Shift to the Spectral Plane and use the steps to get to the top ledge. This time you need to remain on this plane as you
go through the upper gate and jump up to the arch. Now jump over to the raised ledge (the one you didn't jump to last
time). In the spirit world you have no mass so the ledge will not fall. From this platform you can jump once more to
the next arched beam and finally to the high ledge on the opposite side of the room. Use the portal to return to the
Material Plane.
The next room is blocked by a huge gate. Two openings with symbols give a clue to the solution to this puzzle. A pair
of stacked blocks are in one corner. Move them over to the ledge so you can climb onto the ledge and push the top block
off the bottom. With the blocks separated you can now maneuver them into their respective openings. You need to make
sure that the symbol on the side of the block going INTO the wall matches the shape and orientation of the symbol in each
opening. This means you will have to flip the blocks over and on their sides to get the symbols to match. There will be
a "click" when each block is correctly inserted and the gate will open when both blocks are in place.
Head up the ramp and through the doors where a campfire burns to your left and another stone slab is on your right next
to a ledge overlooking the lake you crossed earlier. Push the block over the edge then drop down on top of it. Now pull
the block out and over to the right where you will find another block. Flip the first block up onto the second to stack
them then move them both over to the right as far as they will go. Crouch-jump to the top then jump up again to enter a
passage with wooden support beams. Follow this passage around until you arrive at the shore of the lake.
Follow the path around the lake to the right and climb some ledges where more Vampires need your attention. A nearby
spear proves useful in defeating these creatures. Proceed through the door ahead and head up the ramp where even more
Vampires are waiting for you. The shafts of sunlight are as useful as your spear in this area. Continue to the top of
the ramp killing all the Vampires you encounter.
 Enter the large chamber and circle around until you reach a metal grate with a switch on the wall. Flip the switch to
lower the lift to the next level. Exit and turn right and follow the passage until you reach some Vampires in need of
slaying. Torches on the wall can be used as weapons if you aren't already armed. Climb the steps and go through the
door into the machine room. Turn left and follow the catwalk to a switch on the wall. Flip the switch then circle
around to the opposite wall where you can turn a crank and get the machine started. Exit this room using the door on
the right (opposite the one you entered). If you need weapons you can rip the pipes from the wall before leaving.
Enter the large chamber and circle around until you reach a metal grate with a switch on the wall. Flip the switch to
lower the lift to the next level. Exit and turn right and follow the passage until you reach some Vampires in need of
slaying. Torches on the wall can be used as weapons if you aren't already armed. Climb the steps and go through the
door into the machine room. Turn left and follow the catwalk to a switch on the wall. Flip the switch then circle
around to the opposite wall where you can turn a crank and get the machine started. Exit this room using the door on
the right (opposite the one you entered). If you need weapons you can rip the pipes from the wall before leaving.
Look down from the top of the stairs and spot the Vampire Hunter below. If he threatens you then kill him, otherwise
ignore him and proceed around the tunnels and back to the lift. Ride back to the top and use the level in the floor
just as you exit the left. The entire center section of floor will drop down revealing many alcoves. Glide down and
find the alcove that actually leads to a tunnel. You will also spot a moveable stone (silver colored) which you will
use later so make a note of it. Follow the rocky passage around and up the ramp leading to the central pit. The
passage beyond leads to a locked gate so you will need to solve a puzzle to unlock that gate. Climb the ledges to get
up to the next level where four flaming stones create your next puzzle.
Note the tracks in the floor and push the fire-blocks along their paths until each one is positioned in the corner of
the central floor area. You will hear a locking-click when each one is properly positioned. When the forth block is
in place the floor will drop down and you can glide down to the bottom. Now you can take that passage leading further
down and find that the gate is opened and you can enter the chamber of your brother, Melchiah.
Melchiah is the first of many bosses you will face and special tactics are required to defeat him. First of all,
Melchiah is able to shift in and out of the Material and Spectral planes allowing him to pass through solid objects
such as bars and gates. Keep this in mind while fighting him and only attack when he is in physical form.
Defeating Melchiah is pretty easy when you know his weaknesses. There are two chambers on either side of the main
circular room. Each chamber has a large gate and on either side of the gate is an opening above which you can jump
up and go through. On the other side of each gate is a lever which when pulled will raise the gate. The object is
to lure Melchiah into both of these entrances while you have the gate held open. As he is coming in you can release
the lever and impale him. You can only do this once per gate. While he is screaming and shifting to the Spectral
Plane to free himself you can run past him and jump up and out through the window. Run across to the other gated
area and repeat the procedure once more.
After you have crushed him with both gates you need to crouch-jump into the central cage and stand there until Melchiah
decides to attack. He will plane-shift and pass through the bars. As he does this you need to crouch-jump back out of
the cage and run to the throne room. Pull the crank on the left wall and enjoy your victory. Once Melchiah is destroyed
you will gain his Pass-through Ability and can exit this area.
Shift to the Spectral Plane and pass through the gate which is blocking your exit. Return up the ramp to the area with
the dropped floor and use a fire block to climb up to the portal where you can return to the Material Plane.
Now drop back to the bottom floor and take the passage opposite the one leading to the boss. It will wrap around and
take you back to the upper area where you can now slide out that silver stone and use it to climb up to the top level.
Walk around the pit and find the main passage you used to enter this area and follow it out to the exit. More Vampires
may be guarding this hall on your return trip - kill them as necessary. Once back outside it is time to put your new
abilities to the test.
FORCE GLYPH
Head right after exiting Melchiah's building and shift to the Spectral Plane (or just jump into the lake). Kill or avoid
the Sluagh but remember to keep that health coil filled. Take the underwater tunnel that leads to the twisting chambers
with the two gates. There are plenty of Sluagh around here and they seem to stay in pairs.
The first gate on the right leads to a chamber with your first Health Crystal. Pass-through
the gate and get the crystal and listen to the instructions. You will need five pieces to complete the design and increase
your health meter on the Material Plane. Exit this area and move on to the second gate. Pass-through and continue up the
passage where you will find a portal allowing you to return to the Material Plane.
You should now be in a room with a large head on one wall and three obelisks. Push each of these columns toward the
circle in the center of the room and watch the movie. When the show is over you can move to the center of the room and
get the Force Glyph and the power that it contains. Feel free to test your new power and use the recharge symbol when you
need to. Remember that once you leave this area it will not be as easy to recharge your Force Glyph, so use it only when
necessary.
When you are finished playing with your Force Glyph you can return to the Spectral Plane and exit back through the
watery passages and return to the main lake. Climb the steps leading out of the water and use the portal on the beach
to return to the Material Plane.
 Head back through the door and return to the Melchahim Warp Gate. Activate the gate and set
your destination for the Raziel Clan Warp Gate. Walk through and exit at the other end.
Climb the stairs to return to the main hall. Turn left and face the hall. Up on a high ledge in an arched alcove is an
Eldritch Energy Ball. There is another at the far end of this hall.
Head back through the door and return to the Melchahim Warp Gate. Activate the gate and set
your destination for the Raziel Clan Warp Gate. Walk through and exit at the other end.
Climb the stairs to return to the main hall. Turn left and face the hall. Up on a high ledge in an arched alcove is an
Eldritch Energy Ball. There is another at the far end of this hall.
These Eldritch Energy Balls are scattered all over Nosgoth and now that you have the
Force Glyph they are visible to you. Pick them up as needed or remember their locations if your Force Glyph is already
fully charged. There are far too many of these power-ups to mention them all in this walkthrough. If you see one that
I didn't happen to tell you about then get it if you need it.
Kill any Vampires in the hall and move into the next section of the hall just past the first opening. To your left
is a gate just out of reach and to your right is a stone block in the corner. Move the block across the hall and use
it as a step. When you are on top of the block shift to the Spectral Plane and pass-through the
gate to claim another Health Crystal. Return through the gate and use the nearby portal
to return to the Material Plane.
Now return to the Raziel Clan Warp Gate and use it to warp to the
Lake of the Dead Warp Gate. Exit the room and head up the short hall and exit through the door. Turn right
and follow the rocky passage back to the Sanctuary of the Clans. You will encounter more Vampires along this stretch
so kill any you encounter. There are several large doors which are much to solid for you to pass-through, but at the
far right end is a gate.
SOUL REAVER
Shift to the Spectral Plane and pass-through the gate to get the Health Crystal. Continue
down the hall and enter the large room on the right. Kill any Sluagh in this area to replenish your health coil then
return to the Material Plane.
Cross the bridge where a pair of Vampires block your path. Walk about halfway across the bridge and use your Force
Glyph. The shockwave will push both of the Vampires into the water and you can feed on their souls. Continue on and
get a vase from either side of the bridge. Throw the vase at the next Vampire to stun him allowing you to get past.
There is no easy way to kill the Vampires in this hall unless you want to carry them back to the water and toss them in.
Go either right or left and follow the passage around to the gate which blocks your path.
Shift to the Spectral Plane and pass-through the gate and continue around to the portal, which will return you to the
Material Plane. You materialize next to a large keyhole-shaped door. Open them and enter into the large central
chamber where you will face Kain.
There is a very simple strategy to beating Kain in this first battle. Kain will have to charge his sword prior to each
attack. You need to strike while he is building up this charge. Each time you hit Kain he will teleport to the opposite
side of the room and begin to charge the sword again. If you are fast enough you can run over to him and hit him again.
Repeat this three times. When your strike Kain for the third time a movie will take over.
More than likely you will get hit at least once by Kain's energy bolt. A single hit is enough to empty your health coil
and send you back to the Spectral Plan. If you do get sent back to this plane you will be immediately attacked by a
Vampire Wraith. You will need to kill this menace quickly or you will be returned to the Underworld. Killing the
Vampire Wraith will fill your meter and allow you to use the nearby portal to return to the Material Plane. Before
activating the portal make sure you are facing the center of the room so you are lined up for your next sprint toward
Kain.
Now you possess Soul Reaver, an awesome and powerful weapon which offers many benefits and a few restrictions. The
key to wielding Soul Reaver (at least in the Material Plane) is that you must remain at full health. If you take
even a single hit the sword will return to the Spectral Plane until you can replenish your meter. As long as you wield
Soul Reaver your health will no longer diminish over time. This allows you to remain on the Material Plane indefinitely
as long as you don't take any combat damage. And finally, when you enemy is stunned in combat you can use your impaling
thrust to explode your victim leaving only their soul behind - a very nice effect.
Before you get to run off and test your new sword Ariel appears and gives a short speech. You are offered the use of
this room to return to at any time and restore your Health or Force Glyph power using the symbols on the floor. You
can also seek advice from Ariel by standing in the center circle.
When you are ready to leave, go to the door and thrust Soul Reaver into the lock and the doors will open. Head down
either corridor and shift to the Spectral Plane as necessary to pass through the gate leading to the water room and
the other gate leading back outside. Kill a few Sluagh along the way and see how well Soul Reaver works. When you
are back outside turn right (as you exit through the gate). A portal along the far wall near the campfire will return
you to the Material Plane.
Head through the nearby door and follow the passage as it leads you back to the room where you battled your first pair
of Vampires. Drop to the floor below and jump into the water, which will send you to the Spectral
Plane. Pass-through the gate at the end of the trench to get another Health Crystal then
go to the opposite (shallower) end of the trench to climb out. Jump across and use the portal to return to the Material
Plane.
Continue down the passage and jump over the pool of water. There is an Eldritch Energy Ball
at the bottom of this pool if you need one. Continue through the passage until you reach the large room with the circle
of columns. To one side is a passage leading up to a closed gate.
 Shift to the Spectral Plane and pass through the gate. Follow the passage until you arrive and the huge Cathedral
surround by rocky cliffs and a deep moat. Turn right and follow the narrow path of rocky terrain until you reach the
portal in the distance. Turn left and drop into the water and pass-through the gate. Follow the underwater passage
around until it open into a huge cavern. Ignore the Sluagh roaming around this area and make a mental note of this
location. You will return when you have the Swim Ability and can access that opening high in the opposite cliff-face.
Shift to the Spectral Plane and pass through the gate. Follow the passage until you arrive and the huge Cathedral
surround by rocky cliffs and a deep moat. Turn right and follow the narrow path of rocky terrain until you reach the
portal in the distance. Turn left and drop into the water and pass-through the gate. Follow the underwater passage
around until it open into a huge cavern. Ignore the Sluagh roaming around this area and make a mental note of this
location. You will return when you have the Swim Ability and can access that opening high in the opposite cliff-face.
Return to the moat and walk forward hugging the left wall, which will turn into a ramp leading out of the moat. As you
reach the top of the ramp look up to the top of the cliff straight ahead and spot a Health Crystal. Note the location
as you will be getting it later. Now that you are finished scouting the land, return to the portal and come back to the
Material Plane.
Head back around until you reach the drawbridge then turn left and head down the rocky path opposite the bridge. Climb
the stone ledges and get past the Vampire Hunters. If you've been nice to them so far they should leave you alone.
Head down the passage to the right until you arrive at the First Cathedral Warp Gate. Activate
the gate and then dial in the symbol to return to the Melchahim Clan Warp Gate. Walk through
and get ready for a quick mini-quest.
Exit the gate and head down the passage that leads to the door (not the spiral stairs) and go through the door. Use
the stones to jump across the lake and make your way into the crypt on the other side. Down in the lower area of this
room is a coffin with a picture of crossed Soul Reavers on it. Thrust Soul Reaver into the coffin and it will move
revealing a passage below. Drop down and follow the tunnel until you reach a door. Use your sword once more to open
the door and enter to claim the Eldritch Energy Crystal.
Retrace your path back to the Melchahim Clan Warp Gate and dial-up the
First Cathedral Warp Gate and warp back to the Cathedral. Follow the path back past the
Vampire Hunters and return to the drawbridge. Cross the bridge and thrust your Soul Reaver blade into the door to open
it and enter...
THE SILENT CATHEDRAL
Note: This next section of the game can easily take 2-3 hours before you reach your next warp gate (checkpoint).
You may want to make sure you have that much time before starting this level, otherwise you may have significant backtracking
to do later if you are forced to save and restore.
Your first Zephonim Vampire waits just beyond the gate. If he cooperates you may be able to kill him through the bars;
otherwise shift to the Spectral Plane and pass-through the gate. Turn right and hop over the pit
and use the portal to return to the Material Plane. Jump back over the pool and kill the Zephonim Vampires. If
you lose Soul Reaver you can always toss them into the water to finish them off.
Climb up the ledges then head down the ramp to the double doors. Open them and enter the massive courtyard. Turn to
your right and find the large steps leading to the roof of the nearby tower. Make your way to the roof then turn right
and spot the opening in the cliff. Jump and glide to the opening and follow the hall around. Ignore the passage to
the left and stay in this hall as it makes a U-Turn and comes out at the opposite corner of the courtyard.
The roof of another tower is within jumping/gliding distance off to your right. Jump to that roof and stand directly
beneath the opening above. Now turn left and take a few steps (stay on the highest part of the roof) then jump up and
grab the stone projection above and pull up to the roof. Look back to where you came from and you will see the entrance
to the Cathedral. Jump and glide over to the ramp and enter the massive structure.
Another one of the spidery Zephonim Vampires is down below putting his latest victim in a web cocoon. Glide down and
kill it. If you lose Soul Reaver you can climb the nearby ledge and grab a spear from the wall on either side of the
door and return to finish him off (or you could just ignore him). Go through the door to enter the main room of the
Cathedral and watch the informative movie. You can wander around this level but there isn't much to do in the Material
Plane. Watch out for the deep circular pit.
If you fall in you can jump up to the opening behind you and follow the twisting passages all the way back to that
U-shaped passage you took earlier. There are plenty of vampires to kill in these tunnels. You will exit from the
passage I told you to ignore earlier. Just go left and jump back to the roof to reenter the Cathedral. Of course you
will save a lot of time if you just don't fall in.
Shift to the Spectral Plane and watch the pipes bend and twist. A return portal appears to your right but you need to
go left (clockwise) to the base of the twisted pipe. Hop up onto the pipe and walk along it as it spirals up to a
catwalk above. Use your "sneak ability" to stick to the pipe and when you reach the top use the portal up there to
return to the Material Plane.
Above you is another catwalk so jump up and follow it along jumping over the gaps in the walkway. At the end jump to
the ledge near the door and turn right to follow the narrow path. Sneaking works well for helping you stick to this
narrow ledge. Continue around until you reach the switch in the wall and flip it to lower a wooden platform. Move on
to the right and enter the door. Head down the ramp as it turns to the right and when you reach the gate you can
shift to the Spectral Plane to pass-through the gate. A portal is to the right of this entrance
on the top of the ledge in the corner.
This is the first of many puzzle rooms in this level. While the puzzles are moderately challenging they are nothing
compared to the multiple Zephonim Vampires you will have to fight before and while you are solving these puzzles. You
start off with three of these Vampires. There are several tactics for defeating these creatures. You will almost always
get hit right away and lose Soul Reaver so you can either claw attack them until stunned then pick them up and throw
them onto the spiked torches in the corners or another trick is to get a block between you and one of them then flip it
over on top of them. Instant death and you can reave the remaining soul. The third method (and the one I found worked
best) is to claw the Vampires until stunned then quickly shift to the Spectral Plane and suck up a few souls to get to
full health. Quickly use the portal to return to the Material Plane with Soul Reaver and finish them off with the
impaling blow. Feel free to experiment; I'm sure there are plenty of ways to beat these creatures. Be warned that
more of these Vampires will drop in from above while you are solving the block puzzle.
Now to solve the puzzle. It's not as hard to do as it would be for me to tell you the exact moves to do it. The hardest
of these blocks is the one that is high up in the wall. I'll get you started with that one and you can figure out the
rest. Go to the left of the first block (the one with two arms) and flip it over so the arms are going down and the
block is one space to the right of the upper opening. Now move the next closest block just to the left of the first
block (under the opening) then go to the first block and flip it up onto the second block. The first block should now
be on the same level as the opening and properly oriented. Just go get a third block and slide it over so you can stand
on it and push the first block into the opening. You will hear a click indicating you got it right.
Now flip and move the remaining blocks until their are aligned with the rest of the pictures and push them into their
proper openings. They are all pretty obvious and you will quickly get the hang of how to flip these blocks in
different directions to make the pictures face the proper way. Killing the Vampires who drop in is much harder than
this puzzle. When the final block clicks into place a movie will show you a ledge being extended in another part of the
Cathedral. It's time to leave, so shift to the Spectral Plane to pass-through the gate and use
the portal on the other side to return.
Return up the ramp and back out to the main chamber of the Cathedral. Carefully move right along the narrow ledge and
return to the first door you ignored earlier. Go through this door and down the ramp to the left into the next room. A
nasty pair of Vampires are in this room, but there is a spear leaning in the left corner as you enter which will help
you kill them off quickly. Climb up the ledge at the opposite end and flip the switch to lower another one of those
wooden platforms. Turn around to find another Vampire on the floor and pulsating cocoons stuck to the walls - YECH!
Kill (or run past) this latest Vampire threat and return to the narrow ledge back outside the door.
 Go to each of the wooden platform and jump onto them to lower them the rest of the way so the locking clamp secures them
in place. When the second platform is locked a large fan will start blowing from the circular pit below causing a strong
updraft. Jump out over the pit and ride the air current to the top. A movie will take over and you will be on a ledge
at the top of the shaft when it's over. Jump up to the next highest ledge and follow the spiral ramp even higher.
Go to each of the wooden platform and jump onto them to lower them the rest of the way so the locking clamp secures them
in place. When the second platform is locked a large fan will start blowing from the circular pit below causing a strong
updraft. Jump out over the pit and ride the air current to the top. A movie will take over and you will be on a ledge
at the top of the shaft when it's over. Jump up to the next highest ledge and follow the spiral ramp even higher.
Explore the area and find the short passage that ends at a large bell. About halfway back out of this passage on the
left wall (as you are coming out) is a small alcove that ends in a tall white stone. Remember this for later then
return to the airshaft and head left to the door in the glass wall. Enter the door and head up the ramp past the first
door on the left. Another bell is off to the left and opposite the bell is an opening leading back to the central shaft.
Continue up the ramp until you path is blocked by a glass wall with a picture of two bells on it - a clue perhaps?
Go through the nearby door into the next passage and kill the Vampire Worshippers. They are human and can be killed
with your claws if you have nothing else. At the end of the passage you can shift to the Spectral
Plane to pass-through the gate and get ready for the next block puzzle. Use the portal on the upper ledge to get back
to the Material Plane.
This is a very clever (and fun) puzzle. The Vampires, which drop in frequently are the only difficult part of this room.
Kill the initial Vampires using Soul Reaver or if that has vanished you can pull a pipe off the wall and beat them up
with that. Make sure to reave their souls or they will come back to life and attack you again.
Study the existing blocks already in the wall to figure out how this puzzle works. The holes in these blocks are just
like pipes and you must complete the pipeline by putting in the proper blocks. The opening to the left of the gate
(as you enter) has two holes facing outward. This means you need two 90-degree curving sections to make the pipe loop
back on itself. There are three blocks with 90-degree sections. Find two of them and flip them so they turn in on
each other and slide them into the openings. A clicking noise will indicate you got it right.
The rear wall requires the third 90-degree section and a straight section. Align and insert those blocks then move on
to the final wall, which requires two straight sections running parallel to the wall. When all blocks are inserted
correctly a movie will show the glass being broken over one of four switches located elsewhere in the Cathedral.
Plane shift back through the gate and return to the main passage with the bell and this time enter the first door you
passed earlier. Kill more Vampire Worshippers and Plane shift through the gate at the end of the hall to enter another
puzzle room.
This room is just like the first except somebody has stacked all the blocks on top of each other. Move the entire stack
over to the ledge with the portal then push the top three blocks onto the floor. Now start walking out onto each block
and pushing the remaining blocks until you have all four blocks in a row on the floor. Study the existing blocks to
determine which blocks go where. A new T-Pipe is added to this selection of blocks. When all blocks are correctly
inserted another glass-covered switch will be accessible.
Return to the main hall and head up the curving ramp to the bell. Ring the bell using either Soul Reaver or your claw
then turn and run and leap off the ledge across the hall and glide to the other side. Quickly run down the hall to the
second bell and ring it. If you are fast enough then the ringing should shatter the glass wall with the picture of the
bells on it. If the glass does not break you need to try again and do it faster.
Exit the hall with the second bell and turn left and reenter the curving hall heading past the first bell. Go to the
end where the glass wall used to be and look up to the right where you should see a ledge with a crank on the wall.
Jump up to the ledge and turn the crank, which moves that tall white block in the short hall off the hall with the second
bell. This is only open for a very short time and you will never make it there in the Material Plane.
Shift to the Spectral Plane where time stands still and jump off the ledge where the glass used to be. Go back down the
hall with the second bell and take the short passage to the right into this new area. Turn left up the ramp to find a
portal that will return you to the Material Plane.
A Vampire Worshipper is right there when you materialize. Kill him quickly and you may get to hang onto Soul Reaver for
a while. Return to the previous room and turn the wheel on the opposite wall. This opens the white stone door permanently
in case you need to reenter from the outside again. Now go back where you just killed your last victim and continue
up and jump across the hall below to the next ledge and enter the door.
Continue through the passage beyond this door as it twists and turns. There are plenty of Vampire Worshippers in this
hall so kill them all and feed on their souls. When you reach the next door enter and prepare to do battle with a pair
of Zephonim Vampires. The spear on the left wall proves useful; especially if you have already lost Soul Reaver. The
path leads left and you can see a Health Crystal protected by a glass dome. Ignore it for now and continue until you
reach the next closed gate. Plane shift to get inside the next puzzle room. The return portal is on a high ledge
across the room and you will have to use the corner block as a step to reach it.
We're back to the picture blocks but we seem to be about four blocks short. Don't worry - the other four are above you
and will become available after you insert the first four. You will have to flip most of these blocks many times to
get the direction of the pictures to line-up with the wall. When all four blocks are correctly positioned the other
four will drop to the floor. These are a bit easier to figure out. When all eight blocks are pushed into the wall the
dome over the Health Crystal you passed earlier will open. Plane shift to get past the gate and return down the hall
to get the Health Crystal.
Retrace your path back to the secret room with the tall white stone and turn left. Drop onto the pipe below and then
to the floor. Sprint for the corner and get the spear to and kill the Vampire down here. Plenty more will attack you
as you jump back onto pipe and walk up the perimeter of this room. When you reach the top you will find a passage between
a pair of pipes leading off to the left. Follow this passage as it leads deeper into the Cathedral and you will arrive at
a fork. Go left - you could exploring to the right but it is a dead end with just more Vampires and a nasty Vampire
Hunter with a flamethrower who WILL attack you.
You should arrive at the area with the four switches you have been seeing in the earlier cut scenes. Plane shift to get
past the red gate on the left and use the portal to return on the other side. The passage splits; each direction ending
in a room with three metal hatches. Each room is guarded by Vampire Worshippers and Vampires patrol the halls. A good way
to avoid the Vampires is to walk on the pipes above the floor. Head left to the first room.
Kill the Vampire Worshippers and open the two hatches on the right (as you enter). With the camera view these hatches will
be the two on the bottom of your screen. This breaks the glass over the third switch. No leave this room and follow the
curving passage back around and go to the other end where another room with hatches and a vicious Zephonim Vampire awaits.
Again, flip the two right hatches (this time they will be on the top of your screen) and the forth switch will become
accessible. Return to the red gate and Plane shift through. Head to the right a short distance to
find the portal at the intersection and return to the Material Plane.
Return to the four switches and activate each switch to turn on the giant fan directly in front of you. Jump out into
this area and glide up to a pipe on the opposite wall. A section of pipe is broken and you need to push it down to
fix it. Now turn and look down and across to the opposite wall. Another broken pipe is slightly below you on the other
side. Glide down and fix that section then jump back into the shaft and float to the top and land in the passage.
Head down the web-covered passage into the next room where a pair of vicious Zephonim Vampire attack. You will almost
certainly loose Soul Reaver and have to return to the Spectral Plane several times during this difficult combat. The
return portal is just to the left of the entrance to this room so try to always lead the Vampires to the other corner so
you have time to line-up your attack when you return to this plane. Don't forget your Force Glyph power - it may prove
useful.
When the Vampires are gone you can activate the pair of floor switches to open a door high above. Jump to the metal
ledge to the left of the door (facing it) then jump across to the next highest ledge across the room. Go to the corner
of this ledge and crouch-jump to the three pipes protruding from the wall. Get to the highest part of the pipe (with the
holes) and jump and glide across to the opening.
Follow the passage to the gate then Plane shift through. Make your way to the floor of this next
room and locate the portal in the alcove. Get ready to run as a pair of Vampires are on either side of the portal as you
return to the Material Plane. Run across the room and jump to either end of the machine to rip a pipe off the wall.
Impale these Vampires then examine the front of the device to find Valve #1. Turn this valve
to activate one of the three pipes back in the previous room. As you can guess, you need to find two more of these valves
to computer the puzzle. Facing the machine, turn left and go to the far wall then jump onto the lowest pipe and make your
way up the steps. When you reach the highest pipe there will be a large gap to the next pipe. Turn around and look up to
find a hole in the wall. Jump into this hole and follow the passage.
 A quick Plane shift will get you through the gate where you can use the nearby portal to return. Ignore the bell unless
you enjoy fighting Vampires that drop in from the ceiling. Instead, get on the pipe and follow it up until you can exit
into the passage on the left. Around the corner the passage ends in a pit with more Zephonim Vampires and another machine.
Drop down and kill the Vampires. If you need to go (or are forced back to) the Spectral Plane there are plenty of Sluagh
to kill. They die quickly when hit with Soul Reaver and the return portal is on the ledge opposite the machine. When
the Vampires are gone move over to the rubble at the far wall and pull out the block. The rest of the pile with collapse
and form a ramp leading up which you can use in a minute. For now, pull the block over to the machine and use it as a
step so you can reach and turn Valve #2.
A quick Plane shift will get you through the gate where you can use the nearby portal to return. Ignore the bell unless
you enjoy fighting Vampires that drop in from the ceiling. Instead, get on the pipe and follow it up until you can exit
into the passage on the left. Around the corner the passage ends in a pit with more Zephonim Vampires and another machine.
Drop down and kill the Vampires. If you need to go (or are forced back to) the Spectral Plane there are plenty of Sluagh
to kill. They die quickly when hit with Soul Reaver and the return portal is on the ledge opposite the machine. When
the Vampires are gone move over to the rubble at the far wall and pull out the block. The rest of the pile with collapse
and form a ramp leading up which you can use in a minute. For now, pull the block over to the machine and use it as a
step so you can reach and turn Valve #2.
Head back to that pile of rubble and climb up (or you can glide over from the top of the block). Jump into the passage
above and follow it as it curves around to the next room. At least two Vampires will attack you in the passage and more
wait for you in the next room. A spear is on the left wall as you enter or you can just ignore them and quickly get on
the lowest portion of the pipe to the right as you enter. Follow the pipe up and around until it gets too steep to go
further then look down to your left. A vertical piece of pipe needs to be pushed down to fix the gap. Glide down to the
pipe below. This is a tricky jump as you can overshoot the pipe easily. You may want to glide down and turn to your
right making a U-turn back into the wall where you will drop safely on the pipe. Walk to the broken piece and push it
over to fix the pipe then turn around and walk up this section of pipe as it curves around the back wall and leads to
Valve #3.
With all three pipes venting steam you are ready to return to that room. Glide down and return down the passage to the
pit-room. Drop down and push the block to the opposite wall and use it as a step to jump out. More Vampires will drop
in to give you trouble while you do this. Return to the room with the bell (don't ring it) and Plane shift through the
gate. Make your way back to the room with the first valve and carefully drop down out of the passage
onto the highest pipe. Turn right and glide over to the pipe across the gap and then glide down to the gate below and
to the right. Pass-through and follow the short passage back to the room with the steaming pipes. Glide to the floor
and use the portal to return to the Material Plane.
More Vampires are waiting for you so quickly run to the first metal platform and then jump over to the second. One more
jump should get you on the pipes and then you can jump and glide up using the steam to lift you to the top of this shaft.
Glide to the passage at the top and follow it around until a hall branches off to the right. Take this hall until it
ends at a gate door. Open the door and enter the next area to find the Second Cathedral Warp Gate.
Activate the gate then return to the main passage and take a right.
The passage ends in a large chamber. A pair of really dead (we're talking splattered) Vampire Hunters offer a sign of
the impending danger that lies ahead. Make a note of the burning flamethrower stuck in what's left of one of the corpses.
Advance into the room until the movie starts then get ready for action.
Once again, defeating Zephon is really not hard once you know the secret. Here is the routine. Zephon will try to
stomp on you with one of his legs. You need to dodge this attack - just keep moving and you shouldn't get hit. When he
misses you the leg will get stuck in the ground for a few seconds and this is when you need to attack it, either with your
claws or Soul Reaver if you have it. The leg will shatter and Zephon will then lay an egg-bomb. Run up to the egg sack
and pick-up the egg. Quickly run back to the flamethrower and set the egg on fire then quickly run back and throw the
burning egg at Zephon's head. Repeat this procedure two more times and Zephon will die.
Of course it's not as easy as it sounds. Zephon has pincers that stab you while you are standing near the egg sack. He
will also lunge and bite at you doing massive damage. Plan on getting sent to the Spectral Plane at least a few times.
Vampire Wraiths will attack you but Soul Reaver will quickly kill them and it only takes one of these Wraiths to fill your
health coil allowing you to use the portal located in an alcove along the right wall (as you enter). Also, the eggs are
on a timer. They will explode into poisonous gas if you don't set them on fire and throw them in time. Burning eggs
are on a timer as well and they will burn up releasing deadly smoke. If you manage to hack off all eight of Zephon's legs
and he still isn't dead you can just run up and attack the egg sack and he will lay a fresh egg.
When the battle is over you will acquire Zephon's Wall-climbing Ability and the voice will
give you information on your next quest. Return to the warp gate and set the dial for the Underworld. It's time to test
out that new skill you just acquired on a little mini-quest for another health crystal.
Back in the Underworld you can take the passage leading out and up to the ring of columns. Use the portal in the center
to return to the Material Plane then find the smooth flat vertical wall. Jump onto the surface and you will stick,
then just climb right up to the ledge on top and get the Health Crystal. Your next quest
begins back in Melchiah's area so you will need to make your way to the nearest warp gate. Return
to the Spectral Plane then head back down to the gate to dial in Melchiah's gate.
You've been here before and should know what to do. Head to the door and use the portal to materialize then go
through the door and back to the lake. Jump out to the first stone block and then to the second one and turn towards
the left wall. Jump over to it and stick then climb up to get another Health Crystal. Now
jump into the lake and take the tunnel beneath you (in the same wall) out of here. It will twist
around leading to a pair of Sluagh and a tall ledge you can jump to. Another jump takes you to dry land and a portal that
returns you to the Material Plane.
Climb the flat surface and quickly kill the Vampire at the top. These guys are easy compared to those spiders. Move out
into the valley and check out the giant skull. More Vampires wander the area ahead and some rocks to your right hide a
spear. The Vampires will attack you almost at once so you need to run and get the spear before they can ambush you. Reave
their souls to keep your meter filled and Soul Reaver should stay with you.
A flat surface on the other side of the passage allows you to climb up to a ledge. From there you can hop up to the next
ledge and enter the door that leads to the Stone Glyph Warp Gate. Activate the gate then
return back to the ledge. As you exit, turn right and climb the blocks that lead to another climbable surface. Climb as
high as you can go (for now) then jump off and glide down to the skull. Head towards the right eye socket and enter.
Follow the hall as it twists back on itself and eventually leads to a room with a sheer climbable cliff. Climb up to the
first ledge then find the next smooth surface and climb up to the top ledge where several Vampires require your immediate
attention. Stand under the wooden beam and jump up and climb onto it. Follow it to the gap and jump over to the ledge.
Plane shift and watch your surroundings morph. The wooden beam just off the corner of this ledge is now within jumping
distance. Pull up onto it and carefully walk (sneak) along this beam to the next ledge. Turn and face the next beam
and jump to it and follow it along to the ledge with the portal. Return to the Material Plane. If you fall off any
of these beams you will have to return to the skull's eye socket to find the portal to shift back and climb to the top again.
Crouch-jump to the beam above and walk out about halfway then turn and position yourself under the next beam. Jump up
and follow this beam to the center structure with the steps that spiral upward. Walk out to the end of the stone ledge
and glide across to the far ledge. Jump up the next set of steep ledges to reach the very top and head to the opening
off to your right. Follow the passage around until you reach an outdoor platform which is the jaw of the skull (shown in
the earlier movie). At least one Vampire will be wandering around this area. If you are weaponless then just stun him
and toss him off the ledge.
Walk to the gap in the teeth and spot the far ledge with the fire burning. Glide over to that ledge - if you miss this
ledge you will basically have to start over from the eye socket and repeat the last four paragraphs. After you land take
a moment to view the surrounding area and the structure built into the far cliff. Below is the door leading to the warp
gate and you should be able to spot the surface you climbed up that ended in the stone block. Above that is a Health
Crystal, which you will return for later. For now just follow the path down and into the cave.
STONE GLYPH
As you enter this next area you will pass by a pair of torches then go under an archway and into a large temple with an
upper ledge on either side. This is your next block puzzle and it is certainly the most challenging one yet. Let's take
care of the pair of blocks we need to fill in the lower gaps first. There only seems to be a single block available on
this level but closer examination back in the previous hall by the pair of torches reveals a block up on the ledge (left
ledge if you are leaving the temple). Jump up and push this block down to the floor then drag it into the temple.
The second block is located in the corner just to the right of the archway as you enter. Flip the blocks to get the
pictures facing the proper direction then push them into their openings. As usual, a clicking noise is your sound of
success.
Now jump up to the upper deck and check out the situation. There are missing blocks on both sides and a larger room in
the back links the two side ledges and also stores many of the blocks you need to finish this puzzle. The first thing to
do is get that block in the corner off of the other block. To do this you will need to line up two other blocks so you
can pull the block once then get behind it and push it to the floor. There is also a cleverly stashed block on an upper
ledge, which is out of normal view unless you are looking up in 1st-person view. Use a block as a step to get to this ledge
then push the block off - make sure it lands on the floor and not another block.
Now with all blocks on the floor you can proceed to solve the rest of the puzzle. The narrow side ledges make it impossible
to flip blocks out in the other area so you will have to get all the blocks facing their proper insertion direction before
pushing them through the door and out into the other area. It's not that hard; just make sure the faces are looking in
the same direction as the blocks to either side of the gap. The only special block is the one with the circles. This
block goes in the gap just outside the right door leading back to the temple area.
When the final block clicks into place an impressive light show begins and the statue comes to life long enough to smash
the box with his hammer releasing the Stone Glyph. Jump down and stand under the hovering symbol to get the new power.
Try out your new power. It looks cool now but wait until there are enemies around. Recharge your power on the eye symbol
then leave the temple. Your next destination is Kain's Throne Room (where you acquired Soul Reaver).
The easiest way there is to walk back to the cliffs and glide across to the ledge with the door leading to the warp gate.
Set the destination for the Lake of the Dead. When you arrive at the other side go up the passage and through the door.
Head down the canyon to the right killing the Vampire guard along the way. Back at the Sanctuary of the Clans you can
go to the gate on the right and Plane shift through the gate. You may as well stay in the Spectral
Plane until you reach the door to the throne room. There are at least two more gates you have to pass through and you
can avoid several Vampire encounters by staying in this Plane.
After using the portal outside the throne room, enter and move onto the circle with the blue energy which indicates Ariel
has new information for you. Listen to her advice and recharge anything that needs recharging. Now find the pillar with
the climbable surface and climb up to the narrow ledge that circles the domed ceiling. Follow this ledge around to an
opening leading left and take it until you reach a room with two doors. Both doors lead to the same place but the right
passage has better scenery so go that way. Enjoy the spectacular view of the waterfall. A semi-dead Vampire is lying
in the courtyard below and another pair of Vampires patrol the courtyard just out of sight to the left. Jump off and glide
down.
If you have no weapons you can use the nearby rocks to stun your enemies or you could pull the spear from the fallen Vampire.
Doing this will bring him back to life and then you will have to fight three of them. Now is a good time to experiment
with your new power. Head towards the pair of Vampires (unless they are already heading toward you) and use your Stone
Glyph power. The resulting shockwave will paralyze both Vampires and you can easily finish them off with Soul Reaver. If
you don't have Soul Reaver then you will want to grab that spear. Your Stone Glyph will easily paralyze all three Vampires
and you can finish them off with the spear.
Behind the Vampire guards is a series of pillars which step back up to the door leading back to Kain's throne room. Turn
back to the large gate and take the cave to the left. Another pair of Vampires guard this area and once again the Stone
Glyph is a great weapon for taking out multiple targets. Follow the canyon as it twists and leads you to the Tomb of Sarafan.
TOMB OF SARAFAN
Listen to the short narrative about this place then head to the left and fight the Vampire who is guarding the tall stone
ledges. When the Vampire threat is gone, make your way to the top of these steps and glide into the passage to the left
and follow it back to the door leading to the Tomb of Sarafan Warp Gate. Once this gate is
active you can return to the tomb and investigate further.
Plane shift to get past the first gate and follow the passage around killing any Sluagh you encounter along the way. When
you reach the portal you can return to the Material Plane and proceed through the next door. In the next room you
can pull the stone out from the wall to reveal a door leading to steps which will take you to the main area of the tomb.
 In the room with the crypts holding your brothers you can shift to the Spectral Plane to reveal a
hole leading below. Drop down and pass-through the nearby gate. Move toward the ledge and kill the Vampire Wraith. Jump
over the gap and feed on the Sluagh if you need to fill your health coil. Use the nearby portal to return to the Material
Plane and after you learn all about the Tomb Guardian jump across the trench and fight him.
In the room with the crypts holding your brothers you can shift to the Spectral Plane to reveal a
hole leading below. Drop down and pass-through the nearby gate. Move toward the ledge and kill the Vampire Wraith. Jump
over the gap and feed on the Sluagh if you need to fill your health coil. Use the nearby portal to return to the Material
Plane and after you learn all about the Tomb Guardian jump across the trench and fight him.
Use Soul Reaver to kill the Guardian or if you take damage and your sword leaves you, just stun the Guardian then toss
him in the water. When the Guardian is dead you will receive the Force Projectile power, which will come in very handy
almost immediately. Locate the stone block in the wall with the circle patterns and use your new power. You will need
to fire at the block 2-3 times to knock it out of the wall. Now you can climb through the hole and kill the Vampire
waiting for you on the other side.
Follow the passage to the left and walk into the water. Follow the underwater chamber and head up
the ramp and keep going until you reach the portal that returns you to the Material Plane. Take the steps on the
left that lead to the spiked hallway. Kill the Vampires in this area either with Soul Reaver or by tossing them into the
spikes. Jump and glide over the water and land on the platform then do another jump to the opposite ledge.
Climb the wall leading up to the ledge then turn and glide over to the left column. Use your Force Projectile to knock
the stone block off the next column and glide over to it. Jump and glide to the next ledge and follow the steps leading
to the door. Enter the door and fight more Vampires in the next passage. Spears are located on either side of the door
to aid you in the disposal of these creatures.
The passage to the right is your ultimate destination but if you need to recharge your Eldritch Energy you can first
head down the main passage until it stops at an apparent dead end. Blow the window out with a Force Projectile and go
through to the next room. Kill all the Vampires (use Stone Glyph to stun multiple targets) and when they are gone you
can climb to the ledge with the Eldritch Energy recharge symbol. When you are all filled up you can return to the other
passage and continue.
Kill the Vampire and continue to the gate. Plane shift through the gate then head up the steps that
lead to the left. Battle the Vampire Wraith to fully recharge your health coil then use the portal to shift back to the
Material Plane. Dodge the Turelim Guards who are upon you almost immediately. Kill them using Soul Reaver, the
nearby spears, or the wall spikes.
Approach the cage and fire your Force Projectile at the block several times to move it back against the wall.
Plane shift through the bars of the cage and kill the Vampire Wraith inside then climb up the stone
block and into the opening in the wall. Kill and feed on the Sluagh if necessary then take the left passage through
the arched entry and continue heading left. Ahead on the right is another gate that leads to a watery area you may have to
use if you mess up on the next level. If you want, you can pass through the gate and enter the water. Explore this area
and find a large chain leading to a boat you are about to jump into. Not much else to do here so return back through
the gate and use the portal then continue on to the ledge overlooking the boat.
Take the plunge and glide into the boat. If you miss the boat you can take that passage described above to return and
try again until you make it. Head to the back of the boat and jump to the upper section to spot a ledge above you. A
quick Plane shift will put you close enough to the ledge that you can jump to it. Follow it as it
leads you to the left and use the portal past the next door to return to the Material Plane.
Two additional doors lead out of this room; one goes to the Drowned Abbey Warp Gate. Go to
this gate and activate it. While you are here you may as way take a little side-quest and get another Health Crystal. Set
your destination for the Stone Glyph area and warp to that gate.
Exit out to the valley and glide to the skull and enter the eye socket. Retrace your previous path up the walls and ledges
and Plane shift to morph the area so you can use the beams to reach the top. Return to the jaw platform and glide back over
to the cliff with the torch. Now look across the valley and locate the block that was stopping you from climb to the top.
Target it with your Force Projectile and blast it. When you have moved the block out of the way you can then glide across
the valley and climb to the top and claim another Health Crystal. This should be your third
piece of the second full health crystal if you have been following the guide. Return to the ledge below and enter the door
to return to the warp gate. Set the dial for the Silenced Cathedral (Gate 1) and warp to that area.
This next mini-quest will get you another Eldritch Energy Crystal and the Sound Glyph. You could wait and come here after you
have the Swim Ability but these two items are worth getting now and this trip isn't that far out of the way. Exit the gate
room and head down the canyon and up the drawbridge. Plane shift through the gate and use the portal on the other side. Fight
or run past the pair of Zephonim Vampires in this corridor and make your way to the double doors and enter the main courtyard.
Now that you can climb you could go over to the far wall of this open area and scale the wall to the pair of Eldritch Energy Balls.
You can also glide to the tallest tower where more Eldritch energy is waiting inside and on the backside of the balcony. Another
high ledge has a spear. You can glide over to this ledge and get the weapon then drop down and kill the Zephonim Vampires
patrolling the ground level. Or you can just ignore all this stuff and make your way back to the Cathedral entrance and go
inside.
When you are in the main room with the large pit with the fan blowing up you need to hop into the pit and start gliding up.
Do not glide up so far that the movie cuts in and takes you to the top. If this happens just jump back into the pit and fall
to the lower screen and then start gliding. Control your glide by moving to the outside of the updraft. Your goal is the
catwalk ledge high above the entrance to this area. This is the same section of catwalk you original used the pipe to walk up
to. Gliding is faster but if you cannot master the updraft then just shift to the Spectral Plane and use the curving pipe again.
When you are on the catwalk you will spot a climbable surface leading to a passage above. Climb up and enter this passage and
follow it a few paces then look up and to the right to spot a side passage. Jump up into this passage and blast out the window
with a Force Projectile. Continue through to the other side into another angled shaft and look to your right where an
Eldritch Energy Crystal hovers just out of reach. Drop into the shaft and go towards the gate and
jump up to claim the crystal. Return to the side passage and back to the main shaft and exit to the main Cathedral area.
SOUND GLYPH
Jump off the catwalk and glide to the fan-pit and drop to the bottom of the pit. Turn and locate the door on the side of the
pit and jump up into it. Follow the passage down and kill the Zephonim Vampire guarding the passage. You will come to a
sharp turn in the tunnel. Up high on the wall of this turn is another window. Shatter the glass with a Force Projectile and
then climb the wall and enter the passage.
Plane shift through the bars at the end of the passage and kill the pair of Vampire Wraiths in this area. Use the portal at
the end of the hall to shift back then take the mallet from the back wall and return to the gate you entered. Climb
the surface to either side of the gate until you reach the ledge then turn and face the window on the other end of the hall.
Throw the mallet toward the left alcove (you can aim your throw by going into 1st-person view) then blast the window with a
Force Projectile.
Shift to the Spectral Plane to move the pillars into jumping distance. Jump to the first pillar and use the portal to return
then jump over to the alcove to reclaim your mallet. Jump back to the pillar then jump to the other pillars until you reach
the last one. If you need any Eldritch Energy there are plenty of power-ups along the side alcoves. Throw the mallet through
the broken window then plane shift to raise your column so you can jump through the window. Use the portal
inside the window to return then go get your mallet again and strike the large bell with it.
After an impressive little movie you will be able to acquire the Sound Glyph. That's about all you
can do in this level until you gain the swimming ability so it's time to return to the Drowned Abbey. You can retrace your
steps all the way out of the Cathedral and back to the warp gate OR you could try this little time-saving trick I discovered.
To save a lot of walking around to reach the various Warp Gates simply SAVE GAME, QUIT to main title screen then LOAD the
game you just saved. This will put you in the Underworld a very short walk away from a warp gate with all of your accomplishments
saved. It's always nice when you can make a crappy save-game system work to your advantage. Enjoy!
THE DROWNED ABBEY
Note: This level is very difficult and requires a lot of precise jumping. One wrong step can often make you repeat large
portions of the level. I highly recommend you perfect your jump and glide technique before you get too deep into this level.
The best technique I developed was to always do a standing jump while pressing forward then hold the jump button until I heard
a SINGLE FLAP of my wings. then let off ALL CONTROLS. If you hold the Jump/Glide too long you will overshoot your target and
if you are still pressing forward after you land you can run right off the landing zone (which is often very small). Good luck!
When you exit the warp gate room in the Drowned Abbey you can walk down the hall to the room and take the door across from you.
Follow this twisting passage until it arrives at a dead end then use your Force Projectile on the circular pattern on the wall
to open the passage. Enter the open area beyond and survey all the water. Several columns lead off to the right and you will
have to jump these to proceed. If you fall in the water you can return to the ledge using the tall stone ledges directly below.
 Make your way across the pillars until you jump to the one very close to the water level. The jump to the ledge across the water
and walk to the left around the corner. Jump out to the next pillar and finally to the last and use your Force Projectile to
throw the Rahabim Vampire into the spikes. If you miss he will retreat down the hall to the left and you can jump across and
deal with him in person. Watch out for these vicious breed of Vampires as they have a breath weapon that can damage you even
from a distance. Move in close and force them into hand-to-hand combat. Make sure to use the wall spikes for the impaling
blow and reave their souls.
Make your way across the pillars until you jump to the one very close to the water level. The jump to the ledge across the water
and walk to the left around the corner. Jump out to the next pillar and finally to the last and use your Force Projectile to
throw the Rahabim Vampire into the spikes. If you miss he will retreat down the hall to the left and you can jump across and
deal with him in person. Watch out for these vicious breed of Vampires as they have a breath weapon that can damage you even
from a distance. Move in close and force them into hand-to-hand combat. Make sure to use the wall spikes for the impaling
blow and reave their souls.
Head to the left and down the hall killing more of these nasty Vampires along the way until you reach a large room with a
wooden shaft in the center. Follow the bridge across to the opposite wall and continue to the door. Grab a pipe from the wall
to use as a weapon in the next area. Kill more Vampires as you make your way to the next door and enter the next area. This
water-filled room has more pillars you can use to jump across to the other side.
Start by jumping to the left pillar then turn and jump to the right. Turn left toward the opposite wall and jump to the right
pillar then to the next pillar directly ahead. A Rahabim Vampire stands on the next ledge and he will try to zap you with his
breath weapon and knock you into the water. If this happens you will have to kill some Sluagh and return to the back corner to
climb out. Use the portal and try again. You can try to use your Force Projectile weapons to throw him onto the wall spikes,
but I found that by the time you line-up your shot you are already at the bottom of the pool. It is much easier to quickly
jump from this pillar to the ledge ahead and to the right and fight him hand-to-hand, or use the pipe if you managed to carry
it this far.
Continue through the next door and down the curving passage. The torches on the wall are plentiful and make great weapons
against the numerous Vampires in this hall. When you reach the hall with the slope leading into the water prepare to get wet
and walk down the ramp. Proceed down the passage through the narrow room with the columns and into the
next large room with the tiled floor. Several Sluagh are in here so use them to fill your health coil then turn to the right
and head to the wall. Look up to spot several ledges than protrude from the wall. Find the one closest to the right corner
and jump up to this ledge. Another ledge is just a standing jump and grab above this one. If you climbed the right-most pair
of ledges then you should be standing on a portal. Return to the Material Plane then climb the surface on the wall up
to the ledge - you will have to shimmy sideways a little bit before pulling up.
On the ledge you can grab a spear then turn to look at the next difficult jumping puzzle. Do the single jump/glide move I
described earlier to jump from rafter to rafter and make your way to the opening on the far left wall leading to the next
passage. A pair of Rahabim Vampires patrol this hall. You'll probably lose Soul Reaver when you get hit with a breath weapon
so hopefully you carried a spear with you. Impale the Vampires, either with the spear or using the wall spikes. You can also
stun them and throw them through the door back into the water below the rafters.
At the end of this passage is a stained-glass window. Blast it with a Force Projectile then survey the next jumping puzzle.
A series of gargoyle heads protrude from the wall ahead. You must jump across these heads to the opposite ledge. If you miss
you will fall into the water and you will have to retrace your path back to the tiled room and repeat the rafter jumps. Once
again do the single jump/glide move and angle your landing toward the right wall to help stop you from falling off the far side
of each ledge. When you reach the final head just walk out onto the stone ledge and survey the area.
You are now above the circular lake you first jumped around when you arrived in this level. Do a running jump and glide to
the large circular rooftop ahead. Turn right and do another running leap and glide through the arched windows of the bell
tower. Stand in the circle and pull the chain to ring the bell and open the large doors below leading to this level's boss.
Descend the spiral stairs leading to the bottom of the bell tower. Once underwater keep going down to the
bottom then turn and go up some stairs leading through the large doors you just opened with the bell. Enter the large room
with the circle of pillars and kill the Vampire Wraith. Jump to the lowest pillar (or crouch jump to the second-lowest pillar)
then make your way from pillar to pillar as you spiral to the top. A portal awaits you on the final platform and returns you
to the Material Plane where you can prepare to do battle with Rahab.
Rahab is probably the easiest boss you have encountered yet. You cannot fight him directly, so you must find his weakness, which
you should remember from the story at the beginning of this level, is SUNLIGHT. Use your Force Projectile and carefully aim at
each of the stained-glass windows around this room. As each window shatters sunlight pours into the room limiting Rahab's
movement. Try not to fall off the column you are standing on otherwise you will have to repeat the spiral jumping back to the
top. If you take damage forcing you back to the Spectral Plane just stay put and feed on any nearby green soul energy then
use the portal directly under you and finish the battle.
When the final window breaks, the sunlight will focus and kill Rahab releasing his energy for you to absorb and giving you the
Swimming Ability. This is a very useful ability as it will allow you to finish exploring the
underwater portions of the Abbey as well as accessing lots of areas in other previously explored levels. For now, jump in the
water and notice how you do not return to the Spectral Plane. Swim down and through the door then back up the spiral staircase
to the top of the bell tower.
Do a running leap and glide back to the large circular roof and walk back toward the gargoyles. Run, jump, and glide toward the
dam and into the water on the other side (the canal under the gargoyle statues). Follow the passage and Plane shift through
the gate and use the portal to return then continue to the tiled-floor room (under the rafters) and this time go to the left
end of the room where a large stained-glass window needs to be broken with your Force Projectile.
Continue through this new opening and down the spiral staircase into the next large room. Avoid the pods which are attached
to the floor. If you get too close they will open and release more Vampires for you to fight or run away from. Speaking of
running away - I highly recommend just swimming and avoiding any of the Vampires swimming around in this area. You can avoid
them much easier than fighting them underwater.
Head to the gate on the right and take the passage leading further down to another stained-glass windows. Breaking it reveals
a new passage. Follow it until you see a ramp leading out of the water on the left. Walk into this new room and use the
floor symbol to fill your health and regain Soul Reaver. Move toward the Forge and look at the symbol on the wall. Stick
Soul Reaver into the Forge and turn it into FIRE REAVER. This power-up is great. Now your sword is much more powerful and
can stun your opponents faster than before. You can also shoot fireballs allowing you to target and hit distant enemies. If
you lose Fire Reaver due to damage in combat or by swimming you can simply ignite it using any nearby flame source.
For now, return down the ramp and head left through the next arched door and swim up the stairs. Turn right at the top and
look at the third window with the shaft of light. It won't harm you, so swim into the light and up through the shaft into
the large circular room beyond. Swim up about halfway and find the opening in the opposite wall and enter the rocky tunnel.
Follow the passage into the next area and head to the left. The exit out of this room lies along the far left wall in the
second row of alcoves. Go through the passage and into the next area.
If you don't recognize this area just walk up the steps and onto dry land. This is the area I described earlier (4th paragraph
under Raziel Clan Territory) where I had you take the optional water excursion. Now that you know where you are, turn and
reenter the water. Swim to the far side and toward the top. On the right of the far wall swim into the opening (the opening
on the far wall - not the opening on the right wall next to it). The passage should start glowing green as you go deeper down
the tunnel. As you enter the next round chamber, turn and grab an unlit torch from the wall and then surface. Crouch-jump
out of the water and survey the area. There is a gate, a door, and a hall. You will explore all three but the order is
critical to the success of the next puzzle.
FIRE GLYPH
The first thing to do is stash the torch someplace safe. Drop it by the spear next to the hall then take the spear and go down
the hall and kill the pair of Vampires. With these guys out of the way, return to the main circular room and go through the
door. Follow the passage to the large room and kill the pair of Vampires feeding on the corpse. When they are dead, turn the
crank to open the large doors across the room. Immediately shift to the Spectral Plane to freeze time
and head through the doors. Use the portal on the other side and listen to the doors slam shut behind you.
Jump into the next room and glide to the ledge and turn the crank on the wall to open the gates leading back to the main room
with the pool. Return to the hall and grab the unlit torch from where you left it. Head down the hall and through the door
at the end. Walk out onto the ledge and spot the fire burning across this room. Aim and throw your unlit torch toward the
fire (between the pillars). Shift to the Spectral Plane and the pillars will morph into a spiral
step pattern. Oh boy! More jumping! Kill the Vampire Wraith who roams this area before dropping to the floor and beginning
the long series of jumps. When you reach the top use the portal to return then head to the back of the room and get
the unlit torch from behind the burning altar. Light the torch then run and jump off the ledge and glide to the other side of
the room. Climb up the wall and go through the door.
Return up the hall to the pool room and go through the gate and into the room with the crank. Walk up to the large statue on
the other side of this room and light the brazier. The statue comes to life and after another cool little movie you will be
able to jump into the brazier and claim the Fire Glyph. Try it out then recharge using the floor
symbol. This power is more fun when there are Vampires nearby to toast.
Jump back into the pool and swim down and through the green tunnel and back to the underwater room with the steps leading out.
Kill the Vampire at the top of the steps then turn right and go through the door back into the main hall. If you remember,
the door directly across from you leads to a warp gate and that is your destination. Head to the gate and set the destination
for the First Cathedral Warp Gate.
Exit the gate room and follow the canyon back to the moat. Dive in the moat and swim around to the left and find the underwater
tunnel that leads to a small cave. One wall of the cave has a smooth surface allowing you to climb to the ledge above. Go out
onto the ledge outside and get the Health Crystal then jump off and glide back to the moat.
Plane shift through the gate at the right end of the moat and use the portal on the other side to return. Now you can swim
down the tunnel and into the large cavern. Swim up and through the opening in the far wall and continue through the twisting
passage. You will spot a passage branching off to the right. Take this tunnel and it will lead to dry land and eventually
take you to the Sunlight Glyph Warp Gate room. Activate this gate for speedy returns in the
future then return down the passage and follow the underwater path out into the large open area.
SUNLIGHT GLYPH
The camera zooms out showing you the lighthouse and surrounding area. Crouch-jump to the ledge at the base of the lighthouse.
Head to the right and spot the ledges leading up the side of the cliff. Make your way to the top and look to your right
where a Turelim Vampire patrols the ledge. Kill him; you can use the fire, water, or Soul Reaver if you have it, then
head right and go up to the ledge above. A spear leans against the wall - take it for future use then jump up to the
next higher ledge. Enter the cave and follow it as it wraps around back out to another ledge with another Vampire. When
this Vampire is defeated turn to the lighthouse.
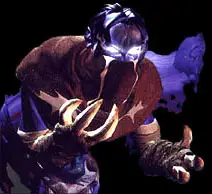 Another Turelim Vampire is near the cave entrance to the left of the lighthouse. Stun him with a Force Projectile then
quickly glide across and finish him off. Enter the tunnel he was guarding and follow it around to the door. Outside,
the ledge leads down to the left. Start down the ledge until you reach the first Vampire. Kill him then enter the door
he was guarding. Grab a pipe on your way in and use it to kill the Vampire patrolling the next hall.
Another Turelim Vampire is near the cave entrance to the left of the lighthouse. Stun him with a Force Projectile then
quickly glide across and finish him off. Enter the tunnel he was guarding and follow it around to the door. Outside,
the ledge leads down to the left. Start down the ledge until you reach the first Vampire. Kill him then enter the door
he was guarding. Grab a pipe on your way in and use it to kill the Vampire patrolling the next hall.
You should arrive in a room with pipes and machinery and another Vampire lurking in the corner. On the opposite wall is
a crank (for later use) and a large gear dominates the center of this room. Crouch-jump to the top of the machine and
push the metal block onto the floor. Slide it around to the left of the crank then turn the crank. After the short
movie, push the box away from the crank--wall into the square opening on the floor and jam the gear. If done correctly
you will notice flames coming out of the pipes on the wall. Return to the ledge outside.
You will notice a narrow ledge leading up to the left. An Eldritch Energy Ball is on this ledge and above that is a
triangular piece of glass mounted into the side of the cliff. Kill the Vampire on the lower ledge then jump out to the
circular platforms on the water. Feel free to search the hall and temple beyond the door on this ledge. There isn't
anything to do in there until you get the lighthouse operational.
Jump across all the platforms and onto the ledge set inside the base of the lighthouse. Kill the Vampire guarding the
passage and continue to the center of the lighthouse. The broken catwalk only hinders your return trip. For now simply
jump off and glide to the bottom. You can stop on any of the catwalk sections on your way down or just drop to the bottom.
Grab the pipe off the wall if you are weaponless and kill the Vampire guarding the base of the catwalk. Enter the door
and follow the passage to the next area. Walk through the angled opening in the drive shaft and kill the Vampire.
Plane shift and the drive shaft will morph and reveal a passage beyond. A portal in the next area allows you to return
then you can go to the door up ahead and enter. Follow the twisting hall and go down some stairs and kill another Turelim
Vampire. Go through the big double doors and into the next room with the giant waterwheel. This room has a small and
rather simple block puzzle. Jump over the wall to the left and into the pit to complete the missing pipe sections.
There are three blocks with straight pipes and one right-angle pipe block. Connect the two pieces of pipe with the blocks
then jump out of the pit and follow the pipe back down the tunnel to the left until you reach a valve. Turn the wheel
and the water will flow and the waterwheel will start spinning. The giant bellows will start to move and steam will vent
from some broken pipes to the right of the waterwheel. Return to this area and use the steam to float up to the ledge with
the bellows. Climb up the bellows and when they are at their highest, jump to the catwalk. Jump over the missing section
to the next catwalk and enter the area beyond. Drop to the floor below and follow the passage into the next room.
The next dark room has several Eldritch Energy Balls. Collect as many as you need and watch out for the square openings
in the floor. If you fall into any of the first few you will have to Plane shift and follow the path in the previous
two paragraphs to get back up here. Make your way to the backside of this dark room and drop into either opening and
follow the passage back out to the lake. The circular platforms are actually pistons and they are going up and down.
Make your way across this pistons to the ledge on the other side and enter the lower door.
Enter and follow the passage to the temple-like Glyph Room. Sunlight shines through the triangular lens in the cliff and
focuses on the back wall in brief pulses. The trick here is that you need a constant stream of light to activate the Glyph.
When the light is shining on the back wall shift to the Spectral Plane to stop the passage of time
and the light will remain focuses on the wall. Enjoy the brief movie and claim the Sunlight Glyph
from the altar before plane-shifting back. Test out your newest power and refill your Eldritch Energy using the
floor icon. When you are ready you can return to the nearest warp gate (or use the save/load trick I mentioned earlier).
Your next destination is the Lake of the Dead and the dreaded Vortex.
WATER GLYPH
The final glyph to add to your arsenal is buried deep within the human city beyond the Vortex. Return to the large outdoor
area with the waterfalls and the central spires and cross the bridge to the first spire. Jump the gap to the second spire
then turn and face left toward the waterfall coming out of the canyon wall. Jump and glide to the top of the falls (if you
miss you will have to follow the ledge back to the stone steps at the base of the bridge) then follow the river swimming as
necessary.
When you reach the T-intersection head left and climb onto the nearby ledge. A door should be in the opposite wall and a
Vampire Hunter patrols this area. You can either kill or avoid the Vampire Hunter. If you haven't killed any of these guys
up to this point then they should leave you alone. If they attack you first then go ahead and finish them off. Some of them
have flamethrowers and can be quite dangerous. If you do start killing these guys then the citizens of the city will run from
you later when you get inside - no big loss. So you decide on whether you kill or avoid the Vampire Hunters.
Enter the door and head around the corner past the guy with the flamethrower and up the ramp. Pull the block out of the left
wall and flip it so the X is facing out and then push it back in. Now move the other block to the left corner and pull the
first block back out and flip it onto the second. Crouch-jump to the top then onto the ledge above and grab a spear from the
wall. Glide past the Vampire Hunter to the ramp on the right and stand on the ledge overlooking the area below where you
surfaced from the water. Listen to the story then glide to the archway on the left and get more info on the city.
Head to the right and deal with another Vampire Hunter then drop to the floor beyond (or take the ramp leading down to the left)
where you encounter your first group of city folk. Head around the corner to the left. As you near the stairs at the end of
this passage look to your right and spot the climbable wall. Climb up to the ledge to get some Eldritch Energy if you need any
then drop down and continue up the steps and around to the next room. Another Vampire Hunter with a flamethrower guards the
doors leading to the inner city. Deal with him and enter.
Cross the bridge and head up either ramp to the water tower. Deal with the Vampire Hunter and make your way around to the
back of this area to the hall leading off behind the large pipe. Take the door on the right wall at the end of the hall.
In the next area climb the stairs and go through another door onto the street beyond. Another climbable wall to the right
of the stairs leads to a series of ledges leading to a roof with more Eldritch Energy if you need it.
Out on the streets head left and around the corner to the right. Spot another climbable wall leading to another ledge with
more Eldritch Energy. Grab it if you need it otherwise continue to the canal and glide across to the opposite ledge then
find the valve in the left corner and turn it to drain the canal. Drop into the dry canal and follow it into the dark tunnel.
The canal empties into a large room. A gate is high up on the right wall above a ledge and a vampire guards the floor below.
Kill the Vampire then drop down and find the pair of moveable blocks. Flip both blocks onto the ledge under the door then
jump to the ledge and flip one block onto the other. Jump to the top of the blocks and Plane shift through the gate.
Follow the passage around to the room with the portal and the spiral stairs leading up on either side and return to the Material
Plane. Climb the stairs and flip the switch to open the gate and enter the next area. A sparkling pool with a fountain
holds a Health Crystal. Grab it, then retrace your path all the way back to the water tower.
As you approach the water tower you have three possible destinations. If you are in need of Eldritch Energy you can turn to
the right as you near the pipe and spot the climbable wall leading to a ledge above. Once on this ledge you can continue to
climb to high ledges until you reach the one with the Eldritch Energy Ball. You can also jump out to the spiral catwalk leading
to the top of the water tower and find more Eldritch Energy if needed. This is a fun trip even if you don't need the energy.
Your other destinations lie underwater in the canal and beyond the gated door to the right of the water tower. We'll start with
the door leading to the next section of the city. Enter this door and head down the street to the right. Spears are located at
most of the street corners and will prove useful in dealing with the Vampire Hunters in this area. Turn left at the first
corner and head down the street. At the end of the street you will see stairs leading up into a building. Take these stairs
and go through the door to find and activate the City Warp Gate.
Return to the city street and continue to the right around the next corner where a waterfall spills into the city street and
drains on the other side. The wall under the water is climbable so climb up and into the passage at the top of the falls and
get another Health Crystal. If you have been following the guide this should be your 10th crystal,
which completes your second big crystal and lengthens your health coil. Return to the top of the falls and jump across to the
ledge across the street.
From this ledge turn and spot the ledge to the right of the falls and glide to it. Now start jumping and curving back to
each archway leading around the corner. From the second ledge around the corner you should be able to glide to the larger
ledge across the street where you will find a wall switch and a pair of Eldritch Energy Balls. Flip the switch to open the doors
below you on the street level then drop down and enter. Ignore the pool and head for the climbing wall to the left and make
your way to the ledge. Glide across the street to the next passage and head down the stairs. A pair of Vampire Hunters patrol
the base of the stairs. The Fire Glyph works nicely on multiple targets. When the room is cleared you can safely take the
Eldritch Energy Crystal and head back up the stairs. Return to the water tower area.
Now that you are loaded with power-ups it's time to get what you really came here for. Dive into the moat by the watertower
and swim to the middle where you will spot a circular grating. Use your Force Projectile to clear the grating and swim into
the tunnel leading to the interior of the watertower. Swim to the surface and scan the perimeter for another tunnel just under
the water level. Follow this tunnel down to a small chamber and make a sharp left into a connecting passage. You will surface
in a room with a ledge to the right.
Quickly jump onto the ledge to avoid the attacking Rahabim Vampire. Pull the pipe off the wall and head up the stairs into the
next area with the large statue. A door in the back, right corner leads out of this room. Follow the hall and head up more
stairs where a Vampire Hunter needs your attention (or lack of attention). Jump the canal and head for the moveable block
almost directly across the canal. The block is stuck in the wall but the color is slightly off so you can spot it. Drag it
out and push it into the canal. Then push it down the canal and into the large chamber at the end. Follow it over the edge
then slide the block to the center of the room and drop it into the drain. With the drain plugged the room quickly fills with
water and feeds the aqueduct leading to the statue in the previous room. Swim to the surface and return to the canal and back
down the stairs to the statue. As you enter the room the movie takes over and when it is over you can claim the
Water Glyph. As always, try out your new power then refill your energy with the symbol on the
floor before leaving.
Return to the water room with the Vampire swimming around. Jump over the water and cling to the climbing wall and climb up
to the passage above. Follow it past the railings and into the chamber where you can claim another
Health Crystal. That's it for this area. You can now return to the nearest warp gate and head for the Lake of the Dead
again. Use the Save/Load trick or jump over the railing to return to the city streets and locate the
City Warp Gate.
RUINED CITY OF THE DUMAHIM
Return to the spires above the Vortex and this time jump toward the opening across from the second spire. You will not be able
to make it all the way to the ledge. When you land in the water position yourself at the base of the broken bridge and crouch-jump
to the passage above and continue. Swim across the small lake grabbing the Eldritch Energy from the bottom if you need it.
Move on watching out for surprise Vampire attacks around the blind turns in this cave until the passage opens into an
outdoor area where it is snowing.
Head to the right and find the cave in the archways along the right wall. Follow this cave around until it ends at a door leading
to the chamber with the Ash Village Warp Gate. Return to the outdoor area and locate the tall
pillar and climb to the top. From here you can get a good view of the city. Jump and glide between the pair of stone heads
and land inside the city walls.
Head through the giant doors at the other end of the courtyard and enter the next area littered with corpses. Listen to the
history lesson then head to the gate ahead and Plane shift through it. Head toward the next gate. A
side passage leads to a dead end around the corner where a block needs to be moved. You cannot manipulate objects while you
are in this Plane so you will need to return later in material form. For now, pass through the next gate and survey the new
area.
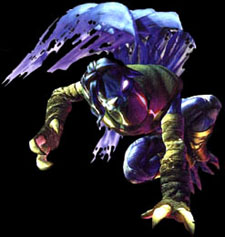 There is a large central area sealed off with gates and a passage, which circles this caged area. Additional passages lead off
to the left and right. Walk around to the backside of the passage that circles the caged area. Notice the block and the Vampire
Wraith inside the cage. When you reach the portal return to the Material Plane and turn to the nearby gate. Use your
Force Projectile five or six times to shove the block up against the far wall. Return to the Spectral
Plane and pass-through the gate and kill the Vampire Wraith. Climb the block and then get onto the ledge above and use the
portal to return.
There is a large central area sealed off with gates and a passage, which circles this caged area. Additional passages lead off
to the left and right. Walk around to the backside of the passage that circles the caged area. Notice the block and the Vampire
Wraith inside the cage. When you reach the portal return to the Material Plane and turn to the nearby gate. Use your
Force Projectile five or six times to shove the block up against the far wall. Return to the Spectral
Plane and pass-through the gate and kill the Vampire Wraith. Climb the block and then get onto the ledge above and use the
portal to return.
Jump down through the opening on the other side of the portal and find yourself between the gates from earlier. Now that you
are in Material form you can head to the left and move that block. Pull it out and use it to climb to the ledge where you
have a disturbing view of another corpse-filled courtyard. A running jump and glide should land you on the opposite ledge.
Follow the passage around until you reach a large chamber with two water-filled pits. The way out is on the opposite high
ledge so you are going to have to move some boxes to get up there.
The first thing to do is drain the water so you can move the boxes, but even before than you should switch to the Spectral Plane
and kill the pair of Vampire Wraiths (one in each pit). If you don't then the Vampire bodies will come
to life when you drain the water. Use the portal on the left ledge to return then jump to the opposite ledge and turn
the crank to empty the water.
Start moving boxes. Your goal is to get two boxes from the first pit up onto the middle ledge and over into the second pit.
Line-up a pair of boxes in one corner and flip the remaining boxes onto the corner box one at a time. Stand on the adjoining
box to push the top box onto the ledge. The first box can slide over and drop onto the box below in the second pit. The last
box from the first pit can be push right onto the stacked pair in the second pit to make a triple-box stack. Move this stack
against the back wall then drag the remaining box against this stack and use as a step to get to the top ledge and the passage
out of here.
Follow the passage until you arrive in a large round chamber with lots of pipes and ramps. Look down to the left and glide down
to the valve and turn it to start the gas. Make your way down the ramp and up to the opposite side and pull the lever to ignite
the burner and cause a violent explosion which blows open the doors behind and below you. Turn and walk down this new hall
behind you to the next area.
As you arrive on the ledge you can easily spot the moveable block. Push it below and follow it over the edge. Another block
is already down here so stack the blocks and push them to the opposite side and use them to step out of this area. Follow the
passage until you arrive at a ledge overlooking a tall shaft with other ledges on all four sides. Directly above you on a much
higher ledge is a switch that will lower the drawbridge on the opposite side of this shaft. Shift to the
Spectral Plane and watch the ledges morph and become more accessible. You can now perform a series of jumps leading clockwise
around this shaft until you reach the ledge with the switch. You will still need to do a running jump and glide to the opposite
ledge to use the portal. Back in the Material Plane you can jump back to the ledge and flip the lever to lower the bridge
and continue down the passage beyond.
The hall turns left and ends at a T-intersection. Head right to the short dead end. Beyond the cage is a passage that leads to
the area under the drawbridge. You don't need to go here - this is just for a return trip if you ever fell off the bridge. Instead,
locate the block on the left wall and pull it out then push it back toward the intersection. Use it as a step to get to the
upper room then carefully head to the left to the fire. Turn your sword into Fire Reaver and blast the Vampires over in the
corner. If they attack before you ignite the sword just kill them the normal way.
Now move to the lowest pillar and crouch-jump to the top. Plane shift to morph the columns and jump to the next pillar and use
the portal. Keep alternating planes as you make your way up the pillars. When you reach the highest pillar you can jump into
the slanted chute and slide into a caged area with a stone obelisk. Flip the obelisk over (just like a regular block) and it
will smash the gate and the door beyond. Head down this new hall and open the giant doors at the end to face Dumah.
Dumah is probably the easiest boss to defeat when you know the secret. Approach his body and remove the three spears and toss
them aside. He will come to life and after a brief chat will attack you. He attacks using his Constrict Power by running around
you in tight circles. The easiest way to avoid being attacked it to always keep moving. Dumah is impervious to any form of
attack you currently have in your arsenal. The only way to defeat him is as follows:
You are going to have to bait him into following you all the way back to the chamber with the exploding gas. Just keep moving
away from Dumah and toward this area. If you get too far ahead you may have to backtrack to get him to follow you. From this
room head back to the obelisk room and out the other side. Turn right at the T-intersection and go around and over the drawbridge.
Back in the passage that circles the caged area (from the beginning of this level) go either right or left and circle around to
the other side. Head down the curving passage and into the chamber. Go up the ramp and turn the valve to start the gas. Dumah
will drop to the floor and try to constrict the main valve so you must quickly run over to the lever and pull it to ignite the
gas and torch Dumah. When he is gone you will have acquired the very powerful Constrict Ability.
Now it's time to do some final clean up on this level and go claim the remaining power-ups from the previous sections of the game,
which are now accessible to you. For now, return to the obelisk room back by Dumah's throne room and this time take the side
passage out into the courtyard. Run around the statue (clockwise) until it spins and faces a new door which will open. Enter this
area and head to the back left corner where a fire will turn your sword into Fire Reaver. Now you can easily kill the Vampires
with fireballs from a distance. Return to the courtyard.
Constrict the statue a second time and enter this next area. A pair of Vampires guard the long hall. Kill them with Fire Reaver
fireballs and go get the Health Crystal from the far end of this room. Return to the statue and
constrict it again. Enter the next area and kill more Vampires with your fireballs then locate the recharge symbol and energize
your Glyph power if necessary. Return to the statue.
Constrict the statue one more time to return it to the starting position and leave this level. Return to the obelisk room, back
to the intersection, across the drawbridge, Plane shift through the two gates, use the portal in the courtyard to return, go
through the big wooden doors to the outer courtyard, and climb the exterior wall. You should now be overlooking the snowy area
outside the city walls. Jump off the wall and head to the left through the stone arches.
Follow the canyon until it opens into a larger area with many Vampires. Run to the back left corner where a fire will ignite your
sword and let you kill all the Vampires in this area without even getting close. Torch them all and reave their souls as you
make your way around to the right to the large sundial. Run around the center piece counter-clockwise and the doors will open
granting you access to the Oracle's Cave.
Enter the cave and kill the first pair of Vampires you come to - Fire Reaver makes this easy. Move further into the cave and
follow the passage along to the right. Very soon a side passage will turn off to the right. Take this short passage up to the
Oracle's Cave Warp Gate and activate it. Before continuing further into the caves now would be a
good time to go get the remaining Health and Eldritch Crystals in the other parts of Nosgoth.
Set the gate for the Raziel Clan Hall and warp to that area. Climb the stairs and exit into the main hall and cross the room.
Enter the opposite door and follow the passages leading to the tower with the spiral stairs. Kill all the Vampires you encounter
with those flaming balls of death from Fire Reaver (or any other weapon/power you like). Climb the spiral steps and enter
the room with the dial in the center and the four drawbridges.
You've been here before but you could only lower the bridge for the current setting of the dial. Now you can use your constrict
ability to spin the dial and open the other three. Spin the dial counter-clockwise by running around it then flip the switch to
lower the first of the remaining three bridges. Enter the new area beyond and if you need it, glide over to the ledge and claim
the Eldritch energy. Otherwise drop to the floor and return to the top of the stairs and spin the dial again.
The next bridge leads to a large pit area with a high ledge across the way. A block is to your left and you need to push it
into the pit. Drop in after it and find the other two blocks. Using the central raised platform, move and flip the blocks so
that they are stacked three-high. Now move this stack halfway between the central platform and the high ledge then do a pair of
crouch-jumps to reach the ledge where you can claim the Eldritch Energy Crystal. Glide across the
pit and return to the tower.
Constrict the dial and cross the final bridge. Enter the room with the pillars and claim the Health Crystal
from the far end before returning to the tower. Retrace your path back to the main hall and through the opposite door leading to
the warp gate. Dial in the Drowned Abbey and pop over there to pick up a few remaining items.
Exit the gate room and head down the passage to the round room and go through the open passage leading to the water cavern and the
boat. Dive in the water and head to the right past the stern of the boat. Some Eldritch energy is down here if you need it.
Swim through this large underwater area and avoid the Rahabim Vampires swimming around. Enter the tunnel at the end and swim to
the connecting room. Angle toward the ceiling and swim up to collect the final Eldritch Energy Crystal.
Continue to avoid the swimming Vampires as you make your way back to the main cavern and swim past the ship and into the cave on the
opposite wall. Follow the short passage until you can surface.
Plane shift through the gate and go right to reach the ledge above the boat. Glide to the boat and jump to
the higher section in the rear and onto the opposite ledge. Use the portal then enter the door on the left and follow the
passage to the doors with the circles. Use the Force Projectile to open them and head to the ledge overlooking the main Abbey.
Dive in and swim toward the ledge on the far left wall and crouch-jump to get out of the water. Enter the door on the left and
kill the pair of Vampires in the adjoining passage. Return to the circular room with the wooden shaft in the center and run
around the shaft counter-clockwise to constrict and spin the shaft and raise the stopper. The water will drain from the area
below and you can investigate.
Drop down and find the two moveable blocks. Pull them out and to either side to find hidden rooms beyond. Kill any Vampires
lurking inside and claim the Eldritch energy from one room and the final Health Crystal from the other.
If you have been following this guide you now have all the available power-ups and you can now return to the Oracle's Cave via the
nearest warp gate (or use the Save/Load trick).
ORACLE"S CAVE
Head back down the passage leading from the gate room and head right. Kill the Turelim Vampire and make a
note of the very large door ahead. You should also be able to spot a narrow vertical crack on the left wall.
Plane shift to morph the wall and pass through the widened crack and use the portal on the other side. Constrict
the dial in this room to shut the door ahead and raise the doors on either side. Head down the passage on the
left (if you are facing the crack) and Plane shift through the gate. Use the portal and get ready for a puzzle.
This next block puzzle is rather devious. Look into the pit room and spot the door on the right wall. The symbols
on the door give you a clue on how to arrange the blocks. Moving the blocks around will also cause various
doors to open and close making the entire process of opening this next door rather difficult. While standing on
the ledge and facing the pit, turn left and pull out the block. Push it into the pit then pull out the block from the
right wall and put it in the opening on the left wall. Plane shift back through the bars and head to the other
passage past the dial.
Pass through the bars on this side and use the portal. Head to the pit and retrieve the block you pushed in
earlier. Drag it across and flip it up onto the ledge and push it into the opening under the Z. Now return to the
other side, Plane shifting as necessary and move the block on this side from the left wall into the opening under
the O. All the doors should now open including the big doors in the back. You can grab the spear from the pit.
If you haven't already get the Vampire Wraith in this area then the corpse will come to life and attack.
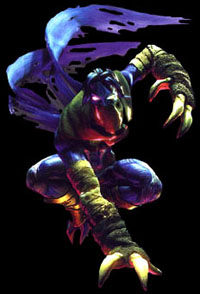 Enter the large open doors and enter the next area and turn right. Kill the Turelim Vampire who is looking the
other way then enter the room with the column and the circular pattern. Make a note of this pattern - it
indicates that the object can be constricted. Constrict the column twice and a secret wall slides open revealing
a Glyph Energy recharge symbol. Head up the passage and Plane shift through the gate and head left. Kill the
Vampire Wraith and head out onto the ledge in the next area.
Enter the large open doors and enter the next area and turn right. Kill the Turelim Vampire who is looking the
other way then enter the room with the column and the circular pattern. Make a note of this pattern - it
indicates that the object can be constricted. Constrict the column twice and a secret wall slides open revealing
a Glyph Energy recharge symbol. Head up the passage and Plane shift through the gate and head left. Kill the
Vampire Wraith and head out onto the ledge in the next area.
Jump and glide to the opposite ledge and kill another Vampire Wraith then turn back and jump to the ledge on
the left with the portal. Jump back to the ledge where you just killed the Wraith and check out the trench,
blocks and openings. The trench prohibits you from getting behind the blocks to push them into the wall. You
can move them sideways, so position the blocks in front of the openings then use your Force Projectile to push
them in. With the blocks inserted, another door will now open. Enter and kill the pair of Turelim Vampires then
investigate the symbol on the floor that matches the symbol on the large door you couldn't enter earlier. Note
the four columns with the gold knobs at the base and the circular patterns. Constrict each of the columns until
the knobs are pointing toward the symbol and then the large door will open back by the gate room.
Make your way back to this door retracing your previous path. You can jump off the ledge to the room below
and cross the pit. Constrict the dial to access the crack then Plane shift to morph the crack into a larger hole.
Use the portal in the next room then enter through the new doors. Listen to the story as you investigate the
cauldron hanging from the tripod. Those circles indicate you need to constrict the cauldron to open the door
leading out of here. Take the twisting passage leading down to the next room with the clock.
Check out the statue of Moebius and start pulling the switches to set the clock for six o'clock. The iris below
will open below the clock and you can jump in and glide to the bottom. This next room is a clever colored light
puzzle. The goal is to get the lenses to shine a matching color onto the symbols. The pair of lenses the light is
currently shining through needs to be switch so the light changes to purple. Constrict the front lens to blue and
the back lens to red to turn the light purple. Now move to the other single lenses and change them to match the
color of their symbols then constrict the central angled piece to turn the light beam onto each of the symbols.
When all three symbols have been activated another door with open.
Enter the passage and follow it down and drop off the tall ledges. When you arrive at the double doors you can
enter the next puzzle room. This puzzle isn't too difficult. Note the colored symbols on the wall to either side
of the rotating door. There are three colored dials and three colored pointers on the floor. Constrict each of
the dials until the matching colored pointer is pointing at the proper symbol. When all pointers are aimed at the
matching wall symbols the door will be in an open position and you can enter the passage beyond.
Continue until you arrive at a ledge overlooking a large room with two Turelim Vampires. Kill the Vampires then
head down the passage to the right to reach the giant gear room. Drop down off the ledge and you will
probably land on one of the three boxes you need to move. Push the box along the wall to either side then move
the middle box back to the wall and flip it onto the first box. Finally, pull out the third box and the gears will
start spinning and a pendulum ledge along the opposite wall will start moving. A platform will also rise out of
the floor creating a path for you to reach the upper ledge. Jump onto the spinning gear then jump to the center
of the gear (you won't spin up here). Line up and jump to the platform and finally glide to the far ledge. Make
your way around to the pendulum ledge and hop on and ride to the top of the arc and jump into the pit beyond.
Follow the passage and kill the Turelim Vampire who ambushes you from the alcove on the right. Look through
the bars and spot a block. Use your Force Projectile to push the block over the ledge then continue down the
corridor as it spirals downward. Another alcove and another stone block is ahead on the right - push it over the
same way. Kill the Turelim Vampire then jump onto the blocks so the camera shifts higher giving you a better
view of this puzzle. Do not make the mistake of trying to recreate the picture on the back wall. Move all the
blocks away from the center to reveal a new picture on the floor. This is the picture you need to recreate by
moving and flipping the blocks into their proper positions. When this is done the back wall will open and you
can continue down the passage until it ends at a deep hole.
Follow this next passage and note the symbols on the right wall. Make a mental note of the top half and bottom
half of each of these symbols then head into the next area. Kill the Turelim Vampire then investigate each of
the three circular chambers in this area. There is a central dial in each room with a portion of the symbol from
the previous hall. You need to constrict this dial until the symbol lines up with its matching other half. After you
have locked in all three symbols giant wooden platforms will start swinging in each of these rooms. You need to
jump onto each platform and ride it to the top of its swing and jump to the ledge where you can flip a wall
switch. When all three switches are flipped a door will open back in the passage below.
Follow this new passage down to a series of six star-filled portals. As you approach each portal a movie will
show you previous events from the game and some future events that haven't even happened yet. Continue down
the passage and learn more information about what has happened and what is going to happen. After the sixth
portal the passage starts to bend and twist and you will soon come to an alcove on the left with a door leading
to the Chronoplast Warp Gate. Activate the gate (and save your game) then return to the hall and move on to the
final battle...
SHOWDOWN WITH KAIN
Your final battle with Kain takes place in a very impressive arena like looks like a cross between a time machine
and a planetarium. After a lengthy speech from Kain the battle begins. You only need to strike Kain three times
with Soul Reaver to win this battle. Of course this means you must always remain at full health to keep Soul
Reaver active in the Material Plane. This is made easier with the health recharge symbol located in the center
of the lower level.
Your best strategy for fighting Kain is to stand in the recharge area and wait until Kain is charging is attack.
Immediately run to his location and attack. Each time you hit Kain he will flip a switch on the time machine and
move to a higher level. Your first two hits are fairly easy to pull off, but once Kain moves to the top level you
will not be able to climb that high before he zaps you and you lose Soul Reaver.
You will need a different strategy. Wait for Kain to zap you then recharge and immediately climb to the top
level and turn and fire your Force Projectile. This will interrupt Kain and he will have to start his recharge all
over again. Keep interrupting his recharge as you make your way around the upper level to his current location.
He may move around quite a bit so getting close enough to hit him with Soul Reaver could take awhile. Try to
run through two or three arches between each use of the Force Projectile. When you hit him the third time the
final movie will begin.
CONGRATULATIONS! You have vanquished Kain (for now) and redeemed your soul. We can only wonder what
adventures lie beyond the Time Portal...
LOCATION INDEX
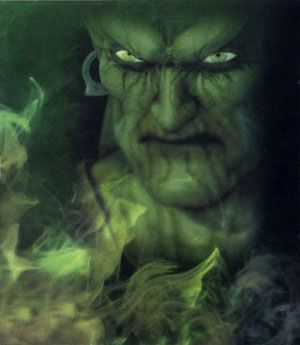 Here are some links to the text above which will assist you in locating those hidden power-ups.
WARP GATES
Underworld
Lake of the Dead
Raziel Clan Lands
Melchahim Clan
First Cathedral
Second Cathedral (Zephon's Lair)
Stone Glyph
Tomb of Sarafan
Drowned Abbey
Sunlight Glyph
City
Ash Village
Oracle's Cave
Chronoplast
ELDRITCH ENERGY CRYSTALS
Eldritch Crystal 1
Eldritch Crystal 2
Eldritch Crystal 3
Eldritch Crystal 4
Eldritch Crystal 5
HEALTH CRYSTALS
Health Crystal 1
Health Crystal 2
Health Crystal 3
Health Crystal 4
Health Crystal 5
Health Crystal 6
Health Crystal 7
Health Crystal 8
Health Crystal 9
Health Crystal 10
Health Crystal 11
Health Crystal 12
Health Crystal 13
Health Crystal 14
Health Crystal 15
BOSSES and SPECIAL POWERS
Defeat Melchiah to gain Pass-through Ability
Defeat Zephon to gain Wall-climbing Ability
Defeat Rahab to gain Swimming Ability
Defeat Dumah to gain Constrict Ability
Strike Kain three times to get Soul Reaver
Defeat Kain to win the game