Welcome to Oddworld

Forward
 Welcome to the second installment of the Oddworld Quintology. You are about to join over 600,000 others who have been exploring Oddworld with me since 1997 when I published my first guide. For those of you who have never played the original game or the Exoddus expansion game, I highly recommend you locate copies and add them to your library before they are no longer available. Meanwhile, enjoy what is perhaps one of the best launch games for the new Microsoft Xbox, and possibly the greatest adventure game to date.
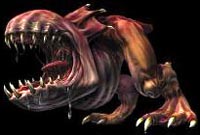
 Like the previous Oddworld games, Munch's Oddysee is huge. There are dozens of locations to explore and hundreds of creatures to meet, greet, possess, and possibly rescue. Those devious designers and programmers at Oddworld Inhabitants have created some clever puzzles and integrated some new styles of game play including teamwork and the ability to switch off between the two main characters at your discretion. Many of your old favorite enemies are back along with many new ones that are even more deadly.
This guide will provide you with solutions to every puzzle, combat strategies, and Sinjin's famous "Rescue Checklist" that you can use to locate every creature you need to rescue and, even a few you don't.
How to Play
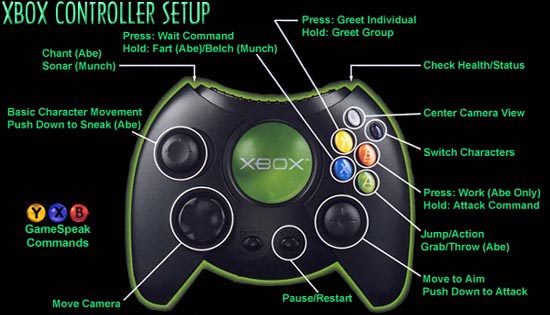
Munch's Oddysee plays just like the earlier adventures with a few new features added in. Here is the default control layout for the Xbox Controller. Abe and Munch have several shared commands and a few exclusives commands as indicated.
Meet the Natives
Oddworld is home to hundreds of characters and crazy items you can interact with. Rather than outline them all in one section, I will give specific notes within the walkthrough, as each new character and item is encountered for the first time. For now, let's meet our unlikely heroes and the two (soon to be) most wanted creatures in Oddworld:
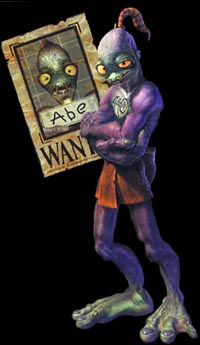
 Everyone's favorite Mudokon, Abe, savior of thousands (or at least 399) is back. He can command small armies or clear out a room with a single fart. While his moves remain pretty much the same he can now pick-up and throw other Mudokons to safety.
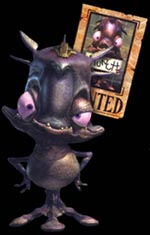
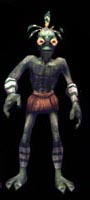
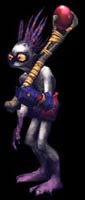
Munch is our newest hero and like so many heroes before him is the last of his race. This tiny creature is a one-legged (or rather one-flippered) Gabbit who is more at home in water than on land. Currently a victim of evil Vykker experiments, he has a funky Headport that allows him to use sonar and jack into remote control devices. Munch can help out Abe when large areas of water block the way. While slow-moving on dry ground, put him in a wheelchair and he becomes faster than Abe, and his thunderous belch rivals Abe's farts.
Spooce, Quarma, and other Oddities
 Spooce is the source of Abe's mystical powers and can be found growing throughout all of Oddworld. Just walk over a SpooceShrub to collect one unit of Spooce. Spooce is used to unlock doors, possess enemies, and resurrect or upgrade fellow Mudokon natives. At the beginning of each level I will tell you how much Spooce is required to complete the level. This number only includes the Spooce necessary to unlock all the doors. You may (and often will) be required to locate additional Spooce. If you run out of SpooceShrubs and need more Spooce you can always chant near a SpooceBud and it will bloom into a full Shrub that you can collect another unit from. You can do this as often as needed so you should never run out of Spooce. You can check your current Spooce by pressing the right trigger at any time.
Quarma (Karma...get it?) is a floating meter than ranks how well you are doing while playing the game. You start each level right in the middle (at 50) and then it's up to you where you go from there. If you rescue every Mudokon, Fuzzle, and Egg Crate your Quarma will go up. If you kill (or allow to be killed) anyone your Quarma starts to drop. Your Quarma does not change if these creatures or items are neither saved nor destroyed.
 Quarma is calculated for each mission and as part of the entire game. This averages out your overall performance and allows you to "mess up" a few times, but if you want to get the Angelic Quarma you are going to have to be pretty close to perfect. You can check your Quarma at anytime in the game by pressing the right trigger. Your Quarma is indicated by the halo over your head that ranges from a jagged red halo to a smooth golden ring.
Your actions (or inactions) will ultimately dictate the outcome of the game. If you have a Good or better Quarma rating you get the "Happy Ending" and two bonus levels. An Angelic rating is yours if you rescue every last creature in every level and also resurrect anyone who dies before leaving. In addition to the aforementioned rewards you also get a special "newspaper scene" at the end of the game.
 Feeling Evil? You can actually get a "bad ending" by getting a Bad Quarma rating, but this is very hard to do and you practically have to play the game with this objective in mind. You have to really go out of your way and kill a lot of innocent creatures. During the game you can even trigger some different newspaper headlines that reflects your "evilness" before you get the scary ending movie. And if you want to achieve the darkest rating you can, kill every single creature that you are supposed to save for a Black Quarma rating and a bonus newspaper scene.
This guide is designed to get you the Angelic Quarma rating. If you want to go for anything else then you are on your own...
Journey to the Big Well
Raisin's Cave -
SCRUBS: 0
NATIVES: 0
FUZZLES: 0
SPOOCE: 50
 You start the adventure inside a large dark cave. You can use this area to practice moving and get the hang of moving Abe around at various speeds. Nearby is the first of many Story Stones. The sign next to it says to "Press
  to use".
 Go stand in the blue circle with the arrows. This is an Activation Arrow pad. These will only appear in the first few levels until you get the hang of things. After you have stood in the circle and pushed the button the nearby door will open allowing you to enter the next area where you can begin to collect some Spooce. Run around this large area and collect as much Spooce as you want. You need 50 before you can leave.
 You will eventually encounter the mystical Shaman sent by the Almighty Raisin. This is the first of many appearances, as he will be popping in from time to time to offer advice and point you in the right direction. Heed his words, as the Almighty Raisin is all knowing and all wise...or something like that.
  Also take note of the Shaman Circle; that ceremonial pattern of rocks. This may or may not be nearby when the Shaman appears, but if you do find one of these circles you can always stand in the outer ring and press to hear his message again.
Finish exploring the area and gather as much Spooce as you want. When you have at least 50 you can head to the door along the upper walkway at the end of the cave. If you are having trouble finding 50 SpooceShrubs remember that you can chant to make them grow back and harvest fresh Spooce.
Approach the strange device next to the door. This is a SpooceLock. The number on the display indicates the amount of Spooce required to open this door. Press to use your Spooce. The counter will count down until the door is either unlocked or you run out of Spooce. Once you have unlocked the door you can exit this area and head out into the forest as you continue your journey to the Big Well.
SpooceShrub Forest -
SCRUBS: 0
NATIVES: 9
FUZZLES: 0
SPOOCE: 295
 Follow the path of Spooce and locate your first Mudokon Native 1 next to the sign to the right. Push
  to get his attention then let him follow you to the nearby Chant Circle. Chant Circles are all over Oddworld and they serve only one purpose. You need to locate one Mudokon Native for each circle and have them all chant to achieve the desired results. In this case press
  to have your new friend stand in the circle and chant to open the gate.
 Follow the trail of SpooceShrubs and you shouldn't miss anything. Follow all the signs that keep pointing you toward the Big Well while searching the surrounding area. After another visit from the Shaman you can explore pits to the right and left to get more Spooce. Use the Travel Well to shoot yourself out of the pit. These are the first of many Travel Wells you will find in Oddworld. They can shoot you to great heights when activated. More Spooce is along the narrow top of the large wooden wall.
You will want to tell your Mudokon friend to "Wait" by pressing  , then carefully make your way through the dangerous mine field. Activate and use the Travel Well to shoot to the scaffolding above and follow it to a canyon with Mudokon Natives 2-3. Have them chant to open the door then rejoin the first Mudokon back by the mines.
 Head to the locked door opposite the mines and use some Spooce to open it up. Inside, Mudokon Natives 4-5 wait to join your team. Head back toward the mines and go through the door past the large gate toward the Resurrection Totem.
The Shaman pops in to explain things, or you can read the info terminal. These totems allow you to resurrect any fallen Mudokons Natives. It will not work on Scrubs or Fuzzles. The top number on the totem lets you know how many Mudokons are floating around in Limbo and the bottom number tells you how much it costs to bring each one back to life. Press to deposit the proper amount of Spooce and a fresh Mudokon 6 will be deposited on the platform.
Now you can take all six Mudokons back to the gate and have them chant to open it up. Continue across the bridge until you come to a short wall. Abe can hop this easily, but his friends aren't as athletic. You need to position Abe behind each of his friends and press to pick them up and toss each of them over the wall. Continue following the trail of Spooce through the gate and down another ramp.
Head left at the bottom and you will come to a vertical cliff with Spooce attached to the side. While standing at the top move carefully to the edge of the cliff and jump up and tap forward to clear the edge then fall vertically through the Spooce to get as much as you can. Return to the top and repeat as needed until you have gotten as much Spooce as you want. You can also recruit Mudokon 7 from the top of the cliff. Toss him off if he refuses to follow you down.
 Now search the far left and far right of this section to find Mudokons 8-9. One is behind a dense mine field so you need to go around the hill and approach from the rear. The other Mudokon is inside a circle of mines that you will need to jump into then throw the Mudokon back outside the circle. Remember to have your other Mudokons "wait" when approaching mines.
Now that you have all nine Mudokons you can head to the plateau in the middle with the catwalk that spirals up. You need to go to the top and take at least five Mudokons with you. When you arrive you need to use some Spooce on the SpooceLock to activate the Travel Wells. Grab each of the Mudokons and toss them into one of the five wells to shoot them to their Chant Circles. When they are all in place the large gate will open and they will all teleport there.
Take your remaining four Mudokons and join the other five at the gate. After another visit from the Shaman you can command your team to work with the button. When the large gate opens a pack of vicious Slogs and their Slig leader will attack. Press and hold to have your team attack the enemy.
 When the battle is over you can head toward the stack of crates. Seems you can't make the jump so head over and activate the Info Terminal to get some info on that colorful vending machine.
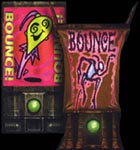
This is the first of many Vendos you will encounter in Oddworld. Each drink has a unique effect on Abe (or Munch) and is represented by colored bubbles coming out of your head. In this case the bubbles are purple indicating a Bounce Vendo that gives Abe the ability to jump extra high. When the effects begin to wear off you will see a five second countdown. Take a drink then jump onto the crates and over the fence.
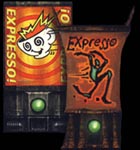 You're almost there. The only thing that stands between you and the end of the level is a large field full of Slogs and 85 SpooceShrubs. The exit on the other side is locked with a SpooceLock that just so happens to require 85 Spooce. If you don't have any extra going in you will have to get every single Spooce in the field. Dodging the pack of Slogs is made easier by making frequent visits to the Expresso Vendo on the raised section. Keep an eye on those orange bubbles and don't get caught in the middle of the field with no boost. You are safe from the Slogs while standing on the raised platforms at either end.
When you have 85 Spooce, open the lock and go through the gate to end this part of the adventure.
Escape from Vykkers Lab
Fuzzle Testing -
SCRUBS: 0
NATIVES: 0
FUZZLES: 38
SPOOCE: 20
After the movie you are now in control of Munch, and the first five Fuzzles, Fuzzles 1-5. Your first objective is to free all the Fuzzles in the testing labs. The path in front of you leads to your eventual exit and another visit from the Shaman. For now, head up the ramp behind you and go to the left where you can free Fuzzles 6-10. The first one is next to the door and the other four are along the wall in two groups of two.
 Head to the other side of the room and get Fuzzles 11-15. Another lone Fuzzles is in the corner and there are two more groups of two along the wall. Continue to the dark area to the rear of this area and order your 15 Fuzzles to attack the Intern using the button and then the button. You can now free Fuzzles 16-18 and pull the level to open the exit.
 Head down the ramp and into the new room where you will find two new items; a Rescue Portal and a Status Board. Stand in the glowing center of the portal and press to activate it. All of the Fuzzles should jump through. You may have to reopen it if there are a few slow ones that don't make it the first time. Check out the Status Board and confirm that 18 Fuzzles have escaped. The display also indicates that one Intern is "retired" and eight more are left on this level along with 20 more Fuzzles. Better get going. Open the SpooceLock and go through the next door.
The Shaman pops in for more tips. You can hit the button on any of these encounters to interrupt him, although he seems to take it rather personal. The next section of this level is rather tricky so you may want to do a QuickSave before each encounter just in case you lose a Fuzzle or two - especially if you are going for an Angelic Quarma ranking.
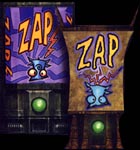 Head over to the Vendo and grab a can of "Zap Cola". This drink gives Munch the ability to zap the enemy with a paralyzing bolt of electricity from his Headport. A single zap only stuns the enemy and it will take repeated attacks to actually "retire" them. The duration of the power-up is noted by blue bubbles coming from Munch's head, and there will be a five second countdown as the Zap begins to run out.
Head down the ramp and try out your new power on the Worker Intern at the console. Press down on the right stick to zap the intern. Make sure to always face your opponent or the Zap will not work. You can even stun multiple enemies by rapidly changing the direction you are facing and clicking down on the attack button. Zap the intern until he finally screams and fades away then you can free Fuzzles 19-21.
Grab another drink from the Vendo then pull the lever and go through the next door with your new furry friends. Have them assist you in the attack on the next Intern and free Fuzzles 22-24. Continue down the ramp and attack the pair of Interns at the next station. Your six Fuzzles should make quick work of these two as long as you keep them stunned. Free Fuzzles 25-27 then continue on to the next Vendo, lever, and door.
 The next area has four Worker Interns, which are more than a match for Munch and his army of nine fur balls. You will need to be careful or you could lose a Fuzzle and hurt your Quarma. Lead the Fuzzles back up the ramp away from the door and tell them to wait. Then go through the door and cautiously approach the nearest Intern. DO NOT Zap him or you will alert all four of them. When he sees you quickly turn and run back through the door and up the ramp and let your friends take care of him. Assist with some zaps if you want then repeat the process for the next one. After you have "retired" two you can lead your Fuzzles into the room and finish off the remaining pair. Free Fuzzles 28-38 and lead them through the door to the portal. Activate the portal to free them then push the nearby button to view the Status Board and confirm you rescued all 38.
Pull the final lever and go through the door. Jump into the water and swim around collecting the Spooce. As you can see, Munch moves much better in the water than on dry land. Head to the left and go through the tunnel that leads to the next area.
Hydroponic Vats -
SCRUBS: 0
NATIVES: 0
FUZZLES: 0
SPOOCE: 99
This is a fairly simple level. There is nothing to rescue - just a straight run through the sewers collecting Spooce and avoiding Slogs. Some of the Spooce is stashed high on the ledges and you will need to use the various Travel Wells to shoot you to these hard-to-reach areas. Swim and jump around collecting all the Spooce and follow the trail as you go deeper into the sewers.
 The first section of dry land has a couple of Slogs waiting for you. Be careful when jumping onto dry land, as you are momentarily stunned when you land. Move fast and try to get back in the water before the Slogs attack you. Follow the sewer around and you will come to a shallow area where the Slogs can attack you in the water. Jump to the various dry ledges for safety and make your way forward. The next ledge is wider and has more Slogs, but it also has several water-filled holes that you can use to jump safely across.
You will eventually come to the final door with a SpooceLock that requires 99 Spooce. If you don't have enough then you will have to backtrack and find some that you missed. Remember that Munch cannot chant to grow more Spooce like Abe can. He must find all of the Spooce that he needs to open doors and wells.
Fluoride Tanks -
SCRUBS: 0
NATIVES: 0
FUZZLES: 13
SPOOCE: 191
This level looks much like the last only this time the sewer is filled with floating mines. You need to move very slowly between these mines or carefully jump over them while swimming. You will eventually come to your first group of Fuzzles. Three Fuzzles against an Intern aren't good odds, even with your Zap power fully charged from the nearby Vendo. Keep the Fuzzles inside their cages and head for the Vendo directly. After a quick drink you can go zap the Worker Intern. Try to position him so you zap him towards the water. Vykkers can't swim so one good zap will "retire" this guy permanently. Warning! If you zap him onto a floating mine the blast will shoot him back on dry land, and you will have to finish him off. Now you can free Fuzzles 1-3 and lead them to the nearby portal. Spend some Spooce to open the well and continue to the next area.
This next area has Fuzzles 4-7 waiting to be freed along with a pair of Worker Interns. The odds are still not favorable to include your furry friends, so use the Vendo to zap these evil creatures into the water. When they are gone you can free the Fuzzles and send them packing through the portal. Use the well to move to the next area.
The mines in this next section are a bit trickier. You may have to jump over some or swim very slowly through them to reach the next Fuzzle/Intern area. There are four Interns in this area so you definitely want to keep your friends locked up until after the battle. Use the same tactics you used earlier and lure the Interns one at a time around the corner and zap them into the water. Release Fuzzles 8-13 and send them through the portal to continue.
Continue until you reach the door with the lock that requires 99 Spooce. Enter and use the lever to open the door and the Expresso Vendo to put that flipper into overdrive. Now carefully race up the ramp and through the mines. The Interns will be in hot pursuit, and you need to keep moving at all times to avoid getting caught in the blast radius of any mines they trigger.
 Continue around this passage and you will come to a Teleporter. Step on and you will warp to another teleporter pad back out in the sewer. Jump into the well to be bounced around until you finally land on the final Teleporter inside a cage with lots of Interns. You will warp out before they can hurt you.
Snoozie Lab -
SCRUBS: 0
NATIVES: 0
FUZZLES: 12
SPOOCE: 0
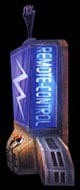 The Poop Chute; your final escape route, is just a few rooms away. Unfortunately, the final room is filled with Interns and there is no way you can take care of them all by yourself. Luckily the Shaman has some advice for you. Head for that remote control console and use your Headport to "jack in" and take control of the Snoozer robot below.
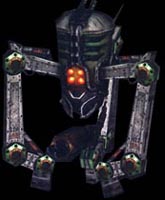 Once you have control of the Snoozer you can control him just like you would control Munch. The Snoozer has two firing modes, both of which are activated by pressing down on the right stick. From a distance, the Snoozer fires tranquilizer bolts, and up close he fires a zapping bolt of energy much like Munch can after drinking a Zap Cola. Your goal here is to either "retire" all the Interns or at least put them to sleep.
 You will need to blast several crates of explosives before you can even get to the Interns. Work your way deeper into the room and eliminate everyone between Munch and the final exit. Watch out for the Armored Shooter Interns near the exit that have both weapons and armor. They put up a good fight, but should go down just like the rest. If you lose your Snoozer in a fight you can simply summon a new one.
Keep in mind that sleeping Interns will wake up after a short time, so you need to act fast once you are back in control of Munch. Press the left trigger to return control back to Munch. Now quickly make your way down to the Expresso Vendo and get some Java so you can pick up the pace. Enter the large room and quickly run around the perimeter zapping the cages and freeing Fuzzles 1-12. Use the lever to open the door leading to the Portal and set the Fuzzles free. Confirm your total on the Status Board then jump into the Poop Chute when ready.
Return to the Raisin
Mudokon Pens -
SCRUBS: 0
NATIVES: 6
FUZZLES: 12
SPOOCE: 65
After Munch and Abe bump into each other they can complete the rest of the adventure together. Each character can use their own unique skills to compliment the other and working as a team Abe and Munch can save the rest of Oddworld. Now that there are two of you, to keep things clear on which character is doing what, anytime you should be controlling Munch I will use this color text. Abe's portion of the guide will remain the default text color.
Begin by having Abe collect the four Spooce in this clearing. It doesn't really matter who collects the Spooce. Abe and Munch maintain their own individual Spooce inventory, but they can both contribute to SpooceLocks. In this case you are one Spooce short so Abe needs to grow a new shrub and get the fifth Spooce to open the door.
After a quick visit from the Shaman you encounter your first Egg Nest. These are empty when you first find them. Whenever Abe or Munch dies during the game their spirit returns to these nests, and the other character can bring them back to life by pressing the button while standing next to the egg.
Continue on to the wall and pick up Munch and toss him onto the high platform in the middle next to the Info Sign. Quickly jump up with him before he hops back down and listen to the Shaman and read the Info Sign. You now have the ability to possess enemy creatures and do all sorts of fun things. Begin with the Slig down by the water.
Possession is a bit different than the previous Oddworld games. You now need to chant for a specific duration to create a Possession Orb. You then control this orb (much like the farts in Exoddus) and guide it toward your target. The duration of the orb and the distance it can travel is directly related to how much Spooce you spend when chanting to create it. The more Spooce you use, the bigger the orb and the farther it can travel. Orbs will always sink to the lowest portion of a room so you cannot possess enemies above you. Orbs will also sink in water. If you lose a Possession Orb you also lose the Spooce used to create it, so be careful.
 Use at least two Spooce to create your first orb and send it down to the Slig Bouncer. Once you have control of him you can make him jump in the water and drown, jump on a mine and blow up, or simply chant once again to make him explode - yuck! Now that the coast is clear (literally) you can hop down and have Munch join you. It's time for the Gabbit to get to work.
Jump in the water and go left avoiding the mines. Jump up onto the shore and grab a drink from the Zap Vendo then jump to the tops of the two columns and zap the Sligs into the water. Continue to the far left end of this area where you will find Fuzzles 1-4 inside the first of three Mudokon pens. Wait for the Slig to go to the far right then quickly zap open the cages and order the fur balls to attack. Make sure to get all of them to work together by holding down then holding down . When the Slig is dead the door opens and you can collect your first set of Fuzzles.
If any Fuzzles die now or in upcoming battles it's up to you whether you reload and try again. I personally recommend doing a QuickSave before every Fuzzle combat just in case...
 Check out the Wheelchair pad. Munch can use these squeaky wheelchairs to get around very fast on dry land - even faster than Abe! Press while moving to do a jump/flip and press when stopped to get out of the chair. If Munch ever loses a wheelchair he can simply find one of these pads and pull the lever to get a new one. Hop in and give it spin. Head up the ramp and down the other side.
A Slig is down on the pier. You could risk your Fuzzles in another combat situation, or swim back to the Zap Vendo and get juiced up then return to the pier and zap the Slig into the water. With this threat out of the way you are free to explore the rest of this section. The path forks with a Rescue Portal at the junction. Each fork leads to another Mudokon pen.
Head down either path and repeat the process of waiting for the Slig guard to move away from the Fuzzles. Free them quickly and order them to attack. You will get Fuzzles 5-8 in one pen and Fuzzles 9-12 in the other. Return to the fork and open the portal to send all twelve Fuzzles to safety and boost that Quarma.
By now you should easily have the 60 Spooce required for that SpooceLock back by the first Mudokon pen. Return there and contribute some Spooce to open the lock and the Travel Well back by where you left Abe.
Abe can now jump in and shoot over to the other side. Go to each of the three pens and get Mudokons 1-3 to follow you back to the pier where you can put them to work chanting in those circles. This opens another Travel Well out in the lake.
Munch can now jump into the water and then jump into the well to get shot up to the high ledge overlooking the next section of the map. There is a Remote Control device here so go ahead and jack in to take control of the giant cargo crane. This is really lots of fun.
 Use the crane to pick up the Bonepowder Kegs and drop them on the Sligs below. Position the claw over the target and press when the light turns green. Press once again to drop your cargo when it's positioned where you want it. Try dropping a keg between a pair of Sligs to get them both if they are close enough. Finally, you will need to drop a keg on the stack of crates that block the path into this canyon so Abe can enter.
Now that the canyon is free of Sligs and the wall of crates is destroyed Abe can lead his three friends into this new area. Have the Mudokons wait while you stand in the middle of the canyon in a location accessible to the claw.
Switch to Munch and have him take control of the crane. Pick up Abe and move him to the right where you can drop him off on the ledge.
 Abe can now enter the valley and collect lots of Spooce and also get Mudokon 4 who is meditating back by the hut. You will need to pick up this Mudokon and toss him down into the canyon to join the first three. Now head along the narrow ledge to the right until you arrive at a pair of Bonepowder Kegs.
Abe can pick up these kegs and toss them into the next canyon where more Sligs are patrolling. There are more kegs further back along this ledge that you can use to blow up the hard-to-reach Sligs. Be careful when throwing kegs from the back ledge. If you throw a keg in the well it will shoot back up to the ledge you are on and BOOM! When all (or most) of the Sligs are gone you can return to the first pair of kegs and blow up the next wall of crates below. Drop down to rejoin your four friends then switch back to Munch.
Have Munch get in a Wheelchair and head down the path doing a flip over the row of mines. Squeak around the corner and get the attention of the Sligs guarding the exit. When they start to chase you turn and head back jumping the mines once again. When you hear the Sligs go BOOM it is safe to return. Note: If you ever hit a mine while in the wheelchair you will be knocked out of your seat and have to get back on.
 Get the attention of your friends by holding and lead them into the new valley. If there are any Sligs remaining you can order your friends to attack. Head up the middle ramp and drop into the pit on the right to collect some Spooce. Use the Travel Well to get out of the pit then head back up the ramp and drop into the left pit where you can free Mudokons 5-6.
These are Tomahawkers, a special fighting class of Mudokon. They are equipped with large Tomahawks they use to bash their enemy and are quite deadly. Pull the lever to open the cage and release them. If any Sligs remain you can test out your new fighters, otherwise gather all six Mudokons and head up to join Munch at the exit.
Push the button to open the final gate and command your troops to attack the Sligs within. When the Sligs are dead you can check the Status Board to confirm your score. You should have already sent the Fuzzles home and Native Mudokons remain behind, even after you have rescued them. Get three of the Mudokons to chant in the circles to power-up the Teleporter then have Munch follow you onto the pad. You cannot leave until you both are standing on the pad.
Sloghut 1027 -
SCRUBS: 9
NATIVES: 0
FUZZLES: 0
SPOOCE: 0
 Munch takes charge as this level begins. Use the nearby Remote Control to activate the crane. Now move the crane around and pick up the Sligs and Slogs and toss them into the Recycler at the opposite end of this area. If you get tired of watching these guys getting chopped up in the fan blades you can always dump the Sligs in the Slog pens and watch them get chased around before finally getting eaten.
 Now use the crane to pick up two of the three Mudokon Scrubs hard at work on the high ledges. Drop them in a safe section (away from the recycler) on the ground. The third Scrub is out of the crane's reach so have Abe climb down the ladder and stand so that Munch can pick him up with the claw and drop him on the same ledge.
Abe can now pick up and toss the Scrub to the ground. Have Abe take one last crane ride over to the lever at the top-right and flip the switch to open the exit. Now he can drop to the ground and lead Scrubs 1-3 into the next area.
Have Munch join the party. Grab a drink from the Expresso Vendo and walk onto the Teleporter to continue along the catwalk. Carefully make your way along the winding catwalk and climb down the ladder at the other end to reach the Remote Control. Jack in and use the crane to get the Bonepowder Kegs and drop them on the Sligs to clean out this room.
 Grab and toss your first three Scrubs to the lower floor then climb down or jump into the cage on the right where you can say "hello" to Scrubs 4-9. The door to this cage opens by standing on the Foot Switch. Once you step off the pad a countdown begins until the door shuts. The timer varies in length with each pad you encounter and is visually indicated by the circle of green lights around the perimeter.
 Now that you have all nine of your Scrubs you just have to get them to safety. Unfortunately there is a large hall filled with Mines, Sligs, and Slogs that stand between you and freedom. Climb the ladder and grab some Expresso from the Vendo then drop down and grab your first Scrub. Run into the next room dodging gunfire, mines, and the Slogs that chase you into the next room. Quickly head up the steep ramp and jump the gap to lose any pursuing Slogs and drop off your first Scrub.
Have Munch activate the crane and drop some kegs on the Slogs that should now be wandering around the base of the ramp. Once they are dead they do not regenerate, so you won't have to worry about them on future trips.
Abe can now jump into the Travel Well and shoot to the catwalk. Make your way back to the other end where the rest of the Scrubs are waiting. Use the Teleporter to get around the fence and drink another Expresso and repeat the dangerous run eight more times until you have all Scrubs safely to the other side.
You will want to check your health (right trigger) after each run through the gauntlet. If your health is down to two or three birds you may want to kill yourself and have Munch bring you back with the nearby Egg Nest. You do not want to die halfway through the run or you will very likely lose one of the Scrubs. If by some chance the Scrub doesn't die when you do he will start to work at that location. You may want to QuickSave if you aren't sure.
Now that you have all nine Scrubs at the other end of the complex you can order them to work. They will pull the levers and the door opens revealing a Rescue Portal. Use it to send these guys to safety then check the Status Board to make sure nobody got left behind. Have Munch join you on the Teleporter to end this level.
The Mudokon Fortress -
SCRUBS: 0
NATIVES: 8
FUZZLES: 6
SPOOCE: 0
Munch takes charge once again. Head to the water and jump in. Swim out and locate the two cage-covered platforms on the lake. One cage is full of Sligs while the other has a Wheelchair Pad and six Fuzzle cages. Release Fuzzles 1-6 to fill your Fuzzle quota for this level. Now all you have to do is keep them alive until the end of the level.
Hop in the wheelchair and lead your furry army back toward the mainland and have them attack the lone Slig guarding the bridge. Continue to the shore and head left until you see the entrance to a valley with several Sligs. Stop!
 Abe needs to run around this area and get Mudokons 1-4 to join him. Now head toward the entrance to the valley with those same Sligs that Munch is watching from the other side. The hovering Chant Suppressor prevents you from possessing any of these Sligs, so you are going to have to fight. This is a difficult battle with several tactics, so you may want to QuickSave your game.
You can fight this battle entirely with your Mudokons, or you can also switch to Munch and have him roll in with his army of six fur balls. With a combined assault the four Sligs will fall quite fast, but timing is crucial and you may lose a Fuzzle in combat. Remember that Fuzzles cannot be resurrected, so you may want to keep them safe and use your Mudokons.
When the melee is over tell everyone to wait and head out onto the bridge past the area where Munch rescued the Fuzzles. Get as close to the second island as you can then launch a Possession Orb and take over the nearest Slig Bouncer. Have him start beating on a fellow guard until one of them is dead. If your possessed Slig survives have him continue beating on other guards until everyone is dead. You can explode your final Slig or have him walk into the water. You can even have him open the cages and release the Tomahawkers before killing himself.
Abe can now safely enter the second cage and get Mudokons 5-6 to join him. Return to the valley and get the rest of your party and head left around the large mountain. Feel free to climb the various ramps and collect the Spooce trails on the cliffs. Eventually you will come to a Resurrection Totem and a Transformation Shrine.
 The first matter of business is to resurrect any fallen Mudokons. You should have four Natives and two Tomahawkers at this point. You now need to bring all four Natives into the circle of stones surrounding the shrine and deposit the proper amount of Spooce. The Shrine will strike the Mudokon with a bolt of energy and transform them into a Tomahawker - cool, huh? Repeat until all Mudokons have been upgraded.
Repeat the process with the remaining Native and you should end up with a fighting force of six Tomahawk Warriors. Those Sligs had better look out now!
Continue around the mountain until you come to a wooden bridge on the left and a dirt slope leading up to the fortress. There is a Tomahawker on guard duty because the door is stuck open. If you can get it to shut he will join you. Take your crew inside and have your Mudokons chant in the circles to close the door. Have everyone wait here while you grab Mudokon 7 and take him out the door to the left. Escort him to the Shrine and turn him into a Tomahawker.
Return to the slope opposite the bridge and go up once again and this time have Mudokon 8 join your team. You now have all eight Mudokons for this level. Circle around and find any door to enter the fortress and rejoin the rest of your party. Head out the door to the right of the wooden ramp and go down the dirt slope. Have Munch and the Fuzzles remain here and take your warriors to the right and then to the left to clear out the Sligs in this area. You can also possess and kill them if you stay far enough away from the Chant Suppressor.
More Spooce is stuck on the cliff if you want to take the time to grab it. Make sure everyone is all gathered together and tell them to wait by the big door to the left of the dirt slope you just came down. Jump in the well to get shot to the high ledge. A path leads back to the fortress, but you need to cross the narrow wooden bridge to the next tower with the spiral ramp leading down.
 You should now have a clear view of your first Storm Circle and the pair of Sligs guarding it. Possess one of the Sligs and have him beat up the other one before jumping off the cliff or exploding yourself. Go stand in the Foot Switch to let everyone in then order your Mudokons to start chanting to activate the Storm Circle. After an impressive display of natural forces the dry lake will now be filled with water.
Time for Munch to actually do something. Have him wheel out of this area and head right as you exit. You should quickly come to the wooden bridge you've been ignoring up till now. Have your Fuzzles stay here then quickly race across the bridge and across the patch of ground as Sligs try to shoot at you. Jump/flip right into the lake, wheelchair and all, and swim to the platform to the left where you can use the Remote Control to operate the crane.
Begins picking up the Sligs and dropping them into the water. Several Sligs are too far to the bottom out of the crane's reach. You could return to that area and lure them out so you can catch them with the claw or just leave them for Abe. Swim to the back of the lack and jump to the high ledge and flip the two levers to open some gates. Now stay here and wait for Abe.
Abe can now bring his elite fighting force into this area. Wave at the Fuzzles as you pass but do NOT bring them along. Cross the bridge and head to the left where those Sligs are that Munch couldn't reach with the crane. Possess one of them and have him cross the bridge. Continue around to the right until you are in the opposite corner of the lake. Go up the ramp and have him pull the lever to open the final gate leading to the exit. By using the Slig to do this you can recon the upcoming area and avoid fighting the Sligs guarding this lever. Either kill the Slig or have him die while beating up on one of his fellow guards.
The safest way across the bridge is to have your Tomahawkers wait at this side of the bridge then have Abe run to the other end and taunt the guards into following him. Run back across the bridge with one or more Sligs in pursuit. Jump over your warriors and give the attack command and watch the bloodbath. When the Slig numbers have thinned you can take the party across and clean up the rest of the Sligs who are stationed on the far side of the exit.
With all opposition eliminated, Munch can swim back across the lake and cross the bridge to get his Fuzzles. Have them follow you across the narrow wooden bridge then go left and cross the larger bridge. The Rescue Portal is right there in the corner, so use it to set them free. The Status Board should confirm your rescues.
All that's left is for Abe to have his friends chant inside the exit area to activate the Teleporter. Once Munch joins him on the pad you are outta here!
Sloghut 2813 -
SCRUBS: 11
NATIVES: 0
FUZZLES: 0
SPOOCE: 0
This Sloghut is designed much like the first. The lever we need to use to open the door for Munch is behind a fence. Abe needs to circle around the upper area and avoid the Slig as he jumps into the Travel Well. After a few shots you are now standing on a ledge across from the ledge with the lever and a pair of Scrubs. Jump down to the lower platform between you and the far ledge then make the final jump to the lever and pull it to open the door.
Munch can now go and enter the door Abe just opened and use the Remote Control to operate the crane. You know the routine - Sligs and Slogs into the Recycler. The Scrubs are out of the crane's reach so Abe will have to save them.
Abe can toss Mudokon Scrubs 1-2 off the ledge he is currently standing on. Drop down and cross the compound then climb the ladder to reach the Scrub 3 and toss him down. Pull the lever to open the exit then drop down and get all three to follow you carefully past the Recycler and into the next area.
Munch brings up the rear and can grab a Zap Cola before teleporting to the other side of the fence to follow the catwalk into the next room. This is a loud room with explosions going off at regular intervals. A Slig attacks you as you round the corner, so zap him off the catwalk and continue down the long stretch. There are Sligs pulling levers that drop the Bonepowder Kegs causing all the noise. Quickly zap each one off the ledge onto the mines below. It should only take one or two zaps each, and if you are quick enough you can get all four Sligs knocked off without having to revisit the Vendo.
Follow the catwalk until you reach the ladder then climb down to the Remote Control and jack in to control the Snoozer back near Abe. Move the Snoozer down the large hall. Even with half the Sligs dead there are still plenty of explosions to avoid. Go down the ramp into the final room and start shooting all the Sligs in this area to put them to sleep. They Sligs put up a good fight and eventually your Snoozer will get destroyed. Just have Abe pull the lever back near the entrance to create a new one. When everyone is dozing you can release control of the robot and switch back to Abe.
Toss your three Mudokons into the area with the Snoozer platform and drop down yourself. Grab a Mudokon and make the dangerous run through the next hall. The left side of this passage is full of mines, so stay to the right and time your runs between explosions. Head down the ramp and toss your Mudokon into the Travel Well to shoot him to safety. Run back and repeat for the other two Scrubs you left at the other end.
During your trips through the exploding hallway you may or may not notice Mudokon Scrubs 4-7 hard at work. You will need to collect each of these and bring them to the Travel Well. It's quite likely that sooner or later the sleeping Sligs will wake up. Simply switch to Munch and have him use the robot to put them back to sleep. Abe can also pick up sleeping Sligs and toss them onto any nearby mines, or you can possess a Slig Popper and start shooting the unarmed Slig Bouncers.
It's also likely that Abe may die on one of his trips through the hall. If this happens just have Munch drop down and use the Travel Well Abe has been using to shoot himself to the Egg Nest near the exit and bring him back.
Once you have all seven Scrubs safely at the exit have them use the levers to open the door and then use the Rescue Portal to send them to safety. A quick check of the Status Board indicates you are still missing four Scrubs. Your missing Scrubs are back in the previous hall; one on each of the Slig-occupied ledges.
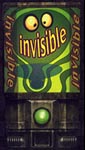
You may have noticed a pair of Vendo machines inside the room with the portal. Grab a drink from both the Bounce and the Invisible Vendos then make your way back to those ledges. Jump to the ledge and get the Scrub's attention with then tell him to wait with then grab and toss him down to a safe location with . If you are fast you can probably get Scrubs from two ledges before the drinks wear off. Visit the Vendos as often as necessary, and you will eventually bring in Mudokon Scrubs 8-11.
Once you have sent them safely through the portal you can have Munch join you on the Teleporter and get out of this crazy place.
Paramite Run -
SCRUBS: 0
NATIVES: 0
FUZZLES: 0
SPOOCE: 99
This level is pretty straightforward. You need to get from Point A to Point B while avoiding a few hundred Paramites, a few dozen Mines, and collecting 99 Spooce to unlock the exit. Sound easy? Think again. The good news is that both Abe and Munch have to make the trip, so you can use their combined Spooce to open the exit.
Note: If either character dies during the Paramite Run they can be brought back by using the Egg Nest at the starting location. This means that Abe may have to run back to the beginning if Munch dies on his run.
 You can start with either character, but I recommend Abe only because when Munch hits a mine he gets knocked out of his wheelchair and usually dies before he can get back in it. When you are ready grab a drink from the Expresso Vendo and jump the fence. You can easily outrun the Paramites as long as you keep moving. Grab all the Spooce you can, as there isn't that much extra, and you can't really stop, chant, and grow more.
As you round the first bend to the left you come to a fork in the canyon. The left fork is the slightly longer path and as such rewards you with more Spooce and an Expresso Vendo halfway through, although you probably won't need it. Feel free to take either path, but I'm going left.
The Spooce is now spaced out between mines. If you weave in and out of the mines collecting the Spooce the Paramites will inevitably hit the mines and blow up. Mines regenerate but Paramites do not, so you could conceivably kill all the Paramite in this level if you took the time. Keep moving forward and use the Vendo on the high walkway if you think you need to. Jump the wall and head right at the giant skeleton.
Continue grabbing Spooce as the canyon wraps around to the left. Another fork leads to the right - this is where you would come out if you had taken the right fork earlier. Keep going left and collect more Spooce. Jump another short wall and make the final dash for the exit. Jump to safety and deposit your Spooce in the SpooceLock. WHEW!
Now Munch gets to make the trip. Climb on your wheelchair and jump the first fence. Things should be calmer, as most of the Paramites followed Abe to the other side of the canyon. Expect a large pack when you arrive at the final stretch.
When you reach the fork stay to the right this time and you can collect all the Spooce that Abe didn't get on his run. A group of mines block the way into the narrow section of the canyon. Jump over them and keep moving. When you reach the end you can turn left at the structure. Ignore the Spooce on the roof and jump the short wall.
Angle to the right and pick up any Spooce Abe might have missed as you come into the final stretch. Race towards the final fence and jump it to rejoin Abe. Deposit your Spooce to unlock the door. If you don't have enough then have Abe grab a drink from the Expresso Vendo and run back out and get the missing Spooce. Once the door is unlocked you can both get on the Teleporter and go visit the Almighty Raisin.
Puds and Chumps
Meep Herder Village -
SCRUBS: 0
NATIVES: 9
FUZZLES: 0
SPOOCE: 0
Munch gets things started by talking to the Shaman then grabbing a wheelchair from the pad and heading down the wooden ramp to the right. Squeak past the four Mudokons that are meditating and talk to the Shaman once again near the Meep pen. It seems you have to get all those fluffy meeps inside this pen before the Natives will talk to you.
 Herding Meeps is pretty easy. Even Abe can do it, but Munch can do it faster in his wheelchair. Just get behind the Meeps and they will always run away from you. You can try to zigzag and move multiple Meeps at the same time. Get them to move into the pen at the far end of the valley and when the last Meep enters the gate will close and the Mudokon Meep herders will snap out of their depression and join your cause. Note: If you simply can't get the hang of herding the Meeps you can always bring Abe down and simply pick them up and throw them in the pen.
Return control to Abe and have him head toward the Wheelchair Pad. Jump over the fence and get Mudokon Native 1 from the pedestal. Lead him down the wooden ramp to the area with the Chant Circles and the Slog pups. Have the Mudokon attack the pups while you
head to the left and toss Mudokon Native 2 off his pedestal. If any pups are left he can join the fight.
When the area is clear, throw both Mudokons into the Travel Well and then jump in yourself to join them up top. Now is a good time to get the Spooce lining the cliff walls. You are going to need at least 100 Spooce shortly. When you have cleaned off the cliff lead your pair of Mudokons to the right and you will find a Transformation Shrine. Leave them here and continue on to the Resurrection Totem. As you approach the totem you will find Mudokon Native 3 on another pedestal. You can also check out the totem and find that there is a Mudokon in limbo. Spend some Spooce to resurrect Mudokon Native 4.
Continue collecting the Spooce behind the totem and all along this upper area. There is more Spooce on the broken walkway leading down to the valley floor. Head to the center spire and make your way up the broken spiral catwalk. Toss Mudokon Native 5 off the top then jump down. Collect any remaining Spooce then head toward the Meep pen.
Once you have found Munch and Mudokon Natives 6-9, have them follow you back up the ramp to the Shrine. Don't forget the last Mudokon you just got. Once back at the Shrine you should now have nine Natives. Have all the Mudokons gather inside the stone circle then turn them into Tomahawkers by using Spooce. Now lead everyone back to the canyon with the Chant Circles and start tossing everyone down.
Once Abe and Munch have joined the party you can order everyone to work, and the large door will open. Lead everyone inside, and use the levers to go through a series of doors. Slogs will attack after each door but they are no match for your Tomahawkers. You can even have Munch use the Zap Vendo if you want an even greater advantage.
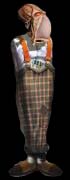
 In the final Slog room have everyone wait on the Foot Switch so Abe can enter the next room. Jump over the wall, and you will see the Glukkon Pud in his office just ahead. Create a nice little Possession Orb (3 or 4 Spooce will do nicely) and send it towards him. You will need to press
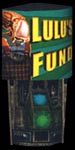
to make the orb jump over the doorway. Once in command of the Glukkon, have him deposit his life savings into the nearby Lulu's Fund Vendo.
In the final Slog room have everyone wait on the Foot Switch so Abe can enter the next room. Jump over the wall, and you will see the Glukkon Pud in his office just ahead. Create a nice little Possession Orb (3 or 4 Spooce will do nicely) and send it towards him. You will need to press
to make the orb jump over the doorway. Once in command of the Glukkon, have him deposit his life savings into the nearby Lulu's Fund Vendo.
This selfless act activates the Teleporter back in the previous room. Return there and meet up with Munch. When you both step on the pads, you are transported to the next level to do some more fund raising.
Brewery to Be -
SCRUBS: 15
NATIVES: 0
FUZZLES: 0
SPOOCE: 30
After the briefing from the Shaman you can have Abe collect the Spooce from the sides of the canyon. There are 60 Shrubs stuck to the walls, but it only takes 30 to open the lock. Collect as much extra Spooce as you want then turn control over to Munch.
 Get Munch into a wheelchair then wheel him down into the main valley. Those of you who have played the previous games will instantly recognize the Scrabs in their new 3D form. They aren't that smart, and while they look fast they are no match for our speedy Gabbit. Start making circles around the valley collecting Spooce and leading the Scrabs on a merry chase. When you have them all (or at least most of them) head for one of the two open pens. Ride up the ramp and jump the gap at the top to flip the lever and trap the Scrabs. Do a jump/flip to the catwalk and follow it back to the valley. If any Scrabs still remain, lead them into the second pen and lock them up. Park somewhere out of the way and go back to Abe.
Abe can now enter the Scrab-free valley and head toward the center island. Jump onto the lowest portion of the catwalk and start making the trek to the top. Follow the bridge out to the tall spire then continue up to the higher bridge and start across. Stop before the Sligs spots you and prepare a nice little Possession Orb. Possess the nearest Slig Popper and have him circle the windmill to take care of the other two. After he has killed his buddies you can pop him.
Locate the Teleporter and get inside the structure. Climb the ladder and begin the long walk to the top, jumping over the gaps as necessary. Along the way you will encounter Mudokon Scrubs 1-3 hard at work and a few Sligs you can possess and dispose of as you see fit. Toss each of the Mudokons to the floor below. When you reach the top, jump in the well to be taken to a room with Chant Circles. Jump right back in the well to return to the ground floor of the windmill where your three Mudokons wait.
 Toss all three Mudokons into the well then join them back in the room with the Chant Circles. Tell them to work and they will get the windmill working, which sends power to two large gates and activates the Teleporter near the exit. Now go stand on the Foot Switch to open the final door leading to the Glukkon Chump. Send in a Possession Orb and have him empty his pockets into the nearby Lulu Fund Vendo. His generosity actually kills him!
Pop into the well to return to the ground floor and teleport back outside where your three Scrubs are working. Toss them to the valley floor and join them. Now go to the large door that just opened - this is the door to the left of the starting location, and collect Mudokon Scrubs 4-15.
Head across the valley to the other door that leads to the exit. You can either have Munch join your party or take control of him directly and go there yourself. Inside this area is a Rescue Portal you can use to set the Scrubs free. Confirm your score on the Status Board then you both can use the Teleporter to leave this area.
Fuel Fields -
SCRUBS: 0
NATIVES: 7
FUZZLES: 0
SPOOCE: 0
Prepare yourself for one of the most frustrating and difficult levels so far. I highly recommend frequent use of the QuickSave feature during this level, as you will mostly likely die dozens of times. Abe can begin the level by running around and collecting all the Spooce between here and the water. Stop near the pair of Vendos and wait for Munch.
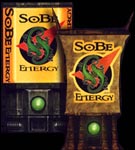 Not much for Munch to do in this area. In fact, you can even have Abe carry him to the water to save some time. Make a note of the new Vendo machine. This is a SoBe Vendo that will replenish any lost birds from your health ring. I found very little use for it as I usually died before I had the opportunity to heal myself.
Get juiced up with some Zap and jump in the water. Make your way to all the platforms with Sligs on them and Zap them into the water. When all the platforms are clear between Abe and the bridge have Munch return to the Egg Nest near the Vendos and get ready for lots of egg hatching.
Abe now gets to do some difficult platform jumping. Each time you miss a platform you lose lots of birds. You can usually miss 3-4 jumps before you die, and Munch has to hatch an egg. Collect the Spooce as you go and QuickSave after a couple successful jumps to avoid having to start over. As you get near the bridge you will come to a series of three large platforms that are connected. Survey the situation and plan your attack.
A pair of Sligs are on a pedestal on the shore to the left, and the entrance to Magog Motors is packed with heavily armed Sligs. To make matters worse, there are Chant Suppressors to the right so you can't possess any of the Sligs in the compound. Chant to get a Possession Orb of at least 4 or 5 Spooce and send it bouncing across the three small platforms. Use the button to make the orb jump. Once on the bridge, send the orb to the left and possess one of the two Sligs.
Walk across the bridge and into the compound. Head down the ramp in the rear and open fire on the two Sligs at the bottom. You are totally outnumbered and will quickly die, but your ultimate goal is to take out as many Sligs as possibly while luring them all down into this lower area. When this Sligs dies you can take possession of the other one and send him in to do his best. Shooting the Bonepowder Kegs will set off a chain reaction and cause some satisfactory damage.
Now Abe can make the final hops to the bridge. Hopefully the Sligs have been lured away from the gate; otherwise you might take some hits as you head toward the gate then cut left to follow the shore. Collect some Spooce and jump the tall fence at the end. You are safe for the moment. Locate the pair of Tomahawkers and toss Mudokons 1-2 over the short fence into the next area.
Now things get totally insane. Don't get confused by all the gizmos in this area. Even though there is a Wheelchair Pad, Resurrection Totem, and Transformation Shrine, you can avoid using all these devices simply by using your QuickSave. Of course, if your think saving and restoring is "cheating" then you will probably be using all of these devices, and you had better bring Munch up to this point in the level and have him standing by the Egg Nest.
The path ahead is filled with hundreds of mines so thick you could never hope to walk through them. Tell your Mudokons to wait then take the ramp to the top and note the series of circular platforms leading to the far end. Two of these platforms have a Mudokon on them. Start hopping from platform to platform and when you reach each Mudokon, pick him up and toss him into the Spooce-filled center. Make your way to the opposite end and jump down near the Bonepowder Kegs.
Things get really crazy now. QuickSave if you want then toss a keg onto the mines to start a massive chain reaction. Start running down the valley chasing the explosions. When you reach Mudokons 3-4 in the middle, quickly press and hold the button to have them follow you, and keep on running all the way back to your first two Mudokons. Now you get to repeat the trip across the platforms to the other side and get another keg. Toss it on the mines then quickly grab a second keg and chase the explosions back to your four friends.
If you die during this run, Munch can bring you back with the Egg Nest. If the Mudokons die you can resurrect them using the totem, but they come back as simple Natives, and you will also have to use the Shrine to turn them back into Tomahawkers. Of course, if you QuickSave and restore you can avoid all this hassle.
Throw that keg you've been carrying into the mines that have regenerated. The chain of explosions now goes the other way. Press and hold to get the attention of all four of your Mudokons (and Munch if he is here) then start running after the explosions with everyone following close behind. You should easily reach the other side before the mines regenerate.
 The worst is over, and things get pretty easy from here on out. Continue forward under the large structure and recruit the Mudokon Mudarcher and the Tomahawker located to either side. With the addition of Mudokons 5-6 you should now have six warriors standing by. Mudarchers are the most deadly of all Mudokons. They carry small rapid-fire bows that shoot deadly energy bolts. One Mudarcher is deadly; a group of them is invincible. The nearby Transformation Shrine will convert your Tomahawkers into Mudarchers. You should have plenty of Spooce, so have everyone step into the circle and start zapping them.
There is a lone Mudokon down near the end of this canyon amongst the final patch of Spooce. Collect Mudokon 7 and convert him into a Mudarcher then take your army of seven archers up the ramp to the upper platform. Order the attack on the Slig then jump out of the way as they cut him to shreds. Continue out onto the platform and clean up the rest of the Sligs then flip the lever to open the gate leading back to the bridge that takes you to Magog Motors.
Take your army across the bridge and go through the gate. Jump out of the way as the Mudarchers finish off any Slig Poppers your possessed Sligs left behind. If the Bonepowder Kegs are still in this fenced area then be very careful or you might lose your entire army in a single blast. Move down the ramp and order your guys to get to work on those Chant Circles. The final gate opens.
There are lots more Sligs down in the lower area; eight to be exact. The best tactic is to order your guys to fire then retreat back into the pits to either side of the ramp. The Sligs will pursue and be cut down by the Mudarchers when they enter the pit. Lead your army down into the lower area and clean up any Sligs that still remain. A few like to hide in the corners. When the area is secure, you can bring Munch in from wherever you happened to have left him. Put them both on the Teleporter and enter Magog Motors.
Magog Motors -
SCRUBS: 8
NATIVES: 0
FUZZLES: 0
SPOOCE: 0
 This level is surprisingly short and easy with multiple solutions, so feel free to experiment. Enter the large room and make a note of the Egg Nest just in case either character dies. The lever on the tall pedestal opens the door to the left leading to several Slig and a Big Bro Slig. This area leads to a heavily mined bridge over a large watery area, but you can easily complete this level without even going into this area or even opening the door for that matter.
Have Abe jump up the stacked crates and enter the hallway above. Continue past the intersection and you will arrive at a walkway overlooking the large watery area. Mudokon Scrubs 1-4 are busy at work in this area. Leave them alone for now, or you might draw the attention of the heavily armed Sligs stationed on the pedestals out over the water. Stock up on the Spooce then head back to the intersection and stop at the corner.
Conjure up a Possession Orb and send it around the corner to possess the nearest Slig. Have him shoot the other Slig in this hall then walk around the corner to the opposite ledge where four more Mudokons are working. Continue to the far end of the ledge and shoot the Big Bro Slig off the column. Shoot any other Sligs you can target then kill yourself when you have run out of things to kill.
Now Abe can follow the path the Slig just took and rescue Mudokon Scrubs 5-8 and bring them back to the other side to join the first four Mudokons. Hang out with your Mudokons for a while as Munch gets to work.
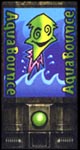 Munch can go for a swim down the water-filled hall under the passage Abe took at the beginning. The Vendos in the corner offer SoBe, Zap and the new Aqua Bounce This is the same as the Bounce for Abe only this is for Munch and only works when jumping from water. Visit the SoBe as needed and when you have charged up with Zap and Aqua Bounce head into the large watery room and begin jumping up to the remaining columns that still have Sligs on them. Zap the Sligs into the water and pull the lever on the tall column with the Big Bro Slig along the right wall. This opens the door where Abe and his crew are currently hanging out. When the room is free of Sligs you can swim to the back corner and jump up to the ledge with the Vendos, Rescue Portal, and Status Board.
Abe can now call all eight of his friends by holding the button and lead them down the new hall. Collect the Spooce along the way, although you won't need more than 3 more Spooce the rest of this level. Tell your friends to wait at the corner by tapping the button then go down the ramp and jump over the wall of explosive crates.
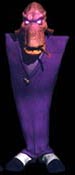 Walk out onto the bridge and grab the Bonepowder Keg from the left and head back to the crates. Toss the keg into the crates to clear the obstruction then go get your friends and bring them down to the row of mines. Have them wait once more then pick each one up and toss them over the mines. Jump over and lead them all to the portal where you can chant and send them to safety.
Climb the blue ladder along the wall and when you reach the top, stand on the Foot Switch to open the door to the Glukkon Wanna-Be's office. Whip up a 3-Spooce Possession Orb and send it around the corner. Once you are in control of the Glukkon, have him deposit his Moolah into the Lulu Fund Vendo.
Return to the Teleporter below and have Munch join you on the pad to leave this level.
Splinterz
Dead River -
SCRUBS: 0
NATIVES: 8
FUZZLES: 0
SPOOCE: 30
Abe takes the lead in this level. Head across the bridge and into the village. The cliffs contain large quantities of Spooce that you will need later. Stock up, then go off in search of Mudokons 1-4 scattered about the village. One is on the ground next to a hut as you cross the bridge. Another is on a high bridge above where you enter the village. This guy requires a drink from the Bounce Vendo to reach. The third native is at the top of the spire. Go up the broken spiral walkway jumping over the gaps until you reach the top. Toss him down then look around. You should spot the final Mudokon on a section of broken bridge. You can make the jump across and toss him down.
Round up your crew and bring them to the door with the four Chant Circles. Get them to work and the door will open into the next area. This next area has several Slig Bouncers. Start sending in possession orbs and destroy all the Sligs however you see fit. You can walk them into the mines or over the cliff, or have them beat each other up, or just explode.
When the area is clear you can lead your Mudokons past the mines and the closed well on the right and continue down the path. Add Mudokon 5 to your party and continue to the Transformation Shrine where you can upgrade everyone into Tomahawkers.
Swing by the Resurrection Totem and pick up Mudokon 6, the Mudarcher. Return to the closed well and tell your Mudokons to wait. Chant to create a possession orb and send it through the mines and over the wall to possess the nearest Slig. Now have him cross the metal bridge and flip the lever to open the well near your Mudokons. While you have control of this Slig feel free to do a little recon down further down the canyon. When you are done you can explode your Slig or have him go out fighting.
Now start tossing Mudokons into the well to shoot them over the mines and the wall into the shallow water. When they are all across hop in and join them. Lead them up the ramp avoiding the floating mines, and have Mudokon 7 join you. Lead all seven Tomahawkers into the Transformation Shrine and upgrade them to Mudarchers.
Cross the bridge and slowly head down the canyon. Don't go too fast, as you only want to engage one or two Sligs at a time. Your archers will take down all ground units and any Sligs perched on the higher ledges. Hop up on the wooden ledge on the right wall and make your way to the bridge that crosses to the other side. Go about halfway across this bridge then create a 4-5 Spooce possession orb. Send it along the catwalk to the remaining Slig and possess him. Have him walk around to the rear and drop into the area behind the explosive crate wall. Shoot any Sligs then open fire on the crates to destroy the blockade. Explode your Slig when you are done.
 Have Abe and his crew sweep the area until you arrive at the SpooceLock. If you have killed everyone there is no need to spend the Spooce to activate the Zapper. Head down the narrow path and Mudokon 8 will complete your party for this level. Enter the canyon at the end and have everyone get to work chanting on the Storm Circle. This floods a section of the level you were just at.
Time for Munch to do something. He should be waiting back at the beginning unless you've moved him. Hop in a wheelchair to speed up the trip to the Travel Well near the mines and jump in. You land in the water on the other side that has just been made much deeper by Abe and his team of chanting Mudokons. Jump over the floating mine and then through the opening in the wall.
Head left and jump onto the ground then flip the lever to open a door elsewhere in the level. Cross over to the final door and flip the lever to open it and enter. The Shaman congratulates you, but the level isn't over just quite yet.
Abe can now lead his elite fighting force back down the narrow canyon and through the opening that was previously blocked with those explosive crates. Watch out for any Sligs that may pop out of the dispenser on the right. Your archers should cut them down quickly.
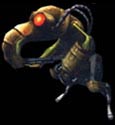
Follow the trail back to the door that Munch just opened and enter. Order your archers to attack the Armored Slig Poppers perched on the towers. Wait for a Slig to get shot off any of the platforms then jump up to safety while your Mudokons eliminate this final threat from below. Join Munch at the Teleporters and leave this level.
No Muds Land -
SCRUBS: 0
NATIVES: 0
FUZZLES: 0
SPOOCE: 99
The good news is that there is nothing to rescue in this level. The bad news is there are a few dozen Sligs between you and the exit. Have Abe hop onto the nearby boulder then up to the higher ledge. Keep climbing until you reach the highest ledge then start collecting Spooce.
Continue deeper into the level. You could take out the Sligs in each of the smaller valleys by tossing Bonepowder Kegs down on them, but I have something more fun in mind. Keep making your way along the high ledges and narrow bridges until you are overlooking a mine-filled lake. Below is an Armored Big Bro Slig.
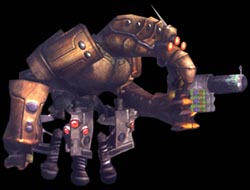 Drop a possession orb down the cliff to take control of this juggernaut and let the fun begin. While this Slig is very durable he can be killed, so be careful and he should last long enough to clean out this entire part of the level. Begin with the nearby Sligs here and across the water and get rid of that stack of crates blocking the bridge.
Step on the Foot Switch and enter the next area killing the Sligs inside. Shoot the explosive crates to do extra damage - just make sure you aren't too close to the blast. Continue into the next area and stop at the row of mines. Shoot at the sleeping Sligs and explode the crates behind them. They should charge toward you and blow up on the mines giving you a few moments to get through before the mines regenerate.
Continue through the next two areas eliminating all Sligs until you make it back to the area with Munch. If your big Slig dies during combat you can always finish the clean up with Abe, either by tossing kegs or chanting and possessing. Now send Abe back for Munch. If you are fast enough you can have Abe pick up Munch and start running back. You should make it through at least two or three doors before the timers shut them again.
 You now need to work together by having Abe hop up the circular platforms to get to the far side of the door then open it so Munch can hop through. Repeat until you are both back at the lake. If either of you have taken any damage you can visit the vending machine to the far right and get healed.
Send Abe across the bridge hopping the mines as necessary. Unlock the SpooceLock to open the Travel Well then head over to the ramp leading up to the closed door. Pull the lever on the right to open the door then quickly go back down before you are spotted by the Sligs. Drink from the Invisibility Vendo then run back up the ramp and through the door.
Note: You can also use the Travel Well to the right of the ramp to reach the guard towers. While invisible, you can possess the nearest Slig Popper and have him shoot all the other Sligs off their perches. Drop down and finish them off.
You can now make your way past the guard towers to the back of this area and use the Bonepowder Kegs to blast your way through the wall of crates. DO NOT ENTER! There is a Big Bro Slig just inside to the right. Ignore him for now and send a possession orb through the door and take it to the left to possess the nearest Slig. Have him pull the lever to open a door in another area then self-destruct.
Munch can now jump in the water and swim over to the Travel Well. Jump in and shoot to the top. Ignore the wheelchair and the Travel Well and go through the door the Slig just opened for you. Two Sligs are patrolling to the fork to the left. Sneak past this passage and head for the lever straight ahead. Flip it to open a door back near Abe.
Abe can now send another Possession Orb through the door and take over the Armored Big Bro Slig. Send him through the door that Munch just opened and have him start eliminating all the Sligs in the large compound. Make sure to kill the Sligs up on the rooftops as well as all the ones patrolling the grounds. When you have eliminated all the enemies you can explode your giant Slig.
Abe is now free to enter the compound. Follow the path around to the blue ladder that leads up to the area where your Big Bro Slig just shot the pair of Slig Poppers. Climb up and follow the ledge around to the left and jump in the Travel Well. This shoots you to a ledge high above the Teleporters. Flip the lever to activate the pad then drop down and wait for Munch to join you. Have Munch grab a wheelchair to get there that much faster.
Boiler Room -
SCRUBS: 13
NATIVES: 0
FUZZLES: 0
SPOOCE: 20
Abe and Munch start off on a ledge with a Remote Control and a ladder leading down. Send Abe down the ladder and stand in the middle of the lower area. Munch can now jack into the remote and control the crane. Rid the area of Sligs by picking up the Bonepowder Kegs and dropping them. Remember you can use the momentum of your crane to arc the kegs further than they would normally go. Finally, pick up Abe and deposit him on the other side of the closed door.
Abe can now climb the ladder to reach the upper ledge and pull the lever to open the door. Climb down and continue around past Mudokons 1-2. Pick up the nearby keg and cautiously move forward. There is a Slig hiding just around the corner of the large machine on the right. Angle yourself so you can toss the keg and blow him up. Now grab a drink from the Invisible Vendo and make a dash for the ladder at the opposite end of this long room.
You can handle this room in two ways. You can kill all the Sligs by tossing kegs down from the upper ledge, or have Munch join you and use the Remote Control to use the crane. Either way works, so it's basically your personal preference. Whichever method you choose, the first thing you need to do is sneak up on the two sleeping Sligs on the side ledges and toss them down below. If you can toss them onto a mine that's two less you have to worry about later. Be careful not to kill any Scrubs working below.
When this area is Slig-free you can return to the floor and collect the pair of Mudokons back by the Vendo and Mudokons 3-6 in this area. Three are on the floor and one is up on the ledge and needs to be tossed down. Lead your party of six (and Munch) into the dark area and flip the lever to open the door to the red passage. Collect Mudokon 7 on your way to the next room.
Have Munch and the Scrubs hang out near the Egg Nest as Abe continues to the right. Possess the Armored Big Bro Slig and continue around to the right. Clear out the other two Big Bro Sligs and the stack of crates then self-destruct. If your Slig dies you can summon another one by using the lever on the upper pedestal.
Send Abe over to the wall of crates and get Mudokon 8 to join your party over in the corner. Pick up the keg and toss it at the wall to clear the path to the area beyond where Mudokons 9-12 are hard at work.
Get them all to follow you then go get the rest of your party and continue around to where you possess the Big Bro Slig earlier. Along the way you can add Mudokon 13 to complete your quota of Scrubs for this level. Carefully lead them past the mines on the right and into the Rescue Portal.
Jump over the mines and grab a drink from the Bounce Vendo then jump over the wall. You should have already collected the 20 Spooce required to unlock this door. Enter and climb the tall ladder then stand on the Foot Switch to open the door leading to the Glukkon. Send in a Possession Orb and have him empty his pockets into the Lulu Fund Vendo.
Climb (or drop) back down and drink from the Vendo on this side then jump over the wall at the arrow to avoid landing on the mines on the other side. Climb the ladder near the Rescue Portal and have Munch join you on the Teleporter Pad to leave this area.
Splinterz Manufacturing -
SCRUBS: 14
NATIVES: 0
FUZZLES: 0
SPOOCE: 0
Time for some teamwork. Have Abe stand on the first Foot Switch then send Munch through the door to stand on the next. This keeps the door open so Abe can pass through. Repeat this process as you make your way along this passage. The final door opens to reveal some Sligs. Have Munch grab a Zap Cola and zap these guys into the row of mines behind them.
Abe and Munch can now continue through the next door. Have Abe pick up Munch and toss him over the gap in the walkway then you can both continue to the end. Have Abe stand on the Foot Switch in the corner then get Munch powered up with some Zap and send him in to battle the Sligs. You will actually have to zap them to death, so make sure to rapidly alternate between Sligs to maximize your firepower. Have Munch stand on the Foot Switch to let Abe in.
 Abe can collect the Spooce and then head over to the break in the rail near the lever. A Big Bro Slig is waiting on the pedestal below. Send a Possession Orb down and take control. This guy is currently unarmed, so send him over to the Blitzpacker Vendo. Now that he is armed, send him out into the large work area to clean up dozens of Slig guards.
There are several ways to do this. The easiest is to stand in the opening leading to this area and start firing. Most of the Sligs will come running toward you and you can mow them down with your machine gun. If too many get too close you cannot target them and they will beat you to death. Simply flip the lever to summon a new Big Bro, grab a new gun, and keep on trying. When Sligs stop coming to you, go out into the area and make a final patrol shooting any Sligs that still guard the Scrubs working here. Blow up any crates lying around while you're at it.
Now Abe can drop down and enter the large complex and start collecting Scrubs. Mudokon Scrubs 1-10 are scattered about this area in the following locations. As you enter the area, hug the right wall. You will make two right turns and find a pair of Scrubs. Double back and keep the wall to your right and as you enter the open area you can pick up another pair in the middle. Keep going to the narrow alcove where a single Scrub works then turn left and get another one working along the short wall. Now enter the dark area and check out the tunnel where three more Scrubs are working. Another Scrub is working in the dark corner behind the explosive crates.
There is another Scrub very close. He is high above you on the corner ledge in this area. Make a quick trip back to the Bounce Vendo near Munch then return and jump up to get Mudokon 11. Toss him down to join the others then lead all eleven back to that group of six levers on the other side of the complex. Get them to work and they will flip the levers opening this door and another door back near Munch.
A pair of sleeping Sligs are all that stand between here and your Scrubs' freedom. Send in a Possession Orb and have one Slig beat the other one then kill himself. Open the portal and send this first group of Scrubs home. Now climb the ladder leading back to Munch and drink from the Bounce Vendo. Jump into the high opening leading to the CEO's office and follow the walkway. Jump the mines and go right around the corner approaching the sleeping Big Bro Slig.
Send a Possession Orb down the hall and take over this guy. Have him use the voice lock by pressing to open the door then enter and flip the lever to open the large door. There are dozens of Sligs in this large area and more will respawn as you kill them. If, or rather when your Big Bro dies, have Abe climb down the ladder opposite the voice lock and flip the lever to summon another. Climb back up and repossess and keep trying. Try staying in the doorway and firing. This makes the Sligs funnel toward you allowing you to concentrate your firepower.
When all the Sligs are dead you can send Abe in and jump on the elevated Foot Switch to open the large door. Create a large 4-5 Spooce Possession Orb and send it through the door and up the stairs into the Glukkon's office. Make the fatal deposit into the Lulu machine to open the door leading to the Teleporter.
Climb back down that ladder opposite the voice lock and go all the way to the bottom. In this dark passage you will find Mudokon Scrubs 12-14. Each is trapped in a circle of mines. Jump into the circle and pick up the Scrub then toss him out. Lead him to the nearest portal and repeat for the other two. Do not be fooled by the Rescue Portal on the other side of the triple-wide row of mines. Simply take the last Mudokon into the portal you used for the second Scrub.
Climb up the tall ladders and follow the walkway back to Munch. You can both now head for the Teleporters and leave this level.
Flub Fuels
Reservoir Row -
SCRUBS: 0
NATIVES: 4
FUZZLES: 0
SPOOCE: 22
Now that you've saved the forests of Oddworld you now need to empty the tanks the Glukkons are using to store all the water they've been stealing from the Mudokons. Along the way you will meet several Glukkon Big Cheeses who are loaded with cash and just waiting for your "motivation" to get then to donate to Lulu's Fund.
Have Abe jump out to the first circular platform then follow the narrow walkway to the other side collecting the Spooce along the way. Use the Spooce to unlock the nearby door then have Munch join you. Munch can get a drink from the Zap Vendo then hop into the Travel Well to shoot to the upper platform. Quickly zap the Sligs guarding the foot switch. Drop down and grab another drink if you run out of "zap" before killing the Sligs. Stand on the Foot Switch to open the door.
Abe can use the Travel Well to join Munch and go through the door. Chant and send a Possession Orb through the nearby gate to get the first Big Cheese to donate his cash. Now begin hopping down the platforms to the left collecting more Spooce. You will arrive at a Bonepowder Keg and a narrow ledge blocked with mines. Toss the keg onto the mines to start a chain reaction then run toward the Invisible Vendo before the mines regenerate. Take a drink then jump to the shore. Hop into the Travel Well to shoot to the next platform. Feel free to toss the Sligs guarding this well into the water if you wish. It will make things easier for Munch later on.
 Have Munch jump in the water and head to the Travel Well that Abe just used. You can also take this time to swim around the entire lake and collect any floating Spooce. This will also help give you a layout of the entire level. Once Munch is reunited with Abe he can step on the center Foot Switch to open the first door. Send Abe through and go to the next door. Now Munch needs to open the next four gates so Abe can continue along the walkway. Begin with the lever to the left of the first door. Pull it and switch to Abe sending him through and to the next gate. Repeat with the next three levers in a counter-clockwise pattern. The gates are on a short timer so have Abe ready to go through after Munch pulls each lever.
Abe can now possess the Big Cheese and have him make the appropriate donation to the Lulu Fund. Jump into the nearby Travel Well to shoot back to shore. Collect the nearby Spooce if you need some for the upcoming Possession Orb you are about to create to take care of the first two Sligs guarding the gate. Now stand on the Foot Switch and send another orb through to take care of the Sligs inside. Have Munch take your place on the switch so you can go through the gate. Enter and use the Travel Well to reach the next Big Cheese. You know the routine - chant - possess - donate - die. Cha Ching!
Follow the trail of Spooce along the cliffs until you can spot the Travel Well below. Possess the Sligs below to clear this area. You can do this safely from above or drop down and hide behind the structure before chanting. Have Munch swim to "Tank 4" and jump to the spiral catwalk. Get a drink from the Zap Vendo then continue to the top and take care of the Sligs. If you lead them back down the catwalk you can zap them into the water to get rid of them faster. Pull the lever the Sligs were guarding to open the Travel Well back near Abe.
Abe can now use the well to reach this same platform. With Munch standing on the Foot Switch, Abe can possess another Big Cheese and make another donation to the Lulu Fund. Follow the walkway and pull the two levers as you come to them. A door opens that leads to a ramp leading to the shore. Quickly jump down and run past the Sligs, through the door, and down the ramp. If the Sligs spot you they will pursue but we have a surprise for them! Mudarchers 1-4 are waiting to join you, and they will make quick work of the Sligs. Head back up the ramp and deal with any Sligs that remain.
 Pull the lever on the nearby platform to open the door and send your SWAT team onto the bridge to take care of more Sligs ahead. Head to the left and jump to the first small ledge on the tower. Begin the tricky process of jumping up the tiny ledges that spiral to the top of the tower. QuickSave often as it is easy to miss a jump with the constant changing camera angles. Stand on the Foot Switch to open the door and possess the Big Cheese on the other side to make a donation and open the next door.
Rejoin your archers and head into the next area. Repeat the process of clearing out the Sligs with the archers then jumping to the top of "Tank 6" where you can convince another Big Cheese to donate to the Lulu Fund. Head through the newly opened door and out onto the bridge. As the bridge starts to ramp up to the final area, STOP, and make a note of the platform to the left with the lever.
Munch now needs to swim to this platform and jump up to flip the lever. Now swim back to where Abe found the Mudarchers and jump to the shore. Hop up the ramp and grab a wheelchair from the nearby platform. This will speed your journey back to Abe and his crew. QuickSave your game then order your Mudarchers to attack the final group of Sligs. While they are busy fighting you can make a dash for the Teleporter. You can either have Munch follow Abe by getting his attention first with the button or control them separately and make two runs. The latter is more dangerous as you have to leave somebody on the Teleporter in the middle of all that gunfire.
Flub Fuels Scrub Pens -
SCRUBS: 20
NATIVES: 0
FUZZLES: 17
SPOOCE: 0
After a quick briefing from the Shaman, Munch can drop into the shaft and swim through the tunnel to reach the lever. Flip the lever to open the Travel Well for Abe. Abe can now join Munch and begin collecting Spooce. When you reach the short wall blocking the passage hide behind the corner and create a Possession Orb. Jump it over the wall with the button and possess the Armored Slig Popper. Have him open the voice-activated door with the button and send him in to do a little clean up. Sligs in this room will keep regenerating for quite some time, so keep repossessing new Sligs as needed until everyone is dead.
Enter the next area and climb the ladder to reach the catwalk. Head to the right toward the lever in the distance and pull it to open the door that will allow Munch to join you later. As you head back along the catwalk drop down into the pen and free Mudokon Scrub 1 using the convenient Rescue Portal. Climb the ladder to return to the catwalk and head deeper into this room.
To the left is another pen with Mudokon Scrubs 2-4 and to the right is a third pen with Mudokon Scrubs 5-6. Each pen as its own portal so send these guys home and boost that Quarma. At the end of the catwalk you can spot a lever below that is being guarded by a Slig. Possess the Slig and have him pull the lever for you before exploding him or dropping him into the rising water. Do NOT pull this lever until you have rescued the previous six Scrubs - unless you are going for the Black Quarma ranking.
Munch can now join you. Be careful swimming through the newly flooded room, as there are mines everywhere. Jump onto the island ledge and pull the lever to open the exit near Abe. Now locate the Zap Vendo and get charged up before facing the three Sligs blocking Abe's path. Zap them into the water and use the Health Vendo if needed. Continue following the watery passage back as it turns left. Another Zap Vendo will charge you up so you can deal with the pair of Sligs guarding the large door and the gate next to the Vendo.
Abe can now go through the open door and jump across the platforms to reach the steep stairs. At the top of the steps to the left is a large circular platform full of Spooce. To the right is a dark passage you can jump into. Follow the L-shaped passage around and down the ramp. Pull the lever to open the gate and meet up with Munch. Have Munch return back up through this passage zapping all the cages to free Fuzzles 1-17. Lead your furry army back to Abe and have them wait.
Abe can now head back up the dark passage and hop back to the top of the stairs. Now jump out to the circular ledge and gather up all the Spooce. Facing the wall with the Zap Vendo below, jump to the right and free Mudokon Scrubs 7-11 who are busy at work. Use the handy Rescue Portal and stay away from the large open area to the left or the Sligs might spot you. Return to the circular platform and jump over to the left.
This section has Mudokon Scrubs 12-20 hard at work. They are guarded by three Slig Poppers. Quickly dash across the hall with the working Scrubs and into the deserted hall just past it. Hide around the wall and create a Possession Orb of at least 3 Spooce and send it around the wall and take control of the nearest Slig. Have him walk around past you and down the long hall. This passage leads to the large room below where a pair of Big Bro Sligs are waiting. Position your Slig in the doorway and try not to attract the other Big Bro Slig as you open fire on the closest one. Keep up a steady stream of fire and he should go down quickly. If you die you have two other Sligs to possess and try again. Repeat for the other Big Bro Slig.
If you lose all your Sligs and a Big Bro is still on duty you can always have Abe lead his army of Scrubs and Munch can join in with his 17 Fuzzles. Their combined forces will bring down a Big Bro easily - especially if he is already damaged from previous Slig fire. Once Abe, Munch, the Scrubs, and the Fuzzles are all reunited in the large room have Munch stand on the Foot Switch so Abe can lead his Scrubs to the Rescue Portal. Abe can then stand on the other Foot Switch and Munch can bring his Fuzzles inside and send them home. End this level by having both our heroes stand on the Teleporter.
FlubCo Executive Offices -
SCRUBS: 11
NATIVES: 0
FUZZLES: 0
SPOOCE: 0
Send Abe over the wall and grab an Expresso. Now begin the crazy twisting run along the path between the Big Bro Sligs. Watch out for exploding crates that not only do damage but can knock you into the water below. About halfway through the run is a wall you can hide behind and grab a drink from the Health Vendo. Finish the run to the final area and collect the line of Spooce before pulling the lever. Possess one of the Armored Big Bro Sligs and use him to blast the other two before exploding your host.
Have Munch jump over the wall and into the water to dodge the incoming Slig fire. Swim over to the Travel Well and shoot up to the ledge just below Abe. Use the Vendo machines to get Zap and Aqua Bounce abilities then begin the lengthy process of jumping to the tops of each of the pillars and zapping the Armored Big Bro Sligs into the water. Return to the Vendos as necessary to heal and recharge your bounce and zap. Jump over the short wall into the other section. Vendos are conveniently located near the water so you can recharge and take out the Sligs in this area. When the area is Slig-free have Munch jump onto the walkway Abe used earlier and wait for Abe.
Abe can now make the trip back along the walkway to the beginning of the level and get Mudokon Scrubs 1-6. Have them follow you back along the walkway. When you spot the ledge below with the Vendo Machines stop and have your Scrubs "wait". Locate the upper catwalk with the green arrow pointing up and jump onto it. Mudokon Scrubs 7-11 can be found on the next series of ledges. The first is at the end of this section. Grab him and carefully toss him back to the main walkway below. Use the Bounce Vendo to reach the next ledge. The next four Scrubs are tricky so you may want to save. Grab each of them and carry them to the narrow plank with the target. Aim for the larger target below and toss. When all four are safely down you can join them. Now lead all eleven Scrubs back to the exit.
 Put them to work to open that final door then set them free with the nearby Rescue Portal. Enter the next room and start collecting Spooce. Jump around on the furniture and you can make your way to the upper ledge. Follow it around to the passage leading to the circular walkway above the Glockstar's office. The camera angle gets tricky here. Follow the upper hallway around until you step on the Foot Switch and the gate opens. Send a Possession Orb into the room below and have this guy make the ultimate donation. Now make your way back through the previous room and out into the main area of this level. Follow the twisting path all the way back to the beginning. Grab Munch along the way and carry him to the very first room. A new door should now be open that lets you both get on the Teleporter and return to Vykkers Labs.
Return to Vykkers Labs
The Loading Dock -
SCRUBS: 4
NATIVES: 0
FUZZLES: 6
EGG CRATES: 22
SPOOCE: 0
Mudokon Scrubs 1-2 greet you as you enter the complex. Send them through the Rescue Portal to get 4 very valuable Spooce and to open the next door. Observe the Vykker Interns on the other side as they repeat their pattern. When you have the timing down head through the door and circle around to the far ladder. Climb up to the top walkway and begin the tricky process of jumping the gaps in the narrow beam that spans this room. When you reach the other side switch to Munch.
Munch can jump through the hatch into the water and swim under the floor grate to the ladder that leads him up to Abe. Have Abe carry Munch back across that narrow beam and toss him over each of the gaps. When safely on the other side, Munch can head down the angled passage and drop into the water below. Follow the underground waterway until you reach a huge room with a central structure. You may take some fire from a Shooter Intern as you enter this area. Quickly swim to the right and locate the two ledges full of Vendos. Grab an Aqua Bounce and a Zap and head to the opposite side of this area. Bounce up to the catwalk along the outer wall and zap the Shooter Intern who is guarding the Foot Switch. One or two zaps should send him into the water below. Stand on the Foot Switch to open the nearby door and wait.
 Abe can now head down the angled passage and jump over the gap that Munch dropped into earlier. On the other side is a large room with more Interns on guard duty. Duck into the alcove on the left and get Bounce and an Invisible drink from the Vendos. Quickly drop to the floor and run across to the other side. You should be able to locate a ladder with the bottom half missing. Your Bounce should let you reach the ladder or perhaps even the ledge itself if you time the jump correctly. Quickly head down the short passage through the door that Munch is holding open for you and up the ladder.
Be very careful on this top catwalk. There are lots of Vykkers on this level including the deadly Armored Vykker Sawbones that can kill you in two or three hits with his large cleaver. Move forward from the ladder and turn right into the first door in the central room. Quickly get a drink from the Bounce Vendo then jump to the high ledge just to the left of the Vendo. QuickSave now if you actually made it otherwise if your invisibility ran out or something else happened you can always return to the previous room and drink from the first two Vendos to try again.
 You now need to chant and create a 2-Spooce Possession Orb. Drop it down and possess one of the Shooter Interns. Position him in a corner or take him out to the catwalk that circles this area. The object is to get in a position where the other Vykkers cannot gang-up on you. Try to get as far away from them as possible and get as many as you can directly in front of you before opening fire. The guys with guns can shoot at you from far away, but the Sawbones will kill you even quicker if they get in close. You only get two chances using this technique. It can be done and it is much easier than the alternative.
The alternative solution to clearing out this room is using Munch. This is very time consuming and dangerous. The routine goes like this. Have Abe drink from all the Vendos on the ledge down by the water then super-jump back to the top catwalk. Lure the Vykkers out onto the catwalk and zap them off into the water below. The Expresso makes you faster than them so you can easily outrun them; however, they can quickly surround you and it only takes one or two hits from a Sawbones to kill you. Make frequent trips to the Vendos to replenish your health and other abilities until the room is clear.
You can do it either way. It took me about 30-45 minutes to clear out this room using Munch and only 2 minutes using Abe and two Possession Orbs. While the placement of the Vendo machines clearly indicates the designers wanted you to use Munch, I think using Abe is the more ingenious solution and probably the best tip I can give you in this entire walkthrough.
However you decide to clear the room, once it is safe you can have Abe toss down the Scrub then head out the door opposite of where he entered. Turn right and you will see an angled walkway. Make sure you still are under the influence of the Bounce Vendo and jump to the corner ledge. Grab the Scrub and toss him down to the target from where you just jumped and lead him inside. You might be tempted to have the two Scrubs pull those two levers. It would be the logical assumption, but they refuse to work. Go ahead and send Mudokon Scrubs 3-4 through the portal.
Have Munch join you in this room and free Fuzzles 1-6. Send them through the portal then position Munch at one lever and Abe at the other. Pull the lever then quickly switch to the other character and pull their lever. If you aren't fast enough just keep trying. When you succeed, the previous rooms will flood drowning all the Interns. You now need to get both Abe and Munch back to the first room with all those Egg Crates. Send Munch down to the second tier of Vendos along the outer wall. With the new water height the lower Vendos are now underwater. Get an Aqua Bounce and head to the other side to jump back up and stand on the Foot Switch.
Abe can now go through the open door and into the previous room. Walk along the ledge and jump into the Travel Well to shoot back over to the Vendos. Head into the angled passage and jump the gap. Make your way back across the narrow beam with the gaps until you are on the far ledge. Stand near the Egg Crates and wait.
 Munch can drop back into the water and head back to the Vendos. Get a fresh Aqua Bounce then swim through that curved passage until you see a green arrow. Jump up and press forward to land on the ledge overlooking the Egg Crates. Quickly jump back in the water in this room and jump to the ledge with the crane Remote Control. If your bounce is gone you can simply take a ladder. Take control of the crane and begin the lengthy process of picking up Egg Crates 1-22 and dropping them into the Loading Chute. Don't forget about the crates next to Abe. Finally pick up Abe and deposit him on the target next to Munch.
Check the Employee Status Board and confirm you have rescued everyone then step on the Teleporter. You get transported to another cargo area and the Shaman pops in for a visit. What happens next depends on how well you have done up to this point. If you have been following my guide you should have Good or Angelic Quarma up to this point and you will get to go on two bonus missions. If you have allowed too many Scrubs and Fuzzles to perish then the game is over.
Labor Eggs Storage -
SCRUBS: 14
NATIVES: 0
FUZZLES: 12
EGG CRATES: 36
SPOOCE: 0
Get Abe juiced up on caffeine then send him out the door. Head past the status board and quickly move to the next set of Vendos on the other side of the door. You may take some brief fire, but you should easily dodge it. Drink from the Expresso and Invisible Vendo then go through that door you just past and quickly climb the ladder in the middle of the room. The invisibility doesn't last long and you may take some fire from the many Armored Shooter Interns in this area as you near the top of the ladder.
 Once you reach the top you can start grabbing Bonepowder Kegs and tossing them down on the Interns below and to the ledges on either side. When everyone is dead you can turn your attention to the Egg Crates. Make sure to save your game until you get the hang of tossing these crates into the chute. You need to arc the crates into the chute so don't get too close. Try standing about one tile away and aim for one of the low sections of the rim. When you find a good spot try to keep using it. If you accidentally smash a crate you need to reload if you are going for that pefect Quarma. When Egg Crates 1-9 have been loaded into the chute you can climb back down the ladder.
Mudokon Scrubs 1-4 are in the two rooms that branch off from this main area. There are two in each room. Get them all to follow you back out to the main room then wait for Munch to join you.
Munch is actually going past this room, so wave to Abe and his friends as you head down the new passage toward the Health Vendo. A passage ramps down to the left just before the Vendo but you need to continue forward and around the corner to the left where you will find a Zap Vendo and a Wheelchair. Drink some Zap then get in the wheelchair. You can ride around and down the ramp, but I found it easier to just jump over the rail opposite the Vendo. If you fall off your chair when you land just get back in and lure the Armored Shooter Intern back up the ramp where you can zap him in private. The zap drink doesn't last long so jumping the rail gives you more time to dispense of the enemies. Repeat the procedure for the other two Shooter Interns down at the bottom of the ramp, and use the Health Vendo as needed.
When the first section of the bottom area is cleared get back in your chair and ride to the bottom. Head up the ramp into the next area and quickly turn left and jump/flip your wheelchair onto the raised section. Get out of your chair and get up against the wall next to the Zap Vendo. Watch the patrol pattern of the Shooter Intern and when he is walking away from you quickly run to the Remote Control and take over the crane. Follow the Intern as he walks down and to the right and when he pauses release control of the crane. This leaves the claw in perfect position to pick him up on his next pass. Quickly hide against the wall before he returns then regain control of the crane when he walks back the other way. Grab the Intern with the claw and drop him in the Recycler.
Pick-up the other Interns that are on the ledges directly above your current position and dispose of properly. There are two more Interns out in the middle of the floor out of reach of the crane. You can use the momentum of the crane to lob Bonepowder Kegs at them. Two or three kegs should kill them both but be careful that the blast doesn't kill any of the caged Fuzzles in this area. I highly recommend QuickSaving before dropping any kegs then send Abe back to stand in front of the Status Board you passed earlier. After you drop each keg you can switch to Abe to view the board. If any Fuzzles got blasted you can reload and try again.
Get back on your wheelchair and ride to the other end of this room where you can jump/flip onto another ledge with another Remote Control. This operates a second crane that gives you access to another pair of Interns. Dispose of them in the Recycler or use the kegs to get rid of them. When the area is clear it's time to bring Abe down. Have Abe leave the first four Scrubs near the six levers then put him someplace where Munch can grab him with the crane and deposit him on the upper ledge.
Abe can then go into the adjoining room and get Mudokon Scrubs 5-8. They will follow him out to the main room, but Abe will have to pick each one up and toss them down to the floor below. Jump down and move to the other half of this room and have Munch get back in his chair and return to the first Remote Control.
Abe can take another crane ride to the other ledge and get Mudokon Scrubs 9-14 just like the others.
Finally, have Munch go around the room and up the ramp at the far end to rescue all the caged Fuzzles. You should get Fuzzles 1-12 before rejoining Abe and his crew of ten Scrubs. Flip the lever to open a door to the left of the ramp you used to enter this area and lead everyone down to the six levers and those first four Scrubs.
Now that everyone is assembled, Abe can order the Mudokons to work. When the levers are all pulled the door opens and everyone can head down the hall to the Zap Vendo. The room ahead has a pair of Armored Vykker Scientists. You can either power-up Munch and send him down or have Abe take the Bonepowder Kegs down and blow them up. When the room is clear have Abe stand in the middle and Munch can use the Remote Control to pick him up and drop him on the ledge to the right next to the lever. Do not pull the lever while Munch is still using the Remote Control.
 Have Munch continue to use the crane to pick-up and drop Egg Crates 10-36 into the Loading Chute. Then send Munch back to the Vendo and get a fresh charge of Zap so Abe can flip the lever to open the door revealing the Armored Vykker Sawbones. Send Munch down and watch how fast he disposes of this guy with just a few short zaps. Go back and get your Fuzzles and take them to the Rescue Portal.
Abe can then drop down and go get his Scrubs and send them through the portal. Make a quick check of the Status Board before you use the Teleporter to leave. Fuzzles are known to get left behind if you aren't careful.
Egg Hunt
Vykkers Suites -
SCRUBS: 10
NATIVES: 0
FUZZLES: 0
EGG CRATES: 17
SPOOCE: 0
 Munch is off doing "something else" so this level is all about you, Abe. Follow the ledge and collect the Spooce. When you reach the far end drop a Possession Orb off the catwalk and take control of the Vykker Scientist below. This guy isn't too tough right now so send him over to either the Snuzi Vendo or the Lil' Hacker Vendo and make him battle worthy. Now send him down the hall and clean out all the other Vykkers in this part of the level. Make sure not to hurt any of the Scrubs working in the side rooms. If your guy dies just possess another and try again. Experiment with the different Vendos and have fun!
When the area is clear drop down and get Mudokon Scrubs 1-10 from the various rooms along this hall. Make sure you have all ten before you have them pull those levers. Even though there are only eight levers something special is going to happen and you want everyone present. The Shaman appears on the ledge above the door and magically turns your Scrubs into Mudarchers...NICE!
Lead your warriors into the next room and have them work once more to open the door to the central area. Wait for them to return to the door that just opened then order them to attack and watch the bodies fly. When the room is clear you can enter and pull the lever to reveal a new area. Before you leave you still need to find 17 missing Egg Crates. Exit this room and circle around to the left. The curved passage ends at a ladder you can climb to reach those missing crates. Start with the crates closest to the Chute and work your way back. QuickSave just in case you miss a toss and smash one of the crates. You've come too far to miss that perfect score now. Once you have rescued Egg Crates 1-17, pull the lever near the Chute to open the final exit.
Drop back down to the main floor and collect your Mudarchers. There's no Rescue Portal for these guys so just lead them down the exit passage and join up with Munch at the giant Air Ship.

CONGRATULATIONS!!!
You've finished Munch's Oddysee.
Enjoy the final movie.
Rescue Checklist
Here is an index of all the creatures that need to be rescued in this game to achieve a perfect Quarma score. These will link back to the walkthrough to explain in greater detail how and where to find the missing creatures. Note: Mudokon Natives technically don't get "rescued".
 Journey to the Big Well
SpooceShrub Forest
Escape from Vykkers Labs
Mudokon Native 1 to right as you enter forest
Mudokon Natives 2-3 bottom of scaffold
Mudokon Natives 4-5 behind locked door
Mudokon Native 6 resurrection totem
Mudokon Native 7 top of Spooce cliff
Mudokon Natives 8-9 to either side of Zap Henge
Fuzzle Testing
Return to Raisin
Fuzzles 1-5 you start with these
Fuzzles 6-10 along left wall of lab
Fuzzles 11-15 along right wall of lab
Fuzzles 16-18 dark corner near lever
Fuzzles 19-21 guarded by first Intern
Fuzzles 22-24 guarded by second Intern
Fuzzles 25-27 guarded by pair of Interns
Fuzzles 28-38 guarded by four Interns
Flouride Tanks
Fuzzles 1-3 guarded by first Intern
Fuzzles 4-7 guarded by pair of Interns
Fuzzles 8-13 guarded by four Interns
Snoozie Lab
Fuzzles 1-12 in final lab
Mudokon Pens
Puds and Chumps
Fuzzles 1-4 in first Mudokon pen
Fuzzles 5-8 in second Mudokon pen
Fuzzles 9-12 in third Mudokon pen
Mudokon Natives 1-3 one in each pen
Mudokon Native 4 in Spooce valley
Mudokon Tomahawkers 5-6 in left cage near exit
Sloghut 1027
Mudokon Scrubs 1-3 working on ledges
Mudokon Scrubs 4-9 locked in pen near final run
The Mudokon Fortress
Fuzzles 1-6 on caged island
Mudokon Natives 1-4 scattered near level start
Mudokon Tomahawkers 5-6 in cells on caged island
Mudokon Native 7 inside fortress
Mudokon Tomahawker 8 guarding open door
Sloghut 2813
Mudokon Scrubs 1-2 on ledge by lever
Mudokon Scrub 3 on far right ledge
Mudokon Scrubs 4-7 working in large hall
Mudokon Scrubs 8-11 one on each Slig platform
Meep Herder Village
Splinterz
Mudokon Native 1 past fence near wheelchair pad
Mudokon Native 2 pedestal in Slog pup valley
Mudokon Native 3 on pedestal by totem and shrine
Mudokon Native 4 resurrect using the totem
Mudokon Native 5 center spire in main valley
Mudokon Natives 6-9 in first Mudokon pen
Brewery to Be
Mudokon Natives 1-3 inside Windmill
Mudokon Natives 4-15 behind large gate
Fuel Fields
Mudokon Natives 1-2 just before mine canyon
Mudokon Natives 3-4 platforms over mine canyon
Mudokon Natives 5-6 under structure after mine canyon
Mudokon Natives 7 just past Transformation Shrine
Magog Motors
Mudokon Scrubs 1-4 working on right ledge
Mudokon Scrubs 5-8 working on left ledge
Deep River
Flub Fuels
Mudokon Natives 1-4 scattered about the village
Mudokon Native 5 on trail just past mines and Travel Well
Mudokon Native 6 end of trail near totem
Mudokon Native 7 top of ramp coming out of water
Mudokon Native 8 in canyon leading to Storm Circle
Boiler Room
Mudokon Scrubs 1-2 near Invisibility Vendo
Mudokon Scrubs 3-6 warehouse with sleeping Sligs
Mudokon Scrubs 7 red passage between areas
Mudokon Scrubs 8 near keg and explosive wall
Mudokon Scrubs 9-12 behind wall of explosive crates
Mudokon Scrubs 13 near Big Bro Slig dispenser
Splinterz Manufacturing
Mudokon Scrubs 1-10 scattered about the factory floor
Mudokon Scrubs 11 stuck on high ledge near explosive crates
Mudokon Scrubs 12-14 trapped in mine rings in dark passage
Reservoir Row
Return to Vykkers Labs
Mudokon Natives 1-4 Mudarchers near end of level
Flub Fuels Scrub Pens
Mudokon Scrub 1 first pen on right (facing lever)
Mudokon Scrubs 2-4 second pen on left
Mudokon Scrubs 5-6 third pen opposite second pen
Fuzzles 1-17 in L-shaped dark hall
Mudokon Scrubs 7-11 to the right of the circular Spooce ledge
Mudokon Scrubs 12-20 to the left of the circular Spooce ledge
FlubCo Executive Offices
Mudokon Scrubs 1-6 at the beginning of this level
Mudokon Scrubs 7-11 on the high catwalk
The Loading Dock
Egg Hunt
Mudokon Scrubs 1-2 in the first passage
Mudokon Scrubs 3-4 in water control room area
Fuzzles 1-6 inside water control room
Egg Crates 1-22 in center of main room and top-right ledge
Labor Eggs Storage
Egg Crates 1-9 top of first ladder
Mudokon Scrubs 1-4 two rooms off of main room
Mudokon Scrubs 5-8 room above crane main area
Mudokon Scrubs 9-14 room above crane main area
Fuzzles 1-12 main room with two cranes
Egg Crates 10-36 final room of level
Vykkers Suites
Mudokon Scrubs 1-10 located in various rooms off main hall
Egg Crates 1-17 above final room