Amateria - The Age of Dynamic Forces

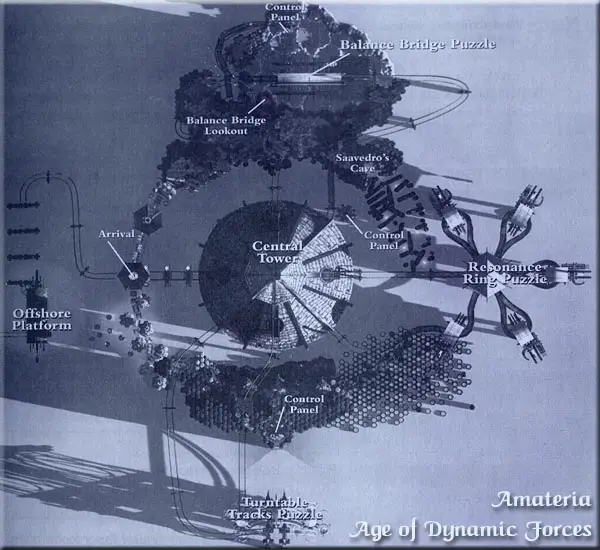
Amateria is basically one giant broken roller coaster that spans the entire island and it is your job to fix it. Naturally this will involve some of the most devious puzzles in the game so far. There are four major sections of the island and each has its own unique puzzle and solution.
 When you first arrive you can look to the right to see the huge Central Tower. This is the where the roller coaster begins, but you aren't ready to go there yet. If you turn around and look opposite this tower you will see an Offshore Platform. This is your final destination and the end of the ride so to speak. But there is much to do so head down the walkway in the direction you were facing when you arrived. Continue through the second pagoda and note the J'nanin Linking Book to the right. No reason to use it now or ever, so ignore it and continue down the stairs to the caves below.
 Follow the caves and you will find an opening to the left that overlooks the ocean and a pair of curving rails above. Continue forward to the intersection and angle right until you spot the elevator set into the left wall. Get in and ride to the top. Turn and look opposite the elevator handle to find missing journal pages resting on the nearby ledge.
 Balance Bridge Puzzle - Difficulty: Very Hard
This is a rather lengthy puzzle that spans several locations before you can solve it. For now, you are just doing some research and experimentation. I'll explain the theory behind the puzzle in a moment. Examine the chute on the right and the orange sphere on the rails to the left. Zoom in on the sphere to learn it is made up of eight sections (four on each side). Make a note that this side is made of three woods and one crystal wedge.

Return to the elevator and ride back down. Turn right and go back to the previous junction and this time take the other path leading across the wooden walkway over the water. Follow it around to a small platform with a control panel. Get on the platform and turn to the right to get a much better view of the chute and fulcrum wheel. Look off to the right and zoom in on the orange sphere again to learn that the remaining four wedges are all made of wood.

 Now turn your attention to the control panel. Pull the lever to the left to raise the platform so you have a better view of the chute. Experiment with the controls to learn that by moving the three levers you can adjust the location of the fulcrum wheel to one of three positions. Pull the lever on the right and watch what happens. The orange sphere drops into a net and acts as a counterweight against the weight at the left end of the chute. Some adjustments need to be made to make this work.
Flip the left lever to ride back down and turn left to walk across the sandbar to the building at the end. Enter this room to discover the other weight that controls the chute balance above. Note several key weights have been destroyed by Saavedro making your task just that much harder. We know that the sphere outside is made of 7 wood sections and 1 crystal, which is equal to 4 woods giving us a total sphere weight of 11 wood sections.

Looking at the available wedges we learn we cannot do a 1:1 counterweight but we can do a 2:1 weight. We know that a one metal wedge equals 4 crystals which is also the same as 16 woods. The weight currently has 4 wooden sections so add 2 more wood wedges and a metal wedge for a total weight of 22 woods. In case you are wondering where I am getting these weight ratios - think back to the workshop in the Observatory.
 Now return to the controls back outside and pull the lever to raise the platform. Thinking back to the model of the hanging men in the Observatory you realize you need to adjust the fulcrum location for a 2:1 ratio. Move the top lever so that it is over to the right and the middle and bottom levers are both left. This causes the wheel to move to the far left as shown in the left image. Pull the right lever and watch the results. When done you will get a quick view of a section of bridge that has now been activated then the console closes in on itself. Make a note of the hex symbol pattern and that the border of this design is yellow. These are both subtle clues for a puzzle near the end of this level.
Now it's time to make a quick trip to the next puzzle. Ride the platform down and return across the walkway to the right back past the elevator you previously took to the other side of the chute. Keep going forward until you see a watery passage ahead and a ladder carved into the rock wall on the right. Climb up to the ledge above and follow the curved walkway then turn left and head toward the control panel. Turn right and get the missing journal pages lying on the ground then turn your attention to the control panel.

Flip the lever on the left to raise the pedestal for a good view of the puzzle below and a great view of the entire island. Pull the lever on the left and watch the results.
 Resonance Ring Puzzle - Difficulty: Very Hard
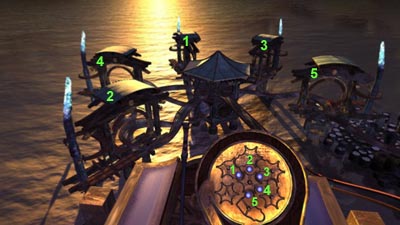 This is a tricky puzzle and requires a lot of manual adjustments before it is solved. In case you didn't understand what you just saw here is how this device works. Each of the five structures out over the water generates one of five possible resonance frequencies. You need to manually go down to the track and follow the path that the ball will be taking changing each station's frequency along the way. You need to match the frequency of each pagoda with the toggle switches on the timer on this console so each one is deactivated just as the ball tries to pass through. Confused?
Flip the left lever to go back down and make your way back to the carved ladder and climb back down. Turn right and go into the watery passage and circle around to the right over the wood-plank bridge. Check out the interesting mural on the wall to the left then continue across the rocks and up onto the track. Turn left and face the first pagoda. Walk forward into the intersection and directly out the opposite side.

 Follow the track until you reach the first station. You will note the vibrating force field. Go out on the walkway to the left and zoom in on the control dial. You will note that each of the settings also has a symbol that matches the symbols on the timer you just left. You can probably figure out what to do from here, but I will give you the answers anyway. Turn the dial to the 10 o'clock position then return to the rails.
 Turn left and pass through the shimmering force field and follow the track to the junction tubes below. Angle slightly to the right and head up the track to the next station. Zoom in on the dial and move the pointer to the 12 o'clock position. Get back on the track and continue your journey along the ball's path. Pass through the shimmering ring and turn right onto the walkway.
 When you reach the next dial shown in this image turn it to the 2 o'clock position then continue down the track as it curves to the lower junction you passed through earlier. Angle slightly to the right and go through the middle opening to follow the track up to the next pagoda.
 Zoom in on the dial and change it to the 4 o'clock position. Now return to the track and head up toward the main junction and straight out the other side. Continue to the final pagoda and walk out onto the walkway to the left. Turn the final dial to 6 o'clock.
Now that all the frequencies are matched to the toggle switches you can return to the control panel for this device. From this location, return to the main junction and turn left to face the large Central Tower. Go across the track then drop down to the right and go back through the watery passage until you can climb the carved ladder.
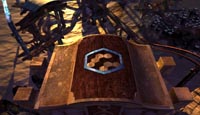 Pull the lever to ride back to the top then pull the other control lever to launch another ball onto the track. Watch as the ball passes through all the rings and out the other side. This causes the control panel to close revealing another pattern of hexagons surrounded by a blue border. Again, these are both clues to a future puzzle so remember them. Pull the left lever and ride back down. Retrace your steps all the way back to the track leading to the center pagoda of the ring puzzle you just solved.
 When you enter the junction turn and go down the tracks to the immediate right. The tracks lead to a moss-covered landmass on the left. Exit the tracks onto the moss and follow the path as it curves to the right. When you see the wooden door set into the wall on the left, open it and enter the next puzzle area.
 Turntable Tracks Puzzle - Difficulty: Hard
This is a puzzle that requires a lot of experimentation to figure out. Fortunately I'm about to give you the answer, but if you really want to figure it out yourself here are the rules. The device consists of twin turntables with several pockets for the ball to land in. Some are open which will cause the ball to drop through, and the others have springs that can launch the ball into the overhead rails sending it to the opposite turntable.
 The turntables are tied into the dials on the control panel in front of you. Note the holes (including the plugged one that Saavedro has sabotaged) in the dials and the three red pegs in the tray below. By placing the pegs in the proper holes you can cause the turntables to stop at certain locations. Your ultimate goal is to get the ball onto the rails at the upper right and send it back to the Central Tower. To solve this puzzle put pegs into the 10 o'clock hole on the right dial and the 12 and 2 o'clock holes on the left dial as shown in the right image above. Pull the lever and watch.
 With the puzzle solved the console closes revealing the third and final hexagon pattern with a green border. Pull the leather-wrapped handle to the left and ride back down. As you turn to face the exit make sure to get the missing journal pages from the rock ledge. Now exit through the door and turn left.
 Continue to follow the obvious path until you come to a walkway leading over the water. Continue along the walkway as it twists through the watery caverns leading back to a rope ladder leading up to your starting location. Turn right to face the Central Tower and approach the first gap in the rail. Turn left and zoom in on the control panel.
 Tower Entry Puzzle - Difficulty: Easy
There are three gaps in the rail system leading to the Central Tower and three pedestals with hexagons. You should have acquired three sets of codes by now. You need to enter one of these codes into each pedestal (order is not important) to raise the corresponding section of the rail. As you enter each code then zoom out the next section of the rail will close allowing you to access the next pedestal and finally the door to the tower.

Push the hex-buttons to form the patterns you found earlier (shown above). The order you push the buttons is not important, and if you zoom out before finished all the pressed buttons will reset. When you have raised all three sections you can open the door and enter the tower.
 As you enter, a set of stairs slides over and opens up allowing you to access the top level. Climb the steps and click on the back of the orange chair to make it spin around. Sit in the chair and access the imager to see another message from Saavedro. When the message is over you can look up to find a handle you can pull to raise the chair to the very top of the tower.
 Track Switch Puzzle - Difficulty: Medium
Enjoy the spectacular view of the entire island then examine the orange control panel in front of you. Also make a note of the colored buttons above you. Each button launches a ball into a certain area of the island. These colors match the border of the hex-code patterns you discovered earlier. If you have already forgotten here they are again:

Your goal is to rotate the various pieces of track so you have a continuous path to the Offshore Platform. Note the four colored lines and the C-shaped markings. The C marks where the ball is launched from when you press that color button. The other end of the line indicates where the ball returns to the Central Tower. Begin by starting at your destination (the red symbol) and work your way backwards to create a path through all the areas. If you can't figure it out just match your console to mine in the right image.
Save your game, as you will want to replay this next part for all your friends. PUSH THE BLUE BUTTON!
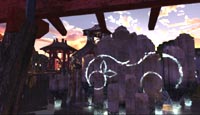 Cool - huh? When the ride is over you will automatically get the Amateria Symbol. Look down to find the J'nanin linking book and open it. Click on the panel to transport back to the Observatory where you can use your new symbol on the imaging table. This triggers another message from our old friend Saavedro and also opens the cage holding the linking book. You still cannot reach it. There is one more book to find (assuming you are following this guide). Exit the Observatory to the upper catwalk and prepare to get the next book.
Return to Chapter 2: J'nanin: The Lesson Age, and jump to the section for the next book you intend to get.
