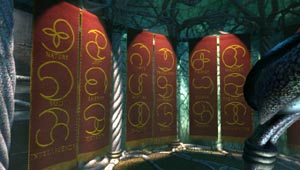
 Welcome to the final stop in your amazing journey. This is a very short level with only one real puzzle, but it is a hard one. You are going to have to do a little research and remember many things you have learned throughout the rest of the adventure. For now, turn and face the five pairs of red tapestries. Study the words and symbols, as they will be important in a few minutes when you start to solve the puzzle. Also make a note of the missing tapestries that someone (guess who) has torn down. Head up the short flight of green stairs to the first landing when you are ready. There are several exits, most of which are blocked, and a mechanical device to the left.
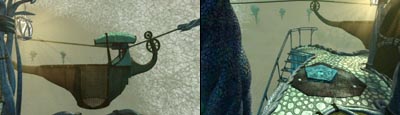
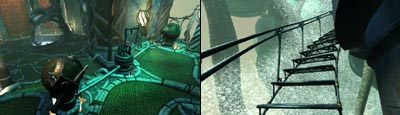 Looking through the door blocked with the vines you can see an airship docked just outside. Another door to the left is blocked by an ice shield. Check out the pod-like console on the floor. Touching it causes it to hum, but it seems there isn't enough power to make it operate as intended. Turn and head up the curving stairs to the top of the power station tower.
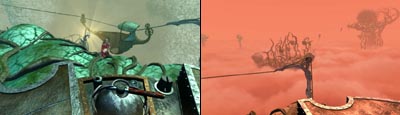
 When you reach the top of the power station take one step forward and Saavedro will come out of the opposite door to talk with you. Interesting robes he is wearing - now we know where those missing tapestries went. When he is done ranting you can turn right and flip the red lever to the position shown in the left image. Now return downstairs to the twin pod-like console and the switch between them.
 Shield Code Puzzle - Difficulty: Very Hard
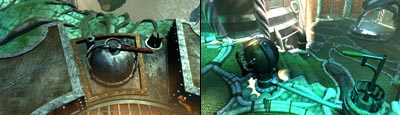
This puzzle is divided into two parts, the Inner Shield controlled by the left pod and the Outer shield controlled by (you guess it) the right pod. The switch in the middle directs power to either pod and toggles the appropriate shield on or off. When there is no power all shields are turned on - this is an important clue for the end of the game. The power is currently going to the right pod, so flip the lever to the left then approach the left pod.
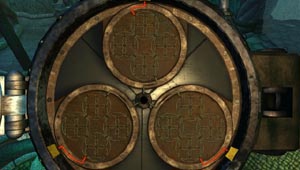 Click on the sphere to cause it to rise up then click on it again to open the cover. Before you is a console with three circular designs made up of several arc segments that can be toggled on or off. You must input the Age symbol you retrieved from each of the Ages you have visited, but it turns out you only have partial symbols. You need to figure out which parts of the symbols are missing by using a combination of the tapestries and Atrus' journal.
By studying the tapestries you learn:
But this is only half of the puzzle. There are four symbols per glyph and you only have two. To find the missing symbols you need to refer to Atrus' journal and read the Age-building tenets to learn the missing words.
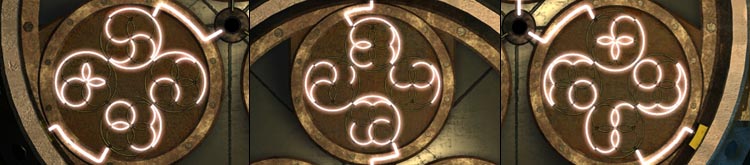
You'll note the final tenet gives you all four words necessary for a forth code yet you can only locate one of those symbols (Civilization) in the tapestries. The missing symbols for the Balance code must be somewhere else. We'll worry about that later. For now, let's enter the first three sets of four symbols. You can enter the Age symbols in any order and in any circle you want but the order of each component of each symbol is important. Enter each symbol by starting at the top and working around in a clockwise direction. Here are the three finished symbols as I did them.
 When the final code is entered the ice shield over the door to the right melts, and you now have access to the ledge outside that leads to the flying ship. Head out to the ledge and note the huge outer ice shield that keeps anyone from using the ship. You will need to figure out how to lower this shield. Locate the stairs to the left and go down to the next level.
 At the bottom of the stairs you will immediately notice the linking book to the left. This is the Tomahna book that will return you to the home of Atrus. WARNING: You may take this book but do not use it. Linking back to Atrus while Saavedro is still on the loose is a fatal mistake and will end the game. If you want to see what happens then make sure to save your game first.
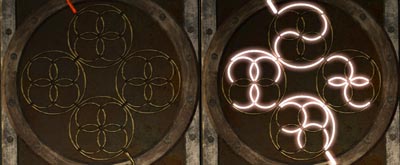 Continue forward and locate more tapestries, which have the missing words you need for the rest of the Balance code. Once you have the symbols for Balance, Stimulate, and Systems you can return to the upper level and flip the lever to the right so you can access the right control panel. Note that the inner ice shield over the door reappears. This panel only has a single circle requiring only one code. Enter the four words for the Balance code in clockwise order from the top as shown in the image. This will deactivate the outer ice shield.
Saavedro shows up and is amazed that you have figured out how to deactivate the shields. He immediately offers you a bargain - he will trade you the book of Releeshahn in exchange for you flipping the switch to allow him to leave on the ship outside. Note: This is where the game splits into several endings. While there is only one good ending, you may want to save your game here just so you can experience them all.
BAD ENDING 1
If you agree to the initial proposal and flip the switch Saavedro will take off in the ship and not give you the book. Sucker!
BAD ENDING 2
Follow Saavedro out to the catwalk and talk to him. If you annoy him long enough he will throw the book off the ledge and attack you. If you leave when he threatens you and return he will threaten you again. If you leave and return a third time he just attacks you without warning.
GOOD ENDING
 We need to get the upper hand on Saavedro. Head up the stairs to the original power switch and flip it down to turn off the power. This causes both ice shields to reactivate trapping Saavedro on the outer ledge. He totally flips out and starts screaming. Go downstairs and talk to him through the gate and he will hand you the book. You now have what you came for and are ready to end the game.
You have two options at this point but once again there is only one good ending. You could be mean and use the Tomahna book leaving Saavedro trapped between the ice shields forever OR you can set him free. Head to the switch and flip it to the right. This is important so that when you restore power the outer shield is deactivated and not the inner shield. If you forget to do this Saavedro will rush up the stairs and kill you. With the switch in the right position head back upstairs and turn the power on. Saavedro will wave to you and get on the ship to sail off to the distant floating island on the horizon.
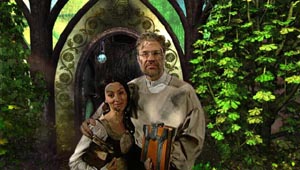 Now that Saavedro has been set free and you have recovered the Releeshahn book you can return to Tomahna by using the linking book in your inventory. Once you are back in the garden spin around to face the door to Atrus' study and take one step forward. Catherine and Atrus both exit from their burned-out study to greet you, and Atrus takes his book and examines it. They thank you for all your hard work and the ending movie begins with an epilogue by Atrus.
CONGRATULATIONS!! You have completed Myst III: Exile.