Welcome to Antarctica! After you and Steve hop out of the plane you split up and head around to the right until you can climb down the ladder. Follow the catwalk past the double doors and the single door and take the steps down to B2. Go through the creepy hall and through the next door into the study. Take the arrows and the ink ribbon. There is also a Green Herb on the floor and a Blue File you can get from the desk and read. Save your game and adjust your inventory to free up some slots.
Investigate the rattling and push the bookcase back to reveal a secret passage leading to a locker. Open the locker and read the Letter. Ignore the button for now and exit the study. Head left through the web-covered wall into the long passage filled with giant poisonous moths. There is a Blue Herb at the end of the hall. You cannot take it with you, but you can eat it and it will grow back so you can use it infinitely. Make sure to eat from this plant before ducking into the double doors.
You are now in a large warehouse filled with several Zombies. They are scattered so you can use your knife and save some ammo. There is a lot to do in this room but none of it is working right now since the power is off. Head to the back of the room and go through the door marked B.O.W. Have a good weapon ready when you enter the room (I recommend acid rounds) and kill the two giant spiders. A third spider is under the floor grate and will spit at you. You cannot kill him, so run around and pick up the two boxes of bullets, the arrows, and the pair of Green Herbs. Do not overlook the very important Barcode Sticker in the back corner.
Return to the warehouse and go under the machinery opposite the steps leading to the door. There is a button on the wall and a lever on a console. These do not work yet, but there is a box next to the lever that you can put the barcode sticker on. Go back toward the B.O.W. door and this time turn right and go under the machines to the WEAPONS door. Enter and kill the Zombie that attacks then move deeper into the room killing more Zombies. Get the Red Key and the Detonator from the Zombie in the very back corner. Insert the detonator into the explosives then leave. On your way out of this area check the green locker to get the AK-47 Assault Rifle.
Return to the main warehouse and go up the short steps to the door. Use the key and toss it before entering. Explore the section to the left (climb up two ledges) and note the stairs that go up to the Emergency Gas Shutoff Valve. Continue straight following the wall and enter the next door to the dark room. There are three dogs in this area and the camera angle makes it difficult to see them until its too late. Have your modified handgun ready to go and slowly move around killing the dogs and collecting the five Green Herbs and the bullets. Locate the switch under the catwalk and turn on the generator. Head back to the door you just entered and locate the other switch to turn on the lights all over this facility.
Return to the middle section of the warehouse and press the button the wall then pull the lever to start the boxes moving. You can now return to the room with the spiders and get the Gas Mask from the opening in the wall just as you enter. Exit this area and return to the study and save your progress. Note: Chances are you will always be poisoned by the moths when leaving the warehouse. Assuming you don't have any Blue Herbs in your inventory the best strategy is to just "stay poisoned" until you return to the warehouse at which time you can eat another Blue Herb from the hall. If you start to walk slowly then use a First Aid Spray or Herb.
Return to the locker in the back of the study and press the button to open a secret door. Enter the new room and get the flowerpot. Spin this item in your inventory until you can take the Blue Key from the bottom. Make sure you have at least four open inventory slots then exit the study and go up the stairs. Back out on the catwalk make a U-turn and enter the single door next to the stairs.
A glimmer of light catches your eye between the lockers. Head to the back and get the Gun Bow Powder to make ten explosive arrows. Search the lockers for bullets and a First Aid Spray and there are more bullets, and ribbons on the floor next to the map of the facility. There are also some more bullets on the shelf. You will have to kill a few zombies while getting these items, but they are pretty easy by this point in the game.
Exit this room and continue to the left and go through the double doors. Go to Claire's left and use the key on the door then toss it. Enter and ignore the console for now. Head to the other door and enter. Walk out onto the catwalk and get the Valve Handle. Return to the previous room for an encounter with Steve. After he has screwed up you need to shutoff the gas back down on the lower level. Here comes a BIG CHEAT!
The valve handle you currently have has a square adapter but the valve requires an octagonal adapter. The game designers want you to run all the way down and find this out the HARD WAY. I'll let you benefit from my experience and save you a lot of time and probably a lot of health. Continue to the other side of the catwalk and go in the other door. Ignore the Zombie beating on the cage and go to the back corner of the room. Use the Valve Handle on the machine and it will reshape the adapter to fit the gas valve. Before leaving you will want to search this room and collect the two boxes of bullets, the ribbons, a Green Herb, and a Blue Herb.
Exit this room and return back to the outer catwalk. Go right and back down the stairs. Dodge the moths the best you can and eat a fresh Blue Herb before ducking back into the warehouse. OH NO! More Zombies. Four of them and they are closing fast. Kill them however you see fit then head back up the steps and into the next room. Climb up the ledges then the stairs and use the valve to clear up the air.
Head back to the study and save your game and adjust your inventory making sure you have a pair of slots open. This is an important save as you are about to turn control over to Chris and he will have access to whatever items you leave behind. I recommend leaving behind your Grenade Launcher and the AK-47 Assault Rifle. Make sure you have a couple healing items and your ten explosive arrows and some handgun rounds. Return to the room where you just shut off the gas and get the Sniper Rifle from the right side of the room. Get in the drilling machine and drive off.
Before heading down the stairs search the two bottom corners of the helipad. You will find some bullets and a First Aid Spray behind the large boxes. Head down the stairs to trigger the encounter with the big boss. Killing this guy isn't too hard. Quickly move to the opposite side of the pad and face him. Target him with your sniper scope and zoom in to shoot him in his exposed heart. After you have used all your sniper ammo switch to the Bow Gun and the explosive arrows. Keep moving as you fire so he cannot sweep you off the pad with his long arms. If he is still alive after this then pump him full of hand gun rounds until he dies. Enjoy the movie.
Chris Redfield
 We now join our hero as he is climbing a sheer rock face leading up to the prison complex. When Chris reaches the top you can get the Green Herb then talk with the man who helped Claire earlier. Your conversation is cut short when that Giant Worm rumbles in and swallows the poor guy whole! Make a note of the carving on the wall as you run around the corner to the storage box and typewriter. Get the arrows and the ribbons then save your game before going through the door.
Prepare to do battle with that Giant Worm. He only takes about 20 hits from your handgun, so keep moving so he can't burrow up under you. You have lots of room to run around as you fight. A pair of Green Herbs and a Blue Herb are available when you enter the cave. Just before the worm dies it will spit out your "friend" who gives you Claire's Lighter.
Head back to the carving on the wall and open the lower section. Use your lighter to ignite the flame and get the Twin Uzi's. Adjust your inventory then return through the worm cave and use the elevator at the opposite end to ride up to the garage in the Military Facility. Kill the three Zombies waiting for you when you arrive (I recommend using the knife) then head through the large doors to the outside area with the tank. Go to the back of the tank and press the red button to move the tank and reveal the lift and some bullets.
Ride the lift down and follow the passage gathering the shotgun shells, Green Herb, and the Blue Herb. Enter the first door where you will find a storage box and typewriter along with more shotgun shells, bullets, and acid rounds in the closet. There is also a Green Herb, and an infinite supply of Blue Herbs that can only be eaten in this room. Check out the drawers in the back corner and open them in this order: RED - GREEN - BLUE then BROWN after the click. Get the Gold Lugar.
Note: This is a special item that has no use in the game. When you finish the game with this item in the storage box you will unlock Steve as a playable character in Battle Mode. Go ahead and put it in the chest and don't worry about it ever again.
After you have saved and adjusted your inventory to free up some spaces you can leave and continue down the passage to the dead end. Get the Battery and then prepare to kill a pair of giant spiders that drop in to visit. Return to the lift and ride up and reenter the garage. Go to the other side and insert the battery into the lift. Climb up and activate the controls to ride up to the top ledge. Go left to get the letter and the Chem Key then go through the door.
After the movie you can go in the nearby elevator and ride it down to B1F. The new camera angle shows you some stairs leading down to a new area. Go down and ignore the shotgun as taking it will raise the stairs blocking your exit. Get the bullets, ribbons, and flame rounds. Go through the door into the lab and get the Green Herb before going up the stairs. On the next level is a computer you can use to lower a cylinder allowing you to get the AK-47 Ammo (50%).
 Go through the next door into the warehouse area and search the far wall where you will see a flickering on the floor. Get the Door Knob that triggers an encounter with a pair of Hunters. These creatures are very deadly if you give them a chance to attack. The trick is to open fire with your Uzi's and knock them to the ground them pump a few more rounds into them to finish them off. Now retrace your path all the way back through the lab to the elevator. Ride it up to 2F and go into the control room and exit through the door to the left.
You are now outside on that balcony where Alfred was shooting at Claire earlier. Watch as the blue shield you need tumbles into the water below. Cross the balcony and enter the opposite door. This hall is guarded by a security robot. Watch the beam of light and make your way down the hall staying out of the light. If you get caught in the beam you will be fighting another Hunter. Duck through the hole in the wall and get the side pack and some arrows. Go through the door in the corner and enter the next hall.
Use the doorknob on the broken door and enter. Search the walkway for some bullets and a model tank mounted on a square piece of wood. Retrace you path back to the control room and enter the elevator and ride it to 1F. When you exit you will have to dodge another robot-cam as you make your way to the room with the typewriter and the model of the military complex. Put the tank on the model to open the picture behind you. Get the Turntable Key and the green book and note the three sockets for the crests that Claire used at the airport.
 Return to the elevator and ride it down to B1F and return to the lab for an exciting encounter with Wesker. After he throws you into the cylinder a Bandersnatch is released. Kill him, then go through the doors into the warehouse area and use your new key. Activate the switch and ride the lift to the top. Climb over the box and enter the main lobby of the Military Facility. Go through the door across the lobby and kill the Zombies inside. Go into the back office and kill another Zombie then get the Acid Rounds from the locker before going out through the other hole in the wall.
Go through the next door and you will be back outside. Kill the crawling Zombie then go into the fenced area and down the ladder. Flip the switch and the fan will clear out the poison gas. Enter the boiler room and go through the door at the back of this room. Kill the Hunter when you enter then go into the room opposite where you entered. Get the hand gun upgrade and the Green Chemical on the shelf. Exit this room and get on the big turntable lift and ride down to the lower level.
Cross the room and go through the two automatic doors to get into the lab. Collect the bullets, shotgun shells, Green Herb, Red Herb, and the Blue Herb. Use the Chemical Key to open the cabinet and set the temperature to 128 (remember that 12 and 8 number I told your to remember). This will turn the one of the chemicals inside a new color allowing you to get the Blue Chemical. Mix the two chemicals then kill the Hunter that comes through the vent.
Leave the lab then go through the warehouse and the lab and get the Shotgun. This causes the stairs to go up. Walk where the stairs used to be and jump into the water. Kill another Zombie and exit on the other side where you can collect a pair of Red Herbs before climbing the ladder and exiting through the manhole. You are now in the hall leading to the save room from earlier. Head there and stash some of your items and save your game.
Now make the long trip back to the turntable lift and ride it to the top. Head out into the worm-free compound and kill the pair of Hunters that attack. Make your way to the cargo lift and ride it down to the airport. Use the storage box and/or typewriter as necessary (make sure to have 3 open slots) then enter the next room. Kill the Hunter that attacks as you enter then ride the lift to the control room above. Go out the other door to the control tower where Claire raised the bridge earlier. The controls are jammed so cross the bridge and enter the other door.
Look at the controls on the wall to the left of the door you just entered. This is a challenging puzzle that requires you to measure out 7 units of oil in the bottom container by manipulating the two other containers that feed it. To quickly solve this puzzle do the following:
Push the 3-unit button 4 times
Push the 10-unit button to drain all the liquid
Push the 3-unit button
Push the 5-unit button
The bridge is now active and so are the three Zombies in this room. You can easily ignore them and exit the room or you can fight them and get the shotgun shells in the corner as your reward. Run back across the bridge and flip the lever to lower the bridge. Go back through the control room and ride the lift down. Exit out onto the bridge and kill another Hunter then cross over and enter the door to the underwater facility.
Kill the three Zombies that stagger around this room then enter the door by the aquarium and kill the Hunter. He has his back turned when you enter so you can get off a free shot. When the monster is dead you can flip the control switch to turn off the power and take the Army, Navy, and Air Force Crests. Return to cargo lift and save your game before riding to the top.
A pair of Poisonous Hunters are waiting in the courtyard. A few grenades wipe them out allowing you to enter the lobby of the Military Facility. Make your way through the complex and down through the boiler room until you reach the elevator. Ride it to 1F and enter the room with the model of the complex. Use the three military crests to disable the lasers and flip the switch to retract the model into the wall. Grab the shotgun shells and the Green Herb then climb down the ladder.
Kill the pair of Giant Spiders that are crawling along the ceiling then get the Grenade Rounds and the two Green Herbs and the Blue Herb. Enter the large pool area and check out the location of the Blue Shield and the giant monster that guards it. You can try to kill this creature but it will take lots of time and ammo (about 20 hits with the shotgun).
You should have enough herbs to survive a dash through the electrified water. Walk out to the bullets and after you take them wait for the creature to swim to the far side of the pool. Quickly climb into the water and run to the shield and pick it up. Then run to the nearest edge (away from monster) and climb out. Heal if you need to then retrace your path back to the elevator. Ride it to 2F and return to the garage. Take the portable lift down to the ground and exit out to the area with the tank and ride that lift down to the passage below.
Return to the save room and adjust your inventory and save your game as you are about to leave the island. Combine the chemical with the blue shield to get the Gold Halberd and open the locked door where you picked up the battery at the beginning of Chris' adventure. Jump in the Harrier and fly off to Antarctica.
Go out the double doors and blast the tentacles until they retract into the wall. Go down the ladder and you should recognize your surroundings. Go down the steps and enter the study. Use the halberd on the column to unlock the cabinet and get the Diary, ribbons, and Dice. Save if you want and grab the Fire Extinguisher from the storage box before leaving.
Head up the stairs and go in the first small door. Search the room and get the Grenade Rounds from the bunk bed any other items Claire may have left behind. Exit this room and go to the large double doors. Go to the right and enter. This is the room that flooded when Claire and Steve tunneled out of here, and the water is now frozen. Walk out onto the ice and get the Valve Wheel. A bunch of Zombies break out of the ice and surround you as you try to escape. You can kill or dodge them as you leave this room.
Back in the main area, go to the opposite door and enter the machine room. Three Zombies are staggering around in here. Kill them, then raid the cage for shotgun shells and a briefcase. Leave this room and climb down onto the ice where the railing is missing. Go to the opposite catwalk (note the giant spider under the ice) and climb up and enter the room on the right. One of Wesker's droids is patrolling the hall. Duck through the door next to you before it can summon another Hunter.
Flip the switch to raise the drum that you can use to refill your Fire Extinguisher. Now ride the left down below and put out the flames. Get the Colt Magnum from the conveyor then head to the back of the room and use your lighter on the detonator that Claire inserted a long time ago. Inside are a lot of bullets and a Gun Part. Return to the lift and ride back up and enter the hall with the security droid.
Follow the corridor and go through the door. Ride the lift and when you reach the bottom go through the door and into the Power Room to the right. Use the valve handle on the console to the right to insert the plug then flip the lever on the left to restore power. Exit this room and kill a small army of Zombies then enter the gray door.
Push the statue onto the crack next to the cabinet and get the map, then kill some more Zombies as you make your way to the door. Follow the hall to the tiger statue and remove the blue eye to get the 4-side brass fitting then put the blue gem back and take the red one to get some magnum ammo. Return that gem and combine the brass fitting with the valve handle then exit through the opposite door and down the lift.
Enter the nest area and get the Dragonfly Wing then move to the left crushing the wasps as you make your way to the next room. Kill a lot more Zombies in the next two rooms then get the two boxes of bullets and read the letter on the disc. Return to the nest and go right to enter the control room where Alexia was being kept.
Use the control panel on the right and enter the code: AA - Crown - Heart - Spade to open the drawer. Insert the dice you have been carrying around and watch Alfred drop out of the pod. Take his Ring then examine it closer in your inventory to get the Blue Gem. Retrace your path back to the room where you filled your Fire Extinguisher and ride the lift up to where you can use your modified valve handle to drain the water from the tank. Get the Crane Key and kill the red Hunter that attacks.
Return to the large icy area with the spider underneath and use the key on the crane. Watch the movie then dodge the giant spider as you run out onto the ice and get the Green Earring. Go back through the door then examine the jewelry to get the Green Gem. Now head back toward the Power Room. When you reach the bottom of the lift go left and kill the Hunter. Follow the water around and get the Dragonfly Wing then get in the water and locate another Dragonfly Wing before going through the large double doors.
Deja Vu! You are now in a replica of the mansion from the first Resident Evil game, so you may know your way around. Go behind the stairs to find Claire trapped in a cocoon. Use your combat knife to cut her free. If you left it in the storage box you can go upstairs and get it. Once you have cut her free two things can happen and you will have to react accordingly.
Scenario 1: Claire is fine and you continue the game as her.
Scenario 2: Claire is poisoned and you must race back to the room where you used the fire extinguisher and get the Blood Bag from the shelf.
Either way, you are now playing as Claire. Head to the room with the storage box and load up on herbs, weapons, and ammo. Now that you have a lockpick you can also open that briefcase and get some magnum ammo. Push the bookshelf next to the box and put the shotgun on the hooks to open the painting behind you so you can get the Grenade and Flame Rounds. Once you have the ammo retrieve your shotgun and leave the room.
Blast the pair of tentacles in this next area then push the middle display case to reveal some more hidden Grenade Rounds. Looks like they are stocking you up for a boss battle, eh? Continue on and exit through the door. Enter the prison area and kill the Zombie that comes out of the cell then head up the stairs and enter the cell to get two sets of arrows from the dead body.
Find and read the note then lower the cannon and watch the plastic ball come out. A block crashes down next to you. Duck underneath and get the ball then stand so you can put the ball under the block when it is up. It will smash the ball and let you get the Emergency Key Card. Return to the prison area and go through the gray door. Use the card in the slot to open the door. When you have control you need to run away from Steve as fast as you can. Heal as necessary and get under those bars.
You are now playing as Chris for the rest of the game. The battle with Alexia is easy if you have the grenade launcher. Three hits and she is down for the count. Collect the Red Gem and head upstairs to put all three of them in the family portrait to reveal a secret door. A pair of Green Herbs are inside the door to the left. Get those then kill some Zombies and ride the lift down to the lower lab. Use the computer to open the glass chamber and get the forth and final Dragonfly Wing.
Exit the lab and kill more Zombies in the hall. Before you round the corner go through the door on the left and enter the study. Get the First Aid Spray and shotgun shells then open the drawer near the painting and get the Mansion Key.
Go downstairs and use the key to open the brown double doors then toss the key. Continue through the gray door and make your way back to the Power Room where you can turn off the power. Head back to the courtyard and reenter the mansion through the front door. Go through the brown double doors you just unlocked and return to the tiger statue. With the power turned off you can now take the Red and Blue Gems.
Go back upstairs and down the hall. Go around the corner and enter Alfred's bedroom. Use the secret door to get into Alexia's room and use the red gem to get the music from the music box. Return to Alfred's room and use the blue gem to open his music box then insert the disc and it will play lowering the bed and giving you access to the ladder.
Climb the ladder and take the ribbons from the shelf then locate the jar and get the Dragonfly Body. Combine this with your four wings to create the Dragonfly Key. Note: You may want to save at this point. The Power Room is the nearest location to do this. Make sure you have plenty of health and the key then go to the lab area that leads to the room with the cannon. You will meet up with Claire who gives you a folder. Examine the folder to get the Emergency Key Card then go through the door around the corner.
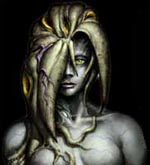 Cross the grating and use the key in the slot to open the door. Kill the three Zombies after you enter and use the key card on the console then enter the code - VERONICA. Exit the room and watch the movies. Take a shot at Alexia with any weapon to stop her then prepare to battle the final boss of the game.
As with most boss battles, the trick is to have plenty of good weapons and healing items. Do not waste time with the tiny creatures that Alexia launches at you. You can however, bait her into smacking them with her own tentacles saving you some ammo. You will probably get poisoned a few times so make sure to have a blue herb or better yet, a red/blue/green mixture handy. Keep hitting her with your best weapons (Colt Magnum to start) and eventually you will gain access to a Plasma Cannon. Keep moving and dodge her acid attacks. Wait for your shot and hit her once with the cannon to kill her.
You have completed Resident Evil: Code Veronica and unlocked the Battle Mode.