Introduction
Welcome to Lara's newest adventure. If you thought her last five adventures were exciting, wait until
you see what she has planned for you this time. There are 30 massive levels all set in exotic Egyptian locations.
There are 70 Secrets for you to find, new moves, new enemies, and new vehicles to ride.
 As always, Sinjin will reveal everything you need to know to win this game and get a perfect score.
All secrets are indexed at the end of this walkthrough and sorted by level making it very easy
to find the one(s) you missed. There is no reward for finding all 70 Secrets other than your own personal
satisfaction; plus you will have the respect of Lara and myself.
Tomb Raider: The Last Revelation is divided into six major parts with various levels in each part. You will often
have to go back through previous areas to continue, but for the most part the game follows a linear path. I've
designed this site so you can easily obtain help for any location in which you are stuck. Simply click the chapter at
the top to bring up the level menu for that area on the left. Then click the level name to jump to that section
in the main text.
There are a few hidden shortcuts on the website. If you click on the Tomb Raider logo in the top-left you will
return to the main menu. If you click on the dark brown stone under the six main menu topics at the top, you will
return to the top of the text in the main window.
New Moves
Lara adds a few new moves to her physical abilities. In addition to her usual moves such as Walk, Run,
Sprint, Crawl, and Monkey Swing, she can now climb and swing on ropes. Naturally, there will be plenty of
opportunities (and puzzles) which require these new abilities to complete successfully. Here are a few tips:
Rope Swinging: When swing from a rope make sure to hit the JUMP button when leaving the rope to continue your
arc. If you just let go you will fall straight down and miss your destination.
Climbing into Crawlspaces: If you are climbing on a wall and need to climb into a crawlspace you must make
sure you are HANGING from the edge of the crawlspace with your feet dangling in the air. If your feet are attached
to the wall then you are still in CLIMBING MODE and will not be able to pull into the crawlspace.
New Vehicles
Lara adds a motorcycle and a jeep to her list of vehicles she can use in her adventures. Here is a quick lesson at
Sinjin's School of Better Driving.
JEEP CONTROLS
Gas - ACTION
Steer - LEFT/RIGHT
Forward/Reverse - SPRINT/CROUCH
Brake - JUMP
Exit Jeep - ALT + LEFT (must be parked so that left jeep door can be opened)
MOTORCYCLE CONTROLS
Gas - ACTION
Nitrous - SPRINT (available after nitrous booster has been attached)
Steer - LEFT/RIGHT
Reverse - DOWN
Brake - JUMP
Exit Jeep - ALT + RIGHT (must be parked so that Lara can dismount bike)
Level Design
The later levels in this game get very confusing. You will be going back and forth across many of the same levels to
locate various items and accomplish certain objectives. I will include the walkthroughs for all trips to each area
under a single heading with a mini-index so you can easily determine which portion of the text you need to read. This means
that the text will not flow correctly if read from top to bottom, so I will include links to assist you in navigating the
text properly.
Combat Tips
Combat hasn't changed much. One of the key things to remember when fighting multiple targets is to LET OFF the
fire key after you drop an enemy. This way you can acquire a new target and not waste ammo on a corpse. Lara can
aim very accurately while jumping around, so try to keep moving to minimize enemy damage.
Hardware List
Compass
Lara seems to have found her compass for this mission, so I can now use references like N,S,E, & W to make things
easier in this walkthrough.
Flares
You can't do any damage with these handy items, but they will be invaluable as they illuminate your surrounding
area, revealing traps, switches and Core's new dynamic lighting engine. There are LOTS more dark areas in this
adventure so make sure to keep a good reserve of flares handy and don't waste them. Remember, the muzzle flash
of your pistols will also light up a dark area - just not as long.
Medkits
These first-aid kits come in the small and large sizes. Collect as many as you can so you can survive the deadly
traps and dangerous enemies that await you.
Binoculars
These will allow Lara to survey the upcoming terrain and plan any strategies in advance. Very useful in the
later levels.
Other Items
Tomb Raider Last Revelation features a new inventory system that allows you to pick up many items scattered about
the various levels and use them to solve puzzles. Some items can (and must be) combined with other items before
they can be used properly. I will provide detailed explanations for all the items you find and how they are
used in the game.
 Pistols
These are Lara's trusty sidearms she brought with her from the first five games. Use them "John Woo-style" to
take out your basic baddies. They will auto-aim each time you press the fire button.
Shotgun - (first found here)
This old favorite is back but this time with a twist. You now have two types of ammo; Normal (red box) and
Wideshot (blue box). Using the right ammo at the right time will make things easier and I'll tell you when to
load up each kind for the best results.
Revolver - (first found here)
More powerful than the pistols; this powerful handgun is the equivalent of the Magnums or Desert Eagle from
the earlier games.
Crossbow - (first found here)
The harpoon gun is gone and has been replaced with this cool weapon. Three types of ammo are available;
Normal, Poison, and Explosive. Explosive crossbow bolts are as powerful as the grenade launcher.
LaserSight - (first found here)
Combine this handy little scope with the Revolver or the Crossbow and you can zoom in for precise target shooting.
Some puzzles and even enemies require the use of this scope.
Uzi's - (first found here)
Another favorite from the previous games; this weapon is very powerful and should be saved for the bigger enemies
or when you are faced with multiple attackers.
Grenade Launcher - (first found here)
This weapon provides some serious destruction. Grenades will explode only after they are armed and they must travel
about 50 feet before they arm. This makes this weapon a long-range weapon which is good because you don't want to get
caught in your own blast. This is a great weapon for those skeletons which can only be killed with this weapon or a
laser-targeted sniper shot to the head. There are three types of ammo for this weapons including; Normal, Super,
and Flash which will stun your enemies.
Weapons and Ammunition
Ammo is scattered all over the various levels. It is always a good policy to save your bigger and better weapons
for the bigger and badder enemies. Sometimes I will give you a recommendation for which weapons to use, but feel
free to use your weapon of choice. There will also be times when I might say "you will find a certain weapon in a
certain location" and all you find is ammo for that weapon. This is not a bug or error in the solve, but rather
part of the game design. Weapons appear in certain locations, but if you ALREADY have that weapon from an earlier
"pick-up point" then you will find ammo for the weapon that would otherwise be there.
Training
You won't be training at the Mansion this time. Instead you will get to take a trip back in time to Lara's first
adventure when she was only 16. Not only is this training mandatory before you play the main game, there are also 8
secrets located in the training level. Make sure to get them all before you start the main adventure.
Angkor Wat
Meet Verner Von Croy, your instructor during this portion of the game. If you are new to the Tomb Raider series then
you will find this training mission very helpful. If you are a veteran "tomb raider" then you will soon grow impatient
with Von Croy's long-winded instructions and frequent interruptions during this first level. During his long speeches
you will notice that the screen will narrow. This indicates an automated cut-scene where you will have no control over
Lara. When the screen returns to full frame you can resume playing.
 Before following Von Croy you will first want to approach and climb the stairs to the left and get
Secret #1; a Gold Skull resting on the steps. Head back down and follow Von Croy up and
around the corner where he is examining a circular pattern in the wall. Don't go past him or you will die in the spike
trap around the next corner. Wait for him to deactivate the trap the continue.
Von Croy will instruct you how to jump over the first gap but first you will want to drop into the water below to get
Secret #2; a Gold Skull lying in the shallow water. Return to the top using the stairs
around either corner. Make the jump and continue into the next room where a Wild Boar will attack. Since you have no
weapons you will need to keep your distance and let your partner kill him with his knife. Move on and head out into a
large open area with a stunning waterfall.
Listen to Von Croy as he instructs you on the standing jump and grab and running jump moves to get you across the next
to gaps in the path. When you are across both of these he will turn and move on. You need to drop to the stone floor
below and get Secret #3; a Gold Skull lying under the walkway. Return to the upper ledge
using the ramp in the opposite corner and make those two jumps again. Continue around until you catch up with Von Croy
who will teach you how to shimmy.
Grab the crack and shimmy to the right and pull up when you reach the ledge. Follow Von Croy down the passage until you
arrive at the next lesson area. He will teach you how to do a "drop down" which I also refer to as a "safety drop".
Drop down and continue along the obvious path until you catch up to Von Croy again. He will give you some swimming tips
and then you can dive in.
Swim to the deepest part of the pool to retrieve Secret #4; a Gold Skull from the bottom.
Now head for the underwater passage and follow it around to where you will find a Large and a Small Medkit. If you need
air you can breath in the long portion of the passage. Return to the main pool and surface for more instructions.
Climb out of the water (and notice the cool dripping water effect) and approach the lever to the left. These levers are
very picky about where you stand - you must be directly in front of the lever or it will not activate. Flip the lever to
lower the bridge. Follow Von Croy as he heads around the corner and unlocks another door leading to your next lesson.
Climb the ladder to reach another lever and flip it to lower another bridge. Return to the ladder and climb down and head
around to the left and up the stairs to the next lesson.
Jump and grab the rungs above you and monkey swing across to the other side. When you are safely over the opposite ledge
you can release and drop down. Continue forward and up the ramp to the outdoor area. More Wild Boar run around this area
so stay out of the way until Von Croy has killed them. Head around the building to the right and catch up with your teacher
who is in the process of opening another door. Continue past him and you will find Secret #5;
a Gold Skull in the far right corner. Collect it then return to the door and follow Von Croy to the next area.
Head down the stairs and continue through the next door with the statues on either side. In the dark chamber turn right and
head around to the right side if the right pillar to find Secret #6; a Gold Skull lying on the
floor. Head past the spike and the bones of the previous adventurer and out the exit. Von Croy is waiting to give you your
next assignment.
Crawl through the opening and down the passage. A tunnel branches off to the left where
Secret #7; a Gold Skull lies at a dead end. You can either get it now or on your return trip.
Continue forward until the movie takes over showing Lara entering the large room. Learn the history of the now-famous
backpack she has worn in her previous five adventures then move over and flip the lever to roll the large stone slab out of
the way. Crawl back outside and follow Von Croy into the next area.
 The next area will test your sprinting and somersault abilities. Use the sprint and jump keys to get past the dart traps
in the next passage and perform a daring roll to duck under the closing stone slab. If you miss the roll you can simply
drop down and crawl under the stone. Enter the next area and locate Secret #8; a Gold Skull
up on the walkway near where you entered. Now head to the other dark entrance and go inside to hear more from Von Croy.
He will tell you about the two doors and depending on if you got all 8 Secret Gold Skulls will determine which door he
opens and also whether you get the regular or difficult path in the next level. Follow him to the next room with another
rolling door and a pool of water with a rope hanging over it. Turn left and move onto the raised section of floor to await
more instructions. Climb and crawl into the narrow opening. Move forward until you can stand then follow the passage back
out onto the upper walkway. Follow it around until it ends. Take a step back then run and jump and grab onto the rope.
Slide down to the bottom to increase your swinging arc then use the Sprint command to shift your weight and begin to swing.
At the far end of your swing release and drop to the opposite ledge. Follow it around to the right and flip the lever to
open the pair of doors below. Return to the lower floor (fall, jump, or dive into the pool) then move to the door. Enter
the passage and slide down the long dark tunnel into the next level...
Race for the Iris (Normal)
 Staying ahead of Von Croy during this next race will make things much easier for you. If he beats you to any of several
checkpoints he will close doors to hinder your progress. Use your sprint command a lot to stay ahead whenever possible.
On your mark...get set....GO!
Sprint out of the mouth and past the cheating Von Croy who took off on the count of "two". Enter the door and turn right
then left and left again up some stairs. Run and jump over the first pit then climb the ledge and do a running jump over
the next pit. If you fall in the first pit you can climb out. If you fall in the second pit look for the hole that
leads to the next area.
Race through the arches and turn right as the camera pans to an overhead view. Run off the ledge and through the door below
and into the next room. If you are ahead of Verner then you can go through the door otherwise he will have shut this door
forcing you to climb the vines on the wall to the left and drop into the room on the other side. In the next room climb
into the opening and continue down the passage to the right then left and left again up the ramp. Do a running jump and
grab to catch the opposite side and pull up. If you miss and fall into the pit head to the block in the corner and
climb out.
Continue forward until you reach another large pit area. Jump and grab the walkway above and monkey swing across to the
opposite side. If you fall into this room you can go to the opposite wall and climb up the vines. The rock piles in this
next room are deceiving. You need to do a running jump to get to the flat ledge of the first pile then climb up onto the
next block. Turn right and pull up onto the ledge then follow it around jumping the gap and head down the wooden bridge
(the same bridge you monkey swung across just a moment ago) toward the giant doorway. If Verner is ahead of you at this
point he will close this door. If the door is closing you can try to somersault under it, otherwise the switch to open it
is in a hole on the wall to the right.
The next section of the passages twists right, left, right, right, and left. These are very sharp turns so don't try to
sprint through this section or you will hit the wall and waste more time than you save. Race down the ramp - this is the
final stretch so if Von Croy is near make sure to sprint into the final room.
Once in this area the movie will take over. Depending on whether you won the race or not will alter the movie just a bit,
but the end results are the same. Enjoy the finale of your training mission and the very cool opening movie for the main
game. See you in the Tomb of Seth.
Race for the Iris (Hard)
If you are a true "tomb raider" and got all 8 Golden Skulls in the first level then you get the more challenging course
in your Race for the Iris. Aside from more twists and turns and some spike traps this path isn't that much harder than
the normal route.
 Sprint to the left and turn right into the passage. Race down the hall and do a running jump at the end to clear the first
pit. As soon as you land do another running jump over the second pit. This second jump can be tricky if your launch and
landing points aren't precise. Falling into the pit is fatal, so you may want to stop and line up your jump before making
it. Continue running forward to the next pit and do a running jump and grab. If you fall short you can catch the vines and
climb out.
Run into the next room to the right and turn left as you race for the next door. It will open as you approach. Head to
the right and sprint across the bridge. At the other side you will start to slide down a slope toward some spikes.
Immediately do a standing jump to land on a second slope and jump again to land in the next passage and head toward the
rubble.
Head to the left side of the passage and jump right then forward over the pile of rocks. Just past the rocks is a door on
the right wall. Enter and turn right to reach a second bridge. Sprint across the bridge and hug the right wall as you
enter the next passage. If Verner reaches this bridge ahead of you he will cut the ropes forcing you to drop into the
water below and swim into the next room using the underwater passage.
Follow the stone path across the water (do running jumps at the corners to shave seconds off your time) and head through
the open gate into the passage ahead and follow it to the left until it ends at a spiked pit. If Verner beat you to
the gate then he will have closed it and you will have to go over to the right corner and climb a pair of blocks to reach
the upper path. Run around this path and it will take you to the other side of the gate and the spiked pit.
Do a running jump over the spiked pit and grab the vines and pull up on the opposite side. Do another running jump and
grab over the second spiked pit and quickly pull out as the spikes will harm you as you hang on the vines. Enter the dark
passage ahead and turn left climbing up into either of the openings and enter the next room. Another rope bridge is in this
room so sprint across and climb into one of the openings on the other side and continue to the left. If Verner beat you
to this bridge then he will have cut it loose and you will have to swing across this pit using the hanging rope.
Turn right and head down the stone passage then turn left to arrive at a giant stone head. Pause for the special camera
shot then turn left and circle the head and enter the mouth. If you fell while moving during the camera shot you can
use the vines to climb back up to the head. Inside the mouth turn to the right then head left, right, and left and
race down the final passage to the Iris.
Once in this area the movie will take over. Depending on whether you won the race or not will alter the movie just a bit,
but the end results are the same. Enjoy the finale of your training mission and the very cool opening movie for the main
game. See you in the Tomb of Seth.
Tomb of Seth
Welcome to the Tomb of Seth where we will kick off this epic adventure. We'll be getting acquainted with Aziz, your
friendly guide who starts off the level by lighting the first of many torches. Note: Your guide is never really
given a name in this game. You may remember Aziz from the movie Fifth Element - "Aziz...Light!" I thought it was
fitting. After he lights his torch he will move down the passage lighting other torches along the wall.
 The first thing you need to do is grab the Flares to your left and another stash of Flares in the room behind you.
There are plenty of dark areas ahead and Aziz won't always be with you. Continue down the passage and get the Shotgun
in the first shallow pit. Another shallow pit ahead contains a Medkit and a Scorpion. Kill the poisonous creature
with your pistols and take the Medkit. Keep your guns out and move forward until the camera shifts and comes rushing at
you from beyond. When you are back in control a Jackal will be attacking. Unload a few rounds into him and put him down.
As you approach the tomb, turn North and jump across a shallow pit and get between the two ledges along the right wall.
Climb onto the left ledge to get Secret #9; a Medkit. Now return to the main path leading to
the tomb and get the Medkit on your way. Enter the tomb and follow Aziz down the blue-colored hall and into the next room.
A pair of Scorpions attack when Aziz lowers a wall, so kill them before dealing with the next puzzle.
Before we proceed there is a secret nearby. Head down sloped passage to the right (as you enter) and follow it until you
arrive at the sand pit. Climb down into the pit and get Secret #10; Shotgun Shells from the short
tunnel. Taking this secret triggers a pair of Scorpions. Get the Medkit on the raised area as you climb out and return to the
upper room where Aziz waits patiently.
The door ahead is locked so move to the left of the door and activate the switch inside the hole. The pit where you just came
from begins to fill with sand. On your way back to the sloping passage stop by the hole in the opposite wall to
get another Medkit. Head down into the room that is now filled with sand and cross over to the pedestal with the Eyepiece.
Take the Eyepiece to open the door back in the previous room and grab the Medkit from the other pedestal before returning to
the now-open door. Aziz will enter and you can follow.
Enter the next room and follow Aziz around the large central altar and down some stairs. Let Aziz go ahead of you to
disable a deadly blade trap - after all, that's what you're paying him for. Continue across the room and get the Second
Eyepiece from the pedestal. Combine the two pieces of the eye in your inventory to complete the Eye of Horus.
Return to the room with the central altar and climb up and jump to grab the rope. Spin around so you are facing the
door with the blue glow. Start swinging and launch yourself into the doorway and enter to trigger
Secret #11; Flares, Shells, Medkit and Uzis. This large circular room had a giant spiked roller
that circles around every few seconds. You are going to need to keep and eye on this device as you perform the next sequence
of moves. When the roller passes by, turn right and jump and pull up to the ledge then run forward and jump to the alcove to
the right and duck. Wait for the roller to go by again then climb up and get the Medkit then quickly turn to face the center
hub. Do a running jump and grab and pull up to the flat ledge. You are safe here as the spikes cannot reach you. Climb up
to the top of the hub where you will find the Flares to the left. Stay along this wall and continue forward dropping onto
another flat ledge. Ahead of you is a lit passage. Doing a running jump to land inside this passage and get your guns out
as you are about to be attacked by another Jackal. Turn the corner to spot two more pairs of evil red eyes advancing on you.
Kill the pair of Jackals and move down the passage over the grate and to the end. Do a safety drop down to the next area.
Avoid the pit with the pair of Scorpions and get the Uzi's (or Shotgun if you are on the Playstation). Continue dropping and
sliding down until you reach the sand pit room. Now that you know where you are - return to the altar room where this massive
secret area all began.
Head across the room and find the place to insert the Eye of Horus. A door will open when you do and Jackals will rush
into the room. The shotgun works great on multiple targets (especially with the wideshot ammo loaded). When they are dead
move into the area where they attacked from and continue until you reach the Sphinx head complete with zooming camera angles.
Aziz continue ahead but there are some items for you to collect. Some Ammo is between the stairs on the right and on the
other side is a Medkit. Now you can chase after Aziz and go through the door into the next room.
Aziz sets the water on fire (actually the oil on the surface of the water) and a door will open - perhaps an ancient Egyptian
Emergency Fire Exit? Follow Aziz down the steps. He will go left at the intersection but you need to turn right and head
toward the green area to retrieve a Medkit at the bottom of a small pit. Continue into the green room and note the gate
preventing Aziz from joining you. Head through the open door to the North and follow the passage until you reach the
room with the cool designs in the floor and a hanging chain. Give the chain a quick pull to open the gate and Aziz will
soon arrive with his useful torch.
 Your next objective will be clear when you look below and notice certain floor panels being lit by the fire. You need to
cross over jumping from each of the lit panels until you reach the other side. Do standing jumps from the center of each
square to guarantee a safe landing. The torches will light on the far wall with each successful jump, and you need to land
on each lit tile in the proper order to trigger the gate. If you mess up, any lit torches will go out and the gate
won't open, so you will have to slide down into another room with another chain and pull it to re-open the previous gate.
Then you must return to the first chain and pull it to reset the panels and try again.
When you successfully cross over and the gate opens you can get the Timeless Sands then proceed through the next gate to
return to the Sphinx. About this time Aziz will be joining you. As he heads down some stairs near the South wall you
need to make a quick trip to the left of the Sphinx and locate a closed gate. Climb the wall nearby until you reach the
lever. Pull it, then climb back down and enter the now-open gate to trigger Secret #12 and
get the Shotgun Ammo.
Climb back up that same wall/ladder and go past the lever at the top and walk out onto the gold and black ledge. Angle yourself so you can
make a standing jump to the next ledge at the front of the face (over the nose) then walk across that ledge and make another
standing jump to the third gold and black ledge. These jumps are tricky and you will have to angle left in midair when making them.
You should now be able to see the rock ledge with Secret #13; Shells and a Medkit hiding in the
darkness to the right. After you have gotten this tricky secret return to the ground by sliding down the sloped surfaces of
the Sphinx's face and hanging as you drop. Go back to the far side of the chamber to catch up with Aziz.
Now head to the stairs and find out where Aziz ran off to. He will open the next door for you then he runs off in a panic
leaving you to finish the mission all by yourself. Continue into the new passage and drop into the next room. Move to the
center and get the Medkit and Shells then head toward the statue. Climb up to it and put the Timeless Sands in it's hands.
This causes sand to rush into this room while emptying the room with the Sphinx..
Quickly exit this room while avoiding the sand. Kill or dodge the Scorpion and return to the room with the Sphinx. With
the sand drained into the other room you can now enter the mouth of the Sphinx. This is a bit tricky. Jump to the mouth
and hang then pull up and crouch to enter. Once inside you can move forward until you slide into the Burial Chambers.
Burial Chambers
They don't waste anytime with the first secret on this level. As you are sliding down the first ramp jump before you reach
the end and grab the edge and pull up to get Secret #14; the Medkit. Finish sliding into the
room at the bottom and move to the lever at the opposite end. Pull the lever to open the door in the other wall, then run
through and slide into the next room.
There is a timed spike trap in this room so act fast. Grab the Hand of Orion then jump to the left to get
Secret #15; Shotgun Shells. Getting this secret causes the gate to open so run forward past the
statues into the next room. More Spikes! Walk up to the spikes and wait for them to retract then run/sprint forward before
they reset. Continue down the passage to the right and blast the urn to the left revealing a Medkit.
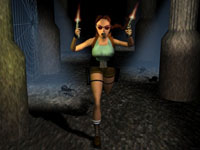 Continue until you reach more spikes. Repeat the previous pattern of walking to the edge then dashing past them when they
are retracted. Slide into the next room where you will find a place on the wall to insert the Hand of Orion. Doing so will
retract the spikes but now the blades are spinning. Walk to the edge and do a standing jump as the blades passes by then
quickly do a sideways jump to the left as the next blade comes at you. You should now be standing on a column with a Shotgun
but the blades are still spinning. If you have time, grab the shotgun and jump back, otherwise you can jump straight up to
avoid the blade then get the shotgun before jumping back to the floor below.
Get the Medkit near where you landed then head to the NE corner and climb up to the main entrance. Do a running jump from
the edge and you should land almost on top of the Shells. If not you will probably need to do a vertical jump to clear the
approaching blade then adjust your position to get the ammo. You now need to make your way to the SW corner where the exit
is. You can jump the blades and make your way along the upper area or you can drop off and hang then shimmy around to the
opposite side. Jump into the exit and continue up the next passage.
Climb over a block in the passage and you will soon arrive at a room with a sarcophagus in the center. Do not approach it.
Instead, turn left and get the Medkit from the corner. Use a flare to light up this dark area. Continue around the
perimeter of the room and get the Shells from the other corner then exit through the opposite door.
Continue down and to the left and enter the next room with more sarcophagi on three walls and a central statue. Get the
Medkit along the left wall then head to the NW corner and drop into the lower area. Secret #16;
Medkit and Shells are stashed down here. Get these items then return to the previous room with the sarcophagus that we
avoided earlier.
Approach the ancient coffin and a movie will take over. The results of the movie are a stream of blood which would have
locked you out of the previous secret. Follow the blood back to the other room where the three sarcophagi are now open.
The Mummies won't be interested in you as long as you keep your distance. Move toward the statue by hugging the right wall
and when you get next to the statue start pushing it South toward the circle pattern on the floor near the empty sarcophagus.
When the statue is in the proper location a door will open inside the sarcophagus to the North. Approach the coffin and
lure the Mummy out by putting a few slugs into his dusty remains. He will come after you, but you are much faster than him so
run around him and into the passage beyond. Continue into the next cavern and drop down to the floor below with guns drawn.
Kill the attacking dogs before heading towards the entrance to the next chamber.
Don't go in just yet. There's a secret nearby. Turn left and go up the stairs. Look for a gap to the right and drop down
into the alcove to get Secret #17; a Medkit. Continue up the steps and take a left at the
intersection. Continue out and across the bridge and get ready for more attack dogs. When they are dead you can climb up
to the high ledge then drop into the large rotating room. Jump to the alcove on the left to get the Shotgun Shells we like
to call Secret #18.
Find the ladder leading to the ground then locate the block to the right of the gate and climb it. Continue climbing across
three more blocks then jump to another block and turn towards the center of the room. Do a running leap over the spikes to
land on more blocks then move forward until you can jump and pull up onto the block above. Climb up onto another block and
go into the room with the switch and flip it to open the gate below. Carefully make your way back to the bottom and enter the
gate.
Pull the lever inside to rotate the chamber. Jump up and make your way to the hole in the East wall. Head left down the
hall and slide to the ground below. Head toward the hole to the right and hang and drop to the room below where you can
find the Hand of Sirius. Leave through the only exit and follow it to the ladder that you can climb taking you to a block
that you must also climb to get out.
Climb the next block then move to the edge and jump and hang. Climb onto the block and crawl under some spikes as you head
left until you reach the end of the blocks. Save your game because your next jump is fatal if you miss. Jump forward into
the alcove on the South wall and get ready for some serious action. Back away from the edge of the hole then run forward
and grab the opposite wall. Do NOT jump or you will smack your head, fall, and die. Now you can climb to the bottom and
enter a room with a pair of Mummies. Pull the chain to spin the room and wake up the Mummies. Dodge them and run toward
the ladder along the West wall.
As you reach the top keep pressing your action command otherwise you will slide right back into the Mummies. Instead, do a
backflip from the top of the ladder to land safely on the floor of the main chamber. Head toward the pair of blocks on the
right and climb them to insert the Hand of Sirius in it's proper place. This lowers a rope behind you. Walk toward the rope
and do a standing jump and grab on. Swing across to the opposite opening and enter. Get the Scarab Talisman from the
pedestal and ready your sidearms.
Another pair of dogs attack as you circle around the pedestal and a third dog waits further down the hall. Return to the
cavern and turn right and take the stairs to the North. When you reach the intersection continue straight this time and
climb the ladder. When you reach the top whip out your guns and blast the pair of urns to get a Medkit and Shells.
Climb into the next chamber with another pair of Mummies and a Golden Serpent. Take the serpent and the Mummies come to life
and attack. Dodge them as you make your way to the North exit. Jump and climb as necessary. Continue forward and slide
into the next area and watch for the spikes falling from above. Turn left and sprint to the far left corner where you are
safe. Climb up and continue down the passage until you reach a large deep hole. You will probably take some damage even
doing a safety drop so make sure you are at full health before lowering yourself over the edge and dropping down.
You are back in the large cavern again. Head East and climb the block between you and the room with the sand and the Mummy.
There are two sockets which are just perfect for the two items you have in your inventory. Put the Golden Serpent in the
right socket and the Scarab Talisman in the left. The room starts to fill with sand and the Mummy wakes up. You are stuck
down here with the Mummy until the sand has filled up enough to let you climb out. Dodge the Mummy until you can escape
through the exit in the NE corner. Go through the door and exit this level.
Valley of the Kings
Seems that Aziz isn't a very nice guy. He takes all of your possessions but you are able to recover your weapons just in
time to be attacked by his henchmen. They attack in pairs and you can kill them in pairs with the shotgun but you may want
to save your ammo and use pistols while jumping around to avoid their attacks. Make a note of the items they drop as you
kill them. When they are all dead you can collect quite an assortment of Medkits and ammo and also the
Jeep Keys which you need to pursue Aziz.
Before hopping into the jeep, head over toward the dark corner near the left and you should find a place you can climb
up and find a hole with Secret #19; Shotgun and two boxes of Shells. Now head over to the
other dark corner and find another area where you can climb to the rocks above the area where you started this level.
Here you will find a very large Secret #20; two boxes of Shells, Uzi Clips, and a Medkit.
 Get in the jeep and use the keys to start it up. Aziz takes off and you must follow. As you chase him he will start to
toss grenades back at you. Swerve to avoid them or die in the explosion. As you near the top of the hill two more of his
henchmen will start firing at you. You can either run them over or exit the jeep and kill them with your guns. Continue
driving until you reach the tunnel. As you emerge you will spot a large pit.
Stop the jeep and climb down to find the crawlspace with Secret #21; Super Grenades and Medkit.
NOTE: You MUST be hanging to climb into the crawlspace. If your feet are attached to the wall then you cannot climb in.
You can now climb back up to the jeep and accelerate to jump the pit using the ramp to the left or go to the right and take
the longer (but safer) path over the pit. This path also lets you splat another sniper with your jeep.
Across the pit, head up the slope and run over another gunman as you near the top. Turn sharply to the right when you reach
the top and continue across the bridge to the left. Head to the right over a second bridge and run over another gunman as
you near the end of this level. Drive down into the cavern and up the hill until the level ends.
KV5
We resume our chase already in progress. Continue down the road toward the dig site. When you reach the bottom of the hill
exit the jeep and collect the Shotgun Ammo and Medkit before resuming the chase. Aziz takes off as you get back in your
jeep and will start tossing grenades at you again. Continue past the statues and through the gap in the rocks until the
sand dune creates a fork in the road.
A pit is to the right and a sniper on a scaffold is to the left. Drive through the scaffold sending it and the sniper
crashing to the ground. Add insult to injury by putting the jeep into reverse and running him over...just to make sure.
Exit the jeep and locate the nearby ledge to the right of the exit. Climb up and crawl to the right to get Secret #22;
a Medkit. Return to the jeep and continue toward the rocks ahead and drive through the gap. More scaffolding and another
sniper are just waiting for the bumper of your jeep. Repeat the crash and smash routine just like before then drive up to
the gate and park.
Climb the broken scaffold opposite the one you just crashed through and go left at the top to get some Shotgun ammo. Turn and head
the other way and go around the corner. Whip out those guns and blast the gunman who tries to get the drop on you. Climb
over the block ahead and drop into the hole to find Secret #23; a large and small Medkit under the
scaffold.
 Return to the top of the block then jump and climb to the top of the scaffolding where you will find a Medkit in an alcove
along the wall. Locate the rope and line up for a running jump and grab the rope and swing across to the opposite ledge. A
lever is to your right and above you on the wall. You need to jump and grab it to activate it and open the gate below. Start
making your way down to the jeep and don't overlook the Medkit in the corner just left of the gate.
Start driving down the next tunnel and stay to the left. A spiked ball drops down on the right and you must avoid it and
the other two which are about to drop as well. Swerve right then left to avoid the second and third balls along this path.
After the third ball drops stop the jeep and look for a climbable wall surface inside the last hole in the ceiling. Climb
it and then backflip from the top to obtain some Grenades which are also Secret #24.
Resume your drive up the hill to spot Aziz near the top. Continue toward the right and hug the left side of the road
to avoid the pit on the right side. When you reach the top turn left and go between a pair of large pits then park. Return
to the pit and locate the climbable surface. Climb down the wall staying towards the left and you will find a crawlspace
below. Hang and drop then grab real fast to grip the edge of the crawlspace and go inside to get
Secret #25; Shotgun and Crossbow ammo. Back out of the crawlspace and shimmy right then scale
the wall and return to the jeep.
Continue down the hill and stay left to avoid the pit then head up another slope between two more pits and drive through the
gap in the rocks. Drive into the area with sand dunes and more pits and you will spot Aziz heading over the dunes to the
North. Follow him carefully and watch for the pits over the rise in the dune. Turn and follow him to the West. You will
soon come to another sniper on a scaffold. You know what to do. Exit this area to the South and keep driving until you find
the entrance to a tunnel. Drive your jeep right into the tunnel entrance to end this level.
TEMPLE OF KARNAK
Click Here if you are Returning to the Temple of Karnak
Start off this level by climbing the blocks to the West and drop down on the other side. Kill the pair of attacking
Scorpions and take the Medkit near the Obelisk. Whip out your compass to get your direction then head through the center
door to the South. Climb over the block inside and go through the door to the left then drop down into the hole to trigger
Secret #26. There are many urns in this area - shoot them all and get the Shotgun Ammo, Flares,
Medkit, and Uzi Clips. Kill the scorpions who defend the final group of urns.
 Return to the surface and go to the block your recently climbed over to get to the hole. Stand on the block and jump/pull
up to the next wall. Turn to face East then jump and grab then collect Shotgun and Uzi ammo. Jump back to get a Medkit then
return to the floor and go back outside to the obelisk.
Head towards the columns to the West and enter the next room. Ignore the locked door to the right and go up the ramp. As you
enter the next room the camera will pan around giving you a better view or this area. Use the block to the right to make
your way to the upper level. Note the pair of gates as you continue left toward the columns. Do a standing jump to clear
the column at an angle. Up here you will find a pair of holes concealing switches to open each of the gates. Also on the
other side of this area is a stash of Uzi and Shotgun ammo. Enter the areas behind each of the gates. One area has the
Canopic Jar (with a mini-movie) and the other has Shells and a Medkit. Return to the main floor and investigate the pool of
water.
Dive in and get the Flares then swim through the passage to the North. Continue forward and down to the closed door. Open
the door and swim in heading for the small opening at the base of the rock. Turn left and look up to find another hole
leading to an area where you can get some much needed air. Not only do you get to breath, you also get
Secret #27; Crossbow and Uzi ammo.
Dive back into the water and swim North through another small hole and into a long passage. The gate to the right is locked
but you should be able to find a crack in the wall to your left that you can swim through and trigger Secret #28;
Uzi, Crossbow, and Shotgun ammo plus a Medkit. Watch your air and make multiple trips to this area if you can't get it all
the first time. Your only source of air is the hole from the previous secret area. When you have pillaged the underwater
secret area return all the way back to the main pool and finally back outside to the obelisk.
Head North this time over the rocks and kill some scorpions in the NW corner. Some Flare are also nearby and you can't have
enough Flares so grab those before dropping into the hole and follow the path until you arrive in the room you saw in the
mini-movie when you took the Canopic Jar. Head over to the crawlspace on the left wall and crawl inside to get Flares and
lots of Uzi Clips which happen to be Secret #29.
Now go to the right side of the room and climb the block and jump to the ceiling so you can monkey swing to the other side.
Climb to the top of the blocks and press the button to open a door behind you. You should also spot a nearby pit that you
can drop into and get a Medkit. Now head to the door you just opened and flip the switch to lower the bowl and reveal a
hole. Grab that Medkit from the block behind you then head toward the statue along the East wall. Insert the Canopic Jar
into the slot in the back of the statue to open the locked door back by the ramp leading to the water.
Go back to where you just got the Medkit and jump up to the crawlspace high in the right wall and pull into it. Crawl
through then back yourself out then hang and drop from the other side. Grab some Flares on your way to the next crawlspace
Crawl through until you are able to stand then jump into the next sandy room and crawl into another crawlspace. Back
yourself out of this one and drop to the ground. You should now be outside the main temple area. Enter and turn left and
go until you reach the hole near the South wall. Drop down and continue toward the columns then climb the blocks to return
to the Obelisk. Now return to the room to the West with the ramp and the now-open door. Enter and
slide into the next level.
Return to the Temple of Karnak
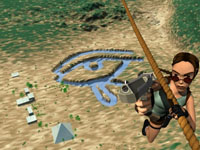 Time to do some backtracking. When you regain control of Lara, swim to the edge and climb out. Start climbing up until you
reach an area that overlooks the Temple of Karnak to the East. Turn and do a safety drop then head left toward the statue and
put the Canopic Jar inside the back of the statue. Watch the bowl as it tips over and spills something into the water. Jump
over the bowl and land on the water - YES, you can walk on water.
Head South through the door into the next room and keep walking across the water. Continue past the large statue and up the
stairs and get the Uzi Clips. Continue through the passage until you reach the end then turn right and jump and grab the
wall and pull up. More croc-infested waters lie ahead. Drop down to the block below and shoot the crocs from the safety
of your current location.
When they are all "floating" you can dive into the water and get some Shotgun ammo before swimming into the opening ahead.
Follow the passage to the right and exit the water in a small room with a switch on the wall. Press the switch to close a
gate somewhere else in the level. Swim back outside and exit onto the shore. Grab the Shotgun ammo then climb up behind the
altar. Get the Hypostyle Key and the Sun Goddess.
Make your way up the blocks and back to the passage that leads to the room with the water you can still walk on. Continue
past the two statues and over to the other side of the room where the crawlspace high in the wall is (same one we used the
first time we were here). Jump and grab and pull into it and crawl through to the other side. When you exit get your guns
ready and head to the door to the right. Kill the henchman who attacks then head left and kill another. Drop down into the
hole by the wall and leave this room.
Back outside you will be attacked by several gunmen when you approach the area with the columns Keep moving and shooting until
they are all dead then make your exit to the South. Approach the Obelisk and kill the gunman to the West. Continue past his
former location and into the next area. This should look familiar with the ramp and the door. Go through the door to leave
this level and return to the Great Hypostyle Hall.
GREAT HYPOSTYLE HALL
Click Here if you are Returning to the Great Hypostyle Hall
Your first trip through this level will be short and uneventful, but don't worry - you'll be back. For now our goal is to
just reach the Sacred Lake, so head North and climb the wall. Exit this room to the left and you will be in an outdoor area
with many blocks scattered about. Grab some Shotgun Shells from one of the blocks then go South through some columns
until you reach a small room. Kill some Scorpions before getting the Medkit and Flares then head back outside.
Head North and climb over a block to enter the next area. Turn left and follow the long passage until you turn a corner and
a movie cuts in. Continue forward and slow to a walk as you near the very deep pit ahead. Line up for a running jump and
grab the other side to pull up and continue. There are many possible paths to take from this next area. Take the door
leading North and grab the Medkit to your left as you enter.
Turn right and continue to the top of the next room then head North to the sloped area and go down it to reach
the next level.
Return to the Great Hypostyle Hall
Climb the wall ahead and turn left to get outside where you will encounter a new and deadly enemy. The Crimson Ninja is
armed with a deadly blade that he will use to attack you and block your bullets. Naturally the best strategy is to stay
further away than the length of his blade. Only fire when he is not swinging his blade. When he starts to block your shots
stop shooting and save your ammo until he stops, then open fire once again.
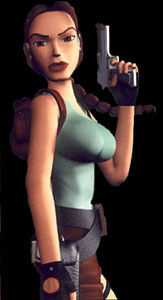 Continue North over a block and into the next room where another Ninja attacks. His sword is no match for your Shotgun at
close range so blast him. Head to the right and climb up to the second level where you can kill a few Scorpions and collect
some Shotgun and Uzi ammo. Return to the ground floor and head NW toward the deep pit you jumped the first time through this
level. More Ninja will rain down from above. They will try to get you boxed in, so keep that shotgun handy for the fastest
results.
Do another running leap and grab to clear the pit and continue to the area where you took the door to the North the last time
through. Go to the blocks to the left and climb over and into the crawlspace and follow it until you reach a locked door.
Use your Hypostyle Key to open the door and enter. You are immediately attacked by a Ninja and a gunman with an Uzi starts
shooting at you from further back in the room. Kill them as best you can and get the Uzi's from the dead gunman.
Examine the ceiling and locate the climbing surface that you can monkey swing on. Monkey swing toward the upper opening in
the South wall. Another Ninja is monkey swinging toward you and while you cannot attack while hanging, he can. Don't even
pause - just keep going toward the door and drop down. Then you can shoot him like a sitting (or rather hanging) duck. If
the Ninja does reach you and knocks you to the floor you will have to climb back up and start the monkey swing over until you
reach the South door.
From the door, turn to the left and do an angled jump to the ledge. Walk to the very edge and do another jump and grab to
reach the next ledge. Jump and hang from the ceiling then monkey swing to the West wall until you come to an open trap door
that keeps you from continuing. Drop then grab again to cling to the pillar beneath you. Climb to the top of the column and you
should now be standing under the open trap door.
Continue forward and to the left to get some Uzi Clips then turn and go the other way to the pair of blocks. Climb both
blocks and backflip from the top to the other ledge. Face the center of the room and jump to ledge ahead of you then turn
and do an angled jump around the column. Continue toward the South past the hole and toward the large boulder. Carefully
approach the boulder and fire your pistols to knock it loose. It will crash through the floor creating a large hole.
Now head back to the hole you just passed and back off and hang. Drop down and get some Shotgun ammo and use a few shells on
the Ninja who attacks from behind the block. Head toward the hole in the floor created by the boulder. A nearby room does
have some Flares being guarded by a Ninja - you decide it it's worth the ammo. Drop into the hole and you should find the
boulder.
Enter the crawlspace to the East and get the Uzi Clips then head North over some blocks. Continue to the end of the passage
and turn left. Stand under the ladder and jump and grab then climb up to the top. In this room is a huge bowl with a handle.
The handle is actually a pointer and we need to get this one and two others pointing in the right direction to solve the next
puzzle. This pointer needs to face the South wall. Turn it 90 degrees then head down the hall and turn left to find the next
bowl. This pointer needs to face the East so turn it 180 degrees. Head down the hall and turn left once more to reach the
final bowl. Turn this one 90 degrees so it is facing North then return to the ladder and climb down.
Continue back down the passage and turn right at the corner making your way around the columns until you reach the glass
pyramid on top of the pedestal. Pull the chain to start an amazing sequence of events. When the show is over you can jump
and climb onto the pedestal and retrieve the Sun Disk. Return to the floor and go over to the West side of the room where
you should easily spot a hole in the floor. Drop down and follow the passage until the level ends taking you
back to Sacred Lake.
SACRED LAKE
Click Here if you are Returning to the Sacred Lake
Make sure you are facing North then climb the ledge in front of you. Head to the left and go outside. Approach the ruins
cautiously looking for a large Crocodile that will attack when you get closer. Your shotgun will do the most damage, but
be ready to jump back or sideways if he survives your initial attack. Grab the Medkit from the rock and head West.
Continue along the path until you reach the water then turn right and go through the gap in the rocks. Dive in and avoid the
crocs as you swim around the central structure and climb out onto the shore. The crocs will follow you onto the shore so get
that shotgun ready and start blasting and dodging at the same time. When they are all "luggage" you can head to the stone
entrance to the North and whip out your pistols to kill some Bats.
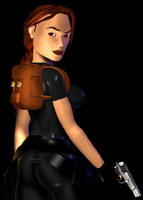 Continue forward to the hole and drop down. Turn and locate the white pole then slide down the slope and jump to grab the
pole. Hang there and spin around until you locate another pole to the West. Now climb up the pole you are on and spin so
your back is to the other pole. Backflip from this pole to the ledge behind you and jump onto the new pole. Climb this
pole until you reach the top marker. Now turn so your back is to the wall and backflip to the ledge. Locate the crawlspace
and go inside.
Crawl through this tunnel and back yourself out at the opposite end and drop into the next room. Follow the passage to the
South until it ends in a room with a pair of gates and a chain hanging between them. Pull the chain to open the large gate
outside and release some more crocs into the water. Retrace your steps back through the passage and the crawlspace until
you reach the ledge back at the poles.
Jump and grab the nearest pole and slide to the bottom then jump to the next pole and slide to the bottom where you will hit
a sloped surface and slide into the water. Swim around collecting some Flares in this area and a Medkit down the passage to
the North. Exit this area by swimming to the South and continue forward making two right turns until you reach the dead end.
Swim to the surface and exit to the beach quickly as those new crocs are coming at you. Kill them quickly.
Dive in and swim through the gate you opened with the chain and locate the lever that you can pull to open a trapdoor in the
center of the room. Go get some air then swim into the hole and open the door. Continue forward and then head left through
a hole in the rocks Continue down and right and through another hole then head up at the dead end. Angle left toward the
light and swim toward the mirror. There is a small hole (visible only in the mirror) over the center of this room where you
can surface and get some much needed air. Swim to the edge and climb out.
Now head down the hall and climb into the room at the end with the Second Canopic Jar resting on
a pedestal. Take the jar and two sets of Uzi Clips and another gate opens. Return to the mirror room and get back in the
water. Swim through the door and into the next hole turning right. Follow the passage around to the left and through the
holes in the rocks until you reach the underwater door. Swim through and surface to get some air.
Dive back down and swim into the hole to the North to locate the gates that opened when you took the second Canopic Jar.
When you reach the end and pass through the gates the current will take control sweeping you back to the
Temple of Karnak.
Return to the Sacred Lake
Continue down the passage until you reach the pool of water outside. Kill the attacking Scorpions then dive into the water
and swim around picking up some Shotgun ammo and a Medkit from the end of a short tunnel. Exit onto the island and examine
the device. You need to insert a specific item here. Switch to your inventory and combine the Sun Disk with the Sun Goddess
to form the Sun Talisman then use it here. Watch the movie and note the doors that open as a result.
Head to the South door and jump to the pole and slide down into the water. Get some Uzi Clips then swim East to find a
Medkit and Shotgun ammo. Locate the underwater door and open it to enter a short passage leading to
Secret #30; a small room with a Medkit, and Shotgun and Crossbow ammo resting on a pedestal. Head back outside.
Investigate the underwater area to the West and you should find some Shotgun Shells. Then you can surface and use the block
to get to the pole. Climb the pole until you spot some Flares on the ledge. Backflip from the pole to the ledge and collect
the Flares then do a running jump and angle to the right to reach the exit.
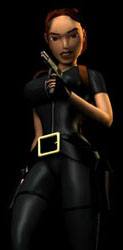 Back at the main area, head North over a block and crawl into the crawlspace to get a Medkit. Return and take the remaining
exit to the West. Climb up the broken rocks and turn to face South and you should find a patch of ceiling you can grab onto
and monkey swing across. At the end you need to drop then grab quickly to clutch the edge and pull into the crawlspace. Kill
those annoying bats and grab the Uzi ammo from the short crawlspace to the East. Follow the passage to the West until you can
finally stand. Turn, jump, and grab and pull up to the ledge above then follow it North. Do a running leap and grab onto the opposite ledge then drop to the ledge below that one.
Locate the hole in the NW corner of the room and make your way over to the small ledge in front of the hole. Do another running
jump and grab to reach this short ledge then pull up and drop into the hole. You will land on another narrow ledge. Kill the
bats and move on to the North. At the end, turn and drop onto the block and carefully continue to the ground. Go through the
South door to find a pedestal with Uzis and Flares. Grab these items then return and exit to the West. Continue toward the
pillars and walk between the pair of green statues to end this level.
TOMB OF SEMERKHET
Nothing like starting off a level being trapped inside a tomb. Vent your frustrations on the nearby vases and get yourself a
Medkit and some Uzi Clips from the debris. Continue to the North and you will slide down into a room infested with Morgue Beetles.
These things are nasty and to be avoided at all costs. Run to the right and jump to the ceiling where you can grab on and monkey
swing across the room (and over the beetles). Get on the pole at the end of your swing and slide down to the lower level (not
the bottom) and backflip to the ledge.
Jump the gap to get an unlit torch then head to the burning torch along the East wall and light yours. The torch is your best
defense against the beetles but it also severely restricts your actions. Return to the hold in the middle of the room and drop
to the floor below. Beetles will swarm you and do some damage - not as much as if you didn't have the torch. You now need to
visit each of the three holes in the surrounding walls and press a button. Of course you will have to drop your torch to do this.
Once you drop your torch, don't bother picking it up again. Just run to the other holes and tough it out. Each time you stop to
press the switch inside the holes the Beetles will do considerable damage to you. Use Medkits as necessary to stay alive including
the Medkit you will find in the hole in the South wall. When all the buttons are pushed you can run for the pole and jump to it
and climb up to the middle level.
 Backflip off the pole and locate the pair of urns on the West wall with a open door between them. Jump the gap and blast the urns
to get a Medkit then enter the door as it shuts behind you. Locate the red square on the South wall and push it open then climb
the block and drop into the next room.
Now locate the ladder on the West wall and do two diagonal jumps to get on it. Climb to
the top and shimmy right. Drop off to get Secret #31; Shotgun Shells and a Medkit. Return to the
ladder and make your way to the bottom. Head through the door to the East and start climbing another ladder. Climb the block
then head down the hall to the left and drop into the next room. Kill the attacking Jackals and try not to get toasted in the
fire shooting from the walls.
The three holes shooting the fire are also hiding two switches and a Medkit (in the left hole). You need to time the flames and
wait for them to shut off then rush up and activate the switches. You can also stand between the switches and sidestep to
activate then sidestep back out of the way. If you catch fire you can sprint for the nearby water but you will have to use a
Medkit halfway through your dash. It's better just to SAVE YOUR GAME before beginning this puzzle and reloading if you start to
burn. When the two switches are pressed a door will open leading to an even worse fire trap.
This room has six firetraps and they are on both walls making things much harder. On top of that, the water is above you making
you have to climb up to put out any "personal fires". Saving your game is still the best policy otherwise you could go through
a lot of medkits in this area. Activate all six switches and get some Shotgun Shells from one of the holes before climbing out
of this area to the West. Continue to the SW by monkey swinging along the ceiling until you can drop into the passage that will
take you back to the main hall.
The East and West sides of this room now have raised sections that you can climb onto. Climb onto the nearest and do a running
angled leap to land on the central platform. Locate another firetrap in the middle of this structure and activate the switch to
turn off the flames in the room below at the bottom of the ramp. Head to the East ledge and drop and hang. Shimmy to the right
until you reach the climbable wall then climb up into the alcove to get a Medkit and Shotgun Shells, which I like to refer to as
Secret #32. Climb down the wall to the bottom and you can safely drop to the floor.
Head down the ramp and get the Rules of Senet from the pedestal, which also triggers a quick movie.
Return to the top of the ramp and head South over the blocks and down the hall. Drop down and take the ladder and drop from the
bottom of the ladder to reach the floor below. Run across the Senet board as you head for the ladder on the other side. Climb
the ladder and shimmy to the right when you reach the level above. You now get to play the game of Senet. You have the rules
in your inventory so I won't retype them here. The only rule you need from me is that you must LOSE the game if you want the
rest of the secrets in this level. If you are not going for a Perfect Secret Score then I highly recommend you WIN the
Senet game as the rest of the level will be much easier to complete if you win.
So how did you do? Are you a Winner or Loser?
Oh well - at least you can now get the remaining five secrets in this level. Climb down the ladder and return to the main hall.
A trap door is open to the left and you can drop into it. Start forward and you will start to slide down several slopes. As you
are sliding down the third slope jump and grab the opposite ledge and pull up to get Secret #33.
Slide down the pole until you reach the ground. Blast apart the pair of urns to get Shells and a Medkit.
Climb back up the pole over the block and start to slide again. Jump for the pole at the bottom. Slide down and get the items
halfway down; Uzi Clips and a Medkit. Jump back to the pole and slide to the bottom. Continue forward and kill more of those
annoying bats then doing a running jump and grab the opposite ledge and pull up. Turn left and enter the door. Head up the
stairs and kill a pair of Jackals before entering the glowing passage on the other side of this room.
Grab the Senet piece and pull it back to the main room until it is resting between the hammers. When the piece is in place, flip
the nearby lever to send the hammers crashing into the Senet piece revealing Cartouche Piece #1 inside.
Now you can leave this area and head back to the pole you slid down before. Jump to the ledge beyond this pole to the left then do
a standing jump to the ledge below with the red doors. Enter and collect Secret #34; crossbow ammo and
a Medkit then exit and drop to the floor. Locate the ladder on the pillar and climb up. Shimmy right and climb the pole to get
some items above then return to the ladder and shimmy left. Drop to the ledge and go to the crawlspace in the West wall. Climb
through it and into the next room.
Climb over the wall and you will find another Senet piece and another pair of hammers. Jump to the walkway and pull the Senet
piece out far enough so that you can get behind it and push it between the hammers. These hammers will smash the piece as soon
as you move it into place. Grab the Cartouche Piece #2 and combine them in your inventory to create the
Ba Cartouche.
Drop down into the room below where you can shoot a pair of Jackals and a pair of urns in the room to the North. Get the Shells
and Medkit for your trouble then use the block to reach the walkway above. Do a running leap to reach the exit then crawl back
through the crawlspace to reach the ladder leading back down to the pair of doors below. Use the Ba Cartouche in the socket by
the East door and it will open releasing a pair of Jackals. Kill them, then enter into the new area.
Follow the walkway around to the right then do a running jump and grab to grip the lever turning off the fire and then you will
slide to the floor below. The fire will reset shortly so act fast! Sprint to the North side of the room with a pair of pools
and a pair of poles and climb either pole to the room above. Backflip off the pole and locate the Senet piece. Pull it away
from the wall then get behind it and push it down the walkway into the main room. The hammers will crush the piece when you have
moved it into position. You can get the Ra Cartouche Piece from the remains.
NOTE: Unless you do this entire sequence perfectly the fire will most likely start back up forcing you to head for one of the
pools below to put yourself out. Use the crawlspace in the SW corner to return to the top walkway and turn off the flames to
finish your quest. You can also flip the lever again to gain additional time.
You can now return to the main hall and use the Ra Cartouche in the socket on the West wall to open the remaining door. Continue
up the stairs as they turn left and continue up into the next room. When you enter a Flame Spirit emerges from the torch. Avoid
any contact with it as you make your way down into the room and head up the ramp to the West. Sprint down the passage with the
Flame Spirit in hot pursuit (no pun intended). In the next room locate and pull the lever to release the Water Spirit then get
out of the way. While these two Elementals battle it out you can grab some Medkits from both sides of this room then return to
the main area.
 Climb up and into the door to the North where you entered and then turn and do a running leap to the first rope. Continue across
the room by swinging from rope to rope. When you are on the last rope and swinging to the South you can launch toward the ledge
between the columns and get Secret #35; Grenade and Revolver ammo. Look around the corner for Uzi
Clips then return to the rope and spin around so you can start swinging again and land in the room to the East.
Continue across the room until you reach the door then do a running jump and grab the edge of the block with the pole. Climb the
pole and backflip to the ledge to the East. Turn right and jump out to grab the switch. This opens a trapdoor and sends you
falling safely to the floor below. Make your way back to the pole and climb it again and backflip to land on the East ledge.
Locate the block with the hole and get the unlit torch. Now go to the edge and toss the torch below before returning to the pole.
Jump and grab on then slide down and get the torch. Do a running jump into the archway to the West then drop down and continue
to the room with the three ropes. Jump up to the flame and light your torch then head to the East where you should spot a pair
of unlit torches. Light them with your torch and a trapdoor opens behind you. Drop down until you reach a blade trap then do
a backwards jump to get past it. You are finally able to get Secret #36; Shotgun, Crossbow, and
Grenade ammo, plus a Medkit. It is also guarded by those Morgue Beetles which will be attacking you while you collect your loot.
When you have everything you came for, exit through the trap doors in the floor.
With that massive secret out of the way we only have one left to get and here it is. Retrace your path all the way back to the
block with the hole where you first got the unlit torch. When you backflip from the pole head toward the block but this time
jump over the gap and enter the next room. It's dark in here so you may need to use a flare to find the switch in the East wall.
Flip the switch to raise a block which you can use to climb into a room above you which has Uzi and Crossbow ammo plus a Medkit
and will also trigger Secret #37. Drop back down and take the passage at the top of this block and
follow it to large room that starts the Guardian of Semerkhet.
Congratulations! I guess you aren't going for all the secrets this time. Head down the ladder and go South through the passage
and up the stairs. Head around to the left and look for the hole in the wall to the North when you reach the top. The Ankh
squares from the game board are now columns that you can use to jump across. Start with a standing jump to either the right or
left column the do a running jump to the next. A running leap with a grab will get you to the next column. Pull up and do another
running jump and grab onto the final column. One more standing jump will get you to the other side.
Head down either of the stairs and approach the door which will open as you get near releasing a pair of Jackals. Kill them then
enter and head down the ramp. At the bottom, blast apart the pair of urns and get the Uzi Clips. Go down some more stairs and
fight another pair of Jackals that come at you one at a time. Continue to the hole and drop through.
Continue down another ramp and start sprinting when the Morgue Beetles start to rain on you from above. Get to the pole and start
climbing until you can backflip to the ledge and shoot another pair of urns. Get the Medkit from the broken remains then head
through the door to the East. Continue past some mirrors and a pair of frozen Jackals and go to the SE corner where you will find
a ramp leading to another pole. Bats will flutter around as you climb the pole. Face toward the East and backflip to the ledge
behind you. Turn and run for the door which opens as you approach.
Drop into the next room where three Senet pieces need to be moved into their proper locations. First, move the red piece out of
the way by pushing it toward the beams lighting the green squares. Push it to either side to make a clear path for one of the
green pieces. Push/pull a green piece to the other end and onto the green square that the red piece isn't blocking to start a
short movie. Now move the red piece to the other side and go get the other green piece and move it to the other green square.
With the two green pieces in their proper location you can now move the red piece to the other end and put it in the red
square. This will open the crypt.
Go to the block in the SE corner and climb up and jump and grab so you can pull up into the passage with the pole. Jump and slide
down the pole then climb up out of the hole and continue down the ramp. The pair of previously frozen Jackals will attack you now
so kill them as you advance toward the crypt. Drop into the opening at the base of the crypt and crawl into the passage. Back
yourself out at the other end and drop into the hall. Head down the hall and turn into the first room on the right to end the
level.
GUARDIAN OF SEMERKHET
Move forward and drop into the hole to the right of the tomb. You will slide into a passage with some spinning blades. Advance
toward the blades and get as close as you can and line up in the middle of the circle. Watch and learn the pattern - they will
retract just for a second after opening twice. Turn around and wait for the blades to stop then backflip through the trap. Head
around the corner and repeat the procedure on the second trap.
 Slide down the next ramp into the map room then turn to the left and climb up into the chute where you will find a crawlspace
inside on the right. Crawl through until you reach the big wooden wheel. This opens the door to the North but it will also
start to close as soon as you release it. Turn the wheel several times to open the door then head down the walkway. Sprinting
can save you some time but it could also cause you to miss a turn if you aren't careful. Follow the path and turn right to jump
a gap and land on the next walkway. Ignore the blade trap behind you and just keep running. Follow the walkway around to the
right and do another running jump to the final ledge by the door. Angle left toward the door and sprint the final distance
doing a forward somersault under the door just as it closes. If you fall off the walkway or miss a jump you can return to
the South where a ladder will take you back up to the wheel. Avoid the pits with the blade traps.
Keep running when you roll under the door all the way to the end of the walkway then do a standing jump to the pedestal where you
will find the Golden Vraeus. It is heavily trapped so watch out for the blades when you take it. Stand between the blades or
get behind it before trying to pick it up. Drop and hang from the pedestal and drop to the floor below. Head toward the South
jumping over the pits to avoid more blade traps. Go through the crawlspace and up the ladder to return to the wheel then take
the crawlspace back out to the map room.
Insert the Golden Vraeus into the opening on the South wall and watch the movie. Get the Guardian Key from the map table then
go to the East wall and use the key in the keyhole to open a trapdoor. Drop in and slide to the bottom of the ramp and listen
to the disturbing sounds of something big lurking around down here. Sprint down the East passage and the doors on the left start
to rattle as you pass by. Grab the nearby Medkit in the corner and continue sprinting to the lever. Pull the lever to open those
rattling doors behind you - unless they have already been opened...
A giant Bull comes charging down the hall but we aren't going to let that stop us from getting the first two secrets in this level.
Head back to where you got the medkit and jump to the ceiling and monkey swing back towards the bull. You should easily spot the
crawlspace to your left where you can get Secret #38; Shotgun and Crossbow ammo. Watch out for the
firetraps! Now drop down and go for the next secret.
You are going to need to dodge the bull and run through the doors he just burst out from. Follow the passage to the end and get
the Medkit then locate the hole in the North wall and get the unlit torch. Race back to the room with the lever and light the
torch using the lit torch on the wall. Now run all the way back to the room where you got the unlit torch and use your new flame
to light the wall sconces. This opens a door leading to Secret #39 where you will find Crossbow
and Shotgun ammo and a Medkit. This room is heavily trapped with spikes and blades so be careful as you collect your loot.
Run back to the room with the lever then head South down the hall with the Bull in hot pursuit and get in front of the big door
to the West. Time to do a little bull fighting without a cape. Approach the center of the door and as you get near do a reverse
roll so you are facing the bull. If the camera tries to take over then shift to 1st-person view. Wait for the Bull to charge
then jump to either side to let him smash open the door for you.
Inside this next room are three targets (or maybe I should say Bulls-eyes) and you need to basically repeat the door trick and
make the bull charge into each of them. The order makes no difference. When all three are smashed the West doors will open.
The left door leaves this level, but the right door takes us to the final secret so go inside that one first.
Head through the right door and climb the ladder to get to the balcony. Head to the left and get some items from that room then
continue to the opposite side and climb up through the hole in the ceiling to get Secret #40;
Uzi and Shotgun ammo and a Medkit, and watch out for the spiked ball that drops from the left while you collect one of these items.
Note: Once you take one item (Small Medkit, Large Medkit, or Shells) the other two burst into flames, so choose wisely.
Return to the ground floor and go out and around and through the other door and follow the passage to the ladder. Start climbing
to exit this level.
WARNING! There is a possible bug at the start of the next level. Make sure to SAVE your game before climbing the final ladder
and exiting this level.
DESERT RAILROAD
BUG ALERT! If your game exits back to Windows after the movie then you need to run the SETUP and turn OFF the
options for Bump Mapping and FMV (uncheck these boxes). Restart the game and wait until you can control Lara in the
boxcar. Save, exit, and restore your settings then load your last save game where you are already on the train.
Time for a little railroad action. Start by pulling the lever to open the door then jump to the next car. This is the
passenger car and contains three private rooms. Check all the rooms and shoot the boxes in two of the rooms to get a Medkit
and Shells. Continue through the car and kill the henchman who tries to get the drop on you. Jump to the next flatbed car
with the blue cover over the crates and watch as another pair of henchman climb onto the train. Kill these guys before
continuing across this flatbed car and jumping to the next.
 At the end of the second flatbed car you can jump and grab onto the side of the boxcar and climb to the top. Continue along
the roof of the train and watch for a pair of gunmen to come out of the roof hatches on the next two cars. Kill them both
and drop through the first hatch into the boxcar. Kill another gunman and get some Shotgun ammo before going through the door
at the back of the car and jumping to the side of the next boxcar. Climb up to the roof continue to the end of this car.
Ignore the hatch - this car is empty.
Jump to the flatbed car with the blue cover and then drop off the side and grab the edge of the car. Shimmy the entire
length of this car and pull up when you can. A helicopter will show up. Do a standing jump to the next car and grab on to
climb to the roof. Kill another henchman then go to the far end of the car and turn and drop down and hang from the roof.
Drop and grab quickly to pull into the door after it opens. Inside you will find Secret #41;
a Medkit and Shotgun and Crossbow ammo. Return through the door and shimmy to the ladder so you can climb back to
the roof.
Go to the North edge of this car and drop and hang from the roof. Shimmy to the right until you are above an opening. Drop
and grab the opening and crawl in to get some Shotgun ammo and a Crowbar. Use the crowbar as a lever in the socket missing
a handle to open a door allowing you into the previous car. Kill another gunman and make the long trip back to the car where
this ride all started from. Kill all the gunmen who will try to stop you.
The remaining two secrets in this level are hidden in cracked crates. You must use the crowbar on these crates to open them
and get the items. A Grenade Launcher and two types of grenades are Secret #42 and you can find
them in the cracked crate in the third boxcar.
The jump to the last car is tricky. Take one step back to land safely otherwise you will smack the wall and fall.
Secret #43; a small Medkit, is in the cracked crate in this car. Use the crowbar on another lever
socket to unhook the rest of the train from this car and end the level.
ALEXANDRIA
As soon as you hit town, head for the central plaza with the fountain. Locate the two-story building nearby with the two sets
of four arches and go inside. Head up some stairs and you will get to watch a small movie before getting the LaserSight
attachment. You will also find Shotgun and Crossbow ammo on the table by the stairs. Head out onto the balcony and run to the
left doing a running jump at the end to land on the next roof.
 Kill the sniper and grab the Uzi ammo then head around the roof so that you are facing West. Do a running leap and grab onto the
clay roof then shimmy around the corner until you are over the lever. Drop and grab onto the lever that will open a secret panel
inside the building. Go claim your reward; Crossbow ammo and a Medkit and Secret #44 is yours.
Feel free to search the rest of the buildings if you want. When you are ready to leave return to the fountain and head SE down
the narrow street. Head past the large building with the columns and keep going left until you reach a dark passage. Continue
until you exit this level.
COASTAL RUINS
Click Here if you are Returning to the Coastal Ruins for the first time.
Click Here if you are Returning to the Coastal Ruins for the second time.
Head for the palm tree and go through the archway that leads to the "Egyptian Adventure". Shoot the boards and enter to find a
stone pyramid on a marble platform. Head up the stairs and blast your way through the boards. The room beyond is much like the
underwater mirror room back in the Sacred Lake. You will see things in the mirror that you won't see in the "real world". You
can figure this room out for yourself or follow these instructions. Do a running jump to the middle section of floor. Turn and
face the reflection of the Crossbow then jump over to get it. Retrace your steps to exit this room with your new weapon.
 Return to the main room with the pyramid and this time follow the path to the right. Before you slide down the ramp go into your
inventory and equip the crossbow and combine it with the LaserSight for the next puzzle. When you slide to the bottom a platform
swings up to protect you from a fatal plunge into the spikes below. The platform only stays up for a few moments so you must act
quickly. Use the crossbow and sniper the nine targets to lower the spikes before the floor opens and you fall in. If you found
Secret #42 back on the train then you can also load a Super Grenade into the Grenade Launcher and take out all nine targets with a
single shot. Simply jump up and fire at the top of your jump for instant success. You cannot prevent yourself from falling in -
your goal is to eliminate the targets and the spikes before you do.
After you fall in, turn and get the Token then head to the South wall and jump and grab to pull up into
the opening above. Crawl in and return to the pyramid room and this time head back up the stairs. When you reach the entrance to the
room where you obtained the crossbow turn left and use the Token in the Snake Charmer machine in the next room. A rope will magically
rise up from the basket and you can climb the rope and jump off at the top to find a Broken Handle.
Head into the small alcove with the three hooks on the walls and use the crowbar to pry the Hook from the East wall. You can
combine this hook with the handle you just got to create the Hook and Pole. Now climb back down the rope and return to the main
pyramid room and go back outside then head over to the wall with the bars and the block. Look through the bars and locate the
Keys. Use your Hook and Pole to get the keys. Now that you have the Gate Key you can return to the street and follow it until
you reach a pair of archways. Head through the right one and continue until you reach the water. Swim over to the ledge and
climb out then jump and grab the opening in the wall and pull up and crawl through.
When you exit the crawlspace you should easily spot the ladder you need to climb. Climb to the top and a movie will take over.
Our immediate goal is to the right, so make your way around the hill toward the castle. As you near a pair of Skeletons attack.
Skeletons can be killed two ways - explosions and headshots using the LaserSight. Kill the pair then head up the back stairs.
Do a running jump to the opposite side and keep moving until you have to do another running jump to the U-shaped ledge.
Follow this ledge around and locate the ledge above. Jump and grab and pull up to get a Medkit and Shotgun Shells. Drop back
down to the U-shaped ledge and do a running leap to the ledge with the face in the wall. Go through the opening and use the
Gate Key to open the gate and enter the Catacombs.
Second Visit to the Coastal Ruins
Do a safety drop to the ledge below then move over to the rock hanging by the rope. Drop down into the area below and find the
stick by the fire. Carefully approach the fire and light the stick on fire the move to the rope and pulley and stand beneath the
rope. Jump up and the rope will start to burn causing the rock to fall. You won't get hurt if you don't move.
Climb onto the ledge the rock just smashed into and then jump and grab and crawl into the passage above. The gate can be opened
with the crowbar then you can jump, grab and crawl through the next opening and continue down the passage into the
lower catacombs.
Third Visit to the Coastal Ruins
At least our third visit to the Coastal Ruins will take us through new and unexplored territory. Exit the water and head toward the
structure with the face carved on it. Get in the middle and look up to find the ladder that you can jump and grab onto then climb up
and exit to the beach area. Go toward the water and dive in.
Swim NE past the cliffs along your right and start looking for an underwater tunnel on the SE face of these cliffs. When you find it,
swim inside and continue until you spot some seaweed on the left. Turn and start swimming in the same direction as the moving seaweed
and you will exit this level and enter the Temple of Isis.
CATACOMBS
This level is very confusing. Not only will you be switching between the upper and lower catacombs, but you will also be
going back to the Coastal Ruins several times. Follow the links carefully so you don't get confused.
Upper Catacombs
As you being the Upper Catacomb level just keep going until you enter the second room and the floor starts to shift. Move over
to the face on the wall and activate it to raise a brown piece of floor in the lower catacombs. Return through the gate and
back to the Coastal Ruins.
Lower Catacombs
Continue until you reach the dead end and you should spot the brown piece of floor from earlier. Now move over to the column and
pull it until it rests on the brown section of floor. This will fix that unstable floor from earlier. Now you can return to the pit
with the torch and head over to the ladder along the wall and climb out of here. Make your way back up to the Upper Catacombs and
reenter that area through the gate you opened earlier.
Return to the Upper Catacombs
There is plenty to do on this second trip to the upper catacombs. Start by pushing the short column to the front of the room
until it covers the face in the floor. A Ghost will appear and a secret passage will open. Run through the secret passage and
head up the stairs to the right in this next room. When you get to the top stand next to the statue and wait for the Ghost who
will fly into the statue and vanish.
 Return to the previous room and locate the pole leading down into a hole. Climb down and continue through the passage. A door
will open for you and shut after you are through. Flip the lever here to raise the walls giving you a better view of the cavern
beyond.
Move toward the pair of ropes ahead and do a running jump to grab the first rope. Move to the bottom of the rope then swing toward
the next rope and jump off to launch yourself toward it. Grab on and turn until you are facing South. Start swinging and launch
toward the wall and grab onto the ledge to get Secret #45; Shotgun ammo, Medkit, and Flares. Return
to the rope and continue swinging across the ropes until you reach the ledge with the opening.
Continue down the hall and walk up to the edge. Take a step back then do a standing jump and grab to cling to the brick wall.
Climb down to the floor and head over to the wall to the South where you will find a passage near the top of the pile of dirt.
Enter the opening and go up the stairs to get some Shotgun ammo and locate a hole you can drop into.
You will find yourself swimming so locate the steps leading out of the water and get out. A Skeleton lurks around these parts so
line up that LaserSight with his skull and blast him. Head south and do a running jump and grab onto the first ledge then do another
running jump to land on the ledge with the lever. Flip the lever and two new platforms come out of the wall. A running jump puts
you on the first while a standing jump with a grab and pull-up gets you onto the second. Target the vase on the next ledge and shoot
it to reveal some Shotgun Shells then jump over and get them.
Locate the black ceiling strip and use it to monkey swing across this area to the other side. You may want to make sure you are
at full health because a ghost attacks when you arrive on this ledge. The winged statue that will get rid of this ghost is back
on the other side of this room in an opening down by the water. Before you head there you need to flip the lever up here to
reveal a new pair of ledges along the East wall.
When the ghost is gone you can make your way back to the previous ledges then do a running leap to the ledge in the middle of the
wall before heading toward the two new ledges. A running jump from the second ledge should get you near the green-tinted opening
on the South wall. Drop down into the alcove to the left then drop and hang once more and shimmy along the ledge to the right.
Continue around the corner then drop to the ledge below when you finally reach the end.
Head down the passage until you reach the large room with the vase. Blast it to get some Shotgun ammo and then deal with the pair
of Skeletons who are probably getting quite close by now. Jump to the rope and swing over to the ledge on the right. Turn and
face the ledge to the West with the column and jump over to it. You will be able to get the Trident #1 from this pedestal, but
in doing so you will awaken a Skeleton. Kill him or knock him off the ledge then continue to the West by jumping to the next
ledge and pulling up to the ledge above to get a Medkit.
A small Skeleton army attacks so start picking them off one by one until they are gone then head around the corner toward the
North wall. Jump the pit and grab the ladder on the wall and start climbing. Kill the Skeleton waiting at the top then get
Trident #2. Climb the pole up to the next level and backflip off to get some Crossbow ammo from the vases. Jump back to the
pole and finish the climb to the top and backflip to the passage.
Continue down the corridor and a door will open as you approach. Enter and you will be back at the beginning of the upper
catacomb level. Climb down the pole and locate the ladder on the North wall. A running jump with a grab should stick you onto
the ladder and then you can climb down to the floor where a pair of Skeletons are ready to attack. Run toward the water to the
West and you will find a ladder on the North wall. Start climbing until you reach an opening at the top. Enter the room to the
left.
Blast the vases and the Skeleton in this area and get the Shotgun ammo as you make your way back to the East wall where you will
find another ladder that you can climb. When you reach the top, drop to the ledge and get the Shotgun ammo and Trident #3
from the high alcove in the East wall. Another alcove to the right of this one has a Medkit and some Shells stashed inside. Return
to the bottom level and locate the lift that will take you back up to get Secret #46; Medkit, Shotgun
and Crossbow ammo hidden in the urn.
Make your way back to the high ledge that lead to the third trident and start jumping across the top level of platforms. You
should come to a rope that you can use to swing to the opposite ledge where you can kill another Skeleton then do a standing
jump to grab and pull up into the alcove with the face. Climb the pole inside and backflip from the top where you will find a
ladder you can climb. When you reach the top, enter the stone passage and check out all the bones. There are five sets of white bones
and you need to blast them all to open a trap door and get Secret #47; Crossbow ammo. If you cannot locate
all five make sure you aren't forgetting the bones back by the pole you just climbed.
Continue across the floor from the last secret and wait for the camera angle to change. Slide down the pole and jump into the
area to the left and go through the door on the right side of the wall. In here is Secret #48;
Shotgun and Crossbow ammo, plus a Medkit.
Return to the stone passage and follow it to the end where you will find the final Trident #4. Take the Trident and kill
any Skeletons which may come to life then climb the ladder behind the Trident to leave this area. Use your crowbar at the end of
the hall to open the gates and get back outside into the Coastal Ruins. You aren't here long enough to switch to another section
of text. All you have to do is make your way back up to the Upper Catacomb entrance and go back inside.
Return to the big cavern with the pair of ropes then use the ladder to climb down to the lower area and head for the West wall.
You should find an opening next to the water that you can enter. Head up the stairs leading to the Temple of Poseidon.
TEMPLE OF POSEIDON
Head towards the winged statue and drop off and grab the brick wall. Drop to the floor and head right through the door on the
North wall. Drop down into the next room and do a reverse roll into the room on the left. Crawl into the secret area to get
Secret #49; Medkit and Crossbow ammo. Light a flare if you can't find the opening.
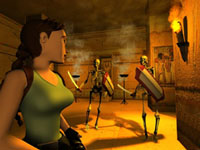 Kill the pair of Skeletons then move on to the next room. Circle around the balcony and go through the door on the opposite end.
Inside is a large statue with a tunnel beneath it. Crawl into it and out the other side. Blast apart the vases to get some Uzi
Clips then carefully make your way past the firetraps in the floor. You will also have to deal with another pair of Skeletons in
this area.
You should now arrive at the room with the statue of Poseidon. Approach the statue and put the first Trident on his staff which
will cause water to start pouring from the mouth of the statue we just crawled under a moment ago. Swim back to the middle area
and watch the water spill into the hole. Continue over to the South wall and go through the opening to find a giant stone face
and a pole. Climb the pole to reach some vases and a second statue of Poseidon. Smash the vases and use your second Trident which
will cause water to start pouring from the giant face by the pole.
Return to the central room and go through the door to the East to arrive at another stone face. You can climb the wall across from
this face and at the top you will find the third statue and you can use the third Trident. More water starts flowing and a ghost
starts chasing you. Quickly return to the brick wall you climbed down at the beginning of this level and lead the ghost to the
winged statue where you first climbed down.
With the ghost out of our way you can return to the main room and go through the West wall. As expected, there is another stone
face and an opening high in the wall with a firetrap directly below it. You need to do a running leap and jump over the black
circle (firetrap) and grab onto the edge of the crawlspace. Pull up and crawl inside to find the final statue where you can use
the forth Trident. Exiting this area is easy since the water has put out the firetrap. You can just drop down and return to the
main area.
With water coming in from all sides you can now safely drop through the central hole and into the water below. Note: If the room
below is not filling with water you will need to make sure you have killed all the skeletons in the previous rooms where you used the
four Tridents. Swim down and through the opening near the bottom of the West wall. Surface and you should be able to see a pair
of stairs on the West wall. Go up either and kill the Skeletons along the way. A pair of Ghosts are in this next room and there
isn't a winged statue in sight....or is there? Blast apart those vases to reveal a pair of winged statues that will deal with Casper
and his friend.
Continue into the next room and approach the coffin along the West wall. Open the coffin to get the Left Gauntlet. A pair of
secret doors will open on each side of the coffin and you can enter either to reach the next passage. Look for the opening in
the West wall and climb into it to end this level.
LOST LIBRARY
Continue through the narrow passage leading to the Library. Enter the room at the end and head toward the North wall with the blue
doors. Go through the middle door and climb down the pole while avoiding those wheels. At the bottom, take the passage leading to
the next pole and once again climb it while avoiding the deadly wheels. Backflip from the top and continue to the next room.
This room has a guy with an axe that you should probably kill as soon as you enter. He is very hard to kill and you must hit him
directly in the heart using the LaserSight. Note: You can also kill this guy (and others like him) with pistols. It takes
several minutes of continuous fire and you will have to take evasive action. Now you can approach the Gold Star and pry it out with the crowbar (this thing is
turning out to be the most useful item in the game). Head over to the left wheel and drop below to find Uzi and Revolver ammo also
known as Secret #50. Now go to the South and climb up the ladder behind the column.
 Enter the next small room and slide down the pole to meet another pair of guards with axes. Shoot them in the heart and take note of
the locked gate as we head off to find the key. Locate the hole in the next room and drop off and hang so you are hanging above the
South wall of the hole. This wall is climbable so start climbing down. At the bottom you can go through passage and into the next
room with a axe-wielding horseman. Target the heart and blast away. The first shot will dismount him and the second will blow his
heart clean out of his body. Examine the heart to find that it is indeed a gem; the Horseman's Gem and is a perfect fit for that
keyhole back by the locked gate.
Before you leave this room you will want to shoot the counterweight in this room to open a secret passage in the wall which leads to
Secret #51; Medkit, Shotgun shells, and Uzi Clips. Make your way back to the gate and use the gem in the
socket to open the gate and enter. Inside you should find a rope that you can pull to open an underwater door somewhere else in the
level. Now you can return to the room where you pried the Gold Star from the wall.
Head toward the West wall and go through either opening to enter the room with the swinging chains. Wait for the chains to swing
out of your way then run/sprint past and repeat for the remaining chains. When you reach the room with the trapdoor and the wheel you
need to stand on the door and use Action to open it.
Drop into the water below and swim West through the gate you opened earlier with the rope. Continue until you reach the room with a
pair of Gold Stars. Whip out the crowbar and pry them off to increase your inventory count to three. Swim back to the trapdoor and
climb out and retrace your steps all they way back to the first room with the blue doors on the East wall. Climbing up the pole past
those blades is much harder than going down. You may want to backflip onto each ledge and collect the medkits and other items on each
level. Go to the left door on the South wall, open it and enter.
Inside is the Planetarium and you should have no trouble in locating the three sockets for your three Gold Stars. As each Star is
inserted gates will open allowing you access to models of the planets. These models need to be positioned out on the floor to complete
this puzzle. We'll start with the Earth since it is already out in the room. Move it until it is in the center of the room. Now head
to the gate on the right of the East wall and move the Moon into the next orbit. Venus is located next to the Moon behind the left gate
and it goes in the next closest orbit. Mars is behind the gate to the North and is positioned next followed by Jupiter on the South
wall. When all the planets are aligned a bolt of blue energy will shoot from the door next to Jupiter. Enter if you dare...
Head down the corridor past the blue door and into the room with all the snake statues. This is your next puzzle so get ready. Each
statue has a lever that shoots flames from that statue and two others. The goal is to light all seven statues and the pattern is as
follows. Start with the closest statue to the door and work your way around the room counter-clockwise. You can always reset the entire
puzzle by standing on the pentagram along the East wall. When all seven statues are lit a ghost and several platforms will appear in
the center of this room.
Use the platforms and stairs to reach the top of this room and jump into the fountain to lose your fiery pursuer and put out any flames
that may have ignited along the way. Exit the fountain and enter the next room and continue until you reach the corridor with the
blue door. Go inside and you should appear on the second floor of the main room with the blue doors along the East wall. Follow the
balcony around to the South wall and go through the door on the left.
 Two Fire Ghosts attack when you enter and your only escape is the fountain where you lost the first one. Race back to the fountain to
get rid of these pests then return to this room and get the Pharos Pillar from the pedestal. Exit this room
and enter the door on the right. You will start sliding down a slope along a lion's head. Quickly locate and jump to the climbable
wall surface and climb up. Jump to the ledge on the right to trigger Secret #52.
Continue the slide down and out of the lion's mouth and you will land in the path of a boulder. To avoid the boulder jump towards the
ramp then jump to either side to doge the rock as it rolls by. Target the guard with the axe using your laser and blast him in the
heart then walk up the ramp that the boulder just rolled down. Get under the lever and jump to grab and pull it and a platform will
rise up in the center of the room. Climb the platform and do a running jump to grab the ledge to the South then pull up into the alcove.
Go to the end of this passage and do a running jump to the top of the lion's head. Continue to the top and pull the rope which will
open his mouth enough so you can enter. Drop and hang from his mouth then catch yourself and pull up into his mouth and crawl to the
back where you will find a pole that you can climb. Backflip from the top and head down the passage to the next room. Get the unlit
torch on the left and step onto one of the grates inside this room to light the pedestal next to it. Light your torch and exit the
room continuing down the passage until you reach the gate that opens as you approach.
Go through the gate and into the next room with the wood floor in the middle. Stay off the wood and throw your torch onto it instead
and watch it burn and fall into the room below. Drop down below and get the Music Scroll from the circle in the
middle of this room. Exit this area through the opening in the East wall and return to the main room with the blue doors again. Go
through the snake statue room and up the platforms and stairs to reach the balcony level of the main room.
Now go to the North wall and enter the right door that leads to another hallway. Follow it to the room at the end where you will find a
harp and a pedestal that you can use the Music Scroll on. The music will open a secret passage. Follow it back to the balcony in the
main room and pull the rope to open the large blue doors below. Vault the railing to reach the floor below and head through the doors
to enter the Hall of Demetrius.
Continue down the hall until you reach the large room then head up the ramp to the South. The room at the top has the
Pharos Knot resting quietly on a pedestal. Take it before returning to the bottom of the ramp. Now go
North through the opening in the wall and up a series of ramps. When you reach the top a movie will play. Watch carefully to see where
Von Croy goes in this movie - you will need this info to get the next secret.
Kill all the henchmen Von Croy leaves behind then return up the ramps on the North wall and enter the opening. Locate the lantern
and push it toward the doors (North) to open a secret door. Collect Secret #53; Crossbow ammo, Medkit, and
broken glasses on your way back to the Coastal Ruins.
TEMPLE OF ISIS
Click Here if you are Returning to the Temple of Isis
A large shark comes after you when you enter the underwater cave. Dodge the pursuing shark as you make your way to the far side of the
temple. A pair of openings are on either side of a wooden door ahead. Swim into the right one and you will be able to climb out of the
water and locate a socket for the Pharos Pillar. Jump back in the water and swim out past the wooden door and into the left opening.
When you exit the water in this area you will find a matching socket that you can insert the Pharos Knot into. The wooden door will
open now.
Swim out and down through the opening and enter the temple. When you exit to dry land a Skeleton will attack. When he is dead you can
head over to the hole in the center of this room and jump in the water. Swim into the next room then swim over to the door along the
North wall; open it and enter. When you exit the water an Eagle will attack you. Kill the bird then head up the stairs to the
South.
As you enter the next room the door slams shut behind you. Approach the statue of Isis and move toward the SW corner where you can find
a column that you can climb. Get out your trusty crowbar and pry the Black Beetle off the wall. A stream of
black beetles will pour into the room so hop off the column and run over to the West wall where you will find a block that you can climb.
From there you can climb into the upper area and push the button in the alcove.
 Return to the floor and head over to the left of the statue and climb up another column to find a Broken Beetle
you can pry off with your crowbar. Doing so releases more beetles into the room so now you really need to run to the block along the East
wall and climb up into that alcove to push a second button. An opening will appear at the base of the statue of Isis. Return to the floor
and drop and hang into the hole then climb down the ladder.
At the bottom, turn and head North then go to the corner of the East wall and climb the stone with the sloped top. Before you slide off
the slope do a backflip to the ledge behind you and take the Winding Key from the pedestal. While you are
here you also need to push the button on the wall to open that door back in the Isis room. Return to the ladder and climb up to the
statue room and go out the door you just opened.
Kill the Skeleton back in the main chamber then head up the stairs to the West. Go through the next two rooms and kill the Skeleton in
the room with the black pyramid. Check out the three holes leading to slides that take you to Black Beetles down below. The hole to
the North leads to a Broken Beetle and is basically a waste of time. You will need to visit both the South and West slides to get both
of the Black Beetles. You can do the holes in either order and the strategy is the same.
Drop in and slide down the slope. As you near the water at the bottom you need to jump forward to gain a few seconds on the fire that is
about to consume this area. Quickly make your way across to the platform and pry the Black Beetle off the wall.
The ramp you just slid down now turns into stairs but that water looks a bit too warm for swimming. Climb up to the ledge on either side
of the burning water and circle around to the stairs. You will need to make a running leap to reach the stairs before you can climb up to
the room. Repeat for the other hole/slide/beetle and you should now have a set of three Black Beetles in your backpack. Only one more to
go, so return to the main chamber and climb the stairs to the North and enter Cleopatra's Palaces.
Return to the Temple of Isis
Head back to the main room and take the stairs to the West leading to the black pyramid. Insert each of the Black Beetles into the pyramid
to trigger some cool events. Ultimately you can obtain the Mechanical Beetle from the tip of the pyramid. Open
your inventory and combine the Mechanical Scarab with the Winding Key. Now that we have this item we can return to
Cleopatra's Palaces.
CLEOPATRA'S PALACES
Continue down the passage until you reach the room with the fountain. Continue across this room and up the stairs to the North and take
the ramp up in the room that follows. A section of the wall has a carved face on it and you can use the crowbar to open it and reveal a
hidden passage. Head down this passage until you come to another carved face and use the crowbar again to open it. Keep on going until
you reach a hole you can drop into and slide down toward some water.
Just before you drop into the water, jump from the slide over to the left and continue in that direction until you find the elusive forth
Black Beetle. Remove it with the crowbar and add it to your collection then quickly do a reverse roll and do a
running leap across the water. When you land on this ledge turn to the West and head for the opening. You will have to enter the flaming
water just long enough to get under the opening and pull up. You can survive as long as you are quick. Heal yourself when you are out of
the water and return to the fountain room and back to the Temple of Isis.
Return to Cleopatra's Palaces
Go past the fountain again and up the stairs to the North. Continue until you see the picture of the Beetle and the Eagle. You can also
spot some suspicious looking holes in the floor, which hide deadly spikes. Use your Mechanical Beetle to defeat the spike traps and cross
to the other side. Don't forget to pick up your motorized friend - he has more work to do.
Time to get another secret. Head South after you cross the first trap and kill the Skeletons as you climb some stairs to the East. Now
go down some stairs and turn right and continue to the North. Another hall with spike traps needs to be deactivated with your beetle.
When it's safe you can cross and get Secret #54; Medkit, Crossbow and lots of Shotgun ammo. Now make your
way back to the hall just past the first spike trap.
 This time go North to enter a room with a coffin and swinging blades over the door. Search the coffin to get the Right Gauntlet
and kill the Skeleton you summoned in doing so. Return to the previous room and head East and use the Beetle to trigger another spiked
hall. Grab your beetle as you climb some stairs to do battle with an eagle. Grab the Medkit from inside the nearby coffin and head down
the passage to the West.
You will come to some double doors and a lever. Jump up and grab the lever to pull it down and open the doors. A block will rise up next
to you and you can climb this then turn to face the ledge to the West and jump to grab the edge. Now shimmy around to where you can pull
up then continue down the passage. Enter the area to the North and search the coffin in here to find the Right Greave.
As expected, another Skeleton attacks, so deal with him before exiting through the door with the swinging blades.
Return to where you pulled the lever a few moments ago and continue to the South. When you reach the end, turn left and go through the
opening on the East wall. Continue until you reach another opening to the left and enter to find a coffin with the Pharos Knot.
Leave this room and head left down the passage until you see some stairs on the left. Continue past the stairs and into the passage
behind them. Continue to the next set of stairs that lead to a locked door that you can open by using the Pharos Knot.
Enter this new room and climb onto the nearest block and get the Medkit. Swirling energy will appear above the blocks and a gold duplicate
of Lara appears on the other block. Try not to hurt the statue or you will ultimately hurt yourself. Head over to the North and climb onto
the block that just appeared and use it to reach the ceiling. Now you can jump and monkey swing over to the other side and drop onto
another block. Continue to the end of this passage, turn and jump to grab and pull up to the level above.
A pair of eagles are in this large area above the blocks with the swirling energy. These eagles will start to attack the gold statue
of Lara so you need to kill them quickly. Now head to the middle of this ledge where you can use the wider ledge and do a running
jump to the West. Turn and head North to the opening in the wall and climb into it. Another Skeleton and another eagle wait to do
battle with you. Kill them both before jumping to the hanging platform in the center of this room.
Locate the levers to the East and West and jump to them and grab to pull them. In doing so you will release an eagle that you must kill
before it starts attacking your statue. Each lever opens a door below. The door on the East wall contains the Hathor Effigy
and the West door contains the Ornate Handle. After you have both items, combine them in your inventory to form
the Portal Guardian, then jump back to the hanging platform and then jump South to the door with the carved face.
Put the Portal Guarding on the pole by the door and it will open. Enter and kill another Skeleton then watch the movie. A pair of
Cleopatra's Guards will attack. These guys are tough so break out the heavy artillery. When the first one dies the other will cease
his attack. Enter the doors behind the guards and collect the Left Greave and the Breast Plate.
Now head to the throne and locate the holes on either side. Take your pick and jump in to end this level.
CITY OF THE DEAD
This place is almost as depressing as the name. Head toward the motorcycle and kill the gunmen on the nearby building. When they are
dead you can climb up to the ledge where the sniper on the right was and get the Revolver. Drop back down and mount the motorcycle and
head into town. Turn left at the intersection then right at the next. You will be under fire at this point so quickly stop, get off
the bike and run into the building to the South.
Inside, you must drag the body off the floor grate then return to the bike and spin around to head in the direction you came from.
Turn left at the first intersection and left again at the next until you come to a dead end. Locate the block in the corner and climb
up and crawl into the space above. Continue through this passage until you reach a lever you can pull to open the floor grate back
where you found the body.
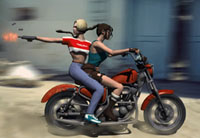 Return to the bike and head out to the West where you should spot a small pile of sand that you can use as a jump ramp to land on the
ledge with the construction signs on it. Crash through the signs and the bike will fall through the floor. Proceed on foot to the end
and climb into the opening and keep on going until you can drop into the pool far below. The next room has a few items you can collect
and a few bats you can shoot. When you are done you can slide out of this room.
Head to the West wall of this next room and jump to the crevice and shimmy around until you can pull up to the ledge. Turn and face the
swinging blue ball and equip your Revolver and LaserSight. Aim at the ball and shoot making sure not to hit the object in front of the
ball. Shooting the ball will release a ghost so quickly drop to the floor and head up the stairs to the right. You will come to a pool
of water that you can jump into that will kill the ghost. Don't fight the currents - just ride it out to the end where you can swim
through an underwater hole and climb onto a ledge on the other side. Drop off the other side and head up some stairs to the pool you
jumped in earlier. It's now frozen.
Push the lever on the South side of this room and a door will open back by the swinging ball. Return to that area and go through this
open door and locate the blue door. Use the crowbar to open it and get Secret #55; a Medkit. Now locate
the ledge on the right as you exit and climb up to reach another pair of blocks you can climb up to exit this room.
You will exit to an area that overlooks the beginning of this level.
Drop and hang off the ledge then shimmy to the right where you can pull up. Turn and jump to the lever and grab to pull it and open
a nearby gate and release a henchman. Kill him then make your way back to the construction site to retrieve your bike. Drive it right
through the wall to exit the underground area and drive back through the gate you just opened. Continue riding and you will drop into a
narrow ravine. Ride up the stairs that lead to a ramp you can use to jump that ravine.
When you land on the other side you can get off the bike and head to the lever located in the corner to the South. Pull the lever to
raise a platform then get back on the bike and ride up the stairs. This time go past the ramp and drop into the hole to the NE. Make
your way back to the area where you pulled the body off the grate and jump up and climb into the passage above the grate. Crawl until
you reach the lever that opens a door above you when you pull it. Head back to your bike and get on.
Return to the stairs and go up until you can spot a path along the North wall. Stop and get off the bike and jump over and grab to pull
up then climb up the block to reach the passage above. At the end of this passage you will be back at the street and be able to see
the machine gun. Do a running jump to grab and pull up to the ledge with the machine gun then head through the door you opened with the
last lever. At the end of the next passage you will come face to face with the machine guns. Target the red and white gas can next to
the guns and shoot it to blow it and the guns to tiny bits.
Now that it's safe to continue, do a running leap from the outcropping on this ledge to grab the opposite side. Shimmy to the left and
pull up to the roof. Head to the North and you will come to another lever that you can flip to open a gate back down and across from
the room with the grate and the dead body. Now return to the motorcycle and use the ramp on the left to jump across the ravine and
head out of the city through the gate.
Secret #56 doesn't really flow with this level. You will have to return to the City of the Dead after you
have equipped your bike with the Nitro Booster. This will allow you to make the previously-impossible jump to the area with the pillars.
Jump over to the pillar with the sloped top and jump until you reach the final ledge with the secret stash. Hardly worth the return
trip, but at least you will have that Perfect Secret Score for all the extra trouble.
CHAMBERS OF TULUN
Click Here if you are Returning to the Chambers of Tulun
Ride into the next area and take a right at the first intersection then make a sharp left and stay left as you jump over the ravine. Follow the
road as it heads left to the base of a stone step. Get off the bike and climb up the step and turn to locate the opening in the building
to the North. Jump to grab the ledge then continue and crawl through the tunnel until you reach Secret #57;
a secret room with a large stash of items you can add to your pack.
Return to your bike and head to the South through the opening and enter the mosque. A Grenade Launcher is over in the SW corner if you
don't already have one. Return to the bike and get on and head back to the ramp. Park the bike near the opening in the North wall then
enter the building across from the ramp and exit on the other side out onto the street. Head to the step and go West until you spot the
large Guard. This guy is tough and you must avoid him at all costs. He can send out shockwaves that do terrible damage if they hit you.
 Run into the mosque with the guard in hot pursuit. Head South into the last room with the two blocks along the South wall and climb up the
left block then turn and do a running jump and grab the ledge above the door on the North wall. Continue out onto the ledge and do a
running jump and grab to the ledge along the West wall. Shimmy to the right until you can stand then turn and jump to grab onto the
climbable surface on the North wall. Shimmy to the right until you can reach the next ledge.
Continue across this ledge and into the next passage. When you reach the end jump and grab so you can pull up to the roof area. Head
out onto the roof and locate the lever you can push to close all the doors in the mosque and trap the guard. These doors are on a timer
so you need to get moving. Head to the opposite side of the roof and do a running jump to the ledge just to the right of the section
of angled roof to the SW.
Walk onto the new section of roof and locate the rope to the East and jump and grab onto it. Swing over and land between the two
sloped surfaces to get Secret #58 then jump back to the rope and swing to the large opening to the South.
When you land, start running toward the hole and ignore the henchman as you drop in. You should land right next to your bike if you
parked it where I told you to.
Note: If you find you do not have enough time to get this secret and exit the level before the guardian is released you may want to
make a separate trip for this secret before triggering the guardian and flipping the roof lever.
Get on and quickly head back over the ravine to the large step you parked at earlier. Get off the bike and run to the large wooden wheel
opposite the door to the mosque. Turn the wheel three times to open the nearby gate. Remember that the mosque will open any second and
a very angry and dangerous guard will be coming after you. I giant fly is also trying to distract you while you open the gate. Ignore
him and get that gate open so you can climb into the opening and up the ladder to get out of this dangerous level.
Return to the Chambers of Tulun
Enter this level and head to the left then turn around at the ravine and face the steps to the right. Using the Nitro, head up the
stairs and ramp into the building. Dismount and climb onto the ledge before going through the door. Kill the henchman blocking your
path to the ramp then slide down and kill another in the room to the North. Take the unlit torch then return to the ramp you slid down and
follow the passage to the right of it on the West wall.
Follow the narrow passage until you reach a ladder. Ignore the ladder this time and continue around the corner to the metal door.
Open it and kill the henchmen inside so you can safely enter and light the torch. Return to the main room and this time go to the ramp
along the East wall. When you reach the top of the ramp you can use your torch to trigger the sprinkler system and open the Emergency
Fire Exit right next to you.
 Inside you will find the switch that turns off the sprinklers and also moves a large box somewhere else in the level. Return to the
previous room and go through the passage in the North wall. Return to the room where you took the unlit torch and locate the box you
moved when turning off the sprinklers. Climb the boxes and do a running jump to reach the exit in the East wall. Go through and drop
into the room on the other side. Locate the box with the X on it and shoot it. When the box is destroyed you will be able to access
the gate behind it once you shoot off the lock with your Revolver.
Enter and find the hole in the wall which hides the Roof Key. Once you have it you can return to the main
room and head up to where you set off the sprinklers. Head through the door on the right with the yellow stripes and follow the passage
back to your motorcycle. Hop on and ride back to the Trenches
NOTE: Now that you have the Nitro for your bike you can take this opportunity to return to the City of the Dead and make that super jump
to get Secret 56.
CITADEL GATE
Drop down and talk to the man below to get some info on the creature you are about to meet. Move ahead until you actually see the beast
then sprint past this monster to the South. Continue running around the next few turns until you reach the area with the banners. Go
to the West wall and climb the step. Now climb over the block next to the rope along the North wall and you will fall into the area
below.
There are three levers along the North wall in this room. Start with the middle lever then head to the SW corner and jump to the ledge
above. Pull the lever here before return to the wall with the three and this time pull the left lever to reveal a hole under a coffin.
Finally pull the right lever to move the other coffin and reveal a second hole. Head toward the furthest hole and drop into the tunnel
below. Locate the switch and use your crowbar as a lever handle to open a door down inside the other hole.
Exit this passage and drop into the other and go through the open door into the next room and flip the switch to open a door above you.
Locust will also attack so you need to climb out of this room and go through the open door. Follow the passage to the top then do a
running jump and grab the rope. Spin around and face the bell to the right. Swing and jump to the edge and grab on. Drop and grab
the ledge below then repeat once more to go to the ledge below that. Now you can crawl in and find Secret #59.
Return to the rope and swing to the South wall then do a running jump to the small section of roof to the East. Jump to next section
of roof the do a running jump to reach the next piece of roof. You can now turn and jump to the climbable surface of the South wall and
shimmy to the left. When you turn the corner you can drop to the ledge, turn and jump to the ledge on the East. Grab and pull up and
do a running jump to the ledge to the SW with the alcove above. A standing jump will take you to the lower roof to the SE then you can
turn and locate the alcove across the way. Do a running jump to grab onto the edge and pull into this area.
Continue down the passage and do a running jump when you reach the end and you will land near a burned jeep. Look behind the jeep and
you will find the Nitrous Oxide for your motorcycle. Head South and do a running jump over the ravine.
Sprint down the street past the monster and return to the man you talked to at the beginning of this level. Climb into the opening
above to make a very brief return to the Chambers of Tulun.
Climb down the ladder and head to the right and climb out of this passage to return to the street. Locate your bike and drive it up
the North ramp to leave this area and enter the Trenches.
TRENCHES
Click Here if you are Returning to the Trenches
Exit your ride at the top of the ramp and start walking to the East. Climb the step by the tree and continue down the streets until
you come to a stack of boxes. Use the boxes to protect yourself from the machine gun that is firing at you. Crawl behind the boxes
until you reach an area where you can go no further. Peek over the boxes, target the gas can, and blow up the machine gun. Now you
can safely climb the boxes until you reach the top. Do a running jump to grab the edge of the opening to the North and pull up.
 Drop down into the passage below and continue until you reach the crawlspace in the West wall. Crawl through trying to avoid the steam
jets and the gunman who is firing at you. There isn't much you can do except to heal yourself as necessary. Get past the steam and kill
the gunman then crawl out of the tunnel and head North.
Climb into the alcove on the West wall then turn and target the gas can to take out another machine gun. If the henchman doesn't die in
the blast then take him out too. Drop down and go back through the crawlspace, turn left, and return to the street. Outside, go North to the
intersection and turn East until the road turns and you can spot another crawlspace to the right. Crawl through to find the
Weapon Key Code then return to the street. Continue across to the ledge and jump, grab, and shimmy past the
steam on the right. Drop down near the burning jeep and use your crowbar to pry loose the Valve Pipe from
the engine. Combine the pipe and the Nitro to create the Nitrous Oxide Feeder which you can use on your
motorcycle.
Make your way back to where you left your motorcycle and install the Nitrous Oxide Feeder. You can now make your final trip
back to the Chambers of Tulun.
Return to the Trenches
Drive up the ramp again and get off the bike and head to the stairs on the right. As you head up the stairs turn and climb the block on
the right then turn and jump to the handle on the South wall and pull it to lower a ceiling gate. Jump and crawl into the tunnel above
and crawl through. Drop into the hole at the other end then climb out and enter the next crawlspace. When you reach the end of this
tunnel look for the decorative stone that blocks the crevice and shoot it out with your revolver. When the rock is gone you can turn and crawl out
of this tunnel and hang. Shimmy left around the corner and drop to the ledge next to the street light.
Jump up and grab the ceiling here and start to monkey swing to the South. Ignore the Locust as best you can and drop to the opposite ledge
to enter the next area. Kill the henchman then head to the door on the right and use the Roof Key to unlock the door and enter. Outside
on the next ledge turn and do a running jump to reach the opposite ledge to the North. Grab on and shimmy left until you can pull yourself
up and enter the next passage.
Continue down the hall until you can climb the block and find a hole in the North wall. Your LaserSight should prove most effective in
shooting the button and the henchman next to it. Now make your way back to where you parked your motorcycle and take off to the West.
A pair of stairs are around the corner and you can hit your Nitro as you ride up the stairs on the right. Go through the narrow passage
on the left and ramp to the next area. Get off the bike and go to the ladder on the East wall. Jump to grab it then start climbing to
the passage at the top. Follow the passage to leave this level.
STREET BAZAAR
Climb down the ladder to reach the street and approach the man to start a movie. When the movie is over you can pick up the
Mine Detonator Body he leaves behind. Go get the Handle from the table over along
the West wall then approach the car and get the Car Jack Body from behind it. Open the door to the South by
pressing the red button next to it and enter the passage.
Inside you will find a ladder and a crawlspace next to it that contains a Medkit. Climb the ladder and at the top you can jump to the
ceiling to monkey swing to the right and drop on the next ledge. Jump, grab, and crawl into the crawlspace in the South wall and follow
it to the next room. Continue South climb to the top of the wall. Combine the Handle with the Car Jack Body to make a functional Car Jack
then use it to open the gate in the ceiling. Climb up and exit to the roof.
Things are a little dangerous up here. You get to dodge lightning bolts and locust as you complete your next series of tasks. Wait for the
lightning to pause and get behind it so you can move the box out of the way. Now find the machine with the basket on top and move it over
to the lift that the lightning keeps striking. A movie will take over. Head around the corner to the bridge you saw in the movie and do
a running leap to the ladder on the other side.
Shimmy to the left and around some corners to reach the roof. Shimmy along the roof edge until you reach another ledge you can pull up
onto and get Secret #60. Head over to the hole next to the ladder and drop down some ramps that take you down
to the bottom. Follow the passage to the room to the East and keep going to the first intersection where you will want to turn right.
Follow the wooden ramp to the storage room with all the crates.
 You should be able to see a headless man to the West of the ramp and beside him is the Mine Position Data. Go
into your pack and combine this item with the Mine Detonator Body to create a functioning Mine Detonator.
Return to the top of the ramp and get ready for another chase. This time a bull is loose in the area and you are going to need to stay
out of his way.
Move toward the crates in the SE corner and the bull will charge. Flip out of his way and he will smash into the boxes and reveal a hidden
passage. Go through this passage and into the next area where you need to kill another henchman over to the left before continuing on
toward the rays of light ahead. Turn left and go under the light to leave this area.
This is a very short trip back through the Trenches. Head West through the passage and go up the first set of stairs on the right. Follow
the streets as the wind to the left, left, right and right once more and you should now be at a new set of stairs. Go up these stairs and
turn East at the end of the room climbing over a step with a pile of sand on it. Climb up onto the sand-covered block along the East wall
and do an angled jump to reach the upper ledge of the East wall. Climb the ladder to return to the Street Bazaar.
Return to the area where you got the Car Jack (near the door with the red button) and go through the door to the East. Follow the passage
until you come to a door. Enter and kill the henchman inside then continue North until you reach a dead end. To your left is a sign with
a Skull and Crossbones. As you approach you will leave this area and make one final visit to the Trenches.
This is your last trip to the Trenches and is also very short. The warning signs in front of you indicate a mine field ahead. Use the
Mine Detonator to clear a path through this area then cross over to the red button and push it to open the door on the South wall. Go
through the door to be reunited with your motorcycle. Drive back through the door and head left to run over another henchman and ride up
the ramp leading to the Citadel Gate.
This is a super-short return trip to the Citadel Gate. Ride your bike toward the mine field ahead and use the Nitro Boost to clear it then
head around to the left and use your Nitro again to race past the beast. Return to the man you talked to earlier and watch the movie.
CITADEL
 Watch the events in the movie unfold then when you are in control you can head toward the room to the South and up the stairs in the SW
corner. Locate and flip the lever to open some doors downstairs that conceal some ammo then get the unlit torch from the alcove to the
West. Light your torch using the lit torch nearby and return downstairs. Locate the rope above you and jump to set it on fire. Head
to the doors you opened with the lever (get the ammo) and drop into the room below.
Continue until you are interrupted by a brief movie then jump to the ledge on your left then jump to the ledge above the stair. Jump across
the water below to land on the far stairs then go up and monkey swing back towards the last ledge. Turn to face the wall and drop and grab
to pull into the crawlspace and get Secret #61. Back out of this secret area and drop to the water below and
swim back to the other chamber. Get the Grenades from the underwater ledge then pull up to the low floor. Jump across to the block and
return to the middle ledge that separates the two chambers.
Back off the ledge so you are hanging down in the second chamber then shimmy left and drop to grab the ledge below. Now shimmy right until
you can go no further then drop and grab again. Continue to the right and shimmy around the next two corners until you reach the crawlspace
that you can pull up into. Go through and out the other side and drop into the water below.
Splash through the water as you head NE them jump and crawl into the crawlspace there. When you back out of the end of this passage you
need to perform a tricky set of jumps. As you are hanging from the edge, drop and immediately backflip from the sloped surface. When you
land do an immediate forward jump and grab the ledge on the North wall. Now you can shimmy left until you can pull up and stand and get
the Medkit. Do a running jump to the ledge behind you then head toward the stairs on the left.
Kill the henchman as you go up the steps and continue up the ramp leading to a lever. Kill the guard that appears after you flip the lever
then do a safety drop into the hole by the lever and continue down a pair of stairs leading down and to the North. Watch the movie then
examine the tables in this next room. Each table has a letter indicating N, S, E or W and you must use your compass to move these tables
into their proper places. When the tables are positioned correctly the large doors to the West will open.
Continue until you reach the step then climb up and drop into the water. Swim through the underwater opening to the South and continue
down until you reach a dead end. Locate the switch in the ceiling and press it to close a hatch elsewhere then return to where you dropped
into the water and get some air. Now head through the North wall and continue until you reach the room where you can exit the water and
go through the door to the South.
Take the ramp back to the room with the table puzzle and go through the passage in the East wall. Head down more ramps until you reach the
room with the lever and two men guarding it. Kill them and flip the lever to open a hatch back in the underwater area. Return to the
main puzzle room and go North and back to the underwater area. You can now climb into the passage in the West wall and follow the tunnel
until you reach another lever. Push it to open another hatch then return to that room and get the Uzi Clips from the hatch area before
heading through the opening to the North. The open hatches will have lowered the water level and you can now run down the hall to get to
the rope at the other end. Pull the rope to open the door in this room then climb out and go to the door in the East wall. Kill anyone
who stands in your way.
Continue to the end of this passage and jump to climb through the opening and into the next room. You will immediately be attacked by a
pair of Crusader Skeletons that cannot be killed. Run past them and up the wood planks until your escape is blocked. Face the wood that
is blocking your path and wait for the skeletons to approach. When they get close you can backflip over them and they will continue
forward smashing through the wood.
Climb up into the next area and locate the bottomless pit down and to the left. Hang from the edge of this pit and drop and grab the ledge
and pull up into the crawlspace. Follow it until you reach the massiveSecret #62. Two skeletons will be hacking
at you as you collect the items so move quickly. Return to the dig site and continue North between the rows of torches to start the next movie and exit this level.
SPHINX COMPLEX
A pair of henchmen wait for you as you head down the trail. Kill them then search the guard on the right (by the door) and take his
Silver Key. You can now unlock the door and enter. The path continues between a pair of short walls and more
henchmen lurk ahead. Kill them then jump to either of the walls careful of the fatal pits on the other side. Do a running leap to the levers
across each of these pits to open the next door. Head toward the door and kill another henchman and search the alcove across from where he
appears to find some Shells.
 Enter to get your first look at the Sphinx then head for the hole on the right. Locate the ramp to the right and slide to the small ledge
below. Now do an angled running leap to the next ledge and another angled leap with a grab to cling to the next sloped ledge. Now head to the
left and do a standing jump down to the ledge below which should trigger some music and the arrival of more enemies. When they are gone and you
have obtained the Medkit from this area you can proceed by doing an angled running jump to the next ledge. You can now climb up to the door
and enter the storage area.
Break open the boxes and you will get some Uzi Clips then head toward the shelves along the wall and push them to the side to find a grate in
the wall. Shoot open the grate and enter and crawl through until you reach the other end. Shoot out that grate and exit the crawlspace. You
will be fired upon almost immediately so kill the gunman and take his Shotgun ammo then locate the switch he was guarding. Flip it to open the
door and send a new pair of gunmen into this area. Kill them and while you are at it, shoot the three boxes in this area and you will find a
Metal Blade in one of them.
Now go to the shelves on the right and start by pulling the shelf on the left as far as it will go. Now push it toward the wall with the open
grate then move to the right shelf and pull it away to reveal Secret #63; a Shotgun. Now you get to retrace your
path all the way back to the Sphinx. When you reach the top you need to head to the front of the Sphinx. Slide down the slope in the left
corner. The next pair of ledges can be reached with running jumps and you can then pull up and out on the other side to continue.
Follow the trail as it heads around the front of the Sphinx then examine the grave shown to you in the sweeping camera shot. Watch the movie
then circle around the right leg to find another pit. Jump down to the ledge at the right then do a running jump to make it across. Kill the
resistance on the other side then climb out and smash the crates along the wall. Get the Wooden Handle from the
wreckage and combine it with the Metal Blade in your inventory to create a Shovel.
Time to do a little digging. Head back toward the right leg and jump to the platform then onto the leg and get some Shotgun ammo. Drop down
on the other side of the leg near the grave and start to dig. Drop into the dark secret passage below and light a Flare to enter this new
area beneath the Sphinx. Kill the bats as you head down the passage and go through the first gate which closes behind you...spooky!
This room has plenty to look at, bulls, tablets, gates, switches, and all of these items make up a clever puzzle. Get started by running toward
the bull on the right. When it comes to life you need to do a reverse roll and sprint for the nearest gate. Once inside do another reverse
roll and watch and wait for the bull to follow you inside. When he gets close jump over him and run out of the area and flip the switch next
to the gate to trap him inside. That wasn't so bad - now do it again with the remaining bull and gate.
Take a trip down the West passage and locate the remains of a previous explorer. Add some more Flares to your inventory and don't overlook the
Scrap of Paper with some translations on it - just what you needed to translate those tablets back in the other
room. Head there now and examine the tablets which are actually buttons you can push. Feel free to make the translation yourself to solve
this puzzle. WARNING! Entering the incorrect sequence opens the gate to a very bad area.
Pressing Right-Left-Middle will open the West gate and you can enter this next passage while keeping a lookout for hidden pits in the shadows.
Stay to the right in this passage and when you reach the pit jump across and continue along the other side until you reach the pit just ahead.
Kill some more bats then walk forward and get against the left wall then jump across the pit.
Locate the glowing holes in the East and West walls of this next room. Use your lighted binoculars to look inside the holes and find more
glyphs. These are four combinations that you need to use in the previous room to access other areas containing specials keys. Write down the
combinations (or use mine) then return through the hall of pits back to the main room.
Press Right-Middle-Left to open the right gate on the West wall. Kill more bats then jump to the ledge on the right wall and do a running leap
to the next ledge. Climb out of the pit and kill more bats then head to the dead end where you will find three crawlspaces. Light a flare and
crawl into the passage on the right. These passage have numerous collapsing floor panels with fatal spikes below so be careful. Turn left and
then right and go up the ramp. Turn left and the top and crawl into the room with the switch that opens a gate. Head back through the tunnel
and this time go North to the passage directly across from this one.
Head left at the first intersection and continue past the branch to the right and make another left. Continue until you reach the dead end
where you will get the Stone of Maat (Red Key). Return to the previous room and take the remaining crawlspace to
the East. Make a right then fall through the floor panel to land in a secret room with Secret #64; a Grenade Launcher.
Return to the central room and get ready to locate the next key.
Press Middle-Left-Right and go through the left gate on the West wall. Kill the bats and jump the pit then cautiously approach the pool with
the alligators. These guys are tough and there are four of them so break out the heavy artillery - that secret Grenade Launcher you just got
should prove most useful. When they are dead you can solve the next puzzle and get the next key.
The key is locked behind a grate which can be opened by flipping the two switches on the North and South walls (four total) in any order you
want. Get the Stone of Khepri (Green Key) then flip the switch on the West wall to open the gate. Return to the
main room by making a tricky running jump and grab to clear the pit.
Press Left-Middle-Right to open the middle door to the East. Follow the path across the pit and into the room with all the wall switches.
Pulling the wrong switch sends in a swarm of those deadly beetles so you may want to save. Head to the North wall and pull the third switch
to the right to open the gate. Now pull the third switch on the right on the East wall and you will get the
Stone of Re (Blue Key). There is nothing left in this area to even tempt you to flip any more switches, so return
the way you came and get ready for the toughest part of this challenge.
Press Middle-Right-Left to open the right door to the East and make your way across the pit by doing a standing jump along the right wall by
the torch. Now drop down off the ledge, hang, and shimmy to the next ledge and enter the room with the hole leading to an underwater area.
Put on your swim fins and get ready for some serious underwater action. Dive in and head to the first junction leading North, South, and East.
Head South until you reach the next branch and then go East. Head South at the next fork and continue South when you reach the next branch.
Keep swimming down and past the hieroglyphs until you reach the first switch room. Flip the switch and dive back in.
Make your way back to the beginning of this underwater area (you remember the way, don't you?) and get a deep breath before diving back down
to head for the next switch room. Go South at the first junction and then head West at the second until your reach the third junction where
you can swim up into the second switch room. Flip the switch and dive back in to make the short trip back to the start.
This time head East at the first junction then South at the next until you arrive at the third junction. Continue South then turn West at the
next branch and swim up at the last fork near the hieroglyphs to reach the third switch room. Flip the switch and dive in to once again return
to the entrance to this area.
With fresh air in your lungs, dive down to head for the next room. This time we want to go North at the first junction then East at the next
which leads into the forth room. Flip the switch and dive back in. We are going for the fifth and final room directly from here. Swim out
of this area back to the first junction (the one with the North, South, and East exits) and go East one more time. When you reach the next
junction head up and you will spot the hieroglyphs indicating the final switch room is nearby. Enter the room and pull the switch to open the
nearby gate and get the Stone of Atum (Purple Key). Make one final swim to return to the hole at the beginning of
this underwater maze and exit.
 Return across the pit and back to the central room with the tablets. Continue across to the West and go through the middle door. Cross the
next two pits and start using your collection of keys in the available holes along the way. Go through the open gate and turn the corner to
find the floor is missing. Jump and grab the ceiling and monkey swing across to the other side. The next room is very dangerous so be careful.
There are four Holy Scriptures protected by deadly blades in the ceiling. You must be quick and precise to get these items and survive. Sprint
to the left alcove and get Holy Scripture #1. Jump back then turn and jump to the right and quickly take
Holy Scripture #2. Do a reverse roll and repeat the previous pattern with the other two alcoves to get
Holy Scripture #3 and #4. A gate to the North will open and you can exit this area.
The final room has many blades hidden in the floor. Make sure to walk through this area so you don't take any damage. When you reach the next
pit jump to the ceiling and monkey swing across to the other side. Kill some bats as you make your way up the final passage and leave this
level.
PYRAMID OF MENKAURE
Continue up this sloped trail and head to the left where you will find a series of small ledges you can start climbing. When you find the
trapdoor in the ceiling turn to face North and jump to grab the handle and open the door to climb in. A giant scorpion is waiting for you as
you climb up to this next area. Kill him quickly before he poisons you - if you are too late a medkit will stop the effects of the poison. A
second scorpion is around the corner so deal with him too before getting the Revolver ammo to the South and a Medkit from the alcove to the West.
Continue to the intersection and go North until you reach the ravine then do an angled running leap to the opposite ledge to the left. The path
leads around to the North where another ravine requires another running jump to get across. You may also encounter a scorpion or two along the
way. When you come into view of the pyramid another scorpion moves in for the sneak attack. Head off to the East and kill the giant flying
insect then approach the next huge ravine.
Do a running jump to the South and grab the ledge that slopes down on the other side. When you pull up and start to slide you need to quickly
jump forward to the next sandy area then turn left and jump once more to the other side and get ready to kill another flying insect. Enter the
nearby building. You may want to save your game because your actions will determine if you see a movie in this next area.
Enter and spot a scorpion attacking a guard. Quickly kill the scorpion and save the guard's life to see a movie where you will receive the
Guard Keys and the Armory Keys. If the guard dies before you kill the scorpion you
still get the Guard Keys from his dead body - you just don't get the nice movie or the Armory Keys. Clear out the Medkits and Shells from this
room then exit the building. Note: The Armory Keys are required to access Secret 69.
Return to the ravine on the left and jump to the right ledge then shimmy to the left and around the corner until you come to a stop. Drop down
and you should now be back at the pyramid where you can spot a block sticking out of the sand. Walk onto the block and continue NW onto the
next higher ledge. Continue North then jump NW to keep going up the blocks. Now continue straight across to the West and when you reach the
end of this flat section do a running jump across to the next area where you slide down to a flat ledge above the sand. A giant insect flies
in for the attack so kill him quickly then continue West until you can go no further. Turn to the North and start climbing the face of the
pyramid.
Continue climbing up two levels then head to the right and climb up three more blocks until you reach the entrance to the pyramid. The opening
is to your right and you will need to do a running jump to make it inside. Before going inside you will want to locate the secret area just
above the doorway to the right. Climb up the pyramid a little higher to find Secret #65; a Revolver. Return to the
doorway and use the Guards Keys to unlock the door and head inside the Pyramid.
Note: You may find it easier to open this door before going after the secret.
Watch the pattern of the pendulums and run past when it is safe. Continue deeper into the pyramid until you reach the room with the stairs
leading down. Kill those annoying bats then look to the South and locate the Star carved into the ceiling. Get our your Revolver and
LaserSight and shoot the Star to open an unseen trapdoor up ahead. Now you can go down the stairs and run past the mummies and jump into the
large container on the left. Inside is the trapdoor (you opened a moment ago) that you can drop into. Now you are overlooking a large pit
with a rope hanging in the middle. Use the rope to swing to the other side and continue ahead until you reach the junction.
The nearby mummies are very slow so ignore them and run down to the room to the right where you will come to another large spike-filled pit with
a pair of ropes you must use to get across. On the other side you can head up the passage and flip the switch at the top of the slope to open
a trapdoor somewhere else in this level. Use the ropes to get back across the pit then run past the mummies and head left this time. Another
pit, another pair of ropes, and another sloped passage leading to the trapdoor you just opened a moment ago.
Climb up through the trapdoor and immediately arm yourself and start dodging the attacks of the Ancient Egyptian Guard waiting for you. When
he is dead you can head over to the Star carved in the wall and pry the Western Shaft Key from the middle. A new
passage is now available, and you need to make your way back to the initial stairs leading down to this area (back where you shot the first
star).
 Locate the new passage and slide down. Light a flare on your way down and carefully walk through the next passage until you hear a clanking
noise then duck to avoid the blade traps. When they have gone by you can standing and continue to the end of the passage and jump to open the
door above. Climb out to do battle with a pair of giant scorpions - I recommend the Grenade Launcher. When they are no longer a threat you can
continue South following the path that leads to the other side of the large ravine. Head East and start searching to the left for a small
alcove with a switch. Push it to cause the roof to collapse on one of the pyramids.
Return to the large ravine and head toward the pyramid and walk up the left side. You should be able to spot your path as you climb up to the
next block the then go and angled jump to the right. Now you can start climbing the various blocks until you reach the top of the pyramid.
From the top you will then need to turn around and back off the ledge and grab on then locate the ladder on the West wall which leads to the
bottom of the pyramid.
Once inside you will find a passage that leads to a pit. Do a running jump over the pit to continue and when you come to the next pit jump to
the ceiling and monkey swing across the top to the other side. Continue to the next pit with the pendulum and stay to the left and do a
running jump and grab to the other side as the pendulum is swinging away from you. Continue around the corner past another pair of pendulum
pit traps. Make a mental note of the passage between the two pits to the left and continue until you reach the dead end with the rope. Pull
the rope to open a gate elsewhere in the level then return across the first pit and head to the passage I mentioned a minute ago.
Monkey swing across the ceiling until you reach the gate you just opened. Head through the gate and slide down the slope leading toward a
bed of spikes below. Just as you reach the pit jump to clear the spiked pit and angle toward the flat surface to the right. Now you can drop
into the pit and get Secret #66; Uzis before climbing out and continue sliding down the other side. At the bottom
you can jump to the other side of the hole and grab on to do a safety drop below, otherwise you will take some damage if you just fall in.
You should now be back under the Sphinx by the hole you dug in the last level. Go South and pull up out of the hole and go West. Jump down
to the ledge on the right and then do a running leap to land on the ledge on the West side of the ravine. A standing jump to the South puts
you on the small ledge which is just another jump back to solid ground. Continue forward to the metal door and use the Guards Keys to unlock
the door and continue to the next level.
MASTABAS
Go straight into the nearest building and locate the hidden trapdoor in the floor. Open it and climb down to get Secret #67;
a Medkit, then return back outside. Wild dogs wait for you as you head toward the North. Circle the truck and get the Jerrycan
from between the two gas pumps. Now head South until you spot the passage leading East and locate the door on the left just as you start down
this passage. Open the door and enter to find ammo for your Revolver and a trapdoor leading down to a tunnel below.
Follow it to the first junction and head East until you reach a small room lit by torches. Three lion heads are mounted on the wall and each
head as a gem inside the mouth. Use your revolver and lasersight to target this gems and shoot each one to open the door to the North. Behind
this new door are several mummies but they are slow and clumsy and you can easily avoid them. Get the Small Waterskin
inside this room and some ammo for your crossbow then return to the intersection and go South.
 Follow this passage until you reach the dead end then jump and pull up out of the hole above to get back outside. Leave the area and battle more
dogs when you reach the area near the two ravines. Wen it is safe you can head to the East ravine and do a running leap across at the narrowest
gap. Now move toward the boarded up entrance and blast it apart with your weapon of choice and go inside. Kill the bats and the dogs and
continue through the trapdoor in the floor to the area below.
Follow the passage around to the intersection and take the East passage leading to the room with more lion heads. You know the drill - when you
have shot the gems the door will open and you can get the Bag of Sand while dodging mummies. Return to the intersection
and go North until you reach the next intersection. Continue going North until you reach the dead end. Pull up into the room above and open
the door. Blast apart the barrier and head back outside.
Head toward the ravine and go to the left until you are next to the South wall. Turn to the North and do an angled running leap to the ledge
in the NW corner then do another running leap to the section of the ground to the NW. Continue to the East to locate a concealed room. Kill
the scorpions and open the trapdoor to continue down into the next tunnel. Follow it around to the intersection and go West until you reach
the dead end with the unlit torch. Pick it up and return to the intersection and head to the East until you reach the next lion head room.
Drop the torch and whip out your guns to eliminate all resistance in this room. When things are more calm you can then shoot the gems to open
the door. Grab the torch and enter the next area which has three scales and a small pool of water. There are also some bats in this area you
may need to take care of. Go to the pool past the scales and fill the waterskin then go to the scale with the water symbol on it
(three wavy lines) and stand on the platform. Pour the water onto the scale.
Now go to the scale on the right with the pyramid symbol (sand) and use the Bag of Sand. Finally, go to the last scale and pour some fuel from
the jerrycan onto the scale. Now light your torch using any of the nearby torches on the wall and light the fuel to open the door on the West
wall. Anyone else having flashbacks to the movie, The 5th Element?
Enter this next area and avoid or kill the mummies. You need to pry the Northern Shaft Key from the West wall so you
may want to kill them this time. You can also lead them back out to the main room and get them stuck in the pool of water. A door opens when
you pry loose the key with the crowbar. Don't overlook those lion heads with the gems. Shoot them both to open a new door before returning to
the room with the scales. Head to the East wall where a that new door is now open. More lion heads and more gems equal more target practice.
Shoot all the gems then continue up the stairs to the East and kill the dogs. Continue to the intersection and keep going straight until you
reach the opening in the ceiling leading back outside.
Continue to the East until you reach another ravine. Locate the ledge to the left and do a standing jump over to it. An angled running leap
will put you on the path to the NE. One more running jump and a grab will get you across the ravine and over to the path on the South. Blast
through the door on the right and go down through the trapdoor.
Head to the first intersection and continue forward until you reach the dead end and climb out through the ceiling. Blast the barrier and shoot
the dog to proceed down the next passage. Continue across the next area to the trapdoor and open it to drop down. Follow this next passage to
the intersection and turn left so you are headed East toward the next lion head room. Shoot the gems and the door will open. Enter the new
room to find three monkey statues representing "Hear No Evil - See No Evil - Speak No Evil".
You need to activate the proper statue by using your crowbar as a lever. If you activate the wrong statues deadly monkeys will attack. Not
only are they hard to kill, but when they die they actually blow-up doing even more damage. But since I am going to tell you how to solve this
puzzle there is no need for you to experience such pain. Head to the "Speak" monkey on the far right and use the crowbar. A helpful chimp will
appear and open the door out of here.
More mummies! You had better kill them since you need to pry the Southern Shaft Key from the East wall. You also
need to shoot the gems in the lion heads to open another door. Return through the monkey room and head through the door to the West where you
get to waste more revolver ammo on gems in lion heads. Continue to the West and follow the passage around until you slide down to a lower
level. Climb the nearby blocks and head up the ramp leading out of this level and into the next.
THE GREAT PYRAMID
The passage you are on will eventually stop at a dead end. Pull up through the hole and blast your way through the door. Head to the right and
kill the henchman then approach the next ravine. Aim to the SW and do a running angled jump to the path and kill another henchman when you land.
Head to the door and blast it open then blast the guard who comes through it. A giant flying insect is also nearby so keep your guns ready.
Locate the hidden trapdoor in the middle of this room and open it to drop and hang from the wall with the climbable surface. Once you stick to
it you can climb down to find Secret #68; the Grenade Launcher. Only 2 more secrets to go...
 Climb out of the pit and blast through the door leading out of this room and get ready to fight the gunman with the Uzi. Kill him before moving
on to the next area with another gunman. Ignore the bogus trapdoor in this room and continue out the door to the East. More of the same waits
for you outside. Blast the barrier, enter the room, and kill the pair of insects inside then grab the Uzi, Grenade Launcher, and grenades.
Ignore the trapdoor again and head off toward the large pyramid. Get ready for some serious jumping and climbing action.
Continue out to the ledge to the North leading over the ravine and do a running leap across. Head to the left and slide down to the ledge on
the West and do a running leap and grab onto the sloped ledge to the West. Pull up and walk up the sloped ledge and climb the block to the
North. Walk NE to the next block then continue to the right and climb up the next block. Now start walking to the East until you stop then
backup and do a running jump to the next flat surface. When you land you will need to press walk while backing-up quickly to avoid the boulder
as it rolls by.
Continue to the East by making a pair of standing jumps and dodge the boulder when you land after the second jump. When the boulder has rolled
by you can continue up the next block to the North then turn East again and make three more standing jumps. When you land after the third jump
you will start to slide down toward the ravine. Don't do anything and when you stop sliding just stand there until the boulder rolls by. Now
you can drop to the block below then turn to the South and do a running jump and grab the opposite side of the ravine.
Now turn East and do a running jump from this ledge. You may have to kill another flying insect either before or after you make this jump.
Turn to the North and make a running jump to grab the opposite side and climb up to the block. Head up the ramp until you can make the jump
to the ledge with the Medkit. Turn NW and do a standing jump to the flat ledge nearby then immediately backflip to the previous ledge to dodge
the boulder coming at you. Now you can jump back to the ledge to the NW and continue across the next pair of ledges in the same direction.
From here you can do a standing jump to the ledge to the West and kill another insect.
Head North and climb up the next two blocks then do two standing jumps to the East to jump the sloped blocks and land on the flat ones. When
you land on the second flat surface you need to backflip out of the way of the boulder. Now you can start climbing the blocks to the North.
Climb up two then turn West and kill a pair of insects then continue up the block at the end leading North. From here you can go West until you
are forced to do a running jump to the next surface. Lara will start sliding down to a lower ledge.
From this ledge you need to continue West and do a running jump over a pair of blocks and kill the insect on the other side. Make another
standing jump to the West then angle to the SW and do a standing jump to the ledge below. Turn and angle to the NW and do another standing
jump then keeping doing standing jumps to the SW and NW until you reach the area below. Turn to the North and climb up three levels then turn
NW and make another standing jump. Dodge the boulder as you make another pair of standing jumps to the West. From this final ledge make one
last running leap to the West and you will land and start sliding all the way to the exit of this level...
KHUFU'S QUEENS PYRAMIDS
You start off as a witness to a fight. Kill both the man and the monster then go South into the room below. Blast open the crates and collect
all the surplus ammo for just about every weapon in the game. Now comes some payback for helping that guard in the earlier level. If you saved
the guard from the scorpion in the earlier level and he gave you the Armory Key you can proceed down the next slope and unlock the next gate leading
to Secret #69; the Secret Armory containing; Crossbow, Shotgun, Uzis, Grenade Launcher and more ammo.
 Head back outside and another scorpion attacks. You should have plenty of weapons and ammo to deal with him by now. Go North until you
reach the chasm then head down to the left until you see the platform on the other side. Do a standing jump to get over there followed by a
running jump to land on the path to the NW. Another scorpion attacks. Locate the ledge leading out over the chasm and use it to make a running
jump and grab the other side of the chasm. A standing jump to the South will put you within combat range of an insect. Climb up to the next
block and turn left to make a running leap to the ledge to the North. From here you can turn and do a standing jump to the NW to land on the
next block then make a running leap back across the chasm and grab the block sticking out of the West wall. Look carefully before making this
jump as the ledge is hard to see.
A running jump to the North lands you on the next ledge where you must kill a scorpion and an insect. Follow the path around the corner until
you come to an apparent dead end. Push the block down the path and a secret passage opens in the pyramid just to your left. Go inside and open
the trapdoor. Hang then climb down the hole to enter a maze of passages inside this tomb. The various holes in the walls of these passages
contain some useful items but they can also release streams of those deadly beetles. You should have plenty of weapons and ammo so there is no
need to be sticking your hands into strange holes. Of course if you MUST make sure to follow my guide or you could get into trouble.
The quickest route through the maze is as follows. Turn RIGHT (W) at the first intersection and get the Medkit from the first hole. Go through the
wall that lowers and ignore the next hole and kill the scorpion that comes around the corner. Look for more scorpions at almost every corner.
Turn RIGHT (W) at the next intersection then follow the passage as it makes a left past some torches then makes another left. Make a RIGHT (S)
at the next intersection and follow it around to the left. Make one final RIGHT (S) and you will soon hear music as you approach the room with
the Ancient Egyptian Guardian.
Unload your favorite weapon into him then go to the other end of the room and use your crowbar to pry the Shaft Key
from beneath the star carving. The entrance gate will open when you do this. To exit the maze exit this room and go RIGHT (E). Get a Medkit from
the first hole then go through the wall that lowers. The passage turns left so follow it straight (N) through the next intersection and get some Shells from the hole just before the section of wall that lowers. Make a LEFT (W) at the next intersection and continue to the next intersection with four torches. Turn RIGHT (N) and it's a straight shot to the exit. Climb out and head back to the chasm to the right.
A running jump will put you on the ledge on the other side then you can do a running jump to the first block to the left followed by a standing
jump to the next block where you must kill another insect. Turn toward the pyramid and begin the climb starting with the block to your right.
Continue up the East face of the pyramid and angle to the NE to make a pair of standing jumps. Stop after the second jump and wait for all the
boulders to come rolling by. One more jump to the NE puts you near the entrance. Kill the pair of flying insects and use the Guard 's Keys to
open the door and enter the pyramid.
Follow the long sloping passage down into the pyramid and stop when you reach the gap. Drop down to the ledge along the left and do a running
leap to the other side where you can finally kill the gunman who's been shooting at you. A ninja also attacks from the opening in the right
wall. When they are both dead you can enter the passage to the East and kill anymore resistance you come across as you head through a gate and
into the next room.
Kill everything that moves then continue North between the ramps until you trigger a pair of sliding pillars in the next
hallway. Continue into this hall and get right up against the path of the sliding pillars then jump through as each slides past. You can also sprint through this deadly hall in one quick run if you get the timing just right. Kill the attacking dogs in the next room and search the container
to get a Medkit and an unlit torch.
Use one of the lit torches to light yours then light the other four unlit torches to brighten things up in here. With the extra light you should
be able to locate the passage in the West wall where you will find a switch and some shotgun ammo. Flipping the switch collapses a wall back
out by those pair of ramps. Return past those sliding pillars (you know how) and head up either of the ramps.
The next room has four keyholes and a large carving of a star in the floor. Use your four Star Keys on the keyholes to cause light to stream in
and hit the star on the floor. When all four keys are inserted a shaft will open in the center of the floor. Now move to the North wall and
flip the switch. Kill the henchmen who show up shortly thereafter and then exit this room. Go down the ramp and back through the sliding
pillars and head toward the light.
Enter the room and survey the wreckage. A passage is now available to the East where you can get another Medkit and flip another switch to open
a gate back near that first sloped passage of this level. Return past the sliding pillars all the way back to the main passage and go North.
Eliminate any resistance and make your way down the steeply sloped passage.
You will come to several pits as you make your way down this passage. A standing jump will get you over the first while a running jump is
required to clear the second. Turn around and jump down to the ledge to get Secret #70; a crossbow, then turn and
do a standing jump to get you back to the other side. Another standing jump gets you over the third and final gap and a Medkit is down on a lower
ledge. Make the final jump and go through the gate. Drop into the shaft of light and hang onto the edge then climb down until
you spot the opening in the East wall. Go into it and follow the passage dropping into the next lower area. Continue following this passage
until you reach the Temple of Horus.
TEMPLE OF HORUS
 This is it. It all boils down to this exciting final level. You have all the secrets and now you only have to survive this temple and the
final encounter. Take a deep breath and enter the tunnel and turn North. Taunt the creature behind the gate if you feel like it and continue
North into the temple and get the Large Waterskin nearby. Check out the wall to the left for part of the solution
to the next puzzle. On the North wall is a scale with a vase on it. You need to pour exactly 2 liters of water into the vase to open the grate
in the floor. If you pour too much or too little water into the scale you get to fight that monster from the previous area.
Here is how to solve this puzzle in case you didn't see Bruce Willis and Sam Jackson do the exact same thing in Die Hard 3. Head to the
fountain and fill the large waterskin with water - 5 liters to be exact. Now open you pack and combine the Large and Small Waterskins. You
will pour exactly 3 liters into the smaller waterskin leaving you with 2 liters in the large waterskin. Pour this on the scale to complete the
puzzle. Your math teacher and Bruce Willis would be proud!
Drop through the opening in the floor and enter the torch room. Slide down the pole and past the attacking bats and time your descent through
the blade trap below. Kill those bats when you reach the bottom and then examine this room. This is another puzzle room much like the one
above but the solution is a bit more complicated. Our goal is to get precisely 4 liters of water. Empty both waterskins and begin.
Fill up the large waterskin giving you 5 liters then pour 3 liters into the smaller one. Dump the small waterskin and then pour the 2 liters
from the large waterskin into the now-empty smaller one. Fill the large waterskin back up giving you 2 liters in the small and 5 in the large.
Finally, pour 1 liter from the large into the small giving you the required 4 liters of water in the large waterskin. Pour the water on the
scale and open the next grate.
Another pole, more bats and more slicing blades below...yawn! Kill the bats when you reach the bottom and get ready for another math puzzle.
Empty out your large waterskin and pour the 3 liters which should still be in your small one into the larger one. Fill up the small one so you
should now have two waterskins with 3 liters each. Now pour 2 liters into the large waterskin so it is full and you have 1 liter left in the
small. Pour this water into the vase on the scale and drop into the hole.
Back into the light you can head to the shaft and do a standing jump and grab the climbable wall and start climbing down past the open floor
grates. When you reach the ledge to your right you can shimmy over and pull up onto the ledge. Get against the wall and then do a running
jump to the North and fall to the water below. Swim around to the area on the North and pull out of the water. This next room has four
pedestals and a huge altar with an egyptian statue. Place those Holy Scriptures you've been carrying around on the pedestals then walk into
the light.
After the movie and the initial attack of Set you need to escape into the water. Turn and head North and jump into the water to locate the
Amulet of Horus which sank to the bottom in the recent movie. If you cannot find it you may need to light a flare
to make it show up. Make your way to the ledge to the SW and get out of the water then quickly make your way to the ledge follow the ramp
along the East wall. Enter the open door and flip the switch to open another door across the room. Exit back to the doorway and locate the
room to the North. Dodge the attacks of Set as you jump out to the middle ledge then over to the room to the North. Head up the ramp there,
enter the room then flip the second switch which activates a strange device.
Return to the opposite ledge and run up the ramp and continue East doing a running leap to land on a patch of safe ground below. Go to the NE
corner of this ledge and do a running jump and grab to a ledge sticking out of the North wall just above you. Pull up and do another running
jump and grab to the next ledge then a standing jump to the next. Climb some blocks to get a Medkit then head South to the next ledge where you
can do another running jump and grab to pull onto the next ledge. Continue South until you spot the stalactite ahead. The next jump is tricky
so walk to the very edge then take one walking step back then take one normal hop back. Now do a running jump and grab to lower your arc and
miss the stalactite. You will land on your feet on the next ledge.
 Continue around this ledge and locate the crawlspace up on the West wall. Do a running jump and grab then pull into it and crawl through until
you can back out of the other end. Follow this ledge around until you are forced to do another running jump and grab to get to the one above.
Pull up and dodge Set by doing a running jump to the North and grab onto the climbable wall. Shimmy over to the beam and climb up to the area
where you first jumped into the water. Start climbing the West wall until the movie takes over.
The gate in the next room will be open thanks to that switch from below. Continue through the gate and jump past the set of three sliding
pillars just like before. When you enter the next room head directly to the left and stay against the wall until the crashing pillars have
finished. Go past the rubble and do a running jump and grab over the spiked pit. Pull up and move forward to dodge another crashing column
and get against the left wall. Do a running jump and grab onto the crevice then shimmy to the right and pull up to continue. Hug the right
wall this time and do a running leap to clear the pit and grab the opposite side. While you are still hanging, shimmy to the left and pull
up in the middle of the dark block and sprint forward to get out of the pyramid and begin the final movie.
You've finished Tomb Raider: The Last Revelation.
SECRET AREA INDEX
Here are some links to the text above that will assist you in locating those Secret Areas and Items. There are
70 Secrets in this game, but you do not need to find any of them to complete the game. There is also no bonus or
special ending for collecting all the secrets either. Aside from getting addition ammo and medkits, your only
motivation for going out of your way to collect these secrets is your own personal satisfaction. Good luck!
Here are the PC cheat codes for Tomb Raider: Last Revelation. Unlike the previous games, you do not have to perform
any special movement patterns. All you have to do is to make sure Lara is facing North (use your compass) and then
use your inventory and keyboard to perform the desired cheat.
Here are the Playstation cheat codes for Tomb Raider: Last Revelation. Unlike the previous games, you do not have to perform
any special movement patterns. All you have to do is to make sure Lara is facing North (use your compass) and then
use your inventory and controller to perform the desired cheat.
Here are the Dreamcast cheat codes for Tomb Raider: Last Revelation. Unlike the previous games, you do not have to perform
any special movement patterns. All you have to do is to make sure Lara is facing North (use your compass) and then
use your inventory and controller to perform the desired cheat.
TRAINING LEVELS
 Angkor Wat
Secret 1
Secret 2
Secret 3
Secret 4
Secret 5
Secret 6
Secret 7
Secret 8
Race for the Iris
No Secrets
THE AMULET OF HORUS
 Tomb of Seth
Secret 9
Secret 10
Secret 11
Secret 12
Secret 13
Burial Chambers
Secret 14
Secret 15
Secret 16
Secret 17
Secret 18
Valley of the Kings
Secret 19
Secret 20
Secret 21
KV5
Secret 22
Secret 23
Secret 24
Secret 25
DISCOVERING THE TRUTH
 Temple of Karnak
Secret 26
Secret 27
Secret 28
Secret 29
Great Hypostyle Hall
No Secrets
Sacred Lake
Secret 30
Tomb of Semerkhet
Secret 31
Secret 32
Secret 33
Secret 34
Secret 35
Secret 36
Secret 37
Guardian of Semerkhet
Secret 38
Secret 39
Secret 40
Desert Railroad
Secret 41
Secret 42
Secret 43
SEARCH FOR THE ARMOR
 Alexandria
Secret 44
Coastal Ruins
No Secrets
Catacombs
Secret 45
Secret 46
Secret 47
Secret 48
Temple of Poseidon
Secret 49
Lost Library
Secret 50
Secret 51
Secret 52
Secret 53 (Hall of Demetrius)
Temple of Isis
No Secrets
Cleopatra's Palaces
Secret 54
SEARCH FOR JEAN-PIERRE
 City of the Dead
Secret 55
Secret 56
Chambers of Tulun
Secret 57
Secret 58
Citadel Gate
Secret 59
Street Bazaar
Secret 60
Trenches
No Secrets
Citadel
Secret 61
Secret 62
FINAL CONFLICT
 Sphinx Complex
Secret 63
Secret 64
Pyramid of Menkaure
Secret 65
Secret 66
Mastabas
Secret 67
The Great Pyramid
Secret 68
Khufu's Queens Pyramid
Secret 69
Secret 70
PC Cheat Codes
Getting Lara to stand perfectly North is the hardest part of this procedure. The easiest way to get her facing North is to
hang from a ledge while facing North. This will line you up perfectly. You can then either press inventory while hanging
or drop to the ground and do it. You will know you are standing North when the needle on the compass becomes transparent.
When this happens do any of the following steps:
LEVEL SKIP
- Switch to the LOAD GAME icon
UNLIMITED ITEMS
- Press and hold the letters H - E - L - P for a few seconds
- Exit the Inventory screen and the next level will load
- Switch to the SMALL MEDKIT icon
ALL WEAPONS
- Press and hold the letters G - U - N - S for a few seconds
- Release the keys and your inventory should say UNLIMITED for your items
- First do the Unlimited Items Cheat
- Switch to the LARGE MEDKIT icon
- Press and hold the letters W - E - A - P - O - N - S for a few seconds
- Release the keys and you will have all weapons
Playstation Cheat Codes
Getting Lara to stand perfectly North is the hardest part of this procedure. The easiest way to get her facing North is to
hang from a ledge while facing North. This will line you up perfectly. You can then either press inventory while hanging
or drop to the ground and do it. You will know you are standing North when the needle on the compass is blinking.
When this happens do any of the following steps:
LEVEL SKIP
- Switch to the LOAD GAME icon
- Hold L1, L2, R1, R2, Up, and press Triangle
- Exit the Inventory screen and the next level will load
ALL WEAPONS
- Switch to LARGE MEDKIT
- Hold L1, L2, R1, R2, Up, and press Triangle
- You will have all weapons
UNLIMITED ITEMS
- Switch to SMALL MEDKIT
- Hold L1, L2, R1, R2, Down, and press Triangle
- Your inventory should say UNLIMITED for your items
Dreamcast Cheat Codes
Getting Lara to stand perfectly North is the hardest part of this procedure. The easiest way to get her facing North is to
hang from a ledge while facing North. This will line you up perfectly. You can then either press inventory while hanging
or drop to the ground and do it. You will know you are standing North when the needle on the compass is blinking.
When this happens do any of the following steps:
UNLIMITED ITEMS
- Switch to SMALL MEDKIT
- Press L, Up, X, Up, R, and Y
- You should now have UNLIMITED ammo, medkits, and all weapons
UNLIMITED LASERSIGHT AMMO (or using Lasersight with Pistols)
- Have the crossbow or revolver combined with the Lasersight
- Zoom in, hold L then press Start
- While still holding L, select the pistols and press A
- While still holding L, exit the pause screen
- The sound of the pistols being drawn will be heard
Note: This can be repeated as often as needed
