
INTRODUCTION

 Welcome to Lara's latest adventure. And you thought she was dead! Actually that is still up for debate as these
new adventures take place as a series of flashbacks as Lara's friends gather for a memorial service in her honor.
You will explore 13 new dangerous and exciting levels spanning 4 new locations and several decades. You will even get
to play as the teenage Lara Croft.
Welcome to Lara's latest adventure. And you thought she was dead! Actually that is still up for debate as these
new adventures take place as a series of flashbacks as Lara's friends gather for a memorial service in her honor.
You will explore 13 new dangerous and exciting levels spanning 4 new locations and several decades. You will even get
to play as the teenage Lara Croft.As always, Sinjin will reveal everything you need to know to win this game and get a perfect score. All 36 secrets are indexed at the end of this walkthrough and sorted by level making it very easy to find the one(s) you missed.
 I've also included a golden rose icon next to each paragraph that describes the location of one of these secret roses.
If you are skilled enough to collect all of the golden roses you will unlock the items in the Special Features menu.
I've also included a golden rose icon next to each paragraph that describes the location of one of these secret roses.
If you are skilled enough to collect all of the golden roses you will unlock the items in the Special Features menu.All weapons and level specific pick-ups are color-coded in the text, and you can find links in the Combat and Weapons section to the text describing the location for each weapon pick-up for each chapter those weapons appear. Special notes and advise (such as good times to save your game) will appear in italics.
NEW MOVES
Here are the default controls for moving Lara around during her adventures. You can customize many of these controls to your liking so find a combination that you are comfortable with.
| Control | PC Command | PlayStation | Dreamcast |
| Movement | Cursor/Arrow Keys | D-Pad | Analog Stick |
| Action | Ctrl |  |  |
| Draw Weapon | Space Bar |  |  |
| Jump | Alt |  |  |
| Roll | End |  |  |
| Use Flare | < | Select + R1 | L + R Triggers |
| Walk/Sidestep | Shift + Arrows | R1 + D-Pad | D-Pad |
| Sprint | ? | R2 | R Trigger + Analog Stick |
| Crouch | > | L2 | R Trigger |
| Crawl | > + Arrows | L2 + D-Pad | R Trigger + Analog Stick |
| Look | Ins (Hold) | L1 (Hold) | L Trigger (Hold) |
| Change Target | Ins (Tap) | L1 (Tap) | L Trigger (Tap) |
| Zoom In | > (binoculars or laser) | L2 (binoculars or laser) | R Trigger (binoculars or laser) |
| Zoom Out | ? (binoculars or laser) | R2 (binoculars or laser) | (binoculars or laser) |
| Normal View Mode | Space Bar | | |
| Pause Game | P | Start | Start |
| Inventory | ESC | Select | Start |
Lara has a large collection of moves and actions she can perform. This list seems to grow with each new game. Below is a brief description for all of her moves in this adventure. New moves are shown in in bold:

- Running: Lara's basic movement mode. Unless you force her to do something else she will always run.
- Sprinting: Gives Lara an extra burst of speed. Combine with the Jump command to perform a diving somersault.
- Walking: Use this mode for precise movement prior to a tricky jump. Lara cannot fall off a ledge while walking
- Side-Step: Great for peeking around corners to fire on enemies or lining up for a tricky jump.
- Roll: Do a forward tumble with a reverse to quickly change directions. Works underwater too.
- Crouch: Used to hide behind objects or used prior to a forward roll or Crawl movement.
- Crawl: Once in the crouch position you can crawl through small tunnels or air ducts, etc.
- Jumping: You can either do a running or standing jump depending on how far you need to jump.
- Flips: Same as a jump but done from a standing position. You can flip to either side or backwards.
- Grab: Pressing the Action button during a jump puts Lara in the grab-mode to cling to any ledges.
- Moving Objects: Stand against the object to move and press and hold action while moving Lara either forward or back.
- Shimmying: While hanging from any ledge you can move either left or right (if possible), around corners, or even drop to lower ledges and quickly grab again.
- Climbing: Lara can climb ladders and other textured walls by standing against the surface and pressing Action. You can back flip from ladders when necessary.
- Monkey Swing: This works just like wall climbing except you are grabbing a textured ceiling surface.
- Poles: Grab the pole and move up or down as needed. You can move sideways to spin around the pole and back flip when necessary.
- Ropes: Grab the rope and move up or down. You can swing on ropes by getting a running start before grabbing or use Sprint to increase your swing. Your arc of swing
is based on your location on the rope. Press Jump at the apex of your swing to get maximum distance.
- Tightrope Walking: Simply walk across any rope or pole spanning a gap. If Lara loses her balance use opposite left and right movements to counteract the direction she is falling. To reverse direction just press the down directional.
- Parallel Bars: Press Action to grab these bars and swing around. Time your release so you land on the next bar or landing area.
- Forward Tumble: There are several places in the game where you must use this new move. While crouched simply press jump to roll
forward. This is useful when trying to crawl into a lower area.
These show-off moves have been part of Lara's routine from the beginning but never really documented. They serve no purpose other than to amaze your friends who don't already know how to do them.
- Sliding Stop: When Sprinting press the Action button to come to a sliding stop.
- Handstand: When pulling up from a hanging position press Action+Walk+Up to do a handstand.
- Diving: Press and hold Walk while doing a forward jump. This can be really impressive on the higher dives.
I will frequently use the term Safety Drop in this walkthrough. This is a term I have been using since the original Tomb Raider walkthrough and it refers to the process of hanging from a ledge first then dropping to minimize or eliminate any damage you might otherwise take from a fall. You can also minimize damage from long falls by hitting the Roll button just as you hit the ground.
One past helpful tip. I noticed while playing this game that the camera will often get stuck in some weird angle making it difficult to control Lara. If this ever happens just press the LOOK command to restore the camera to its regular position (behind Lara). You can also use this command to interrupt lengthy camera pans if you have already seen them.
COMBAT and WEAPONS
Stealth vs. Combat
You may find it to your advantage to sneak around and avoid unnecessary conflicts. In the later levels ammo and medkits are few and far between so keeping quiet and out of sight can get your further than killing everything that moves. Use the walk and crouch/crawl commmands to assist you in your stealth tactics. You will also want to use your sniping abilities to eliminate enemies quickly and silently. Effective use of the scope with the revolver is even required in some levels.
Targeting
Lara now has an optional manual targeting system where YOU get to choose who she fires at. A simple press of the Look button will select the nearest target while repeated taps will cycle through any other targets in range of the currently selected weapon. Even if you pick the standard auto-aiming you can still cycle through targets using this method.
Hardware List
Lara's weapon's list is a bit more limited in this game but there is still plenty of firepower at your disposal to eliminate your enemies.
Pistols - (Submarine pick-up)
These are Lara's trusty sidearms she brought with her from her previous adventures. Use them "John Woo-style" to take out your basic baddies. Their unlimited ammo supply makes them a good fall-back weapon when you run out of ammo for your bigger guns. You usually start off with these weapons unless the story dictates otherwise.
Shotgun - (Rome pick-up) - (Submarine pick-up)
This old favorite is back complete with two types of ammo; Normal and Wideshot. Using the right ammo at the right time will make things easier and I'll tell you when to load up each kind for the best results. The slow reload time on this gun makes it useful for single attackers only.
Revolver - (Rome pick-up)
More powerful than the pistols; this powerful handgun is the equivalent of the Magnums or Desert Eagle from the earlier games. It also has a slow reload time and a tricky aiming system so you cannot fire while flipping, etc. It makes a good sniping weapon when combined with the Laser Scope.
Desert Eagle - (Naval Base pick-up) - (Submarine pick-up)
This powerful handgun packs the same punch as the Revolver and features the same limitations. Ammo is usually scarce, so use this weapons only on the toughest opponents.
Uzi's - (Rome pick-up) - (Naval Base pick-up) - (Sinking Submarine pick-up)
This powerful old favorite is back, but ammo is so limited you will hardly ever get to use it except for the most serious of encounters.
HK - (Escape with the Iris)
This is a new weapons and features three firing modes; single shot, burst, and full automatic. Ammo for this weapon is even more limited than the Uzi, so keep it in single shot mode unless you are facing a unique enemy.
Chloroform - (13th Floor) - (Escape with the Iris)
This is a new stealth "weapon" with very limited opportunities for use. When combined with a cloth (use combine feature in your inventory) you can use the combined item on an enemy to render them unconscious.
Laser Scope - (Rome pick-up) - (Naval Base pick-up)
Combine this handy little scope with the Revolver and you can zoom in for precise target shooting. Headshots are a basic part of the stealth tactics required in later levels of the game.
Crowbar - (Rome pick-up) - (Submarine pick-up) - (Old Mill pick-up)
This is more of a tool than a weapon although you will get to smack at least one person with it later in the game.
Medkits
These come in both small and large sizes and heal half or all of Lara's health accordingly. Try to save as many as possible for the later levels where things get really dangerous and these medkits are in short supply. Lara will also heal after each level (without using a medkit) so avoid wasting medkits if you are near the end of a level.
Flares
You can't do any damage with these handy items, but they will be invaluable as they illuminate your surrounding making a great light source for finding your way around dark areas such as the submarine. You will often find valuable items and passages you would have otherwise overlooked in the dark, so use a flare whenever it gets too dark to see.
Torch - (Gallows Tree Pick-up) - (Old Mill Pick-up)
Another valuable light source. Lara can light this piece of wood by pressing Action near any existing flame. It can be dropped and reclaimed as needed since Lara is unable to climb or shimmy while carrying the torch.
Binoculars
These allow you to survey the surrounding area to pinpoint items and enemies. Use the zoom commands to identify your targets.
Headset
Works just like the binoculars but with the added ability of an infrared mode that lets you see in the dark or invisible heat sources.
Grappling Gun - (Red Alert)
This item is found near the end of the game and comes complete with its own scope. Once equipped you can aim at the ceiling and when the target turns green you can fire.
Timex-TMX
Lara's watch certainly "takes a licking and keeps on ticking". Use this device to get level statistics, game status, and your current completion times. Sinjin's record time for the entire game is 6h:22m.
Gold Roses
There are three dozen of these roses scattered across the various levels in this game. They have no function, but if you collect all 36 there will be something special waiting for you in Special Features menu. The Rose in your menu will display your current total and the number remaining.
 Weapons and Ammunition
Ammo is scattered all over the various levels. It is always a good policy to save your bigger and better weapons for the bigger and badder enemies. Sometimes I will give you a recommendation for which weapons to use, but feel free to use your weapon of choice. There will also be times when I might say "you will find a certain weapon in a certain location" and all you find is ammo for that weapon. This is not a bug or error in the solve, but rather part of the game design. Weapons appear in certain locations, but if you ALREADY have that weapon from an earlier "pick-up point" then you will find ammo for the weapon that would otherwise be there.
SPECIAL NOTE: Your ammo and weapons are reset between each of they stories/chapters. As you near the end of each story you may as well use all of the firepower at your disposal since you can't take it with you.
Level Specific Items
There are additional items that you will find on each level that are used to solve puzzles or for other activities. These will be color coded red in the walkthrough text so you can easily pick them out.
ROGUES GALLERY
You will meet an interesting variety of people and creatures in this game. Avoid some and kill others. Here is a list of your potential enemies and tips for getting rid of them.
Enemies in Rome
Bats
You are unable to target these creatures so just run away.
Dobermans
Kill with pistols while jumping and flipping to avoid their teeth.
Gate Guardians
Dodge their flame attacks and fire at them when their mouths are full of fire.
Gladiators
Best killed from a distance. They are very fast.
God Head
Avoid the green lasers while you shoot the eyes out with the revolver.
Hammer God
Dodge the hammer blast while firing pistols or Uzi'os at him.
Larson
Pistols work nicely to disable this enemy.
Lions
Pistols or revolver works well on these animals.
Rats
Another creature you cannot kill. Run away or swim to avoid them.
Sword God
Dodge his fire while using your shotgun on this enemy.
Enemies in Search for the Spear
Attack Subs
Use Chaff Flares to redirect their rockets.
Chef
Sneak up and whack him with the crowbar.
Huskies
Dodge their attacks while firing your pistols.
Mafia Goons
Keep it simple and use the pistols while avoiding their attacks.
Soldiers
Just like the goons, keep it simple and use pistols while dodging their attacks.
Enemies in Black Isle
Bats
You are unable to target these creatures so just run away.
Imps
Use the torch to scare them. Run away if you don't have the torch.
Maze Monster
Follow the lights and he won't bother you.
Rats
Another creature you cannot kill. Run away or swim to avoid them.
Skeletons
Avoid them and they won't bother you.
Underwater Demon
Get the coin and put in the cage to get rid of this monster.
Enemies in VCI Headquarters
Armored Troopers
Can only be killed with a headshot. Dodge their deadly lasers.
Blue Guards
Sniper headshots work great on these guys.
Cockroaches
Run...run very fast away from them.
Cyborgs
The HK in full-auto mode is a good start, but these guys require some advanced strategy to defeat.
Soldiers
Headshots are quick and silent, otherwise use your weapon of preference.
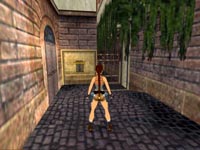
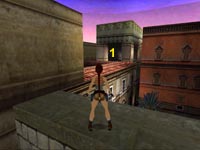
STREETS OF ROME
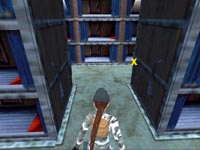
Lara seeks the "Philospher's Stone" and must acquire three keys to the Gate that leads to it. Watch out for the villains; Pierre and Larson who will be pursuing you throughout the level.
 As you begin this level you may want to duck into the Backstage Area to the left. This serves as the training
area for Lara to practice her new moves, plus there are some nice items you can get even if you don't feel like
training.
As you begin this level you may want to duck into the Backstage Area to the left. This serves as the training
area for Lara to practice her new moves, plus there are some nice items you can get even if you don't feel like
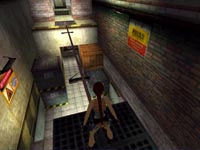
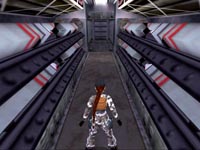
training.Make your way to the walkway above using the roof of the forklift or the crate then jump the gap to enter the next room. Do a running leap over the next gap and follow the passage to the next room. The next gap requires a running leap with a grab to catch the opposite edge. Pull up and continue until you reach the next gap requiring a side jump to the left. When you reach the area with the metal grid work on the ceiling jump up and grab then monkey swing to the opposite side. Climb the ladder to the left then go around the corner and drop down to the ledge below.
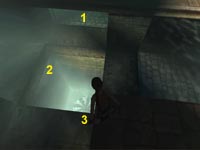
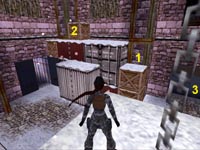
 Look back into the room to locate an alcove then make a running jump to the top of the grid work and get the Flares (1) and Medkit (2).
Another Medkit (3) rests on a lower metal ledge to the right as you face the alcove. A standing jump takes you there and
another gets you back. Make another standing jump to reach the platform at the top of the ladder. Crawl
through the passage next to the ladder and turn left where a drop requires you to use the new tumble move.
Drop down to the floor and flip the switch to open the door leading to the next room.
Look back into the room to locate an alcove then make a running jump to the top of the grid work and get the Flares (1) and Medkit (2).
Another Medkit (3) rests on a lower metal ledge to the right as you face the alcove. A standing jump takes you there and
another gets you back. Make another standing jump to reach the platform at the top of the ladder. Crawl
through the passage next to the ladder and turn left where a drop requires you to use the new tumble move.
Drop down to the floor and flip the switch to open the door leading to the next room.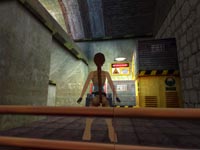 Head across this room and climb the boxes and jump across to the pool. Dive into the water and swim through the tunnel. Take a breath
at the other end then dive to the bottom and locate the tunnel in the corner. Swim through until you reach
a small room with Revolver and Shotgun ammo plus a medkit. Return back through the tunnel to the previous pool.
Head across this room and climb the boxes and jump across to the pool. Dive into the water and swim through the tunnel. Take a breath
at the other end then dive to the bottom and locate the tunnel in the corner. Swim through until you reach
a small room with Revolver and Shotgun ammo plus a medkit. Return back through the tunnel to the previous pool.Exit the pool and continue until you reach the tightrope. Ignore it and drop into the lower section to get some items before heading into the room with the shelves. Get the Flares from the one shelf then locate the two sets of empty shelves that can be moved. Move both of these to find secret areas; one with Revolver ammo and the other with Uzi ammo and your first secret, Rose 1 hidden on the shelf.
 Head back to the area below the tightrope and climb the crate to leave through the door on the upper level. A search of the
shelves in this area will reveal another Medkit. At the end of the passage is a lever you can pull to open the
door. Drop down into the next room and head back outside to the street where you started.
Head back to the area below the tightrope and climb the crate to leave through the door on the upper level. A search of the
shelves in this area will reveal another Medkit. At the end of the passage is a lever you can pull to open the
door. Drop down into the next room and head back outside to the street where you started.Follow the street until you spot an alley to the right. Follow the alley and kill the dog that attacks as you near the fountain. Turn right and continue down the narrow alley to the right of the cafe until you come to a hole (looks like a mouth) in the wall. Flip the switch inside this hole to open a gate at the end of the first street. Now make your way back down the alley and enter the new area to the left past the opened gate.
 Locate the hole in the wall and flip the second switch at the end of this passage. Quickly, do a reverse roll
and sprint out of this area to avoid the bats that will attack you immediately. As you exit this short
passage you will spot a new block that has slid out allowing you to climb to a ledge with the pillars above. Proceed across
the balconies and go through the opening just past the red and white lounge chair. Drop down to find yourself in a hall with
three windows.
Locate the hole in the wall and flip the second switch at the end of this passage. Quickly, do a reverse roll
and sprint out of this area to avoid the bats that will attack you immediately. As you exit this short
passage you will spot a new block that has slid out allowing you to climb to a ledge with the pillars above. Proceed across
the balconies and go through the opening just past the red and white lounge chair. Drop down to find yourself in a hall with
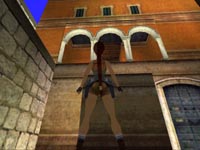
three windows.Shoot out the windows and take the Revolver ammo and medkit from the first two and climb out the third to get on a ledge. Jump across to the other side and take the first left. Climb up to the walkway above and get the Golden Key. Climb back down and follow the passage around to the left to the next balcony where a movie will show you where to use that new key. A barking dog warns of an upcoming encounter.
 Leap over the railing to land on the red and white striped awning above the cafe and search behind the sign for some
Flares. From here you can easily target and kill the dog with no danger to yourself. Drop down and cross the courtyard
to unlock the gate and enter the passage beyond. As you enter the next area have your pistols ready as Larson shows up
about now and wants to have a shootout. He's up on the balcony to the left so start firing as soon as you go around the
corner and keep firing and dodging his bullets until he runs away.
Leap over the railing to land on the red and white striped awning above the cafe and search behind the sign for some
Flares. From here you can easily target and kill the dog with no danger to yourself. Drop down and cross the courtyard
to unlock the gate and enter the passage beyond. As you enter the next area have your pistols ready as Larson shows up
about now and wants to have a shootout. He's up on the balcony to the left so start firing as soon as you go around the
corner and keep firing and dodging his bullets until he runs away.Search the dark areas behind the pillars to locate a Medkit in the corner. Locate the entrance opposite this item and go through and head left. Follow the ramp leading down to the area with the boxes and get the Garden Key. Go back up the ramp and head to the ramp leading up to the right. You can see Larson so open fire until he runs away. Now use the tightrope to reach the other side and drop into the alley.
 Locate and pull the lever so you can return to the fountain. Now make your way back to the hallway with the
three windows you shot out earlier. Climb through and drop into the room below quickly killing the dog that
attacks. Put your guns away so you can activate the door to open it. As soon as it opens a dog leaps at you.
Back flip while drawing your pistols and let him have it. Enter the new room and get Shotgun ammo from the crate and the Medkit.
Locate and pull the lever so you can return to the fountain. Now make your way back to the hallway with the
three windows you shot out earlier. Climb through and drop into the room below quickly killing the dog that
attacks. Put your guns away so you can activate the door to open it. As soon as it opens a dog leaps at you.
Back flip while drawing your pistols and let him have it. Enter the new room and get Shotgun ammo from the crate and the Medkit.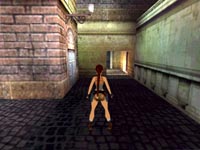 Head through the door opposite this room and follow the passage until you come to a lever. Pull it to open
a gate leading back to the fountain. Head back to that area and go back through the gate you opened after finishing
the tightrope. Continue to the intersection and turn left to face the entrance shown in the picture.
Head through the door opposite this room and follow the passage until you come to a lever. Pull it to open
a gate leading back to the fountain. Head back to that area and go back through the gate you opened after finishing
the tightrope. Continue to the intersection and turn left to face the entrance shown in the picture.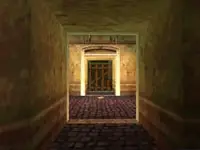 Go through the entrance and turn right and head down the long passage. An alcove on the left has some Revolver ammo
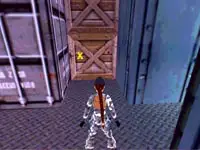
and a locked wooden door that you can't open right now. Remember this door for later as it has the final secret.
Continue down the passage and climb the stairs at the end. Get the Revolver then head up
the ramp to the blue door.
Go through the entrance and turn right and head down the long passage. An alcove on the left has some Revolver ammo
and a locked wooden door that you can't open right now. Remember this door for later as it has the final secret.
Continue down the passage and climb the stairs at the end. Get the Revolver then head up
the ramp to the blue door. Get the Laser Scope to the left as you enter this new room. Combine this item with
your new Revolver then head over to the gate on the opposite side of this room. Use the Revolver and scope to
shoot the lock off the gate then go inside and get another Garden Key. Rats swarm into
the room so you need to get out of here fast.
Get the Laser Scope to the left as you enter this new room. Combine this item with
your new Revolver then head over to the gate on the opposite side of this room. Use the Revolver and scope to
shoot the lock off the gate then go inside and get another Garden Key. Rats swarm into
the room so you need to get out of here fast. Return to the previous street and go past the closed gates and head left at the end to locate the two slots where you can insert your
pair of Garden Keys. The gates you just passed are now open and you can enter this new area. Watch the movie
that triggers when you near the building. Make a note of the room off to the side with the pool then take the narrow
alley to the right of the main building then turn right and follow the passage up to the bell tower. You may have to
kill another dog along the way. The camera pans around giving you a nice view of this new area.
Return to the previous street and go past the closed gates and head left at the end to locate the two slots where you can insert your
pair of Garden Keys. The gates you just passed are now open and you can enter this new area. Watch the movie
that triggers when you near the building. Make a note of the room off to the side with the pool then take the narrow
alley to the right of the main building then turn right and follow the passage up to the bell tower. You may have to
kill another dog along the way. The camera pans around giving you a nice view of this new area. Use your Revolver and scope to shoot the bell to open another pair of gates. Now head to the left of the bell
tower and locate the small passage (1) which is now open. Climb up and make a standing jump with a grab to the
passage on the other side. Quickly run down this passage and flip the switch then run back as bats swarm in and
attack. Now the door to the bell tower is open. Quickly run back and make sure to stop and make that standing
jump back across the gap. Go to the newly opened door under the bell and get the Revolver ammo to the right
before going inside.
Use your Revolver and scope to shoot the bell to open another pair of gates. Now head to the left of the bell
tower and locate the small passage (1) which is now open. Climb up and make a standing jump with a grab to the
passage on the other side. Quickly run down this passage and flip the switch then run back as bats swarm in and
attack. Now the door to the bell tower is open. Quickly run back and make sure to stop and make that standing
jump back across the gap. Go to the newly opened door under the bell and get the Revolver ammo to the right
before going inside.
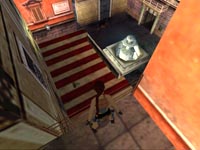
Head to the back of this room and go left. Pull the lever on the back wall to crack one of the bird statues in the previous room revealing a dove. Return to that statue and press Action. Now go down the next passage past the other bird statue and follow the ramps leading up to a deadly trap. Walk up to the edge and turn around and back off clinging to the edge (1). Shimmy past the battering ram and climb into the alcove (2). Pull the lever you find here to crack the remaining statue. Drop down (2) to the floor and return to the other bird statue and press Action again.
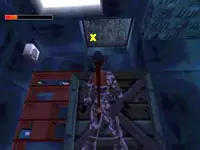
This opens the entrance to a new chamber (1) near the front of this building where you will find the first of the three Gateway Keys. Don't go get it just yet unless you want to continue without the last two roses for this level. Instead, head back to the passage you were just in where you were attacked by the swarm of bats. Now you will find a pair of secret alcoves are now open and you can get a Medkit and Rose 2.
 Now go back to the stone wall that borders the stairs leading up to the bell and make a running leap to the outer wall.
Follow the wall around to the left until you are close enough to jump to the red roof. Follow the roof until you can jump
into the opposite tower (1) where you will find the Medkit and Revolver ammo.
Now go back to the stone wall that borders the stairs leading up to the bell and make a running leap to the outer wall.
Follow the wall around to the left until you are close enough to jump to the red roof. Follow the roof until you can jump
into the opposite tower (1) where you will find the Medkit and Revolver ammo.The final rose is located in that locked room near the Revolver ammo you got earlier. You can take a shortcut by dropping down the ledge near where the bats attacked you. Once you reach the wooden door it will now be open and you have to quickly kill the dog that attacks as you enter. Search the shelves for a Medkit and Rose 3.
Return to the building with the bell and enter the new chamber at the front of the building to get the Gateway Key and trigger the movie that ends this level.
TRAJAN'S MARKET
 From your starting position you have two possible doors to explore on either side of you. The entrance
to the right leads to a building with a box containing a Laser Scope in case you managed to lose the one from
the previous level. Head into the left building and shoot the box inside. Get the Crowbar
then head back outside and go down two more doors on the right and use the crowbar to open the door. The street
branches off just past this door but you will be exploring that section later in this level.
From your starting position you have two possible doors to explore on either side of you. The entrance
to the right leads to a building with a box containing a Laser Scope in case you managed to lose the one from
the previous level. Head into the left building and shoot the box inside. Get the Crowbar
then head back outside and go down two more doors on the right and use the crowbar to open the door. The street
branches off just past this door but you will be exploring that section later in this level. Shoot the box and get the Medkit before climbing up the ledges to reach the second floor where you should find a
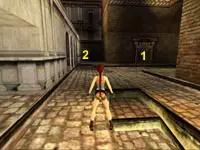
tightrope. Before crossing the rope you will want to make a jump over to the window ledge (1). Grab on and pull up to
get another Medkit then jump back and walk across the tightrope (2) to the opposite ledge. Jump the sections of broken
floor to reach the opening above on the right then walk out along the walkway toward the gate and turn right to face the
sloped wall.
Shoot the box and get the Medkit before climbing up the ledges to reach the second floor where you should find a
tightrope. Before crossing the rope you will want to make a jump over to the window ledge (1). Grab on and pull up to
get another Medkit then jump back and walk across the tightrope (2) to the opposite ledge. Jump the sections of broken
floor to reach the opening above on the right then walk out along the walkway toward the gate and turn right to face the
sloped wall.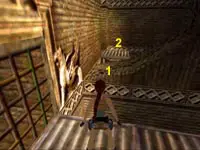 Jump to the sloped section of wall (1) then to the small ledge (2) beyond that. Now make a running long jump to get the
shotgun ammo from the window ledge overlooking the previous tightrope. Repeat the running leap to reach the previous small
ledge and enter the building. Make your way to the floor by dropping down to the first ledge then to the floor and get the
Revolver ammo and Flares. Jump and pull up to the next ledge and go into the next area until you trigger a movie. You can
now drop down to the ground.
Jump to the sloped section of wall (1) then to the small ledge (2) beyond that. Now make a running long jump to get the
shotgun ammo from the window ledge overlooking the previous tightrope. Repeat the running leap to reach the previous small
ledge and enter the building. Make your way to the floor by dropping down to the first ledge then to the floor and get the
Revolver ammo and Flares. Jump and pull up to the next ledge and go into the next area until you trigger a movie. You can
now drop down to the ground. Head over to the second arch and climb the textured wall located on the backside of the column. When you reach the
top move left around the corner then slide down the short slope to land on the flat ledge (S) and turn to your right.
Make a running jump to the next small ledge (1) followed by another as you curve around the wall to land on it the
next ledge before entering the room.
Head over to the second arch and climb the textured wall located on the backside of the column. When you reach the
top move left around the corner then slide down the short slope to land on the flat ledge (S) and turn to your right.
Make a running jump to the next small ledge (1) followed by another as you curve around the wall to land on it the
next ledge before entering the room.Locate the rope and give it a pull. After you pull it three times a movie will play. Head back outside and jump back to the small ledge and then back to the first ledge (S). Position Lara on the highest section of this ledge and aim her next jump to the lowest part of the next ledge (2). From this ledge you can make a short jump to the ledge (3) leading to another room with another rope. Pull this rope once to start another movie revealing a new location.
There are some Uzi clips on another ledge (4) nearby. Return to the previous ledge (3) then aim for the entrance flanked with the statues and make a running jump and grab just in case you come up short. Do a safety drop down to the floor below and enter the new room you just opened with the rope. Get the Medkit and Revolver ammo from either side of the statue then turn and start to exit this room. When you reach the door light a flare and look for the ledge concealed in the darkness on the right. This ledge is located in the back of the slot where the giant round door rolled out of.
Climb up then drop into the small room where you can pry the Coin from the wall with the crowbar. Rats pour into the room when you take the coin, so quickly turn and run back to the room with the statue. Insert the coin into the slot at the base of the statue to open the gate to the next area.

Make a quick detour back out into the area where you dropped down after getting those Uzi clips. You should now spot a trapdoor that was also opened when you used the coin. Drop down into the lower area and stock up on Shotgun ammo and Rose 4. Now you can climb out and head back to the main street from the beginning of this level and go through the new gate you just opened.
 Locate the new passage and follow the alley until you reach a cavern with a waterfall. Locate the short alley (1) and
head down it to get some Revolver ammo then return to the water (2) and dive in. Swim under the waterfall then climb out
onto the ledge and enter the large stone door. A movie plays as you enter. Collect the Revolver ammo nearby - from
the looks of that movie you are going to need it.
Locate the new passage and follow the alley until you reach a cavern with a waterfall. Locate the short alley (1) and
head down it to get some Revolver ammo then return to the water (2) and dive in. Swim under the waterfall then climb out
onto the ledge and enter the large stone door. A movie plays as you enter. Collect the Revolver ammo nearby - from
the looks of that movie you are going to need it. This is the first of three boss encounters on this level. You may want to save your game. This boss, which I
will refer to as "the Head", fires green lasers out of its eyes. Lara needs to dodge these blasts and shoot out the
eyes between shots. You can see when the Head is powering up for another blast so be prepared to sidestep or flip
out of the way. Use the revolver and laser scope to snipe the eyes to defeat this enemy. I hid behind the first corner
leading into this area then leaned around the corner and shot both his green eyes before he ever fired at me.
This is the first of three boss encounters on this level. You may want to save your game. This boss, which I
will refer to as "the Head", fires green lasers out of its eyes. Lara needs to dodge these blasts and shoot out the
eyes between shots. You can see when the Head is powering up for another blast so be prepared to sidestep or flip
out of the way. Use the revolver and laser scope to snipe the eyes to defeat this enemy. I hid behind the first corner
leading into this area then leaned around the corner and shot both his green eyes before he ever fired at me.
Collect the Mars Symbol after you defeat the Head then continue to the back of the room and climb onto the raised platform on either side of the entrance. Jump up and grab the grid work above and pull up. Make another jump to land on top of the red machinery where you can collect Rose 5. Drop back down and head to the opposite side of the area and locate the circular hatch. Get the Revolver ammo (1) in the corner then stand near the brown part of the hatch (2) and press Action to open the door. Drop down to the canal below.
 There are three underwater passages to explore. You will also want to watch out for rats which will swarm into the
passage if you get to close to those metal grates along the outer wall. If rats do appear just dive into the water
and stay under until they go back into the walls. Dive in and swim through the closest passage (1) to get a Medkit. Now
locate the tunnel in the corner (2) and swim through until you reach the machine room. Get the Shotgun ammo and use the
crowbar to pry off the Valve Wheel.
There are three underwater passages to explore. You will also want to watch out for rats which will swarm into the
passage if you get to close to those metal grates along the outer wall. If rats do appear just dive into the water
and stay under until they go back into the walls. Dive in and swim through the closest passage (1) to get a Medkit. Now
locate the tunnel in the corner (2) and swim through until you reach the machine room. Get the Shotgun ammo and use the
crowbar to pry off the Valve Wheel. Now you need to retrace your steps back to the room where you found the last secret rose and use this wheel on the
large red machine. This stops the deadly propeller blade that was blocking your path to the remaining underwater tunnel (3).
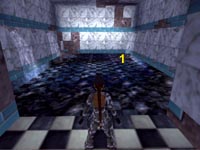
Go back down the hatch and dive into the water. This time you can swim through the bottom passage. Continue forward
then head left toward the small opening (1). Swim through and enter a small room with a Medkit. Swim back out and follow
the hex-shaped metal passage (2) until you come to another spinning propeller. Follow the current to the right and it will
lead you to a gap in the ceiling. Swim up into the next room.
Now you need to retrace your steps back to the room where you found the last secret rose and use this wheel on the
large red machine. This stops the deadly propeller blade that was blocking your path to the remaining underwater tunnel (3).
Go back down the hatch and dive into the water. This time you can swim through the bottom passage. Continue forward
then head left toward the small opening (1). Swim through and enter a small room with a Medkit. Swim back out and follow
the hex-shaped metal passage (2) until you come to another spinning propeller. Follow the current to the right and it will
lead you to a gap in the ceiling. Swim up into the next room.Climb out of the water and turn the valve wheel in this room to stop the propeller in the water below. Dive back in and swim back toward the propeller and through the small passage next to it on the right. Swim up the sloped passage and exit the water in the next room. Move ahead into the next area until the gate slams shut blocking your exit. Get the Shotgun and the Shotgun ammo. Arm yourself with your new weapon and enter the next large room.
This is the second of three boss encounters on this level. You may want to save your game. Defeating the Gladiator requires constant evasive tactics such as back flips and jumps to dodge his attacks. The Gladiator attacks by firing energy bolts or by charging at Lara while swinging his deadly sword. Wait for his charge then sprint in the opposite direction then turn and fire. The shotgun is your best weapon, but you need to be pretty close to use it effectively. Fire away at the Gladiator and parts of him will break away. Dodge his attacks and keep up your assault until he is totally destroyed. Upon his destruction two gates will open and a window will break.
Exit this arena by using the platform, but make sure to grab the Medkit and Shotgun ammo on the ledge on your way out. Before dropping to the street grab the medkit off to the left then return to the main street intersection. You should now be near the location where you started this level. The metal door you opened with the crowbar (1) should be to your right and the newly opened gate (2) leading to Rose 6. is ahead and to the left.
Now make your way back to the cavern with the waterfall and swim through the new underwater passage on the left. Get the Medkit and the Venus Symbol on your way to the next room. Things are about to get dangerous so you will want to save your game. After a brief movie you need to whip out your pistols and fire at Larson until he is injured. This leads to the third boss encounter for this level.

The Gateway Guardians have two attack modes. They shoot guided bolts of fire that actually seek you out. If you take a direct hit you will burst into flames. If you aren't instantly killed you can quickly run to the pool to extinguish the flames and heal yourself. Even if you dodge the fire you can still take considerable damage from the explosion when it hits any nearby surface. They Guardians will also bite but only if you get too close, so your best position for combat is somewhere between the trees and the streetlights. You can now fire at each of the heads but only just prior to when they launch a fire attack at you. Wait for their mouths to fill with fire and their heads to go back then fire rapidly with your pistols. Target only one at a time and the danger will lessen with each dead Guardian.
When the battle is over you can collect four boxes of Shotgun ammo (two of each kind) and a Medkit. Insert your two keys into the slots to open the Gateway and go inside. Make a series of running jumps to each of the platforms and when you jump onto the last one it will send you falling into the pit and the next level...
COLLOSEUM
Continue forward through the rooms until you spot the block with the ring in the nook to the right. Push it into the wall as far as you can then go around the corner to find Rose 7. Head down the passage and a movie will show the floor start to break away. Get ready to make a running leap over the gap to clear the lava and reach the other side.
 Return to the broken passage and back off and hang over the edge. Now shimmy around to the narrow gap to the left and pull up
and crawl through. Vault into the next lower area and press the button inside to open a door back in the previous room. Climb
back up and crawl through. This time you have to rotate around and back off and hang then shimmy to the right to get back to the
large room.
Return to the broken passage and back off and hang over the edge. Now shimmy around to the narrow gap to the left and pull up
and crawl through. Vault into the next lower area and press the button inside to open a door back in the previous room. Climb
back up and crawl through. This time you have to rotate around and back off and hang then shimmy to the right to get back to the
large room. A door is now open above allowing you to slide into a lower part of this level. Get ready for action as soon as you
reach the bottom as a lion attacks. The Shotgun with the Wideshot ammo proves a useful weapon in this close-range
encounter. Locate and press the button on the wall to open the exit and another lion attacks. Kill him with a few
blasts from your shotgun then enter the next area.
A door is now open above allowing you to slide into a lower part of this level. Get ready for action as soon as you
reach the bottom as a lion attacks. The Shotgun with the Wideshot ammo proves a useful weapon in this close-range
encounter. Locate and press the button on the wall to open the exit and another lion attacks. Kill him with a few
blasts from your shotgun then enter the next area. Climb the wall until you reach the top where you will find a pedestal with a Gemstone Piece #1.
Enter the next room and fight the Gladiator who charges from a newly opened door. Dodge his attacks while firing at him
with your favorite high-powered weapon. Search the room where he entered from and get the Medkit.
Climb the wall until you reach the top where you will find a pedestal with a Gemstone Piece #1.
Enter the next room and fight the Gladiator who charges from a newly opened door. Dodge his attacks while firing at him
with your favorite high-powered weapon. Search the room where he entered from and get the Medkit.Follow the ramp leading up to another level and another Gladiator. Retreat back down the ramp and he won't give chase. You can then fire away at your leisure with pistols or whatever you want. Head back up and take the Revolver ammo and flip the switch on the back wall. Continue up and then turn right to continue up another ramp where you will have to fight a Gladiator and a lion. Your Shotgun and Wideshot ammo are a great tool for taking out two enemies at once. Search the room where these enemies came from to find another room. In here you will find the Uzi's and a Medkit.
Head back down one previous level and locate the large room and enter. Your goal here is to collect the second piece of the Gemstone by navigating a tricky puzzle that is on a timer. The following four pictures show the area from various views. Ledges are numbered the same in each picture. Go to the center dais then jump toward the left wall and stand by the rope. Face the center of the room and pull the rope three times to raise the pedestal on the central platform above. Now jump back and angle yourself toward the platform to the right and make a running leap from the corner of this area (1).


Start running as soon as you recover from the landing on the next ledge (2) and make a running leap to the following ledge (3) and then do another running leap and a grab to clear the next gap (4) and cling to the edge of the next platform. Pull up quickly and turn left following the ledge as it turns back toward the center of the room. Make one last death-defying running leap (5) to reach the pedestal (6) with Gemstone Piece #2. You can now casually exit this area through the door opposite of where you entered, but a trapdoor opens sending you down toward the rocks where you manage to grab on and dangle above a huge pit. This triggers an encounter with Pierre who is after your Gemstone.
 After the encounter you will want to return to the room where you just got the second part of the Gemstone. To do this
shimmy along the narrow ledge you were just clinging to until you reach the triangular ledge and can pull up. Locate the opening
above (1) and grab on and pull up to reach the Gemstone room. Climb up to the upper area using the same route you took earlier
(no rush this time) and head toward the trapdoor you fell through moments ago. This time make a running leap over the trapdoor
to end up in a room with Rose 8. When you are ready to leave simply fall back through the trap door
and this time go toward the other exit.
After the encounter you will want to return to the room where you just got the second part of the Gemstone. To do this
shimmy along the narrow ledge you were just clinging to until you reach the triangular ledge and can pull up. Locate the opening
above (1) and grab on and pull up to reach the Gemstone room. Climb up to the upper area using the same route you took earlier
(no rush this time) and head toward the trapdoor you fell through moments ago. This time make a running leap over the trapdoor
to end up in a room with Rose 8. When you are ready to leave simply fall back through the trap door
and this time go toward the other exit.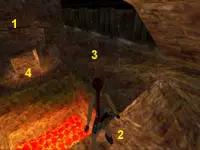 The door opens as you head back up the ramp. Combine the two pieces of the Gemstone in your inventory then insert it in
the obvious slot. As the floor starts to break away quickly do a reverse roll followed by a running leap to the
stable ledge (1) on the opposite side of this room. Now make another running jump to the opening (2) across the gap then drop
over the edge and shimmy around the ledge (3) to the other side and drop down to go through the door (4) below.
The door opens as you head back up the ramp. Combine the two pieces of the Gemstone in your inventory then insert it in
the obvious slot. As the floor starts to break away quickly do a reverse roll followed by a running leap to the
stable ledge (1) on the opposite side of this room. Now make another running jump to the opening (2) across the gap then drop
over the edge and shimmy around the ledge (3) to the other side and drop down to go through the door (4) below.Use the block to reach the room above then whip out your shotgun to take care of another Gladiator/Lion combo. A quick search of the room gets you the Colloseum Key which you can use to open the large doors that lead to the boss. Saving your game now would be a good idea.
 The Thor Gladiator is much like the gladiators you fought in the market but much more powerful. Since this is the final
encounter before you lose all your weapons feel free to use Uzi's and any other powerful weapons you have collected up
to this point. Make sure to take plenty of evasive action and dodge the blasts from his mighty hammer when it strikes
the ground. When he is destroyed the exit will be revealed on the wall opposite of where you entered.
The Thor Gladiator is much like the gladiators you fought in the market but much more powerful. Since this is the final
encounter before you lose all your weapons feel free to use Uzi's and any other powerful weapons you have collected up
to this point. Make sure to take plenty of evasive action and dodge the blasts from his mighty hammer when it strikes
the ground. When he is destroyed the exit will be revealed on the wall opposite of where you entered.In the next room you will find a table with another Colloseum Key. Return to the previous room and use the key on the lock to open up the next passage. Slide down to the cave with the strange lighting and ignore the tempting treasure for now.
Make a running leap across the first ledge and a running leap with a grab over the second to reach the crawlspace. Crawl through into the next area to find the final secret for this location; Rose 9. Now retrace your path back across the ledges to the Philospher's Stone and pry it from the wall with your crowbar to end your adventures in Rome.
NAVAL BASE
Lara is after the Spear of Destiny, an ancient artifact rumored to be lying at the bottom of the ocean inside a wrecked U-boat. Naturally others are also after this treasure. A Mafioso boss has recruited a Russian submarine admiral to take him to the treasure, and you are going to go along for the ride.
 You begin this adventure already inside the submarine base. Head down the stairs until you reach the door leading into
the warehouse. A movie shows you the dangers that lurk inside and above. Quickly run in and head to the metal lockers on the opposite
wall and slightly to the left under the control room window. Get the Silver Key from inside the locker then
run across the warehouse to the locked door on the opposite wall behind the stacked boxes. Use the key then head up the stairs until
you come to a large window. Blast the guards in the control room and get the Access Card that one of them drops.
Search the locker in the corner and get the pair of Uzi's.
You begin this adventure already inside the submarine base. Head down the stairs until you reach the door leading into
the warehouse. A movie shows you the dangers that lurk inside and above. Quickly run in and head to the metal lockers on the opposite
wall and slightly to the left under the control room window. Get the Silver Key from inside the locker then
run across the warehouse to the locked door on the opposite wall behind the stacked boxes. Use the key then head up the stairs until
you come to a large window. Blast the guards in the control room and get the Access Card that one of them drops.
Search the locker in the corner and get the pair of Uzi's.Head back downstairs and return to the locker where you found the key. Use the Access Card on the locked door to the left. Kill the dog then continue in to find a ventilation shaft with a loose cover. Blast open the cover and climb into the shaft to get Rose 10. Return to the locker and this time use the Access Card on the door to the right of the locker and enter.
Head up the steps to the next level where you must make several tricky jumps while dodging the giant mechanical claw. As you enter the upper area make a running leap from the broken railing (1) and land on the lower container (2) across the way. Pull up onto the box (3) then line yourself up to make another running jump back to the crates (4) just to the left of your starting ledge. When you land on this box angle yourself to the right and prepare to make a tricky running leap to the closest section of crates (5). This is a very tricky jump so you may want to save.
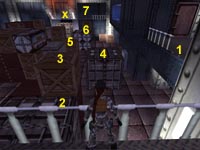 As you land the claw is about to come crashing down. Quickly back up to the edge so you have room to make the running
leap required to clear the gap and reach the next section of crates (6). Climb up to the top crate and immediate run and
leap to the gap in the railing (7). Grab the edge and pull up and get inside before the claw catches up to you. Now
you can press the button to open the doors and trigger a movie.
As you land the claw is about to come crashing down. Quickly back up to the edge so you have room to make the running
leap required to clear the gap and reach the next section of crates (6). Climb up to the top crate and immediate run and
leap to the gap in the railing (7). Grab the edge and pull up and get inside before the claw catches up to you. Now
you can press the button to open the doors and trigger a movie.After the next exit has been revealed you can make a quick search of the lockers in this control room to find a Medkit and some Uzi clips. Press the button to open the other door and return to the ledge where you started all that crate hopping. Now that you are out of danger from the claw you could take the time to explore the tops of the crates for some additional items. A Medkit (x) is on the far silver crate to the right and Uzi clips are on the silver crate along this side of the warehouse. Each item requires more jumping out to the center stack. The Uzi Clips are probably worth the trip. You decide if you want either or both of these items. Head to the newly revealed exit when you are ready.
Follow the large passage and kill the two guards who attack as you near the end. Take the left passage and exit outside and climb the snow-covered box hanging from the crane. Make a running leap to the lowest crate (1) along the wall then climb up the stack to locate Rose 11 on the top crate (2). Drop back down to the ground and use that handy Access Card to enter the locked door (3) nearby.
 Enter and kill the guard taking his Silver Key. Note that the machine is missing a yellow fuse
then return to the previous passage where you took the left turn to go outside and this time follow the opposite hall leading
up to a locked door at the end that can be opened with your new key. A movie introduces the villains for this chapter. When
it is over you can jump the gaps (1) to reach the ledge (2) near the submarine. Collect the Laser Scope
and Desert Eagle ammo then drop down to the ground. Even with a safety drop and a roll as you hit you will still take a small amount of damage.
Enter and kill the guard taking his Silver Key. Note that the machine is missing a yellow fuse
then return to the previous passage where you took the left turn to go outside and this time follow the opposite hall leading
up to a locked door at the end that can be opened with your new key. A movie introduces the villains for this chapter. When
it is over you can jump the gaps (1) to reach the ledge (2) near the submarine. Collect the Laser Scope
and Desert Eagle ammo then drop down to the ground. Even with a safety drop and a roll as you hit you will still take a small amount of damage.Unlock the door with your Access Card and whip out your pistols to take care of the guard dog. The lockers in this area contain all sorts of goodies. Before leaving you should have added; Medkit, Fuse, Uzi clips, Desert Eagle ammo, and the coveted Desert Eagle.
Enter the shower area and locate the hatch (1) in the far right corner. A tricky swim leads to the next secret but you can also easily drown so you may want to save. Jump in and swim down until you reach a junction in the tunnel. Take the passage to the right and keep swimming until you surface in a hidden room with Rose 12. Return back through the underwater tunnel turning left this time at the same junction and resurface in the showers.
 Push the button to open the door to the left as you exit the showers and you are now back in the main passage. Go across to the
opposite hall and go back outside near the crane. You will want to arm your Desert Eagle after attaching the Laser Scope
and get ready to pick off the two snipers who are staked out in the windows above. One is ahead and to your left and the other
is in the window above and to the right as you exit the building.
Push the button to open the door to the left as you exit the showers and you are now back in the main passage. Go across to the
opposite hall and go back outside near the crane. You will want to arm your Desert Eagle after attaching the Laser Scope
and get ready to pick off the two snipers who are staked out in the windows above. One is ahead and to your left and the other
is in the window above and to the right as you exit the building. Snipe them then enter the room with the machine and insert
the Fuse into the slot to turn the machine on. A door unlocks and you quickly need to kill an attacking dog. Finally press
the button in the new room to position the crane/box giving Lara access to the sub. A running jump from the red crate will get
you close enough to grab the hanging crate. Make a running jump toward the submarine to trigger the final movie for this level.
Snipe them then enter the room with the machine and insert
the Fuse into the slot to turn the machine on. A door unlocks and you quickly need to kill an attacking dog. Finally press
the button in the new room to position the crane/box giving Lara access to the sub. A running jump from the red crate will get
you close enough to grab the hanging crate. Make a running jump toward the submarine to trigger the final movie for this level.SUBMARINE
 The bad news is that you are now captured and being held captive. The good news is that you are very close to the first
secret on this level. Turn left between and locate the four bars between the bunk beds and grab the loose one to pull it free.
This item makes a suitable Crowbar, so use it to pry the cover off the air duct cover around the corner
to the right and crawl through the ventilation system until you come to a ladder. Climb the ladder and move forward until you
reach a hole in the vent then hang down into the hole and climb down using the footholds. About halfway down on the left is a
short tunnel leading to Rose 13. Make your way back to the top of the shaft.
The bad news is that you are now captured and being held captive. The good news is that you are very close to the first
secret on this level. Turn left between and locate the four bars between the bunk beds and grab the loose one to pull it free.
This item makes a suitable Crowbar, so use it to pry the cover off the air duct cover around the corner
to the right and crawl through the ventilation system until you come to a ladder. Climb the ladder and move forward until you
reach a hole in the vent then hang down into the hole and climb down using the footholds. About halfway down on the left is a
short tunnel leading to Rose 13. Make your way back to the top of the shaft.Go toward the fan and climb the next ladder toward the power cables. Drop into another hole and hang down then shimmy over to the next ledge and climb back up. Open the vent and drop into the room below where you can search some shelves to find a Medkit and a Battery. Climb back up and proceed to the ladder. When you reach the top of the ladder you will overhear a conversation between the Admiral and Sergei. Continue to the end of this tunnel and climb down the next ladder.

 Crawl through the next shaft and open the hatch to climb down into the kitchen area. You may want to save here.
Cautiously sneak (walk) across the kitchen toward the unsuspecting cook and whack him with the crowbar when you get
behind him. If he sees or hears you he will attack and you will eventually die and have to reload. Take the
Bronze Key from the cook and unlock the supply room. Search the shelves for a
Silver Key and get your Pistols from the drawer. Make sure to
equip your weapons so you can draw them for your next encounter. Use the new key on the locked door near the red phone to continue.
Crawl through the next shaft and open the hatch to climb down into the kitchen area. You may want to save here.
Cautiously sneak (walk) across the kitchen toward the unsuspecting cook and whack him with the crowbar when you get
behind him. If he sees or hears you he will attack and you will eventually die and have to reload. Take the
Bronze Key from the cook and unlock the supply room. Search the shelves for a
Silver Key and get your Pistols from the drawer. Make sure to
equip your weapons so you can draw them for your next encounter. Use the new key on the locked door near the red phone to continue.Have your guns ready as you enter the mess hall. Two men attack but they are easily eliminated. The door to the left leads to a bathroom with a guard inside. Take care of him and get the Shotgun ammo then return to the mess hall and head to the door opposite the bathroom. Follow the passage left then right and kill the guard in the hall. Continue to the end of this passage and go right and open the airlock.
Climb the ladder and continue to another supply room where you will encounter two more guards. When they are dead you can search the crates to get a Medkit, Aqualung, and the Shotgun left behind by one of the guards. In the corner below the Medkit is also a cracked crate. Open this crate with the crowbar and get Rose 14 from inside. Return to the mess hall and open the airlock to the right of the TV.
Follow the passage until you reach the room with a flashing light. Kill the guard on duty then climb onto the crate and jump up and press Grab to open the hatch above you. Climb into the shaft and go through until you reach the second narrow gap then stand up. Jump up to the secret nook above on the right to get Rose 15 then return to the shaft and crawl through to the hatch just around the corner to the left. Open it and drop down into the next room.
 Quickly kill the guard who enters then search the drawers to get another Battery. Follow the
next passage until you come to a hole in the floor just past the hall leadin left Climb down to the walkway below and shoot the guard.
Proceed past the airlock on the left and continue toward the bunk area at the end of this passage. Collect the Medkit and the Shotgun
ammo. Head back to that airlock and open it then enter and shoot the guard. Climb up the ladder to reach the diving area.
Quickly kill the guard who enters then search the drawers to get another Battery. Follow the
next passage until you come to a hole in the floor just past the hall leadin left Climb down to the walkway below and shoot the guard.
Proceed past the airlock on the left and continue toward the bunk area at the end of this passage. Collect the Medkit and the Shotgun
ammo. Head back to that airlock and open it then enter and shoot the guard. Climb up the ladder to reach the diving area.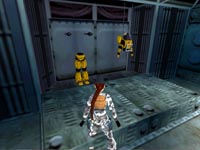 There are now four possible doors. Head to the right door and enter. Shoot the sailor and get the
Suit Console then return to the main hall. Continue to the doors at the end of the hall and
enter the door that's already open. Shoot another guard then return to closed door across the hall and enter. Inside is the
Diving Suit (the only one that is on the floor), which you cannot really take but you can activate
it by playing around with your inventory.
There are now four possible doors. Head to the right door and enter. Shoot the sailor and get the
Suit Console then return to the main hall. Continue to the doors at the end of the hall and
enter the door that's already open. Shoot another guard then return to closed door across the hall and enter. Inside is the
Diving Suit (the only one that is on the floor), which you cannot really take but you can activate
it by playing around with your inventory.Combine the Suit Console and Aqualung then combine the two Batteries. Now approach the torso part of the EDS suit and use these combined items on it to trigger the movie that takes you to the next level.
DEEP SEA DIVING
Save your game as danger lurks ahead in this short but exciting level. You will be attacked by mini-subs armed with rockets. You have some defensive countermeasures as well as the ability to dodge the rocket attacks provided you stay near the ocean floor. Also watch your breathing. Dangerous situations make Lara breath faster using more air. This won't really become a problem until later in the level.
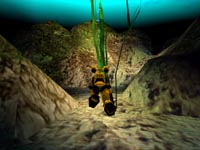 When you exit the sub head straight down then move forward until you come to two possible directions you can take. Head
to the right and continue until you reach the wreckage and an attacking mini-sub. Move side to side as you approach the
sunken U-boat and the rockets will be unable to lock on. If you are in danger of getting hit you can always use a Chaff
Flare to temporarily disrupt the rocket's homing device. Make sure to stay off the walls which also slows you down
making you an easy target.
When you exit the sub head straight down then move forward until you come to two possible directions you can take. Head
to the right and continue until you reach the wreckage and an attacking mini-sub. Move side to side as you approach the
sunken U-boat and the rockets will be unable to lock on. If you are in danger of getting hit you can always use a Chaff
Flare to temporarily disrupt the rocket's homing device. Make sure to stay off the walls which also slows you down
making you an easy target.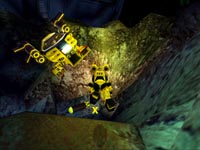 As you approach the U-boat start looking for a small underwater opening (x). It's near the back of the underwater box
canyon down near the bottom left. Quickly get inside and follow the short tunnel to get Rose 16
then get ready to quickly exit the alcove and dodge immediate attacks from the mini-sub waiting outside. Return to the previous
junction and go the other way (left). You are fighting a strong head current as you try to exit this canyon making you a slow
and easy target. Use your Chaff as necessary. Continue straight to reach the next open area.
As you approach the U-boat start looking for a small underwater opening (x). It's near the back of the underwater box
canyon down near the bottom left. Quickly get inside and follow the short tunnel to get Rose 16
then get ready to quickly exit the alcove and dodge immediate attacks from the mini-sub waiting outside. Return to the previous
junction and go the other way (left). You are fighting a strong head current as you try to exit this canyon making you a slow
and easy target. Use your Chaff as necessary. Continue straight to reach the next open area. When you enter this new area head to the right to find more wreckage. Swim toward the wreckage but keep an eye on a new
mini-sub entering the area. Locate the small opening in the back left corner as you swim over the wreckage. Swim through this tiny
gap and use Chaff to protect yourself from any incoming rockets. When you reach the next area things are starting to
get darker. Locate the small tunnel in the round rock formation area ahead of you and swim through. Swim down and
forward then turn left and continue forward until you spot the opening up along the ceiling. Swim through then turn right
enter the next chamber then head through the next opening slightly over to your left.
When you enter this new area head to the right to find more wreckage. Swim toward the wreckage but keep an eye on a new
mini-sub entering the area. Locate the small opening in the back left corner as you swim over the wreckage. Swim through this tiny
gap and use Chaff to protect yourself from any incoming rockets. When you reach the next area things are starting to
get darker. Locate the small tunnel in the round rock formation area ahead of you and swim through. Swim down and
forward then turn left and continue forward until you spot the opening up along the ceiling. Swim through then turn right
enter the next chamber then head through the next opening slightly over to your left.Swim through to trigger a movie where Lara claims the Spear of Destiny and a cave-in damages her diving suit. Now with a limited oxygen supply you must get Lara back to the sub quickly and safely. Saving would be a very good idea about now.
 Retrace your previous path back through the underwater cavern. Swim fast through the larger areas and slow down going
through the narrow passages. Too many bounces off the wall will deplete your O2 supply and you will die before you ever
make it back to the sub. As you leave the cavern use a Chaff and start taking evasive action immediately to dodge the
incoming fire from the mini-sub parked outside. Retrace your path through the narrow passage and then through the open
are patrolled by the other sub and finally back to your own submarine. Try to maintain control and not hit the walls.
Retrace your previous path back through the underwater cavern. Swim fast through the larger areas and slow down going
through the narrow passages. Too many bounces off the wall will deplete your O2 supply and you will die before you ever
make it back to the sub. As you leave the cavern use a Chaff and start taking evasive action immediately to dodge the
incoming fire from the mini-sub parked outside. Retrace your path through the narrow passage and then through the open
are patrolled by the other sub and finally back to your own submarine. Try to maintain control and not hit the walls.You should be able to spot the submarine about now so head through the final underwater opening in the rocks and get under the sub to reach the airlock. Swim up through the hole to end the level. You may be out of air but your health bar will give you a few extra seconds. You can breath now.
SINKING SUBMARINE
Just when you thought it was safe to get out of the water you get back onboard the sub only to find it is sinking. Flickering lights and dangerous power cables are making flooded passages dangerous if not downright deadly. You may be tempted to use your flares in the dark passages. Make sure to keep at least two or three back until the end of the level. Remember your pistols can be used to light-up your immediate surroundings.
 You are greeted by Sergei and his goons as you remove your diving suit. After a brief movie your human threat is
eliminated and a new threat presents itself. The sub is damaged and going down quickly. Climb down the ladder behind
you and get out your guns. Kill the guards next to the missiles and get the Uzi ammo and Desert Eagle ammo they leave
behind. Remember, you can't take anything with you after this level so use it now.
You are greeted by Sergei and his goons as you remove your diving suit. After a brief movie your human threat is
eliminated and a new threat presents itself. The sub is damaged and going down quickly. Climb down the ladder behind
you and get out your guns. Kill the guards next to the missiles and get the Uzi ammo and Desert Eagle ammo they leave
behind. Remember, you can't take anything with you after this level so use it now. Climb the ladder to the next deck and enter the corridor to the right that is on fire. Jump the first patch of flames
and enter the room on the left. Search the shelves and get the Uzi's then return to the
hall and jump over the other patch of fire.
Climb the ladder to the next deck and enter the corridor to the right that is on fire. Jump the first patch of flames
and enter the room on the left. Search the shelves and get the Uzi's then return to the
hall and jump over the other patch of fire.The safest way to jump these fires is to get against the wall and do a side flip over each fire.
 The movie shows the next part of the passage being electrified. Jump onto the closest table then make a series of
standing jump to cross the room and avoid the deadly water. When it comes time to jump across to the other side make
sure to press grab to lower your arc, otherwise you will hit your head and fall in the water. Jump through the sheet
of falling water and enter the passage.
The movie shows the next part of the passage being electrified. Jump onto the closest table then make a series of
standing jump to cross the room and avoid the deadly water. When it comes time to jump across to the other side make
sure to press grab to lower your arc, otherwise you will hit your head and fall in the water. Jump through the sheet
of falling water and enter the passage. Go right and enter the supply room at the end of the next passage. The sailor has his back turned so you have the
element of surprise if you walk into the room and shoot first. Get his Access Card and
search the shelf for a Medkit. Now retrace your path through the mess hall and back over the fires in the first hall.
Past the fire, turn right then left and continue to the end where you can shoot the man in the room on the right and
get some Uzi clips.
Go right and enter the supply room at the end of the next passage. The sailor has his back turned so you have the
element of surprise if you walk into the room and shoot first. Get his Access Card and
search the shelf for a Medkit. Now retrace your path through the mess hall and back over the fires in the first hall.
Past the fire, turn right then left and continue to the end where you can shoot the man in the room on the right and
get some Uzi clips.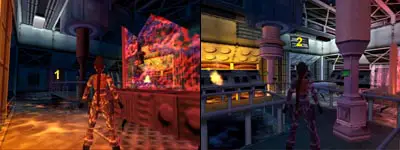
 Get on the table and jump to pull up into the ventilation system. Follow the duct until you reach the trapdoor in the
floor and open it to drop down into the room below. Locate the switch high on the wall (1) of this room and jump and
grab to pull it and turn off the electrical power. The door in this room (2) is locked, but remember it for later as this
is where the final secret is located. Make your way through the air duct and exit to the control room. Use your pistols
to light the way if necessary.
Get on the table and jump to pull up into the ventilation system. Follow the duct until you reach the trapdoor in the
floor and open it to drop down into the room below. Locate the switch high on the wall (1) of this room and jump and
grab to pull it and turn off the electrical power. The door in this room (2) is locked, but remember it for later as this
is where the final secret is located. Make your way through the air duct and exit to the control room. Use your pistols
to light the way if necessary. Return to the control room and go back to the flooded room that was previously too dangerous to enter. Now
you can enter and collect the Medkit, Nitrogen Canister, and the
Desert Eagle complete with extra ammo. Return to the hall and turn right and take
the nearby ladder down to the passage that was previously electrified. Use the Admiral's key on the locked door
at the other end and enter the stateroom where you will find a Medkit and a green Oxygen Canister
in the lockers.
Return to the control room and go back to the flooded room that was previously too dangerous to enter. Now
you can enter and collect the Medkit, Nitrogen Canister, and the
Desert Eagle complete with extra ammo. Return to the hall and turn right and take
the nearby ladder down to the passage that was previously electrified. Use the Admiral's key on the locked door
at the other end and enter the stateroom where you will find a Medkit and a green Oxygen Canister
in the lockers.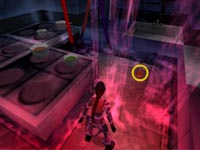 Get ready for combat as you exit the state room. A pair of sailors attack and one drops a
Bronze Key when he dies. Now make your way back through the previous hall and jump the fires to reach the
mess hall one last time. Return to the kitchen through then door to the left and wade through the now-safe water to get
Rose 17 lying on the floor near where you whacked that cook earlier.
Get ready for combat as you exit the state room. A pair of sailors attack and one drops a
Bronze Key when he dies. Now make your way back through the previous hall and jump the fires to reach the
mess hall one last time. Return to the kitchen through then door to the left and wade through the now-safe water to get
Rose 17 lying on the floor near where you whacked that cook earlier.Return to the control room and climb back into the vent. Head back to the room where you disabled the power earlier and use the new Bronze Key on the locked door in this dark room. Enter the next room and search the drawers to find Rose 18.
Return through the duct back to the control room and enter the room with the Admiral. Climb the ladder and use the Nitrogen Canister in the left slot and the Oxygen Canister in the right to end your underwater adventures.
GALLOWS TREE
This chapter takes us back to the teenage adventures of Lara Croft. Lara stows away on a boat headed for a mysterious island. Her adventures will require the use of your brain rather than combat, as Lara is unarmed for these next few levels. Your immediate goal is to locate the stolen heart from an undead creature.
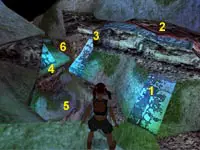 Move away from the hole and head to your left to approach the deep canyon. Line yourself up and make a running leap over
canyon and land on the lower sloped ledge (1). Jump and grab the crack (2) in the wall and shimmy left and around the
corner (3). Drop down and slide to a stop. Jump over to the sloped ledge (4) and press grab as you land so you can catch
the edge as you slide off. Drop down to the ledge below (5) then locate the cave opening in the cliff wall to your right
(or left if you are facing back toward the canyon).
Move away from the hole and head to your left to approach the deep canyon. Line yourself up and make a running leap over
canyon and land on the lower sloped ledge (1). Jump and grab the crack (2) in the wall and shimmy left and around the
corner (3). Drop down and slide to a stop. Jump over to the sloped ledge (4) and press grab as you land so you can catch
the edge as you slide off. Drop down to the ledge below (5) then locate the cave opening in the cliff wall to your right
(or left if you are facing back toward the canyon).Jump into the mouth of the cave and a swarm of bats attack. Run around and dodge them until they all fly away then get the Medkit and Rose 19. Exit the cave by hanging off the edge and dropping to the canyon floor below. Make a few jumps to flat ledges to reach the low stone ledge then climb up and then jump and pull up into the tunnel that leads to more ledges and eventually returns you to the start of this level.
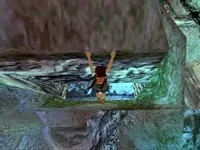 Retrace your path back to the sloped pillar (using steps 1-4 above), but this time when you slide off and hang, shimmy
around the corner (6) to the right. Continue to shimmy along the ledge until you are hanging above an opening below.
Release the grab and quickly press it again to drop and grab the edge of the opening then pull up into the cave.
Crawl through to the other side and drop to the floor. Turn right and climb onto the short stone ledge and face the opening
in the wall across the way.
Retrace your path back to the sloped pillar (using steps 1-4 above), but this time when you slide off and hang, shimmy
around the corner (6) to the right. Continue to shimmy along the ledge until you are hanging above an opening below.
Release the grab and quickly press it again to drop and grab the edge of the opening then pull up into the cave.
Crawl through to the other side and drop to the floor. Turn right and climb onto the short stone ledge and face the opening
in the wall across the way.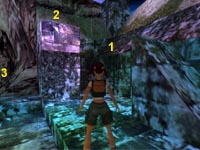 Locate the vegetation growing on the ceiling and jump and grab to monkey swing across to the ledge on the other side. Get
the Medkit located in the shallow pit to the right then slide down the slope to the outdoor area. A movie triggers as Lara
approaches the fire. Locate the pillar along the wall where you first arrived in this area then climb the wall behind the
pillar (1). Actually you just jump and grab the sloped ledge and pull up. You will start to slide off, so quickly jump to
back flip to the top of the pillar (2) where you can get Rose 20. Drop back down to the ground and
head out the exit (3) just past this pillar.
Locate the vegetation growing on the ceiling and jump and grab to monkey swing across to the ledge on the other side. Get
the Medkit located in the shallow pit to the right then slide down the slope to the outdoor area. A movie triggers as Lara
approaches the fire. Locate the pillar along the wall where you first arrived in this area then climb the wall behind the
pillar (1). Actually you just jump and grab the sloped ledge and pull up. You will start to slide off, so quickly jump to
back flip to the top of the pillar (2) where you can get Rose 20. Drop back down to the ground and
head out the exit (3) just past this pillar.
 You should spot another textured ceiling that you can use to continue forward and up into the next passage. More startled bats
attack Lara and you must run around dodging these creatures until they eventually fly away. At the end of this passage is
a ledge you can climb up to then turn to face your next jump. Do a standing jump to land in the well with the broken roof.
It is quite easy to get lost or drowned in this next part so you may want to save.
You should spot another textured ceiling that you can use to continue forward and up into the next passage. More startled bats
attack Lara and you must run around dodging these creatures until they eventually fly away. At the end of this passage is
a ledge you can climb up to then turn to face your next jump. Do a standing jump to land in the well with the broken roof.
It is quite easy to get lost or drowned in this next part so you may want to save.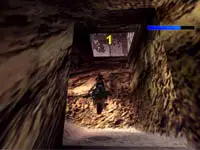 Take a deep breath and dive down. Continue to the first junction and go right. Follow this passage until you reach the
next junction and go right again, this time through a very narrow gap. Continue into the larger area where you will notice
an inviting hole in the ceiling (1). Ignore it - there is no air up there. Instead, turn left and follow a new tunnel until
you reach a vertical shaft leading to some much needed air. Exit the pool by swimming past the dock to the right and climb out
onto the sloped wall and doing a back flip as you climb out to land on the flat ledge behind you.
Take a deep breath and dive down. Continue to the first junction and go right. Follow this passage until you reach the
next junction and go right again, this time through a very narrow gap. Continue into the larger area where you will notice
an inviting hole in the ceiling (1). Ignore it - there is no air up there. Instead, turn left and follow a new tunnel until
you reach a vertical shaft leading to some much needed air. Exit the pool by swimming past the dock to the right and climb out
onto the sloped wall and doing a back flip as you climb out to land on the flat ledge behind you.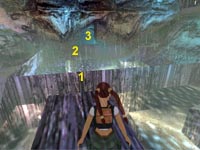 Enter the house by crawling through the opening behind you. Once inside you can get the Medkit from the floor and search the
drawers for a Rubber Tube. Head back to the pool and climb onto the dock. Run fast to avoid the attacking
rats and jump over the wall to the opposite side. More rats are waiting as you land so quickly climb into the opening then crouch
and crawl through the gap to reach the previous area with the campfire.
Enter the house by crawling through the opening behind you. Once inside you can get the Medkit from the floor and search the
drawers for a Rubber Tube. Head back to the pool and climb onto the dock. Run fast to avoid the attacking
rats and jump over the wall to the opposite side. More rats are waiting as you land so quickly climb into the opening then crouch
and crawl through the gap to reach the previous area with the campfire.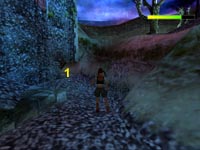 If you spot a fat little creature running around make sure to keep your distance - sprint if necessary. Head past the fire
to the low opening (1) in the far left corner of the wall on the other side of this area. Quickly crawl through as the Imp and
possibly some rats from your previous swim may still be chasing you. Follow the path on the other side once you can stand up and
continue to the next area with the ledge.
If you spot a fat little creature running around make sure to keep your distance - sprint if necessary. Head past the fire
to the low opening (1) in the far left corner of the wall on the other side of this area. Quickly crawl through as the Imp and
possibly some rats from your previous swim may still be chasing you. Follow the path on the other side once you can stand up and
continue to the next area with the ledge.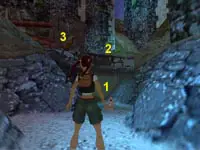 First run into the misty nook under the ledge and get the Pitchfork hidden in the darkness to the right.
Run back outside and quickly jump and grab and pull up to the ledge (2) above. If the Imp is nearby you may want to lead him away so
he can't swipe at your with his claws. Once you reach the top you are out of danger from the menacing little creature below. Now
combine your Pitchfork and Rubber Tube to make a Catapult that you can fire at the chain on the wall just inside the
blocked passage (3). This triggers a movie that results in a clear path into the room with the bells.
First run into the misty nook under the ledge and get the Pitchfork hidden in the darkness to the right.
Run back outside and quickly jump and grab and pull up to the ledge (2) above. If the Imp is nearby you may want to lead him away so
he can't swipe at your with his claws. Once you reach the top you are out of danger from the menacing little creature below. Now
combine your Pitchfork and Rubber Tube to make a Catapult that you can fire at the chain on the wall just inside the
blocked passage (3). This triggers a movie that results in a clear path into the room with the bells.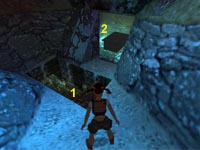 You can now pick-up the Iron Clapper from this room then locate the hole over in the corner and drop down.
As you exit the passage you should come to a room to your left with a piece of wood hidden on the floor behind the table. This is your
Unlit Torch and you either carry it in your hands or you drop it (draw weapon button). You cannot climb
or shimmy with this item in your hands. Exit this room and head up the winding dirt path past other empty rooms with tables until
you reach the large intersection.
You can now pick-up the Iron Clapper from this room then locate the hole over in the corner and drop down.
As you exit the passage you should come to a room to your left with a piece of wood hidden on the floor behind the table. This is your
Unlit Torch and you either carry it in your hands or you drop it (draw weapon button). You cannot climb
or shimmy with this item in your hands. Exit this room and head up the winding dirt path past other empty rooms with tables until
you reach the large intersection. The room to the right (1) had a burning torch you can use to light your own piece of wood. Just stand next to the torch and press Action.
Directly a head is a pit (2) with a ladder leading down to your ultimate goal. Make a note of the dirt path (3) leading up to the left.
This is the final exit to this level when you are finished with your quest. Throw your torch into the hole (2) then climb the ladder
and pick it up at the bottom, or you can just jump in and roll as you hit the bottom for some minor damage.
The room to the right (1) had a burning torch you can use to light your own piece of wood. Just stand next to the torch and press Action.
Directly a head is a pit (2) with a ladder leading down to your ultimate goal. Make a note of the dirt path (3) leading up to the left.
This is the final exit to this level when you are finished with your quest. Throw your torch into the hole (2) then climb the ladder
and pick it up at the bottom, or you can just jump in and roll as you hit the bottom for some minor damage. From the bottom of the ladder follow the new passage until you come to a junction. The brown floor ahead will collapse if
you walk on it sending you into a fatal pit of spikes - trust me! Take the branch to the right and go up the ramp then
turn right again at the T-junction and head for the lit torch ahead. If you didn't light your stick previously you can
do it here. Go down the tunnel to the right where some bats flutter around briefly before leaving you alone. Drop your
torch and carefully crawl through the gold spikes to reach a Medkit and Rose 21 at the far end of
this crawlspace.
From the bottom of the ladder follow the new passage until you come to a junction. The brown floor ahead will collapse if
you walk on it sending you into a fatal pit of spikes - trust me! Take the branch to the right and go up the ramp then
turn right again at the T-junction and head for the lit torch ahead. If you didn't light your stick previously you can
do it here. Go down the tunnel to the right where some bats flutter around briefly before leaving you alone. Drop your
torch and carefully crawl through the gold spikes to reach a Medkit and Rose 21 at the far end of
this crawlspace.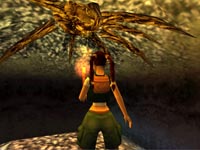 Return to the passage on the other side of the spikes and take your torch. Now head to the T-junction opposite the wall
torch and turn right. Run/sprint up this sloped passage past the attacking bats. When you reach the top use your torch
to light the brownish roots on the ceiling. After the fire has burned itself out you can retrieve the
Heart. This triggers a movie where Lara talks with Father Patrick about her "mistake" and what
she must now do. Head toward the exit that Father Patrick used and get the Medkit stashed around the corner. Slide down
the slope to return to the campfire.
Return to the passage on the other side of the spikes and take your torch. Now head to the T-junction opposite the wall
torch and turn right. Run/sprint up this sloped passage past the attacking bats. When you reach the top use your torch
to light the brownish roots on the ceiling. After the fire has burned itself out you can retrieve the
Heart. This triggers a movie where Lara talks with Father Patrick about her "mistake" and what
she must now do. Head toward the exit that Father Patrick used and get the Medkit stashed around the corner. Slide down
the slope to return to the campfire. Retrace your previous path to get to the area where you first picked up your unlit torch. Continue
forward but don't go down the hole this time. Go up the slope to the red door and insert the Heart in the hole next to it.
This triggers a movie where several Imps come out of the various buildings. Enter the opened door to your left to trigger
another movie where you defeat a small horde of those fat little Imps with the Iron Clapper. When you have control again,
drop into the hole to escape the two remaining Imps. Follow the passage to a bridge. Dodge the swarming bats as you find
another Medkit on the bridge and follow the path to the next level.
Retrace your previous path to get to the area where you first picked up your unlit torch. Continue
forward but don't go down the hole this time. Go up the slope to the red door and insert the Heart in the hole next to it.
This triggers a movie where several Imps come out of the various buildings. Enter the opened door to your left to trigger
another movie where you defeat a small horde of those fat little Imps with the Iron Clapper. When you have control again,
drop into the hole to escape the two remaining Imps. Follow the passage to a bridge. Dodge the swarming bats as you find
another Medkit on the bridge and follow the path to the next level.LABYRINTH
 Head toward the angled bench on your left to trigger the movie. Now go to the front of the church and locate the three stone buttons
and press the middle button, then the left, and finally the right. Watch another frightening movie then turn left to face
the urn in the wall. Note the ghostly skeleton to your left. Keep your distance so he won't attack and carefully make your way to the door
that the wraith took in the first movie. The skeletons will disappear and reappear in new locations creating a sort of maze
you must follow. Here is an easy (and safe) route:
Head toward the angled bench on your left to trigger the movie. Now go to the front of the church and locate the three stone buttons
and press the middle button, then the left, and finally the right. Watch another frightening movie then turn left to face
the urn in the wall. Note the ghostly skeleton to your left. Keep your distance so he won't attack and carefully make your way to the door
that the wraith took in the first movie. The skeletons will disappear and reappear in new locations creating a sort of maze
you must follow. Here is an easy (and safe) route:Stick to the wall with the buttons and move toward the corner. Walk between the pair of pews to reach the pillar then go around the left side to avoid another skeleton. Continue forward past the next pew and make a tight turn around the end where another skeleton is waiting. You should now be able to enter the next room and approach the first pew. Go to the right corner and get the Bone Dust. Now make your way back to the front of the church using the same route you took to get here.


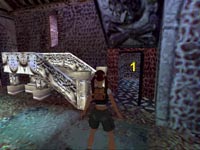 Use the Bone Dust and it will burst into flames and send the skeletons to their final resting place. Now head for the
door at the back of the chapel on the left. Go inside and locate the hidden ledge (1). Climb up and pull the switch
to open a gate back in the room where you found the Bone Dust. Return there now and go into this new passage just to the
right of the skeleton. Get the Medkit then go to the hole in the far wall and press Action to get the concealed
Rose 22. Now return to the slope leading down next to where you just flipped that switch.
Use the Bone Dust and it will burst into flames and send the skeletons to their final resting place. Now head for the
door at the back of the chapel on the left. Go inside and locate the hidden ledge (1). Climb up and pull the switch
to open a gate back in the room where you found the Bone Dust. Return there now and go into this new passage just to the
right of the skeleton. Get the Medkit then go to the hole in the far wall and press Action to get the concealed
Rose 22. Now return to the slope leading down next to where you just flipped that switch.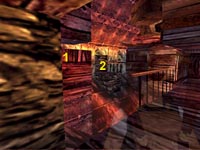 Slide down into the bat-filled room and drop into the central hole. Do a safety drop to the pool below then climb out to
trigger another movie that shows you the way to proceed. Head up the wooden ramp until you reach the opening in the wall then follow the
passage until you arrive at a bridge with a broken railing. Aim for the broken section and do a running leap to grab the
ledge (1) and shimmy around the corner until you reach a ledge you can pull yourself up to. Turn and make a running jump from this ledge
to reach the ledge (2) just outside the entrance to the tunnel. Collect Rose 23 from inside the
tunnel then make a running jump back to the previous edge and shimmy back around to the left. Pull up and do a running jump
back to the bridge.
Slide down into the bat-filled room and drop into the central hole. Do a safety drop to the pool below then climb out to
trigger another movie that shows you the way to proceed. Head up the wooden ramp until you reach the opening in the wall then follow the
passage until you arrive at a bridge with a broken railing. Aim for the broken section and do a running leap to grab the
ledge (1) and shimmy around the corner until you reach a ledge you can pull yourself up to. Turn and make a running jump from this ledge
to reach the ledge (2) just outside the entrance to the tunnel. Collect Rose 23 from inside the
tunnel then make a running jump back to the previous edge and shimmy back around to the left. Pull up and do a running jump
back to the bridge.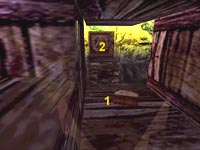 Cross the bridge and pull the switch to rotate the central platform and lower some bridges. Cross the new bridge and continue
up the wooden ramps and make a right to cross the higher bridge leading back to the central area. Ignore the switch and turn right
heading up more ramps to the very top where you can crawl to get a Medkit. Now return to the previous opening you just passed and follow the
passage to the next bridge. Cross the bridge and get the Bestiary Book (1) then jump the gap to go
through the door (2) that just opened. Continue forward until you reach an area with broken walkways along the walls. You will have
to jump and climb to reach the top but you are aided by a ghostly white light. Get the Medkit on the lower floor then do a
standing jump to grab the edge of the first walkway and pull up.
Cross the bridge and pull the switch to rotate the central platform and lower some bridges. Cross the new bridge and continue
up the wooden ramps and make a right to cross the higher bridge leading back to the central area. Ignore the switch and turn right
heading up more ramps to the very top where you can crawl to get a Medkit. Now return to the previous opening you just passed and follow the
passage to the next bridge. Cross the bridge and get the Bestiary Book (1) then jump the gap to go
through the door (2) that just opened. Continue forward until you reach an area with broken walkways along the walls. You will have
to jump and climb to reach the top but you are aided by a ghostly white light. Get the Medkit on the lower floor then do a
standing jump to grab the edge of the first walkway and pull up.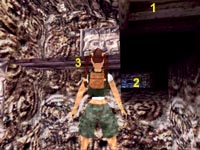 Head up the ramp until you can spot the textured ceiling (1) and the blue-tinted crawlspace in the far wall. Do an angled jump
up and out to grab the bars then swing across to the far wall. Drop and quickly grab again to catch the opening (2) and pull up into
it. Continue to the spiked pit in the floor and lower yourself down then shimmy around to the other side and pull up. Continue
to the end of the tunnel where Rose 24 is waiting for you. Retrace your path back to opening and drop down to the walkway below then make your way back to the earlier walkway just before you used the monkey bars.
Head up the ramp until you can spot the textured ceiling (1) and the blue-tinted crawlspace in the far wall. Do an angled jump
up and out to grab the bars then swing across to the far wall. Drop and quickly grab again to catch the opening (2) and pull up into
it. Continue to the spiked pit in the floor and lower yourself down then shimmy around to the other side and pull up. Continue
to the end of the tunnel where Rose 24 is waiting for you. Retrace your path back to opening and drop down to the walkway below then make your way back to the earlier walkway just before you used the monkey bars.Make a standing jump from the top of the incline to grab the walkway above (3). Turn around and make a running leap to reach the next section of walkway and continue to the top. Now is a good time to save if you haven't been saving regularly all along. Go through the exit and slide down the slope. At the bottom you will spot some ghostly lights and you must now follow them quickly as they will guide you out of this area. If you ignore them or stray too far from their path you will encounter the horrible monster that lives in the maze and ye shall surely die.
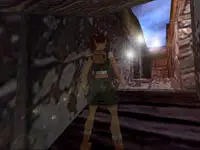 Follow the lights making standing jumps over the various pits when necessary. If you fall into a pit you can use the lower
tunnels to find your way back to the top where the lights will be waiting for you. Continue following the lights until you
reach the tunnel with the slope. Slide down to avoid the monster who quickly moves in as the white lights vanish. At the
bottom you can collect a Medkit then quickly go through the iron maiden and fall down the slope to encounter Father Patrick.
He leads you into the final level of this saga.
Follow the lights making standing jumps over the various pits when necessary. If you fall into a pit you can use the lower
tunnels to find your way back to the top where the lights will be waiting for you. Continue following the lights until you
reach the tunnel with the slope. Slide down to avoid the monster who quickly moves in as the white lights vanish. At the
bottom you can collect a Medkit then quickly go through the iron maiden and fall down the slope to encounter Father Patrick.
He leads you into the final level of this saga.OLD MILL
 Head left through the tunnel until you reach the pit. Jump over the pit then head up the slope and turn right at the junction.
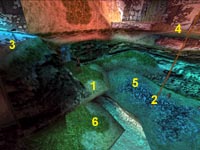 You get a nice view of the area as well as the two Imps who come out to toss rocks at you and finally an unlit torch on a ledge above
your current location (1). Make a running leap toward the rope (2) hanging above the pit then spin to face the ledge with the
torch (3) and start swinging until you can launch toward the platform. Make sure you are at the very bottom of the rope for maximum
arc. Use Sprint to increase your momentum and jump at the just the right time to land and get the Unlit Torch.
You get a nice view of the area as well as the two Imps who come out to toss rocks at you and finally an unlit torch on a ledge above
your current location (1). Make a running leap toward the rope (2) hanging above the pit then spin to face the ledge with the
torch (3) and start swinging until you can launch toward the platform. Make sure you are at the very bottom of the rope for maximum
arc. Use Sprint to increase your momentum and jump at the just the right time to land and get the Unlit Torch.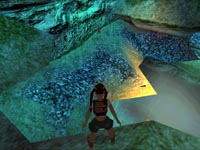 Head back to the beginning of this level and go in the other direction. Make a left at the bottom of the slope and avoid
the bats then light your torch with the one on the wall. Collect the Medkit from around the corner at the end of this
passage then make your way back to the large pit and save your game. Throw your lit torch at the Imps so it lands on the
ledge and scares them away. Jump out and grab the rope then spin to face the gate (4) high above and to the right of where you
entered this area. Swing and jump to this gate then rip one of the bars off to make a Crowbar.
Head back to the beginning of this level and go in the other direction. Make a left at the bottom of the slope and avoid
the bats then light your torch with the one on the wall. Collect the Medkit from around the corner at the end of this
passage then make your way back to the large pit and save your game. Throw your lit torch at the Imps so it lands on the
ledge and scares them away. Jump out and grab the rope then spin to face the gate (4) high above and to the right of where you
entered this area. Swing and jump to this gate then rip one of the bars off to make a Crowbar.Hang off the stone ledge and drop to the ledge below and then jump over to the ledge where you threw the burning torch. Crawl into the Imp cave (5) and follow the tunnel to Rose 25 at the end before returning to the ledge outside. Jump over to the next ledge (6) then one more jump up to the ledge (1) where you began.
Jump back to the rope and make a decision on how to proceed. You can try to swing directly over to the crawlspace to your left, but this jump is nearly impossible to make. I recommend going for the sloped pillars across the way and you can even pick up a spare medkit along the way. Swing to the opposite platform and drop down to enter the tunnel and get the Medkit. Climb back up to the flat ledge and survey the arrangement of pillars and the crawlspace you need to end up in behind you to your left. You may want to save now. Climb the short lip (1) and as you slide down jump to the next pillar (2). As you slide down again jump at the end to land on the next pillar (3). As you jump from this pillar press left and grab to angle toward the middle of the pillar and grab on. Almost there. Pull up and as you slide down jump once more to the next pillar (not shown) and make one final jump to the crawlspace. Angle this final jump to the left and grab as you hit.
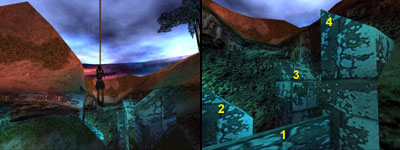
Pull up and crawl through the low gap and around the corner to the left. When the path gets too narrow you will have to back off and shimmy to the left and pull up into the final crawlspace to continue. Drop down into the other area and get the Medkit on the floor and some Chalk that can be pried from the far wall using your crowbar.
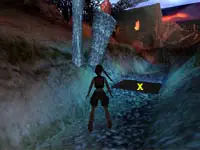 Now retrace your path back to the beginning of this entire level and locate the smooth section of ground (x) just outside the
tunnel and to the left. Use the Chalk to draw a symbol on the floor and trigger a very exciting movie. Enter the nearby opening and slide
down the slope to start another movie. After you get your orders from the demon head across the water and between the two buildings and follow
the water. Jump over the fast moving stream and continue toward the windmill.
Now retrace your path back to the beginning of this entire level and locate the smooth section of ground (x) just outside the
tunnel and to the left. Use the Chalk to draw a symbol on the floor and trigger a very exciting movie. Enter the nearby opening and slide
down the slope to start another movie. After you get your orders from the demon head across the water and between the two buildings and follow
the water. Jump over the fast moving stream and continue toward the windmill.Locate the second cave to the left as you exit the passage. Bats will flutter out forcing you to run around until they leave. Enter the cave and crawl through the gap to find a Medkit. The passage ahead bursts into flames and you have no choice but to "face the heat". Use a medkit to get your health to full power then run through the fire and dive into the water to put yourself out. Climb back into the passage and collect Rose 26 then dive back into the water and find the safer route out of this area.
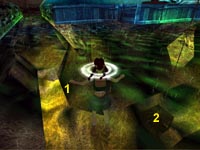 Dive into the water near the mill and head toward the left channel. Take a deep breath and dive down toward
the gold light and turn right going through the hole (1) in the bottom. Watch the red water demon swimming around and learn
his pattern. When he swims off to the right you can dash forward and get the Coin. If the demon
catches you there will be a struggle that uses much of your air. The current will force you out a small opening so you can
resurface and breath before trying again. Once you have the coin quickly swim to the cage (2) located at the front of
the mill with the demon in hot pursuit. Use the Coin on the cage to trigger the movie where the Imps get their revenge on this demon.
Dive into the water near the mill and head toward the left channel. Take a deep breath and dive down toward
the gold light and turn right going through the hole (1) in the bottom. Watch the red water demon swimming around and learn
his pattern. When he swims off to the right you can dash forward and get the Coin. If the demon
catches you there will be a struggle that uses much of your air. The current will force you out a small opening so you can
resurface and breath before trying again. Once you have the coin quickly swim to the cage (2) located at the front of
the mill with the demon in hot pursuit. Use the Coin on the cage to trigger the movie where the Imps get their revenge on this demon.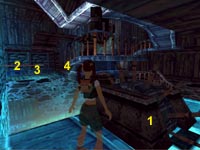 Return to where you found the coin and locate the underwater entrance to the mill. Once inside find and pull the crank (1)
five times to open the door then run to the end of the ledge and make a running leap and grab to catch hold of the bar (2).
Swing around and release at the right time to launch and land on the opposite ledge (3). Jump onto the next platform (4) off to
the right of your current position then crawl through the gap under the metal door before it shuts. Tumble and run around to
dodge more bats then face the steep slope but don't slide down. Jump to grab the ledge above and pull up then turn to
face the switch on the wall. Jump over and pull the switch to shutdown the windmill.
Return to where you found the coin and locate the underwater entrance to the mill. Once inside find and pull the crank (1)
five times to open the door then run to the end of the ledge and make a running leap and grab to catch hold of the bar (2).
Swing around and release at the right time to launch and land on the opposite ledge (3). Jump onto the next platform (4) off to
the right of your current position then crawl through the gap under the metal door before it shuts. Tumble and run around to
dodge more bats then face the steep slope but don't slide down. Jump to grab the ledge above and pull up then turn to
face the switch on the wall. Jump over and pull the switch to shutdown the windmill.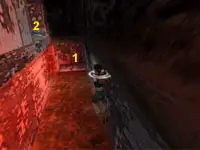 You can now leave the mill through the hatch that you saw open during the movie. Retrace your path back to the horseman's
house and locate the red water to the left of the building. Jump in and swim into the tunnel (1) that goes around to the back of
the house. You should spot a small hole on the left you can swim through to locate Rose 27.
Return to the main channel just past the detour to the previous rose and locate the opening (2) above to the left.
Climb up and crawl through this passage until you can stand.
You can now leave the mill through the hatch that you saw open during the movie. Retrace your path back to the horseman's
house and locate the red water to the left of the building. Jump in and swim into the tunnel (1) that goes around to the back of
the house. You should spot a small hole on the left you can swim through to locate Rose 27.
Return to the main channel just past the detour to the previous rose and locate the opening (2) above to the left.
Climb up and crawl through this passage until you can stand. Locate the ledge above and pull up to face the buildings. Make a running jump to the stone ledge (1) then make a running
jump to the first window (2) on the roof of the horseman's house. Next jump to the flat area (3) near the flat area above the door
followed by a running jump to land near the next window (4). If you miss any of these flat areas you will slide off the roof and
have to start the sequence over. Now comes a very tricky running leap to the high ledge (5) on the next building. This is
a very unpredictable leap. Sometimes you will make it and other times you will miss the exact same jump. Just keep trying until
you make it. Once you do make it to the roof you then need to crouch and tumble forward through the window. Note: You
cannot crawl forward through this window, but you can crawl backwards into the window and drop down. Flip the lever on the
wall to shutdown the waterwheel and start the final movie for this chapter.
Locate the ledge above and pull up to face the buildings. Make a running jump to the stone ledge (1) then make a running
jump to the first window (2) on the roof of the horseman's house. Next jump to the flat area (3) near the flat area above the door
followed by a running jump to land near the next window (4). If you miss any of these flat areas you will slide off the roof and
have to start the sequence over. Now comes a very tricky running leap to the high ledge (5) on the next building. This is
a very unpredictable leap. Sometimes you will make it and other times you will miss the exact same jump. Just keep trying until
you make it. Once you do make it to the roof you then need to crouch and tumble forward through the window. Note: You
cannot crawl forward through this window, but you can crawl backwards into the window and drop down. Flip the lever on the
wall to shutdown the waterwheel and start the final movie for this chapter.13th FLOOR
This final chapter is one of the hardest and introduces some new stealth tactics that we have never seen before. Your objective is to obtain a powerful object known as the Iris. Naturally this item is heavily guarded by all sorts of soldiers and advanced security systems. You do have the assistance of a computer hacker named Zip who will help guide you through this area. Good luck!
 Talk to Zip as you proceed down the first hall then go left and shoot off the vent cover to the right. Start crawling through the vent
and watch the movie that plays. Note the gold rose on the floor. Continue to the end of the shaft and turn right staying crouched to
avoid the laser moving above you. Get the Medkit then turn and approach the hole in the bottom of the shaft. Lasers protect this
opening so watch the laser moving overhead and when it goes past quickly stand and jump over the hole then crouch again and continue
forward to the safe area.
Talk to Zip as you proceed down the first hall then go left and shoot off the vent cover to the right. Start crawling through the vent
and watch the movie that plays. Note the gold rose on the floor. Continue to the end of the shaft and turn right staying crouched to
avoid the laser moving above you. Get the Medkit then turn and approach the hole in the bottom of the shaft. Lasers protect this
opening so watch the laser moving overhead and when it goes past quickly stand and jump over the hole then crouch again and continue
forward to the safe area.You now have a choice. You can go right and explore the dark room to get some items that will make things much easier later on, but doing this will activate additional lasers back where you began this level. You can choose just to go left to get the secret if you wish. The next paragraph explains how to do both.
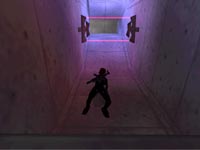 Go through the vent on the right and drop down into the dark room and get the Medkit, Hammer, and
some ammo for the HK from the shelves. Climb back in the vent and go back right to shoot off another vent cover to access a
new shaft. Drop into the new tunnel and immediately crouch to avoid the moving lasers. Wait for the laser to move behind you
before standings and making a run for the opening at the end of this passage. Crouch and crawl around the corner and through
the hatch to get Rose 28. Now retrace your route back to the beginning of this level. If you
aren't collecting secrets and don't want the hammer then you can skip the previous two paragraphs and avoid the new set of lasers
that are now here.
Go through the vent on the right and drop down into the dark room and get the Medkit, Hammer, and
some ammo for the HK from the shelves. Climb back in the vent and go back right to shoot off another vent cover to access a
new shaft. Drop into the new tunnel and immediately crouch to avoid the moving lasers. Wait for the laser to move behind you
before standings and making a run for the opening at the end of this passage. Crouch and crawl around the corner and through
the hatch to get Rose 28. Now retrace your route back to the beginning of this level. If you
aren't collecting secrets and don't want the hammer then you can skip the previous two paragraphs and avoid the new set of lasers
that are now here.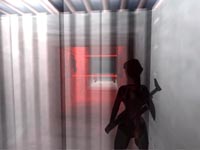 Security lasers are now protecting the hall where you first started this level. Watch their movement and learn the pattern.
When the top lasers start to move away from you run after it and quickly jump over the bottom lasers that are approaching.
Crouch and crawl to the end of the passage. Now wait for the top laser to come and go then stand and climb the ladder leading
up to the next vent. Move forward until a movie plays showing you the Iris.
Security lasers are now protecting the hall where you first started this level. Watch their movement and learn the pattern.
When the top lasers start to move away from you run after it and quickly jump over the bottom lasers that are approaching.
Crouch and crawl to the end of the passage. Now wait for the top laser to come and go then stand and climb the ladder leading
up to the next vent. Move forward until a movie plays showing you the Iris.Follow the passage and collect some more ammo for the HK to as you round the corner to the right then continue walking down the next passage to keep quiet. After a brief movie showing the huge guard below you will need to approach the locked door and use the Hammer on it. If you opted not to get the hammer earlier then you have a dangerous battle ahead of you, so you may want to save now before reading the next section, otherwise skip over the next paragraph.
Since you don't have the hammer you must target the lock on the door and shoot it off with your HK. The floor under you will collapse and send you sliding into the room below with the armored guard. You now have 2-3 seconds to target and snipe this guard in the head. If you miss or hit him anywhere else you are dead. His laser weapon kills you in a single blast. After you have killed this guard you can climb into the ventilation shaft and locate a broken grate. Drop into this shaft and hang on while several explosions rock this area. After the second explosion you can drop and run to the end of the passage where you will find a ladder leading to the room above.
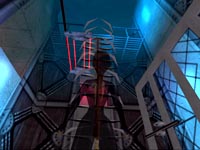 Regardless of how you got here, you are now in a tall room with a ladder leading up and another security laser moving back and
forth. Time your climb to avoid contact by sticking to one side of the ladder and starting your climb as the laser moves off in
the opposite direction. Look left at the top and shoot the shaft cover then climb into it. Continue to the left and get more
HK ammo then continue to the end of the vent making sure to walk to avoid making unnecessary noise. You should be able to
spot the guard without being seen. A quick headshot using your scope will silence him. If you miss you are pretty much dead as
he will activate a turret that will tear you to shreds. You may want to save before attempting the headshot.
Regardless of how you got here, you are now in a tall room with a ladder leading up and another security laser moving back and
forth. Time your climb to avoid contact by sticking to one side of the ladder and starting your climb as the laser moves off in
the opposite direction. Look left at the top and shoot the shaft cover then climb into it. Continue to the left and get more
HK ammo then continue to the end of the vent making sure to walk to avoid making unnecessary noise. You should be able to
spot the guard without being seen. A quick headshot using your scope will silence him. If you miss you are pretty much dead as
he will activate a turret that will tear you to shreds. You may want to save before attempting the headshot.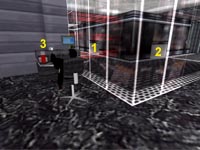 Drop into the hall below. Big red beams block your path so target the damaged vent cover (1). Crawl through until you can stand
then draw your weapons and target the second vent cover (2). Exit into the hall on the other side of the red beams and listen
to Zip who gives you a clue about the sleeping guard ahead. Keep quiet as you sneak around the glass wall and get the
High Level Access Card from the desk (3). Use this card to enter the nearby supply room behind the
guard. A quick search of the shelves will get you a Medkit and some HK ammo.
Drop into the hall below. Big red beams block your path so target the damaged vent cover (1). Crawl through until you can stand
then draw your weapons and target the second vent cover (2). Exit into the hall on the other side of the red beams and listen
to Zip who gives you a clue about the sleeping guard ahead. Keep quiet as you sneak around the glass wall and get the
High Level Access Card from the desk (3). Use this card to enter the nearby supply room behind the
guard. A quick search of the shelves will get you a Medkit and some HK ammo.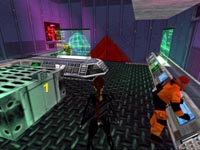 Return to the main passage and head for the elevator and press the button to use it. Enter and use the panel to reach the
16th floor where a pair of guards can be overheard talking to your right as you exit. Crouch down and crawl toward the
triangular door to the left and use your new access card to enter. There are two lab technicians inside who won't bother
you if you don't bother them (don't draw your weapon). Locate the switch on the central table (1) and press it before quietly
leaving this room.
Return to the main passage and head for the elevator and press the button to use it. Enter and use the panel to reach the
16th floor where a pair of guards can be overheard talking to your right as you exit. Crouch down and crawl toward the
triangular door to the left and use your new access card to enter. There are two lab technicians inside who won't bother
you if you don't bother them (don't draw your weapon). Locate the switch on the central table (1) and press it before quietly
leaving this room.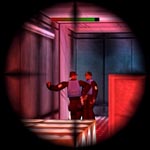 Those guards are still talking down by the crates. Use some sharp shooting skills to take them out from a distance. After you drop
the first one you will have a few moments before the other guard reacts. Aim and shoot quickly then head to that end and stop at
the corner leading to a right turn. Peek around the corner and wait for the guard to walk away then drop him with a headshot.
Continue toward the Iris which can be seen through the metal cage and head through the unlocked door on the opposite side of this room.
Those guards are still talking down by the crates. Use some sharp shooting skills to take them out from a distance. After you drop
the first one you will have a few moments before the other guard reacts. Aim and shoot quickly then head to that end and stop at
the corner leading to a right turn. Peek around the corner and wait for the guard to walk away then drop him with a headshot.
Continue toward the Iris which can be seen through the metal cage and head through the unlocked door on the opposite side of this room.Keep your weapon holstered in this next room and ignore the man in the radiation suit - he just works here. Press the switch to the right of this man to release a radiation suit from its compartment. You aren't after the suit, but rather the Access Code Disc that drops out with the suit. Take the disc and return to the elevator back where you first entered this area.
 Return to the main floor and creep past the still-sleeping guard. The red beams are gone now so you can use the main passage.
Go around the corner to the computer terminal (1) and use the disc to open the vent to your right. Climb into this hatch (2) and locate
the pole on the right going down to a lower level. Watch and learn the sequence of explosions that run from the top to bottom
of this shaft. About halfway down this shaft is a secret area. Slide down and back flip into this secret nook and get
Rose 29. Time the explosions once more before grabbing the pole and sliding to the bottom or just drop
to the bottom for minimal damage.
Return to the main floor and creep past the still-sleeping guard. The red beams are gone now so you can use the main passage.
Go around the corner to the computer terminal (1) and use the disc to open the vent to your right. Climb into this hatch (2) and locate
the pole on the right going down to a lower level. Watch and learn the sequence of explosions that run from the top to bottom
of this shaft. About halfway down this shaft is a secret area. Slide down and back flip into this secret nook and get
Rose 29. Time the explosions once more before grabbing the pole and sliding to the bottom or just drop
to the bottom for minimal damage.Crouch to continue through the low opening and you will reach a walkway overlooking a large room. Below is a door being guarded by one of those armored troopers. Move quietly across the walkway until you reach the hall leading to a room with some shelves. Search these shelves for a Medkit and a Cloth. Head to the next walkway and quietly make your way down to the lower area.
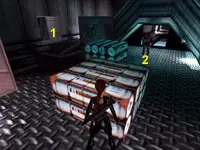 Locate the door (1) not being guarded and sneak over to it. Use the access card to get inside and search the cabinet to get some
Chloroform that you can combine with the cloth for a nice stealth weapon. Grab the Medkit while you're
here. The second cabinet contains more Chloroform and another Medkit but if you take these items one of the glass tanks holding
the insects will shatter and you will take some damage. You can easily finish this level without these two additional items,
so only risk the radioactive roaches if you are after a perfect item score.
Locate the door (1) not being guarded and sneak over to it. Use the access card to get inside and search the cabinet to get some
Chloroform that you can combine with the cloth for a nice stealth weapon. Grab the Medkit while you're
here. The second cabinet contains more Chloroform and another Medkit but if you take these items one of the glass tanks holding
the insects will shatter and you will take some damage. You can easily finish this level without these two additional items,
so only risk the radioactive roaches if you are after a perfect item score.Return to the large room and cautiously sneak up to the trooper (2). When you are behind him use the Chloroform-soaked cloth to put this guy to sleep. If he detects you he will spin around and you can still shoot him but the gunfire will attract another trooper that you must also kill with a headshot and you won't have the element of surprise. When the guard(s) have been eliminated use the access card to open the door and enter.
Follow this passage and the door slams shut behind you just as another trooper charges from the door ahead. Quickly target and take him out with a headshot before he fires his deadly laser. Grab the HK ammo behind you then search his body for an Iris Lab Access Disc. Locate the computer terminal around the corner and use the new access disc to open the door to the next guarded area.
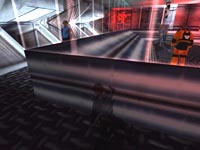 You can sneak past the guard ahead by crawling into the second opening on the left and hiding. This is highly recommended for
if you do decide to shoot him you will also have to deal with a gun turret mounted to the ceiling which can prove quite deadly.
Wait for him to go past your hiding place then quickly crawl around the corner into the next room. You will find a scientist
hard at work and Zip calls to tell you NOT to kill him. Unfortunately for the scientist you are forced to kill him if you want
the final secret for this level. Don't move too close to him or the movie will trigger and you will miss the last secret.
You can sneak past the guard ahead by crawling into the second opening on the left and hiding. This is highly recommended for
if you do decide to shoot him you will also have to deal with a gun turret mounted to the ceiling which can prove quite deadly.
Wait for him to go past your hiding place then quickly crawl around the corner into the next room. You will find a scientist
hard at work and Zip calls to tell you NOT to kill him. Unfortunately for the scientist you are forced to kill him if you want
the final secret for this level. Don't move too close to him or the movie will trigger and you will miss the last secret.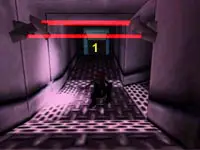 Shooting the scientist triggers a door to open back near the computer terminal and several guards come to investigate. Let them
come around the corner and you can easily kill them one at a time with a headshot. After you have killed the third guard sprint
past the turret and head for the door where the guards came from and kill the remaining two guards in this next passage. Crouch
and move into the junction and go left to get Rose 30. Now face the other way and wait for the lasers
to pass before running into the next stairwell (1).
Shooting the scientist triggers a door to open back near the computer terminal and several guards come to investigate. Let them
come around the corner and you can easily kill them one at a time with a headshot. After you have killed the third guard sprint
past the turret and head for the door where the guards came from and kill the remaining two guards in this next passage. Crouch
and move into the junction and go left to get Rose 30. Now face the other way and wait for the lasers
to pass before running into the next stairwell (1).If you had listened to Zip and spared the scientist's life he would have helped you open the door to get to this area. Oh well - roses aren't cheap! Head up the stairs until you reach the door at the top leading to the Iris control room. Enter and pull the switch on the wall to turn off the security force field. It only stays off for a few moments so quickly make your way back down to the bottom and enter the Iris room to get the Iris before it comes back on. Head through the opposite door and run down the long hall to exit this level.
ESCAPE WITH THE IRIS
 Continue around the corner and enter the next room where you will stop to talk to Zip. He tells you to drop all your weapons
in the tray so you can pass through the X-ray scanner. You MUST do this. Go through the scanner and skip the first box with the
bomb in it and get the Medkit from the second box. Head into the next hall and turn left. Continue forward and go right then
enter the first door that leads to an office.
Continue around the corner and enter the next room where you will stop to talk to Zip. He tells you to drop all your weapons
in the tray so you can pass through the X-ray scanner. You MUST do this. Go through the scanner and skip the first box with the
bomb in it and get the Medkit from the second box. Head into the next hall and turn left. Continue forward and go right then
enter the first door that leads to an office. Search the cabinet and get some Chloroform, then leave the office and go right to trigger a movie
showing a guard up ahead. Quietly walk into the next office on the right and search the drawer to find a
Cloth. Return to the hall and sneak into the final office behind the guard and search the drawers for
a Medkit. Combine your cloth and Chloroform then sneak back into the hall and put this guy to sleep. Enter the next office
and get another bottle of Chloroform from the cabinet then head to the third office and search the
drawers to find the Restroom Access Card.
Search the cabinet and get some Chloroform, then leave the office and go right to trigger a movie
showing a guard up ahead. Quietly walk into the next office on the right and search the drawer to find a
Cloth. Return to the hall and sneak into the final office behind the guard and search the drawers for
a Medkit. Combine your cloth and Chloroform then sneak back into the hall and put this guy to sleep. Enter the next office
and get another bottle of Chloroform from the cabinet then head to the third office and search the
drawers to find the Restroom Access Card.Return to the hall and head back to the previous hall where you can easily find the locked door with the keypad next to it. Examine the new access card in your inventory to get the code 8526 then use the keypad to enter this number and press Action once more to confirm the code. Enter the bathroom and kick open the stall door so you can move forward enough to jump up and pull the ceiling hatch open. Climb into the air vent and proceed to the long vertical shaft. Back over the edge and hang then drop and grab then drop once more to safely reach the bottom without taking any damage.
 Enter the lift shaft through the small hole and climb onto the textured wall. You now need to do a reverse back flip so press
Jump followed by Roll followed by Grab to back flip from the wall and grab the chain behind you. It can be hard if you are out
of practice so you may want to save first. Slide down the chain then jump into the alcove to get
Rose 31. Jump back and climb up the chain to the very top of this shaft.
Enter the lift shaft through the small hole and climb onto the textured wall. You now need to do a reverse back flip so press
Jump followed by Roll followed by Grab to back flip from the wall and grab the chain behind you. It can be hard if you are out
of practice so you may want to save first. Slide down the chain then jump into the alcove to get
Rose 31. Jump back and climb up the chain to the very top of this shaft.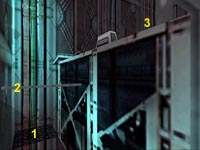 Back flip to the ledge (1) behind you then turn to face the alcove on the opposite wall. Now locate the horizontal bar (2) and take a running
start to jump and swing around it. Time your release so you land in the alcove on the other side. Now line up (see picture) and do a tricky
diagonal jump to the top of the elevator car (3). Steer to the right as you jump and grab then pull up to the top. Cross over to the far elevator car to get the HK ammo. Open the roof hatch and drop into the car then press the button to open the doors.
Back flip to the ledge (1) behind you then turn to face the alcove on the opposite wall. Now locate the horizontal bar (2) and take a running
start to jump and swing around it. Time your release so you land in the alcove on the other side. Now line up (see picture) and do a tricky
diagonal jump to the top of the elevator car (3). Steer to the right as you jump and grab then pull up to the top. Cross over to the far elevator car to get the HK ammo. Open the roof hatch and drop into the car then press the button to open the doors.Quietly sneak out of the elevator and press the button between the two elevators to open the doors on the right. Enter and press the button to ride to the next floor. Three guards are waiting for you on this floor so quickly press the button to try another floor. Stray gunfire damages the elevator and you start to freefall to the ground far below. Quickly press the keypad to activate the emergency brakes and avoid a horrible death.
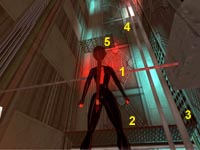 Exit the car through the ceiling hatch and line up with the horizontal bar (1). Make a standing jump to this bar and swing around
releasing it to grab the opposite ledge (2). Pull up to the ledge then climb the textured wall (3) to the right. When you reach the
area where there is a vent (4) to your left you need to back flip to land on the ledge (5) behind you. Now you can make a running leap
to reach the next bar and swing around to launch to the opposite corner ledge. Jump and grab the edge of the vent and pull into it.
You may want to save here.
Exit the car through the ceiling hatch and line up with the horizontal bar (1). Make a standing jump to this bar and swing around
releasing it to grab the opposite ledge (2). Pull up to the ledge then climb the textured wall (3) to the right. When you reach the
area where there is a vent (4) to your left you need to back flip to land on the ledge (5) behind you. Now you can make a running leap
to reach the next bar and swing around to launch to the opposite corner ledge. Jump and grab the edge of the vent and pull into it.
You may want to save here.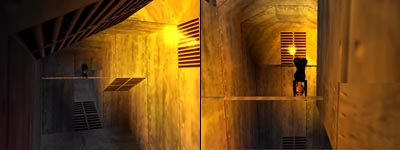
Drop down onto the sloped floor and as soon as you hit the second slope immediately Jump and Grab to reach the bar above rather than slide into the fire below. Wait for the fire to go out then release the bar to launch toward the next bar and grab it. Watch the fire on the far ledge and when it goes out release this bar to land on that ledge then move away from the vent before more flames shoot out. You can reach the opening in the left wall with a standing jump and proceed across the elevator shaft by walking the pole you swung across earlier. Once across this obstacle you can get the bottle of Chloroform then slide down the next shaft where you can spy a guard patrolling the next passage.
There is no way to sneak past this guard, so save your game and crawl through the opening into the hall. Turn right and make a dash for the aquarium at the end of this hall while the guard opens fire shattering the glass. Locate the recessed portion of the floor in the back-right corner the tank and get Rose 32. Exit the tank and head either left or right exit avoiding the gunfire as best you can.
Continue up the metal walkway and you will be given a visual clue that a sniper is targeting you. Circle around to the right and climb the first ladder leading to the ledge above. You are safe for the moment. Now look across the room to the opposite wall and note the location of the fire extinguisher and the button to the left of it. Head for the fire extinguisher and if you time it just right a sniper bullet will hit it causing and explosion revealing a secret area with Rose 33. The easiest way to do this is to run up to the fire extinguisher and pause for just a second then back flip away from the impending explosion. Of course, if you time it wrong, Lara will burst into flames herself, so be prepared to reload and retry a few times to get the final rose for this level.

Continue around the balcony and locate the button on the wall just past the fire extinguisher. It opens the door and also turns off the security lasers back at the main entrance. The sniper is still after you so quickly jump back off the ledge and do a safety drop then run for the passage to avoid more sniper fire. Go down this passage until you reach the step near the end and make a running leap to the raised floor in front of the aquarium. If you step into the lower part of this room you will die. A guard will enter the hall and begin firing. Jump around to dodge his attacks and one of the bullets will shatter the tank and short out the security system.
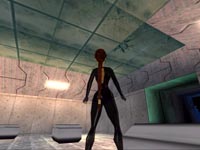 Press the button and a door will open. As you enter Zip will talk to you some more. Walk over to the pair of switches
and flip them both to disable the gun turrets then quickly run down the passage and turn right to go through another door. A
trooper is chasing you so don't waste any time. Continue past the machine and into the storage room with a bunch of booby-trapped boxes. Jump up and grab the hatch to open it then climb into the vent shaft. Now you can crawl around to the other side
of the protective glass and press the button to activate the X-ray scanner. Locate the box with the object inside then crawl
back around to the storage room and locate that same box. Open it and take the Teleporter Disc.
Press the button and a door will open. As you enter Zip will talk to you some more. Walk over to the pair of switches
and flip them both to disable the gun turrets then quickly run down the passage and turn right to go through another door. A
trooper is chasing you so don't waste any time. Continue past the machine and into the storage room with a bunch of booby-trapped boxes. Jump up and grab the hatch to open it then climb into the vent shaft. Now you can crawl around to the other side
of the protective glass and press the button to activate the X-ray scanner. Locate the box with the object inside then crawl
back around to the storage room and locate that same box. Open it and take the Teleporter Disc. Now go back into the next room and locate the green console where you can use this disc. Climb up to the central area with the
big "X" and use the Iris in the receptacle to transport Lara to another room. Quickly drop into the tunnel and continue until
you hear from Zip. Using the zoom capabilities of your headset, watch the combination the guard uses to open the door to the
security room. If you missed it the code is 1672.
Now go back into the next room and locate the green console where you can use this disc. Climb up to the central area with the
big "X" and use the Iris in the receptacle to transport Lara to another room. Quickly drop into the tunnel and continue until
you hear from Zip. Using the zoom capabilities of your headset, watch the combination the guard uses to open the door to the
security room. If you missed it the code is 1672.When the guard leaves you can run up to the keypad and enter the code. Duck inside before he spots you. Inside is the switch (1) to disable the security system. Flip it then crawl into the vent system (2) and follow the shaft as it leads back to the first area where you gave up your HK weapon so you could get past the X-ray scanner.
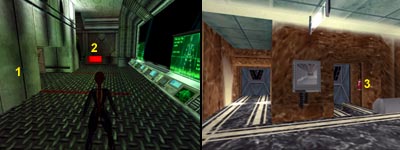
Now that the scanner is off you can take your HK and go back through the scanner. Cut through the lounge to reach the hall and turn left. Go to the end and locate the locked door on the right. Shoot the fire extinguisher (3) to blast open the door then go through to end this level.
RED ALERT
Before you even start up the stairs target the head of the armored trooper on the landing above and to the right. He plunges to a horrible death. Climb up and jump over to the landing he was on then make a running jump to grab the next platform and pull up. Now head up the stairs and turn right and as you start up another set get ready to grab as the stairs collapse and you grab onto what's left. Climb down to the bottom of the stairs (which now form a ladder) and find the alcove n the left which has Rose 34. Now jump back to the stairs and finish your climb to the top.
 Continue forward making a standing jump to the next platform followed by a running leap to land on the one after that. Start
up the next flight of stairs and just as you hear the explosion jump forward to land on the ledge above. You should be able
to find a section of crumbling wall that you can kick down revealing a narrow passage you can crawl through. A camera pans to
show you a guard above when you exit the passage. Stand under the floor above and jump up and grab the handle to pull down the
hatch then climb up and target the guard with your HK and blast away until he's dead.
Continue forward making a standing jump to the next platform followed by a running leap to land on the one after that. Start
up the next flight of stairs and just as you hear the explosion jump forward to land on the ledge above. You should be able
to find a section of crumbling wall that you can kick down revealing a narrow passage you can crawl through. A camera pans to
show you a guard above when you exit the passage. Stand under the floor above and jump up and grab the handle to pull down the
hatch then climb up and target the guard with your HK and blast away until he's dead.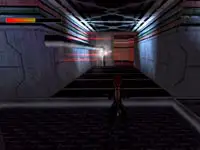 Climb up on the nearby crates to get HK and Grappling ammo then talk with Zip who thinks you should
investigate the next corridor a little more closely. Using the infrared mode of your goggles you easily spot the series of
lasers blocking your way. Watch them to learn the pattern. It goes on-off-on and then off for a longer duration which is when
you make your move. If you would rather not have to keep taking the glasses off each time before advancing you do have the
option to use your scope and shoot the valve at the far end of the passage. This will flood the corridor with steam showing
you the approximate location of the beams. Note: This is not as precise as the goggles.
Climb up on the nearby crates to get HK and Grappling ammo then talk with Zip who thinks you should
investigate the next corridor a little more closely. Using the infrared mode of your goggles you easily spot the series of
lasers blocking your way. Watch them to learn the pattern. It goes on-off-on and then off for a longer duration which is when
you make your move. If you would rather not have to keep taking the glasses off each time before advancing you do have the
option to use your scope and shoot the valve at the far end of the passage. This will flood the corridor with steam showing
you the approximate location of the beams. Note: This is not as precise as the goggles.Once you get through this tricky hallway you can climb some boxes around the corner and get the Medkit from the top. Continue toward the elevator and it will open releasing a guard. Kill him quickly then enter the car and use the panel to go to the next floor. Watch out for another attacker as you exit the elevator. When he is dead you can go through the blue door on the left.
 You are now about to go for another rose, but if you fail the only way to try again is to reload your game so save now.
Take the HK ammo and press the button to start the shooting range target practice. Your goal is to shoot every target before it
reaches the first white line. If even one gets past you may as well reload unless you aren't going for secrets. When you
successfully complete the first target shoot another gallery opens to the right of this door. Enter and take more HK ammo
and save again before repeating the same exercise. This one is a bit harder and poison gas spills into the room when you
are done. Quickly head up the ramp and into the armory on the left where you can collect a Medkit, HK ammo, and
Rose 35. Note: This armory is only unlocked if you successfully complete both shooting exercises.
You are now about to go for another rose, but if you fail the only way to try again is to reload your game so save now.
Take the HK ammo and press the button to start the shooting range target practice. Your goal is to shoot every target before it
reaches the first white line. If even one gets past you may as well reload unless you aren't going for secrets. When you
successfully complete the first target shoot another gallery opens to the right of this door. Enter and take more HK ammo
and save again before repeating the same exercise. This one is a bit harder and poison gas spills into the room when you
are done. Quickly head up the ramp and into the armory on the left where you can collect a Medkit, HK ammo, and
Rose 35. Note: This armory is only unlocked if you successfully complete both shooting exercises.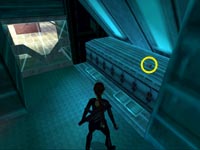 Now enter the right armory and get more HK ammo and the Grappling Gun from the weapon rack. Kill
the guard who shows up then approach the door to the next area. Search this area carefully for the Grappling Gun ammo on the
ledge to the right then enter the next large room. Walk toward the crates in the left corner with your weapon drawn and when
the guard peeks out blast him. Now use your Grappling Gun and aim for the vent in the ceiling. The target will turn green
when you are aimed correctly. Jump up to the highest box and get the HK ammo from the top.
Now enter the right armory and get more HK ammo and the Grappling Gun from the weapon rack. Kill
the guard who shows up then approach the door to the next area. Search this area carefully for the Grappling Gun ammo on the
ledge to the right then enter the next large room. Walk toward the crates in the left corner with your weapon drawn and when
the guard peeks out blast him. Now use your Grappling Gun and aim for the vent in the ceiling. The target will turn green
when you are aimed correctly. Jump up to the highest box and get the HK ammo from the top.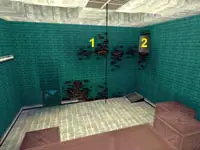 Make a running leap to grab the rope then swing back and forth until you can launch toward the opposite wall and grab onto the
damaged section of wall. Shimmy along the damaged area until you can pull up into the opening. Save your game before sliding
down to the next passage where a pair of Armored Troopers are already on their way. Duck into the entrance on your left and
use your HK to take them out with headshots as they appear around the corner. Continue forward and ride the elevator back up.
Take out another guard hiding behind some crates near the lasers.
Make a running leap to grab the rope then swing back and forth until you can launch toward the opposite wall and grab onto the
damaged section of wall. Shimmy along the damaged area until you can pull up into the opening. Save your game before sliding
down to the next passage where a pair of Armored Troopers are already on their way. Duck into the entrance on your left and
use your HK to take them out with headshots as they appear around the corner. Continue forward and ride the elevator back up.
Take out another guard hiding behind some crates near the lasers. Make your way back through the lasers and then drop through the floor hatch and head back to the stairs outside. Use the
Grappling Gun on the stairs above (1) to attach a rope then jump to the rope and swing to the opening (2) on the other side. As soon as
you release the rope and land in on the ramp jump again to grab the next ledge above the burning fire. Crouch and roll forward to the
right to drop down on a crate then jump to the next crate and use your HK to snipe the guard below. Don't miss or he will activate
a ceiling turret and you will die.
Make your way back through the lasers and then drop through the floor hatch and head back to the stairs outside. Use the
Grappling Gun on the stairs above (1) to attach a rope then jump to the rope and swing to the opening (2) on the other side. As soon as
you release the rope and land in on the ramp jump again to grab the next ledge above the burning fire. Crouch and roll forward to the
right to drop down on a crate then jump to the next crate and use your HK to snipe the guard below. Don't miss or he will activate
a ceiling turret and you will die.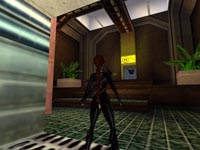 Climb down the crates and pull the switch to open the door then grab the Medkit and go through. Head to the elevator and press the
button to call it. Ride to the next floor and save your game. A pair of guards drop down through the ceiling and open fire.
Kill them swiftly to avoid lots of damage. Make a note of the door with the triangle-shaped lock. This is the FINAL EXIT for the
entire game. Locate the talk stack of boxes with the hatch above them then run and jump to the rope that will allow you to swing
to the top of these boxes. Jump and grab to open the hatch revealing a sniper. To make things worse another guard appears below.
Kill them both then enter the new tunnel.
Climb down the crates and pull the switch to open the door then grab the Medkit and go through. Head to the elevator and press the
button to call it. Ride to the next floor and save your game. A pair of guards drop down through the ceiling and open fire.
Kill them swiftly to avoid lots of damage. Make a note of the door with the triangle-shaped lock. This is the FINAL EXIT for the
entire game. Locate the talk stack of boxes with the hatch above them then run and jump to the rope that will allow you to swing
to the top of these boxes. Jump and grab to open the hatch revealing a sniper. To make things worse another guard appears below.
Kill them both then enter the new tunnel. Continue forward toward the switch and a trapdoor opens sending you into a tunnel below. Head toward the opening in the floor with
the ladder leading up and drop down. Remember this ladder - it's your final escape route later on. Drop down and follow
the path that isn't guarded by lasers (forward - right - right) to reach a low crawlspace then crawl through. Climb up into the
upper vent and head to the end where the cover opens automatically. Drop down onto the crate to the right and collect some more
HK ammo and save your game. This HK ammo will continue to reappear if you run out.
Continue forward toward the switch and a trapdoor opens sending you into a tunnel below. Head toward the opening in the floor with
the ladder leading up and drop down. Remember this ladder - it's your final escape route later on. Drop down and follow
the path that isn't guarded by lasers (forward - right - right) to reach a low crawlspace then crawl through. Climb up into the
upper vent and head to the end where the cover opens automatically. Drop down onto the crate to the right and collect some more
HK ammo and save your game. This HK ammo will continue to reappear if you run out. WARNING! DO NOT SAVE/RESTORE YOUR GAME at anytime while in this room or you will trigger a bug that prevents you from completing the
game.
WARNING! DO NOT SAVE/RESTORE YOUR GAME at anytime while in this room or you will trigger a bug that prevents you from completing the
game.A Cyborg is circling your crate and he is very difficult to beat. Your weapons are not powerful enough to kill him so look around the room and locate the valve. Drop to the floor and shoot at the Cyborg while evading his attacks. Take careful aim as you must hit him many times. You can run around the room or snipe at him from the top of the crate. Pretty soon his endoskeleton will start to show and after a few more shots he will start to spark. Now target that red valve wheel under the vent you dropped out of to flood the room with water. The electrical damage combine with the water on the floor destroys this menace but it also electrifies the water preventing you from walking on the floor.
 You now need to get to the upper walkway. Here is the best hint in this entire walkthrough. Rather than jumping to all those crazy
sloped vents to get to the top simply position yourself on the right edge of the box (1) and jump toward the far side of the vent where you
entered this room. Don't press grab. As soon as you start the jump angle hard to the left and you will land on the metal ledge
behind this vent. Get the Grappling Gun ammo then climb to the top of the vent and use the Grappling Gun on the ceiling. Use the rope
to swing across to the opposite opening and press the button to drain the water from the floor.
You now need to get to the upper walkway. Here is the best hint in this entire walkthrough. Rather than jumping to all those crazy
sloped vents to get to the top simply position yourself on the right edge of the box (1) and jump toward the far side of the vent where you
entered this room. Don't press grab. As soon as you start the jump angle hard to the left and you will land on the metal ledge
behind this vent. Get the Grappling Gun ammo then climb to the top of the vent and use the Grappling Gun on the ceiling. Use the rope
to swing across to the opposite opening and press the button to drain the water from the floor. Swing back to the vent and make your way down to the floor and get the Medkit and the Key Bit from the Cyborg.
Draining the water has sealed the vent shaft so get back on the box and repeat the curved jump to the left so you can swing back and
press the switch again to open the vent. This also replaces the water on the floor so don't step in it. Swing back to the vent then
hang from the front edge and drop to grab and pull up into the shaft. Enter the vent and go through until you reach the passage that
is no longer protected by lasers. Another tough encounter lies ahead so save your game.
Swing back to the vent and make your way down to the floor and get the Medkit and the Key Bit from the Cyborg.
Draining the water has sealed the vent shaft so get back on the box and repeat the curved jump to the left so you can swing back and
press the switch again to open the vent. This also replaces the water on the floor so don't step in it. Swing back to the vent then
hang from the front edge and drop to grab and pull up into the shaft. Enter the vent and go through until you reach the passage that
is no longer protected by lasers. Another tough encounter lies ahead so save your game. A helicopter is firing a very deadly chain gun at you as you sprint down this passage. Stray bullets explode the canisters knocking
large chunks of the floor away. Keep your distance from these blasts and jump the pits. As you start down the long hall make a note
of the door to the left as you pass. This is where you will be returning to in a moment. When you reach the lounge at the other end
of this long hall go around the corner to the left and enter the bar. No time for a drink. The helicopter opens fire so take cover
behind the bar and make your way to the end where you find a button you can press to open a door. The door seems broke but another
door has also opened back in the previous corridor so make a dash back to that hall. When go back through the lounge you will smack
into another Cyborg. Run past him quickly.
A helicopter is firing a very deadly chain gun at you as you sprint down this passage. Stray bullets explode the canisters knocking
large chunks of the floor away. Keep your distance from these blasts and jump the pits. As you start down the long hall make a note
of the door to the left as you pass. This is where you will be returning to in a moment. When you reach the lounge at the other end
of this long hall go around the corner to the left and enter the bar. No time for a drink. The helicopter opens fire so take cover
behind the bar and make your way to the end where you find a button you can press to open a door. The door seems broke but another
door has also opened back in the previous corridor so make a dash back to that hall. When go back through the lounge you will smack
into another Cyborg. Run past him quickly.WARNING! DO NOT SAVE/RESTORE YOUR GAME after pressing this button until AFTER you have trapped the Cyborg (see next paragraph) or you will trigger a bug that prevents you from completing the game.
 Several new holes have been blasted into the floor. Some even contain Medkits but unless you fall in on accident it's not worth the
effort to go for these on purpose. Jump these holes and dodge the helicopter gunfire. The Cyborg is in hot pursuit so try not to
miss any jumps. The original entrance is now blocked with lasers so turn right and SPRINT down the new passage. You will come to a grate
showing a room with a switch below. Quickly go to the end then go left, left, and left a third time to reach that small room. If your
timing was perfect (and you didn't save any new games) you should be able to see the Cyborg overhead on the grate. Flip the switch to
seal him in the room at the end of the hall. If for any reason the Cyborg doesn't get locked in you will need to reload and try again.
If you do trap him then you may now save, but I still recommend using a different slot.
Several new holes have been blasted into the floor. Some even contain Medkits but unless you fall in on accident it's not worth the
effort to go for these on purpose. Jump these holes and dodge the helicopter gunfire. The Cyborg is in hot pursuit so try not to
miss any jumps. The original entrance is now blocked with lasers so turn right and SPRINT down the new passage. You will come to a grate
showing a room with a switch below. Quickly go to the end then go left, left, and left a third time to reach that small room. If your
timing was perfect (and you didn't save any new games) you should be able to see the Cyborg overhead on the grate. Flip the switch to
seal him in the room at the end of the hall. If for any reason the Cyborg doesn't get locked in you will need to reload and try again.
If you do trap him then you may now save, but I still recommend using a different slot.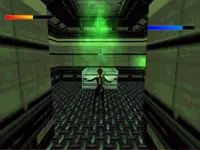 Leave this small room and turn left to follow the passage entering the door on the left at the end. You are now in a room filled
with a green toxic gas. You will hold your breath so you will see your O2 meter. If this is drained you will start losing health
until you die. HINT: Crouch and crawl on the floor to avoid the vapor and refill your O2 meter. Move forward into the next
room then go through the door on the left and jump onto the box to pull a lever. Turn to exit this room and look to the left corner to find
the small crawlspace with Rose 36 - the final secret! Crawling in to get this should also fill your O2 meter.
Leave this small room and turn left to follow the passage entering the door on the left at the end. You are now in a room filled
with a green toxic gas. You will hold your breath so you will see your O2 meter. If this is drained you will start losing health
until you die. HINT: Crouch and crawl on the floor to avoid the vapor and refill your O2 meter. Move forward into the next
room then go through the door on the left and jump onto the box to pull a lever. Turn to exit this room and look to the left corner to find
the small crawlspace with Rose 36 - the final secret! Crawling in to get this should also fill your O2 meter.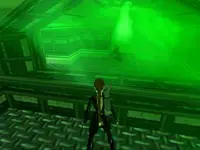 Head back through the door and return to the first room where guards will attack. They have gas masks so don't even try to fight
them. Quickly go to the other door on the right that is now unlocked and enter the room where you can see the Cyborg through a glass wall.
Jump on the box and pull the lever in this room to pump the gas from your area into the Cyborg's room. When he goes down you can pull the
lever again to reverse the airflow. Make your way back to the room where you flipped the switch to trap him in the first place and flip the
switch to open up the doors.
Head back through the door and return to the first room where guards will attack. They have gas masks so don't even try to fight
them. Quickly go to the other door on the right that is now unlocked and enter the room where you can see the Cyborg through a glass wall.
Jump on the box and pull the lever in this room to pump the gas from your area into the Cyborg's room. When he goes down you can pull the
lever again to reverse the airflow. Make your way back to the room where you flipped the switch to trap him in the first place and flip the
switch to open up the doors. You can now enter the room with the Cyborg and get the Key Bit. Combine these two items to create the
Helipad Access Key. Head down the passage toward the helicopter and turn right. The lasers are now off so
enter and turn right then left and jump up to grab and pull into the shaft. Turn and jump to the ladder that I told you to remember
earlier and climb the ladder to reach the large room from earlier. Head to the other side and use the new access card to open the door.
Run through to end this level and the game.
You can now enter the room with the Cyborg and get the Key Bit. Combine these two items to create the
Helipad Access Key. Head down the passage toward the helicopter and turn right. The lasers are now off so
enter and turn right then left and jump up to grab and pull into the shaft. Turn and jump to the ladder that I told you to remember
earlier and climb the ladder to reach the large room from earlier. Head to the other side and use the new access card to open the door.
Run through to end this level and the game.You've completed all four adventures and hopefully found all 36 secrets.
Enjoy the items in the Special Features Menu.
I'll be seeing you for Lara's next adventure in 2001.
 Here are some links to the text above that will assist you in locating the 36 Golden Roses scattered through the various
levels. There are 9 roses in each chapter and finding them all unlocks one of the special features. If you manage to obtain
all three-dozen roses you will unlock ALL the items in the Special Features menu plus earn the respect of Lara and myself. Some
of these roses are hard to find and even harder to get. Good luck!
Here are some links to the text above that will assist you in locating the 36 Golden Roses scattered through the various
levels. There are 9 roses in each chapter and finding them all unlocks one of the special features. If you manage to obtain
all three-dozen roses you will unlock ALL the items in the Special Features menu plus earn the respect of Lara and myself. Some
of these roses are hard to find and even harder to get. Good luck! ROME
| Streets of Rome Secret Rose 1 Secret Rose 2 Secret Rose 3 |
Trajan's Market Secret Rose 4 Secret Rose 5 Secret Rose 6 |
Colloseum Secret Rose 7 Secret Rose 8 Secret Rose 9 |
SPEAR OF DESTINY
| Naval Base Secret Rose 10 Secret Rose 11 Secret Rose 12 |
Submarine Secret Rose 13 Secret Rose 14 Secret Rose 15 |
Deep Sea Dive Secret Rose 16 |
Sinking Submarine Secret Rose 17 Secret Rose 18 |
BLACK ISLE
| Gallows Tree Secret Rose 19 Secret Rose 20 Secret Rose 21 |
Labyrinth Secret Rose 22 Secret Rose 23 Secret Rose 24 |
Old Mill Secret Rose 25 Secret Rose 26 Secret Rose 27 |
VCI HEADQUARTERS
| 13th Floor Secret Rose 28 Secret Rose 29 Secret Rose 30 |
Escape with the Iris Secret Rose 31 Secret Rose 32 Secret Rose 33 |
Red Alert Secret Rose 34 Secret Rose 35 Secret Rose 36 |
CHEATS and CODES
Playstation Cheats
Unlimited ammunition and key level items:
Highlight the large medkit at the inventory screen.
Hold L1 + L2 + R1 + R2 + Down and press
to exit the inventory screen.Note: In the PAL version of the game, highlight the Timex-TMX at the inventory screen.
Hold L1 + L2 + R1 + R2 + Down and press
.Unlimited medkits, ammunition, and flares:
Highlight the small medkit at the inventory screen.
Hold L1 + L2 + R1 + R2 + Up and press
to exit the inventory screen.Note: In the PAL version of the game, highlight the Timex-TMX at the inventory screen.
Hold L1 + L2 + R1 + R2 + Up and press
.Special Features:
Highlight the small medkit at the inventory screen.
Hold L1 + L2 + R1 + R2 + Down +
and press to exit the inventory screen.Quit the current game. A "Special Features" option will be unlocked at the main menu.
Highlight the Timex-TMX at the inventory screen.
Hold L1 + L2 + R1 + R2 + Down +
, press . View FMV sequences:
Press R2 + Select at the main menu.
Black Isle level:
Highlight the "New Game" option at the main menu, then hold Up + L2 and press
.Russian Base level:
Highlight the "New Game" option at the main menu, then hold Up + L1 and press
.Tower Block level:
Highlight the "New Game" option at the main menu, then hold Up + R1 and press
.Dreamcast Cheats
Black Isle level:
Highlight the "New Game" option at the main menu, then hold L + R and press LEFT.
Russian Base level:
Highlight the "New Game" option at the main menu, then hold L + R and press DOWN.
Tower Block level:
Highlight the "New Game" option at the main menu, then hold L + R and press RIGHT.
Unlock Special Features:
Press START anytime during game then highlight the Timex-TMX and press
until Secrets show 36/36.PC Cheats
None Available at this time.
Tomb Raider Chronicles PC Trainer
Run this trainer to setup hotkeys you can press during the game for unlimited ammo, flares, and medkits. You MUST leave the trainer running while playing TRC for it to work.
Note: This only gives you ammo for weapons you have already found or started with.
[Download the Trainer] - 112kb