- DO NOT copy this solve to any other site.
- Please do not email me for hints.
- Click here for the original Tomb Raider 3 Solve.


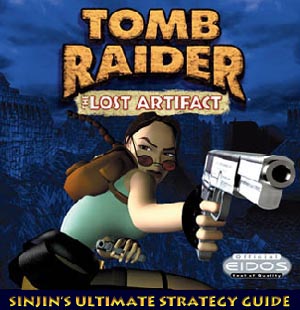
Welcome to Lara's latest adventure. The Lost Artifact is a sequel to the original Tomb Raider 3 game from 1998 that had you searching all over the world for the various artifacts created from the meteor. Apparently you overlooked one of those artifacts and now Lara must explore six new levels in order to recover the final artifact and complete the adventure.
 The Lost Artifact includes the Mansion Training Level that was part of the original Tomb Raider 3 game. I won't be
reprinting the solutions for the various mansion puzzles in this walkthrough. If you need to know what to do at the mansion
then please reference the text found in the original Tomb Raider 3 Solve by clicking the link above.
The Lost Artifact includes the Mansion Training Level that was part of the original Tomb Raider 3 game. I won't be
reprinting the solutions for the various mansion puzzles in this walkthrough. If you need to know what to do at the mansion
then please reference the text found in the original Tomb Raider 3 Solve by clicking the link above.As always, there are plenty of secrets to find. There are three secret areas in each of the first five levels. These secrets are not always objects, but rather hidden areas you must locate. A chime will sound when you discover each of these locations. You can use the handy Secret Area Index at the end of this solve to find any secrets you may have missed.
Remember that this walkthrough is only one way to finish the game. You can explore the various levels however you wish. You will lose much enjoyment of the game if you try to follow this solve word-for-word. Experiment and have fun...
Highland Fling

Use those red vines to climb the wall and drop down on the other side. Head toward the crate and move it under the vines so you can jump up and monkey swing across to the opposite side where your first Medkit rests on a small ledge. Slide down into the water and start swimming with the current until you can surface. Then head toward the wooden dock and get the Harpoons underneath before climbing out. Additional items are scattered around the lake. Feel free to collect them now or later when you return.
 Head past the "Do Not Enter" toward the ramp and locate the small cave to the right. Crouch down and get the Flares then head up
the ramp. A guard will appear and open the gate allowing his huge dog to attack you. Make sure you don't kill the guard before
he opens the gate or you will create a lot of extra work to get the large Medkit. You can kill the dog from here or from the
safety of the doorway to the right. From this ledge the dog cannot reach you and you can target the guard first. When the guard and
dog are both dead you can retrieve the Medkit, Shells, and Flares.
Head past the "Do Not Enter" toward the ramp and locate the small cave to the right. Crouch down and get the Flares then head up
the ramp. A guard will appear and open the gate allowing his huge dog to attack you. Make sure you don't kill the guard before
he opens the gate or you will create a lot of extra work to get the large Medkit. You can kill the dog from here or from the
safety of the doorway to the right. From this ledge the dog cannot reach you and you can target the guard first. When the guard and
dog are both dead you can retrieve the Medkit, Shells, and Flares.Note: If you did kill the guard before he opened the gate you can return to the cave to the right of the ramp and crawl inside to flip the switch opening a trapdoor allowing you access to the Medkit. You will have to fight an extra dog as punishment for your hasty actions. If you are going for the maximum "kill score" then you may want to do it this way on purpose.
Head through the stone entrance and out to the ledge to the right overlooking the water. Follow this ledge until you get a sneak-peek of a guard up ahead. Kill the guard either from here or the bridge and collect the Shells he leaves behind as well as another box on the bridge over to the left. You may be able to spot the Loch Ness Monster in this area. It should be swimming over by the tower. Save your ammo - you can't kill it. Follow the bridge toward the ruins and kill the crow that attacks when you near the dog statues. Search the steam vent and startle the bats. When they have flown away you can collect some Shells from the vent then get ready for a few side-quests to get some new weapons.
Head across the bridge to the right where you can see the dock below. Get next to the dog statue and jump out toward the vine-covered wall and grab on. A crow will appear so quickly backflip to the bridge and kill it then jump back to the vines and climb to the top. You can backflip to the ledge behind you or move left and climb up to the top. Head toward the wall and kill the crow and the guard then locate the vines leading up to the opening above. Climb up to find Secret #1; Shotgun and two boxes of ammo.
Make you way down to the rocks and head toward the area under the bridge. Kill the crow that attacks then slide down to the water and get the small Medkit. Jump back up to the rocks and head toward the tower with the flag. You need to make a tricky running jump from the flat area near the wall and land just past the corner. You will need to curve to the right while you are in the air. Get the Harpoon Gun and the extra harpoons.
 This next part is a bug in the game that you can exploit to get you a pair of Uzi's. It's not always predictable and you may
have to try it several times before you actually get them. Save your game and restore if necessary.
This next part is a bug in the game that you can exploit to get you a pair of Uzi's. It's not always predictable and you may
have to try it several times before you actually get them. Save your game and restore if necessary.Ahead in the darkness you can probably just make out an object - those are the Uzi's! Jump in the water and fight the current as you swim toward the flat surface across the lake. When you swim into the small cove and you reach the exact spot you will exit onto the shore and can collect the Uzi's. Jump back in the water and swim back to the dock and climb out.
Return to the bridge and head to the right where you can see the dock below. Do a running leap from the ledge to the flat green surface on the rocks below then do a standing jump to the next section of rocks and you will slide down to a flat ledge. Jump up to the flat surface above and quickly move forward so you don't slip back. One final jump to the ledge across to the right and you can get the Rocket. Make one last trip back to the bridge and continue on into the ruins.
Head toward the two gates at the end of the bridge near the dog statues. Kill the guard to the right then jump over the gap into his area. Head toward the pool on the right and get more Harpoons and the Crowbar from the water. Climb the steps to the right of the water and flip the switch to open the right gate. This gate is on a timer so quickly run back to the bridge and jump the gap and head through the right gate before it closes.
As you go down the stairs a guard will rush out from behind some crates. Kill him and take his Medkit then head into the next room with the dog statue. Wait for him to open the next gate (also on a timer) before you kill him then run through the gate before it closes. Use the Crowbar to open the wooden door and get Secret #2; MP5 Assault Rifle and extra ammo. Use the small passage to the left of the gate to crawl through and exit this secret area.
Return through the previous room and exit out into the cemetery. Kill the guard that attacks and get his Shells then head to the exit to the right and kill another guard. He drops more Shells and a small Medkit is stashed in the niche to the left of the stairs. You cannot cross the mud so return to the cemetery and take the other exit.
Head to the right and follow the ramp down to the mud. Jump to the top of the pillar to the right of the ramp then do a running leap to the pillar to the right with the purple flowers. Make sure to land on the right half of this pillar or you will slide off. A crow attacks so kill it quickly before it can knock you off your perch. A standing jump will land you on the mossy rock and from there you can jump to the slope on the left and slide down to the flat ledge.
 Enter the mud and start walking toward the opening beneath the Coat of Arms painted on the wall. Keep moving and you will make it
out of the mud before you run out of air. Head to the crawlspace on the left and follow it until you reach the intersection then
turn left. When you can finally stand you will be near some crates. Collect the MP5 and Shotgun ammo and the flares. Then take
the Medkit which animates the two dog statues. The shotgun works best on these creatures. Return to the crawlspace when you have
collected the items and kill the dogs.
Enter the mud and start walking toward the opening beneath the Coat of Arms painted on the wall. Keep moving and you will make it
out of the mud before you run out of air. Head to the crawlspace on the left and follow it until you reach the intersection then
turn left. When you can finally stand you will be near some crates. Collect the MP5 and Shotgun ammo and the flares. Then take
the Medkit which animates the two dog statues. The shotgun works best on these creatures. Return to the crawlspace when you have
collected the items and kill the dogs.Take the other fork in the tunnel and follow it to the next area and into a second crawlspace. Continue until you arrive on a ledge above the mud then start climbing the ledges and get the Medkit. Climb up another ledge and get the Thistle Stone near the steam vent then jump up to the ceiling and monkey swing across the vines until you reach the opposite side. Drop onto the ramp and slide into the passage below then slide down the next ramp to return to the pool where you obtained the harpoons and crowbar earlier. From here it is just a short trip back to the bridge with the pair of gates.
Head to the left side of the bridge and jump toward the vine-covered wall of the castle. Climb up and into the opening which will startle more bats that fly out. Inside is a switch that opens the left gate down by the bridge. Press it then quickly make your way back to the bridge and go through the left gate before it closes. Kill the guard waiting inside then exit through the door in the left corner.
Make a note of the gate to the right. This is the final exit for this level but you need one more Thistle Stone before you can use it. Head to the left and go through the door. Follow the path and kill the dog statue after it animates. Continue up the path and slide down the slope on the other side and enter the next area. Follow the path through a narrow passage leading toward a pit. A guard patrols the ledge above. Kill him then climb up to the ledge and get some Flares. Approach the pit and jump up to grab the vines and monkey swing across the pit.
 Crawl into the small passage and head right. A boulder will come crashing toward you so dodge it by quickly crawling into the
small alcove on the right. Return to the main passage and continue until you reach a ledge with another crawlspace. Follow it until
you reach the ledge above the pit. Kill the crow that is flying around then head up the stairs and get the Medkit from the alcove
on the left. When you reach the ledge at the top of the stairs you can make a running leap to grab the ledge on the right. You could
also use the vines on the wall if you don't feel like jumping.
Crawl into the small passage and head right. A boulder will come crashing toward you so dodge it by quickly crawling into the
small alcove on the right. Return to the main passage and continue until you reach a ledge with another crawlspace. Follow it until
you reach the ledge above the pit. Kill the crow that is flying around then head up the stairs and get the Medkit from the alcove
on the left. When you reach the ledge at the top of the stairs you can make a running leap to grab the ledge on the right. You could
also use the vines on the wall if you don't feel like jumping.Watch out for more bats as you enter the building then turn around and use the vines on the inside wall to climb up until you are high enough to backflip to the ledge behind you. Make a running leap to the stone ledge in the center of this area and kill another crow that flies out of a dark niche. Investigate this niche and you will find some MP5 ammo. Return to the ledge and jump to the alcove on the right and get the Medkit then jump back to the middle.
Locate the opening above this ledge and jump up and grab the edge and pull up to reach the roof. Head toward the steam vent and kill another crow before collecting the second Thistle Stone. Drop back down through the hole to the ledge below and then do a safety drop to the next lower ledge. Jump out to the catwalk that crosses this room and face away from the stairs. Do a running leap into the opening in the left corner and collect the MP5 ammo.
Now move to the edge of this opening and make a standing jump toward the opening in the left wall. Press the GRAB button so you don't hit your head and you should land on a ramp that you will slide down until you reach a pillar above some more mud. Drop off the pillar and get a Medkit then head to the right and jump to the rocks. Enter the cave just past the pillar and you will trigger Secret #3.
 Wade through the mud until you reach some water then dive down and collect the Flares to the right. Exit the water on the opposite
side and immediately head right to avoid the fire-breathing monster. Wait for the monster to inhale before jumping into the pool
beneath the creature's neck. Dive down and follow the twisting underwater passages until you can surface. You are now behind the
monster. Head through the small opening behind the left flipper and you will arrive in a control room. Kill the guard and collect
the Grenades and the Medkit next to the pool.
Wade through the mud until you reach some water then dive down and collect the Flares to the right. Exit the water on the opposite
side and immediately head right to avoid the fire-breathing monster. Wait for the monster to inhale before jumping into the pool
beneath the creature's neck. Dive down and follow the twisting underwater passages until you can surface. You are now behind the
monster. Head through the small opening behind the left flipper and you will arrive in a control room. Kill the guard and collect
the Grenades and the Medkit next to the pool.Flip the switch on the right to open the gate and head through killing another dog along the way. At the top of the stairs you will have to climb some ledges before you can slide down the path leading to the hall with the final exit. Use both of your Thistle Stones in the snake-openings to open the gate. Grab some more Flares before sliding down the ramp and ending this level.
Willard's Lair

When you reach the bottom of the ramp grab the flares and jump through the door before the spiked wall crushes you. Slide down the next ramp and time your next jump so the crashing boulder goes under you then get the Crowbar from the nearby sloped area - sorry; you didn't keep the one from the last level. Climb the ramp and crawl through the low passage until you reach some water. Take a swim and get three packs of harpoons then return to the slope that the boulder was rolling on a moment ago.
Head to the bottom and enter the tunnel doing a running leap over the spikes and land on the left side of the green ledge in the middle of the room. Now you can jump to the stone ledge on the opposite wall and kill the dog below you. Drop down an avoid the spike traps when you collect the Medkit and head around the corner. Exit into the next room.
 This room is extremely challenging. There are several objects to collect and many boulders waiting to crush you. These boulders are triggered
when you move into certain trigger-zones. Make sure you follow these instructions perfectly or you will easily be crushed. Head down the stairs
and keep to the right. When you reach the bottom turn left and run toward the square column angling to the right toward the boulder so you end
up behind the right side. Three boulders including the one you are aiming for will move around when you do this, but you should be safe.
This room is extremely challenging. There are several objects to collect and many boulders waiting to crush you. These boulders are triggered
when you move into certain trigger-zones. Make sure you follow these instructions perfectly or you will easily be crushed. Head down the stairs
and keep to the right. When you reach the bottom turn left and run toward the square column angling to the right toward the boulder so you end
up behind the right side. Three boulders including the one you are aiming for will move around when you do this, but you should be safe.Now turn and slowly head around the column clockwise until you are near the corner facing the ammo clips on the opposite side. When you move toward the clips a boulder will roll at you from the far corner. Jump back and let it pass then pick up the ammo and head toward the corner where the last boulder started from and another boulder will roll against the wall behind you. Turn and get the Rocket to the right then turn right again and head toward the column and your previous location along the right side.
Another boulder rolls out of the passage in the opposite corner of this room. Run across the room toward the small section of wall between the passage and the recessed wall on the right. Steer to the left of the Shells for now and three more boulders will cross your path behind you including the two on the stairs. Return to the center of the room and get the Shotgun Shells then head toward the short passage in the corner and get the grenades from the small alcove. You are almost out of here. Head toward the exit then hop back into the grenade-alcove when the rocks comes rolling at you. When it has gone past you can continue down the hall.
When you slide to the bottom of the next ramp more spikes will start coming at you. Head to the left and climb up to the next room where more spikes move toward you. Grab the MP5 ammo and quickly climb up to the next level where (you guessed it) more spikes coming sliding toward you. Run toward the switch and flip it to open a gate to the right. Exit before the spikes poke you. Head right to the end of the passage and drop down to get the Medkit in the pit. Climb out and continue to the top passing a pair of ramps. Slide down the third ramp and get your guns ready.
 Four birds fly in from above. Kill as many as you can from here and save the rest for later. Jump and grab onto the white ledge and pull up to
get some Flares. Head toward the closed door and drop down to get a Medkit inside the doorway. Head back out the door and make an angled standing jump
to the right to get over the wooden ledge and then jump and pull up to the white ledge in the corner. From here you can jump to
the green ledge above and move to the right until you have to climb over a block. The camera pans around showing you the room and a switch above.
Four birds fly in from above. Kill as many as you can from here and save the rest for later. Jump and grab onto the white ledge and pull up to
get some Flares. Head toward the closed door and drop down to get a Medkit inside the doorway. Head back out the door and make an angled standing jump
to the right to get over the wooden ledge and then jump and pull up to the white ledge in the corner. From here you can jump to
the green ledge above and move to the right until you have to climb over a block. The camera pans around showing you the room and a switch above.Make a running leap to the right of the green door leading into the room with the floor grates. Blast the dog that attacks when you land then carefully make your way around the left side of this room. Stay away from the center or rocks will fall from above. Climb the vines to reach the ledge on the left with the door then get ready for a long and tricky trip to the first secret. If you wish to skip this secret then click here.
Note: This is a lengthy trip to the secret - covered in the next 5 paragraphs.
Head toward the dog statue and move to the left side of the opening behind it. You should now have a view of the previous room with the wooden walkway. Stone steps should be on your left. Jump over to them and climb up to flip the switch. Some spikes lower in another part of the level and you can head down the steps and return to the ledge near the dog statue. Return to the door and enter.
 Make a running jump to the ledge on the left and climb onto the block. Back yourself against the wall so you are facing the vine-covered wall to
the right and do a standing jump to grab the vines. Climb down until you are just above the spikes then shimmy to either side and drop into the
spike-free area. Now you can walk through the spikes and get the Flares from the passage then climb the wall with the carved warning
message.
Make a running jump to the ledge on the left and climb onto the block. Back yourself against the wall so you are facing the vine-covered wall to
the right and do a standing jump to grab the vines. Climb down until you are just above the spikes then shimmy to either side and drop into the
spike-free area. Now you can walk through the spikes and get the Flares from the passage then climb the wall with the carved warning
message.Run off the right side of this ledge and grab the Medkit below then climb the wall to the left before the spiked ceiling kills you. Now you are facing a new spiked pit but this one has the spikes lowered - thanks to flipping that switch earlier. Make a running leap to the opposite ledge and locate the Shotgun Shells in the next pit. Run off the right end of this ledge and get the shells then climb out to the left ledge before you are crushed. You now face the final pit.
Do a short jump and press GRAB to lower your arc to land near the ledge with the Shotgun Shells. Grab them then do a safety drop off the ledge and crouch to avoid the descending spikes. You may need to scarf a medkit about this time as you probably just took some damage. Stay crouched and crawl across this pit to the next room. Note: If you don't feel like trading a medkit for two boxes of Shells then you can always just drop into the pit and crawl out skipping this paragraph entirely.
Crawl down to the second level and get a couple packs of Harpoons at the opposite end of this room then flip the nearby switch to open the gate above. Crawl down to the bottom level and you will hear the chimes for Secret #1 as you collect the MP5 ammo and a Medkit. Climb all the way to the top and through the gate you opened just a moment ago. Now you can make your way back to the room with the grates in the floor and climb the vine-covered wall to reach the ledge on the left and pick-up where we left off earlier.
Jump back to the ledge and climb onto the block. Instead of jump back to the vines you will want to jump straight up to pull up to the ledge above then you can jump to the next ledge and climb onto another block leading toward the door. Turn and locate the high ledge in this passage and pull up to get some Uzi Ammo then drop back down to the ledge near the door. Follow the passage until you reach the walkway above the Library.
You can get the drop on two of the three guards in this room but the third will probably make it up to your level. When all three are dead you can stroll through the door at the other end of the walkway and head up the stairs. Climb into the window and crawl through the low passage to the left until you reach some ledges you can climb to obtain a Medkit. Head back to the Library and take the stairs down to the main floor. A Medkit and some Flares should be near the dead guards. Search the tape with all the drawings to find the Cairn Key.
Head toward the crates in the corner and pull out the one moveable crate then pull it again - this time from the left side. Now you can use the crowbar to open the wooden door that was behind the crate and enter the next room. Move the large crate to get the MP5 ammo underneath then head to the right and climb onto the boxes. Locate the box in the corner and pull it twice to get it away from the wall then get on the other side and push it into the corner and get more MP5 ammo.
 Continue past this latest ammo stash and pull out the next crate then head around to the left and push the crate in the wall over to the corner
where the last crate used to be. The chimes indicate you just found Secret #2 to get your Medkit then return to the Library. Head toward
the bookcases which are actually doors that are triggered by pressure plates in the floor. Head to the right and locate the alcove and enter to
open a secret door behind you. Exit the alcove and angle to the left slightly and make your way across the room between the bookcases.
Continue past this latest ammo stash and pull out the next crate then head around to the left and push the crate in the wall over to the corner
where the last crate used to be. The chimes indicate you just found Secret #2 to get your Medkit then return to the Library. Head toward
the bookcases which are actually doors that are triggered by pressure plates in the floor. Head to the right and locate the alcove and enter to
open a secret door behind you. Exit the alcove and angle to the left slightly and make your way across the room between the bookcases.When you enter the secret alcove another door opens to the left. Spin around and exit the alcove and enter this new secret alcove and you will hear another door open. Turn around and head back to the previous alcove but don't enter - turn left and enter the second secret door and get the Shotgun Shells from the newly revealed area. When you get the shells you will hear another door open. Exit the alcove and make a quick right and another quick left to enter the first secret area. Inside is a newly opened passage you can use to exit.
Head past the "Warning Signs" and up the slope. Take a left at the top and kill the dog that attacks from the shadows. Head to the right and go up the ramp until you can climb into the window and collect the Shells and a Medkit. Head back down the ramp to the safe which used to contain the missing artifact. Avoid the green toxic waste and head for the stairs to get the final secret.
Climb the steps and enter the opening about halfway up on the right. Head toward the left of this next rocky area and locate a small opening near a platform with various carvings. Use the Cairn Key and get ready to battle a trio of warriors who attack. Return to the stairs through the opening and continue to the top killing another warrior who charges from above. Head left and you will hear the sound for Secret #3.
Climb over the wall and you will spot a helicopter landing. Use the crawlspace to the right and kill another warrior who was guarding a Medkit and lots of Uzi Ammo. Return through the crawlspace and back over the wall to where the secret chime sounded. Drop to the ledge with the flag then hang and drop to the bottom. Locate the door to the left and go through to find more Uzi Ammo. Continue into the fog and kill three more warriors who will attack as you proceed further into this area.
When you reach the green ledges start climbing to get more Uzi Ammo and the Uzi's from the top ledge. Note: If you used the bug in the previous level to get the Uzi's then more ammo will be on this ledge. Head across this area toward the steam vent and locate the small hole. Drop down and you will land on a walkway between more toxic waste. Kill the attacking warrior then head to the stairs and climb them to exit this level.
Shakespeare Cliff

Take care of the guard hiding over by that truck behind some boxes then get the Flares from the yellow box. Head toward the blue box and push it to reveal some Desert Eagle ammo then head to the stone ledge near the door and get some MP5 ammo before flipping the switch and entering the door. Kill the worker in the orange suit before he runs off to get help. Two more workers wait in the next room. You will need to kill them both then get the Medkit over by the computers.
Push the next blue box toward the black grate. Get the Shells from underneath then move the box back to its original location and the grate will open. Enter the area behind the grate and get more shotgun ammo then search behind the yellow crates to find a Medkit which also triggers the chime for Secret #1.
 Head toward the stairs and shoot the vent out of the air duct to the left before climbing onto the ledge. Time your run past the firetraps and make
your way to the top of the stairs. You should find a hole with a giant drill and a ladder leading down one side of the shaft. Position yourself so
you can backflip to the ramp above the ladder and grab the edge when you start to slide off. Climb down the ladder as fast as possible to avoid the
drill coming down the shaft above you. When you reach the bottom of the blue area you need to stop to avoid more fire below. Shimmy to the left and
exit onto the ledge. Hug the wall to avoid more fire then get the MP5 ammo when it is safe.
Head toward the stairs and shoot the vent out of the air duct to the left before climbing onto the ledge. Time your run past the firetraps and make
your way to the top of the stairs. You should find a hole with a giant drill and a ladder leading down one side of the shaft. Position yourself so
you can backflip to the ramp above the ladder and grab the edge when you start to slide off. Climb down the ladder as fast as possible to avoid the
drill coming down the shaft above you. When you reach the bottom of the blue area you need to stop to avoid more fire below. Shimmy to the left and
exit onto the ledge. Hug the wall to avoid more fire then get the MP5 ammo when it is safe.When the drills have both gone by you can jump to the opposite side of the shaft near the large fan. Flip the switch on the metal box to open the door behind the fan then climb up and into the crawlspace above. Move forward until you can stand up then kill the pair of rats. Flip another switch to turn off some fans and grab a Medkit. Continue to the end of the crawlspace then back out and drop to the floor near a door. Head into the passage to the left and follow it until you reach one of the fans.
Climb to the ledge on the right and shoot out the vent cover and enter the tunnel. Shoot out the next vent and slide down to the Grenades. Jump back up to the vent and head back to the fan. Now head to the door you opened with the switch and slide down the slope backwards grabbing the edge as you slide off. Drop safely to the walkway below and head around toward the column to get some Flares. Drop off the ledge to the floor below and cross over and climb up to the ledge above the drill shaft. A running jump puts you on the opposite side of the shaft as a door opens elsewhere in the level.
Climb onto the stone ledge to the right and kill the workman who attacks. He leaves behind a Medkit which you can take before going over the ledge and into the next passage. Kill the gunman lurking in this hall then head up the ramp and time your run past the fire trap at the top. Turn and make a diagonal jump onto the ledge above the fire and shoot out the middle vent. Head through the shaft until you reach the end then climb up and continue until you reach the room with the grate floor. Collect the Shells and Medkit then return to the ledge above the fire trap.
 Go to the left and slide down the ramp until you land on the ledge above the tracks. A gate opens to your left. Drop down to the tracks and jump to
the slope near the yellow door to dodge the train that speeds by. Head down the tracks toward the gate the opened earlier. Hug the left wall and
get ready to jump over to the Medkit when you hear the tense music just as another trains comes out of the tunnel. Take the Medkit then head back
along the passage until you find the opening in the right wall. Jump up the slope and enter to get Secret #2; a Rocket, then follow the tunnel
until you reach the cave with the old steam engine.
Go to the left and slide down the ramp until you land on the ledge above the tracks. A gate opens to your left. Drop down to the tracks and jump to
the slope near the yellow door to dodge the train that speeds by. Head down the tracks toward the gate the opened earlier. Hug the left wall and
get ready to jump over to the Medkit when you hear the tense music just as another trains comes out of the tunnel. Take the Medkit then head back
along the passage until you find the opening in the right wall. Jump up the slope and enter to get Secret #2; a Rocket, then follow the tunnel
until you reach the cave with the old steam engine.Get the Rocket Launcher from behind the engine then return through the tunnel back to the tracks. Flip the switch to open the yellow door then get inside before it closes. Kill the workman and his friend and get some Flares then head over toward the yellow boxes to find the Quad Bike (ATV). Ride up the ramps in a clockwise direction and use the turbo to jump the tracks and the train as it speeds by beneath you. Head across the pit with the toxic waste and up the ramp on the other side. Turn right at the top and line up for a big jump. Use the sloped right edge of the stone steps and turbo across to the opening in the opposite side. Drive into the next area and kill the worker in the orange suit to the right of the train.
Head toward the left of the train and locate the machine with the switch that you can flip to open the door to the portable toilet around the corner. Head along the left of the train and around the deep pit to locate the door you just opened which actually conceals a large computer hidden inside. You cannot use the computer yet but two more doors just opened up so you can raid those two toilets and get lots of Shotgun Shells and kill a worker who was "using the facilities".
 Return to the ATV and head to the brown ramp on the right of the engine. Drive up and jump to the top of the train then turn right as soon as you
land and line yourself up to make a long jump over the pit into the passage on the opposite side. When you land quickly steer right so you don't hit
the burning barrel. Line yourself up with the slope to the right of the tunnel and drive up the hill making a quick right at the top and stop. Get
off the ATV and collect the Uzi Ammo. Note: If you don't have the Uzi's already you will get them here. Get on the ATV and drive back down
the hill turning right to avoid the burning barrel again.
Return to the ATV and head to the brown ramp on the right of the engine. Drive up and jump to the top of the train then turn right as soon as you
land and line yourself up to make a long jump over the pit into the passage on the opposite side. When you land quickly steer right so you don't hit
the burning barrel. Line yourself up with the slope to the right of the tunnel and drive up the hill making a quick right at the top and stop. Get
off the ATV and collect the Uzi Ammo. Note: If you don't have the Uzi's already you will get them here. Get on the ATV and drive back down
the hill turning right to avoid the burning barrel again.Continue through this passage and when you reach the bottom make a 180-turn just as you hear the music and spot the sniper over by the fence. Exit the bike and walk to the ledge to get a Medkit then get on the ATV and ride along the ledge and jump to the opposite side of the pit. Head left along the narrow ledge around the pit and park behind the beam. Climb off and shoot the pair of snipers - one above and one in the opposite door. Grab the nearby Flares then hop on the ATV and drive to the door near the blue pillars.
Exit the bike after you enter and get the MP5 clips on the steps and shoot the pair of rats who attack when you do. Locate the hole near the stairs then get on the ATV and drive into it. CRASH! Head into the tunnel below and steer toward the barrel. Using the turbo, jump the gap and run over the guard on the other side then park and walk into the room to collect some Grenades. Exit the room and locate the orange pillar and flip the switch to open a nearby gate. Grab the "Drill Activator Card" then get back on the ATV and jump to the other side and go through the gate you just opened.
A Medkit is stashed in a niche just inside the gate. Grab it then head through the next room past the flaming barrel and climb up to the walkway above. The pair of workers attack when you reach the top. Kill them and take the Flares and the Medkit then head right toward the machine. Search behind the toilet to get more Uzi Ammo then kill the rats that appear. Climb onto the large machine and flip the switch to activate it and open a nearby trap door. Head toward the door and drop in. Locate the card reader and use your activation card then climb back out and head to the front of the drilling machine where you will find a fresh tunnel.
Slide down this new opening and flip a switch to open a gate and then kill some rats. Head through the gate and make a running leap to reach the opposite side of the pit. Grab on and pull up into the opening and get the "Pump Access Disk". You can now choose to exit this level by following this passage or you can go for the final secret...continue reading.
 Turn and make another jump back across the pit and grab onto the ladder on the blue column and climb up to the ledge above. Jump to the left and
enter the tunnel until you reach the bottom of the pit and another ladder. Climb up until you reach the stairs then head up the stairs and out onto
the ledge. Climb the blue ladder to the left until you near the top then shimmy to the right and continue up to the top. Locate the nook to the left
and get the Rocket then head to the right keeping your eye on the barrel below. This barrel bursts into flames when you get close. Kill the worker
in the next room and jump over the flames to reach the floor.
Turn and make another jump back across the pit and grab onto the ladder on the blue column and climb up to the ledge above. Jump to the left and
enter the tunnel until you reach the bottom of the pit and another ladder. Climb up until you reach the stairs then head up the stairs and out onto
the ledge. Climb the blue ladder to the left until you near the top then shimmy to the right and continue up to the top. Locate the nook to the left
and get the Rocket then head to the right keeping your eye on the barrel below. This barrel bursts into flames when you get close. Kill the worker
in the next room and jump over the flames to reach the floor.Head to the right and jump to the ledge by the train engine and climb up and head back to the portable toilets. Enter the toilet with the computer and use the Access Disk to turn on the water pumps and fill the pit. Dive into the pit and swim to the bottom where you will find 3 sets of Harpoons then head toward the underwater cave and collect more Harpoons. Swim to the surface and exit onto the walkway to trigger the chimes for Secret #3.
Continue up the path above the lava and jump to the ledge on the left then jump up the slope. Slide backwards down the ramp and grab on as you slide off. Pull up and jump immediately and flip in midair so you can grab the ledge behind you. Pull up and kill the Pteranodon that attacks then jump to the ledge and a running leap to the ledge after that. Another running jump lands you on the corner ledge. Turn and kill another Pteranodon then face the wall and jump and grab. Shimmy to the left until you are almost all the way across the lava then pull up and quickly backflip to the ledge behind you.
Grab the Medkit then follow the path leading into the cave with another lava pit. Head right and kill another Pteranodon then jump to the ledge with another Medkit and quickly turn to kill another Pteranodon. Grab the Medkit when all these flying beasts are dead then jump into the water and swim back to the pit. Swim through the underwater passage to the left (this is where you got the "Pump Access Card" earlier) and follow it to the end of this level.
Sleeping with the Fishes

Start off by getting the Harpoons from the alcove then leave the room. Search the window on the left to find more Harpoons and get a peek at the scuba diver in the next area. Head through the next door and past the "Restricted Area" and continue to the right. The windows give you a good view of the ocean floor and another tunnel across from you.
 Head through the left door and kill the gunman on the other side of the pool. Circle around the pool and turn the valve to open the "restricted" door
you passed by moments ago. Jump into the water and dive down under the yellow ledge and get some Harpoons from under the net. Surface and breathe
then dive back down and head to the far corner and swim up through the opening to locate and pull a lever to open some bars. The scuba guy appears
and you can kill him with harpoons before collecting Shotgun Shells and more Harpoons.
Head through the left door and kill the gunman on the other side of the pool. Circle around the pool and turn the valve to open the "restricted" door
you passed by moments ago. Jump into the water and dive down under the yellow ledge and get some Harpoons from under the net. Surface and breathe
then dive back down and head to the far corner and swim up through the opening to locate and pull a lever to open some bars. The scuba guy appears
and you can kill him with harpoons before collecting Shotgun Shells and more Harpoons.Return to the surface and exit the pool and enter the passage. Go through the "Restricted" door and get the Medkit from the left and MP5 ammo over by the pool. Head down the ramp into the water and pull the lever to open the gate and summon another pair of divers. You can fight these guys with harpoons but you will find it easier to exit the water by swimming under the yellow area and killing them from dry land. Collect the Harpoons and Flares from the ledges in this area then locate the niche with the button. Press it to open the gate then head toward those crates.
Move the crate on the left toward the left to reveal a Medkit and a guard. Dive back in the pool and return to the yellow area by the cage. Some Uzi clips rest on the ledge by the cage door. Grab them then head right through the small opening and follow the twisting passage. Collect more Harpoons and continue until you meet up with a pair of dolphins.
 The current takes over and you cannot swim against it. Instead, aim for the opening near the corner and swim into the passage. When you exit the
tunnel head left and climb out to sound the chimes for Secret #1. Grab the two Medkits and Harpoons from the ledge then get back in the water
and swim to the next opening and surface. Tred water for a moment and wait for one of the dolphins to push you onto the ledge then quickly get your
guns out and kill the guard. He leaves behind some MP5 ammo.
The current takes over and you cannot swim against it. Instead, aim for the opening near the corner and swim into the passage. When you exit the
tunnel head left and climb out to sound the chimes for Secret #1. Grab the two Medkits and Harpoons from the ledge then get back in the water
and swim to the next opening and surface. Tred water for a moment and wait for one of the dolphins to push you onto the ledge then quickly get your
guns out and kill the guard. He leaves behind some MP5 ammo.Dive back into the water and collect another Medkit and more Harpoons then locate the hole in the net and swim through so you can return to the pool where you first entered. Surface in the room with the crates and catch your breath then head toward the gate you opened earlier and let the current take you into the next area. Swim straight up and into the control room exit the water and collect another Medkit and even more Harpoons. Two divers emerge from the sinking submarine - you can either fight them in the water with all those harpoons you've been collecting or dive in and tease them into this area and kill them with regular guns.
With the guards dead you are now free to explore this area. Return to the control room whenever you need to breather. Dive in and head toward the original entrance to this area and head up to get some Grenades from the yellow ledge and a Rocket from the support beam near the crane. Now head to the rocky wall to the right of the crane and locate the cave with the "Circuit Bulb" and some Flares inside. Now head to the left of the crane and swim past the round grates toward the pillar. Swim up and locate another small cave where you can breathe and collect another Medkit and the second "Circuit Bulb".
Now head down toward the light on the bottom and get more Harpoons then head left and follow the path of lights leading back to the control room.. Use the two bulbs in the wall receptacles to open a yellow door leading to another "Restricted Area". Swim back toward the crane and follow the lights leading to this new door. The current will start to drag Lara just as another sub releases another pair of divers. Kill the divers however you see fit and don't forget to breathe if you decide to fight them underwater.
 When you have killed the divers swim toward the door and enter the small passage to the right of the door. The chimes indicate you just found
Secret #2. Follow the passage until you reach a cave then follow the cave until you reach an opening in the floor. Follow this passage
to the next room and exit the water to get some more Harpoons and a Medkit. Return to the secret area and get the Shotgun Shells and some Flares.
Quickly dodge the mini-sub as it rushes past and smashes into the wall creating an opening into the next area. Swim through the hole and discover an
old rusty submarine with the Desert Eagle and lots of ammo sitting on top of the wreckage. Use the air pocket near the left end of the sub to
fill your lungs.
When you have killed the divers swim toward the door and enter the small passage to the right of the door. The chimes indicate you just found
Secret #2. Follow the passage until you reach a cave then follow the cave until you reach an opening in the floor. Follow this passage
to the next room and exit the water to get some more Harpoons and a Medkit. Return to the secret area and get the Shotgun Shells and some Flares.
Quickly dodge the mini-sub as it rushes past and smashes into the wall creating an opening into the next area. Swim through the hole and discover an
old rusty submarine with the Desert Eagle and lots of ammo sitting on top of the wreckage. Use the air pocket near the left end of the sub to
fill your lungs.Exit this cave and head right past the yellow mini-sub and return to the large cave. Turn to your right and enter the "Restricted Area" door from earlier and let the current carry Lara to the next area. Swim up and through the yellow opening and exit into the hallway above. Head down the passage toward the bars until you spot a door and window on the left. The door is locked so tease the guard until he opens the door then kill him. Enter this room and watch out for the trap door in the center. If you fall through you get to do a lot of back-tracking. Get the Flares and a Medkit and don't overlook those Harpoons behind the radar display. Press the button to open the bars in the hall then exit this room.
Follow the walkway until you reach the pair of red valves. Turn these wheels to release a pair of giant fish that arrive out in the main area. Continue down the passage and collect another Medkit and a Rocket. Investigate the lab then return to the control room and drop through the trapdoor in the middle of the room and get ready to rumble. When you have carved those giant fish into sushi you can head toward the narrow passage between the two support columns where a third fish is waiting for you. Kill this mutant sea bass (or whatever it is) then swim back into his tunnel to collect Grenades, a Medkit, and the Grenade Launcher, collectively known as Secret #3.
 Swim back to the main area and swim into each of the doors where the original two fish came out of. Inside each is a "Mutant Sample". Once you get
the sample from the left passage you can continue to follow it all the way to the lab. Swim to the surface and exit the water. Head down into the
room with all the other mutants on display and move the pair of green boxes to get some Uzi Ammo and reveal a machine. Put one of your mutant samples
in this machine then locate the matching machine in the opposite corner and do the same with your second sample.
Swim back to the main area and swim into each of the doors where the original two fish came out of. Inside each is a "Mutant Sample". Once you get
the sample from the left passage you can continue to follow it all the way to the lab. Swim to the surface and exit the water. Head down into the
room with all the other mutants on display and move the pair of green boxes to get some Uzi Ammo and reveal a machine. Put one of your mutant samples
in this machine then locate the matching machine in the opposite corner and do the same with your second sample.Head up the ramp and continue up some stairs where you get to fight a guard and get his Medkit. Continue around the walkway until you can climb to the upper deck and get the Rocket. Continue climbing up and you can get some Grenades from the ledge above the Rocket then dive into the water below. Take the "Hand of Rathmore" from the pedestal and a door will open leading into the dolphin area. Swim inside and pull the lever on the left to open another door releasing another mutant fish. Kill the fish then swim into his area and get the Uzi ammo from the bottom of the tank. Continue up and through the opening in the ceiling where you can finally climb out and onto a submarine. Drop down into the inflatable raft to exit this level.
It's a Madhouse

When the raft sinks you need to swim until you can reach the surface then head for the stairs leading out of the water. To the left of the stairs is the "Hand of Rathmore" hidden in the darker area of the water. Use a flare (there are some on the stairs) if necessary and once you have the artifact the gate will open above. Climb the ladder and head up through the now-open gate into the courtyard above.
 Head left through the door into the second courtyard and approach the stairs with the arched windows. Get the Shotgun Shells from each of the
stairs and watch the quick movie before heading back to the previous courtyard. Go left into the next area where you will find a gate and an exit
opposite this gate. Go toward this area and locate the tiger cage and collect some more Shotgun ammo then head up the stairs. Two Tigers attack from
the top of the stairs. Retreat to the area below and kill them - you can use the nearby ledges as a perch to safely snipe at them.
Head left through the door into the second courtyard and approach the stairs with the arched windows. Get the Shotgun Shells from each of the
stairs and watch the quick movie before heading back to the previous courtyard. Go left into the next area where you will find a gate and an exit
opposite this gate. Go toward this area and locate the tiger cage and collect some more Shotgun ammo then head up the stairs. Two Tigers attack from
the top of the stairs. Retreat to the area below and kill them - you can use the nearby ledges as a perch to safely snipe at them.Climb the stairs noting the gates leading to the Aviary and the Monkey House. Head to the opposite end and climb the ledge near the streetlight and sneak through the gap in the bushes. You should be able to locate the "Zoo Key" in the trench. Take it and head to the Monkey House and use the key on the gate. Head down the stairs until you reach the room with the pillars then flip the switch to open the gate over to the left. Search near the benches to get more Shotgun ammo and watch the monkeys scamper off with a Medkit. Go through the gate and crouch to crawl through the narrow opening leading into the shrubs. Collect the Medkit then crawl back out and head to the right.
Head toward the brick pedestal and get the nearby Flares before climbing onto the pedestal then up through the hole above. You are now in a hedge maze (just like home, eh?). Two Tigers attack almost immediately so be ready for them. When they are dead you can make your way through the maze using the classic maze-technique of "hugging the left wall". The maze is fairly simple with only a few T-intersections.
When you enter the low tunnel turn left and head down to the Tiger Cage. Grab the Uzi ammo then head to the left of the ramp and locate the hidden opening in the leaves. Enter this area and you will trigger Secret #1. Start climbing the ledges and when you reach the third ledge that overlooks the street you will see a short movie. Drop to the street and quickly run to the right and grab the Gold Statue before the monkeys run off with it. If they beat you to the statue just kill them before they steal it.
Head to the left and go down the hill. Just before you get to the house you should spot a ledge on the right with a Medkit. The monkeys will try to swipe this item to so you either have to get it quickly or kill them. Continue forward until you reach the red car and get another Medkit from the alcove on the left. A nearby ledge has lots of MP5 ammo and when you take it some giant lizards attack. They aren't much of a threat at this time so ignore them and head back up the hill. Locate the switch on the back of the statue pedestal and flip it to open a door elsewhere in the level. Now return to the Tiger Cage and up the ramp to the maze and follow the low passage until it exits to the right.
 A Tiger attacks from the right as you exit the passage so be ready for him. Follow the maze the rest of the way to the exit by continuing to hug
the left wall. As you climb the ledge to enter the next area you will notice several monkeys scamper off to steal your stuff. Kill them quickly so
you can get the Aviary Key and the Medkit from the walkways to the left and right. Take a swim in the nearby pond to collect several stashes of
Grenades from small underwater caves then exit the pond and head toward the slope near the three circular windows.
A Tiger attacks from the right as you exit the passage so be ready for him. Follow the maze the rest of the way to the exit by continuing to hug
the left wall. As you climb the ledge to enter the next area you will notice several monkeys scamper off to steal your stuff. Kill them quickly so
you can get the Aviary Key and the Medkit from the walkways to the left and right. Take a swim in the nearby pond to collect several stashes of
Grenades from small underwater caves then exit the pond and head toward the slope near the three circular windows.Head toward the white column and make a running leap to the walkway to the right of this column. Follow it back toward the entrance and get some more grenades from the nearby alcove. Climb up to the upper area and head through the opposite door. You will want to WALK in this next area so you don't fall onto the spikes below. Head to the right and get a target-lock on the Tiger below and blast him. Jump up to grab the canopy of leaves and monkey swing to the opposite side until you can drop to the slope surface below. Jump again to grab the crack in the wall then shimmy to the far right and drop down into the spike-free area.
WALK through the spikes to avoid taking damage as you make your way to the walkway. From the walkway do a running jump and grab the edge and pull up into the alcove to get some Flares then turn and make another running leap back to the walkway. Head to the left until you reach the end then hang and drop from the ledge into the pit in the corner. Search the alcove for some Uzi ammo then cling to the wall and climb back to the walkway. Head to the opposite side of the room and go into the hall with the pair of stairs leading up on either side. Go up the left stairs and flip the switch to open the gate. A monkey will try to make a grab for the Medkit. Kill him before it takes it then head to the right through the brick passage with the benches.
The closed gate at the end blocks the way to the second secret so head to the right and go through the door. Climb the left ledge and grab the T-bar to ride down the cable into the next area. A gate will open as you slide down the line and you will spot some monkeys attempting to steal more of your precious Medkits. If you really want the Medkits you can kill the chimps and get them back otherwise you can circle around the island and get a pair of Rockets. The water around the island if infested with piranha but the small pool with the Aviary Key is save for a few moments. Dive in and get the key then get out quickly before the hungry fish find you.
 Head to the right across the walkway and go into the gate that opened a moment ago. Continue through the spiked passage and down some stairs. A
concealed nook behind the plant may contain some Medkits if you chose not to shoot the monkeys earlier. Now make your way back to the hall with
the twin stairs and go back up the left and into the brick hall with the benches. The gate at the end is open and you can enter Secret #2
and get the Desert Eagle with ammo and the Medkit. Head back out and retrace your steps riding the cable back down to the monkey area below.
Head to the right across the walkway and go into the gate that opened a moment ago. Continue through the spiked passage and down some stairs. A
concealed nook behind the plant may contain some Medkits if you chose not to shoot the monkeys earlier. Now make your way back to the hall with
the twin stairs and go back up the left and into the brick hall with the benches. The gate at the end is open and you can enter Secret #2
and get the Desert Eagle with ammo and the Medkit. Head back out and retrace your steps riding the cable back down to the monkey area below.Locate the stone block and flip the switch to open the gate which is on a short timer. Sprint through the gate before it closes and you will arrive back in the cramped room with the pillars. Head up the step and into the courtyard where you can use the Aviary Key to open the gate. Follow the walkway around to the right and you will end up in front of several large trees. Line up with the middle one and drop down to the flat spot. If you miss you will slide into the pool and get eaten by piranha.
Behind the tree is a ladder leading to a room with ammo for all your guns. Climb down to the base of the tree and head right. You need to make a running leap between the bridge structure to land near a large tree. Grab the Shotgun Shell then make another jump back to where you came from. Line up by the middle tree again and do a running jump to the patch of land with the palm trees and bridge structure. Climb onto the walkway and follow it along. A pair of birds attack from above. Deal with them both then jump from the end of the walkway to the ledge with the Medkit. Drop to the next lower ledge on the left near the palm tree then turn and locate the branches that form a makeshift ladder. Jump up to grab on then climb to the top.
Carefully WALK to the right and don't fall through the tree branches. Jump to the leaf-covered ledge to the left then jump to the next ledge under the metal arch. Press Grab in midair so you don't hit your head. Some Shotgun ammo is on this ledge. Get it then crawl under the arch and when you can stand make a running leap to the top of the while column and kill another pair of birds. You are now free to grab onto the T-bar and ride the cable but first you may want to make a quick running leap to the green ledge with the slope leading to the blue wall. Grab the grenades then return to the column for your cable ride.
 Use the second Aviary Key on the lock in the side of the nearby statue to open the gate near the Gold Statue and the clock. Head along the wall on
the right and look for an opening just past the hole in the ground. Jump into that opening in the wall and follow the tunnel back to the first
statue. Assuming you flip the switch on the second statue earlier there should now be an open trapdoor at the base of this statue. Drop down and
you will hear the chimes for this level's (and the game's) final secret - Secret #3.
Use the second Aviary Key on the lock in the side of the nearby statue to open the gate near the Gold Statue and the clock. Head along the wall on
the right and look for an opening just past the hole in the ground. Jump into that opening in the wall and follow the tunnel back to the first
statue. Assuming you flip the switch on the second statue earlier there should now be an open trapdoor at the base of this statue. Drop down and
you will hear the chimes for this level's (and the game's) final secret - Secret #3.Jump over the toxic waste and get the Flares then jump to the next block and get a Rocket. Drop to the bottom step and get a second Rocket then head left toward the ladder on the wall. You will need to make a running leap to grab the ladder and climb to the top. Now climb down about once space and backflip off the ladder to land on a ledge behind you and get another Rocket. Jump back to the ladder and climb up until you are level with the bottom of the rock on the left then backflip once more to reach your starting position.
Head across this ledge and drop down to the brown rock - the only safe part of this area - and get ready to fight a trio of giant lizards. Try to kill as many as you can from here and save the rest for when you reach the sandy area. Keep an eye on your health meter as Lara can easily get poisoned by the deadly breath attacks of these beasts. Two Medkits are within easy reach on the nearby vents but taking them will summon another pair of lizards - you decide if the risk is worth the reward. Climb the blocks leading up to the opening above then drop down into the next area.
Circle around the first disgusting pool and continue past the second one with the floating corpse. Head up the steps and get some Flares then return to that pool with the corpse and jump down to the platform near the body. You will notice a hole in the corpse's chest - place the "Hand of Rathmore" into this hole and you will have completed the level.
Reunion

 A meteorite is rolling at you as this level begins. Flip to either side and circle around the pool. You can head through the doorway between the
windows or if you want to stock up on ammo you can continue toward the long pool of toxic waste and light a flare to illuminate the semi-transparent
walkway across the sludge. Step onto the walkway then jump back as another meteorite rolls by. Cross the bridge and grab lots of Grenades then
return to the center of this room. Locate another long walkway and repeat the procedure to get more Grenades and a Rocket Return to the first pool
and climb up through the opening and get the Flares by the pillar then return to your starting location.
A meteorite is rolling at you as this level begins. Flip to either side and circle around the pool. You can head through the doorway between the
windows or if you want to stock up on ammo you can continue toward the long pool of toxic waste and light a flare to illuminate the semi-transparent
walkway across the sludge. Step onto the walkway then jump back as another meteorite rolls by. Cross the bridge and grab lots of Grenades then
return to the center of this room. Locate another long walkway and repeat the procedure to get more Grenades and a Rocket Return to the first pool
and climb up through the opening and get the Flares by the pillar then return to your starting location.Now you can head through that door and get your Desert Eagle ready to pop the two big guys who are headed your way. Grab the Flares as you enter and MP5 ammo when you reach the bottom then enter the opening on the right and get the Medkit. Head back to the stairs and continue to the opposite side where a matching area has a matching Medkit. Climb the stairs and search the pillar to the right for a Rocket. Start using some of those flares you've been collecting to illuminate the invisible ledges leading across the pool. When you reach the final ledge you can jump into the opening with the short slope. Angle away from the burner so you don't get toasted.
Grab the Flares off to the right then head left and jump from the middle of the ledge out to the next ledge past the swinging burner. You should spot Sophia (your arch-enemy) moving into position for the final battle. Jump across the gap to the next ledge and head around to the right and make a sharp turn up the ramp. Get the Medkit from the ledge then jump to the grated ledge (under the body) and climb up to another ledge with another Medkit.
Head to the left and hide behind the pillar to avoid Sophia's attacks. When Sophia stops to power up you can quickly climb to the low ledge then jump up to the higher one and pull up. Sophia will also start climbing giving you some extra time. Pull up to the stone walkway on the left and enter the cave to the lef and get the Medkit in the back. You'll need to kill another one of those big guys to get it. Head back out and toward the wide stairway across the way. Head along the left wall and kill another big guy and dodge the meteorite rolling down the stairs. Grab the Medkit then head up the stairs and pull the switch at the top.
 Go through the door and get ready to tackle four more of those big guys. They will try to surround you so use the Desert Eagle to pick of the solo
guy behind you giving you room to move around while you take out the other three. A Medkit is your only reward for victory but another Medkit and
some Flares are stashed in the back of this room. Make your way past the swinging burner and flip the wall switch to open a door above. Climb the
steps then the ladder entering the passage that closes behind you. Pick up another rocket at prepare for the final battle...
Go through the door and get ready to tackle four more of those big guys. They will try to surround you so use the Desert Eagle to pick of the solo
guy behind you giving you room to move around while you take out the other three. A Medkit is your only reward for victory but another Medkit and
some Flares are stashed in the back of this room. Make your way past the swinging burner and flip the wall switch to open a door above. Climb the
steps then the ladder entering the passage that closes behind you. Pick up another rocket at prepare for the final battle...Climb onto the wall above the pool then climb up again to the ledge with a Medkit. A meteorite rolls into the area distracting Sophia long enough for you to get the Medkit and jump down. Make sure Sophia has climbed to the upper ledge by the steam vent with the Hand of Rathmore. If she isn't there you will have to climb up until she follows you to this ledge. Hide behind the wall and wait for her to shoot 11 energy bolts then while she is powering-up fire a rocket and blast her. It only takes one hit to win the battle but it must be dead-on and timed perfectly.
Battle Strategy
 Face Sophia with the wall between you and her. Wait (and count) for the first 10 bolts of energy to be fired then jump to the top of the wall and
fire - you only have a second to line-up your shot so you may have to repeat as needed until you finally hit her. Each of her blasts get successively
weaker so its okay to get hit with her final blast but don't get hit by her first one. If you've been wasteful during the main game and don't have
any rockets you can find several in the small rooms at either end of the wall. There are also some extra Medkits in addition to the 6 Rockets.
Face Sophia with the wall between you and her. Wait (and count) for the first 10 bolts of energy to be fired then jump to the top of the wall and
fire - you only have a second to line-up your shot so you may have to repeat as needed until you finally hit her. Each of her blasts get successively
weaker so its okay to get hit with her final blast but don't get hit by her first one. If you've been wasteful during the main game and don't have
any rockets you can find several in the small rooms at either end of the wall. There are also some extra Medkits in addition to the 6 Rockets.After Sophia falls to the ground you can jump down from the wall to the area below Sophia and climb up to her ledge and get the "Hand of Rathmore". Drop back down to the room below and you will find a door that has just opened. Enter and slide down the slop leading to the pool. Climb out of the water and head for the beach where a hot-air balloon awaits to take you out of this level and end the adventure.
You have defeated Sophia and
obtained the Lost Artifact.
Secret Area Index

Highland Fling
Secret 1
Secret 2
Secret 3
Willard's Lair
Secret 1
Secret 2
Secret 3
 Shakespeare Cliff
Secret 1
Secret 2
Secret 3
Sleeping with the Fishes
Secret 1
Secret 2
Secret 3
It's a Madhouse
Secret 1
Secret 2
Secret 3
Reunion
No Secrets
