
All images in this walkthrough are property of Ubi Soft Entertainment™
All images in this walkthrough are property of Ubi Soft
Entertainment™
Walkthrough by Bert Jamin
© September 2005 Bert Jamin (www.gamesover.com)
This walkthrough may not be sold and may not be used for any commercial
purposes. Neither is it permitted to publish this walkthrough in any way without
the written permission of the author Bert Jamin (www.gamesover.com) and his E-mail address ([email protected]) are mentioned unchanged. For the most up to date walkthroughs always visit www.gamesover.com.
If you have any suggestions
to improve this walkthrough, let me know by sending me an email: [email protected].
Click on one of the images to go to that chapter,
 |
 |
 |
 |
 |
| K'Veer | Taghira | Todelmer | Noloben | Laki'ahn |
or click on the image at the bottom of this page to go to the next chapter.
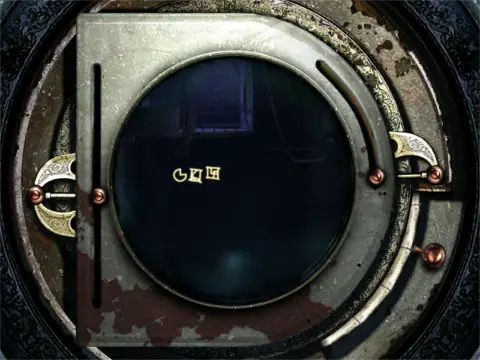
Todelmer
Turn around and exit the linking bubble. Cross the bridge to the right. Enter the linking bubble. Don't forget to take the Slate from the pedestal. Press the triangle shaped sign on the left side of the pedestal. Place the Slate on the pedestal. Turn around and exit the linking bubble. Turn to the left and climb up the stairs. Go forward. Climb down the next stairs. Go forward two times. Turn to the left and enter the control room. to meet Esher in the control room.
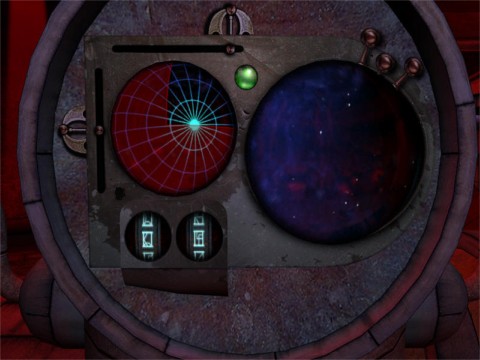
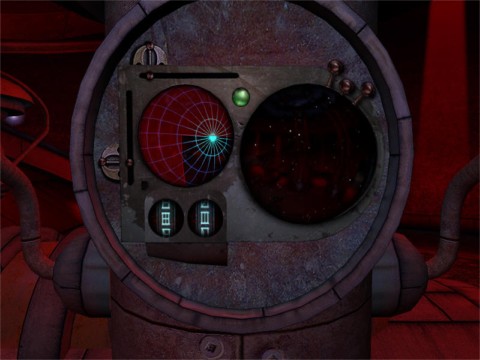
First of all you have to set power to this Age. Believe me... this is easier done than said! Turn to the left and walk five times forward along the back wall until you see a green light at your right side. Turn to the right and notice two little levers beneath a green screen. Move the left lever to the top position. Move the right lever to the center position. As soon as the inner ring of the device starts to turn it's all set and done. It is possible that you have to move the little levers into another position. This may differ from game to game.
Turn to the right and walk back to the entrance of the control room. Exit the control room and climb up the stairs at your left side. Keep on walking until some boulders and some sort of cable block your way. Look up to see that this cable is broken. Turn around and head back to the control room.
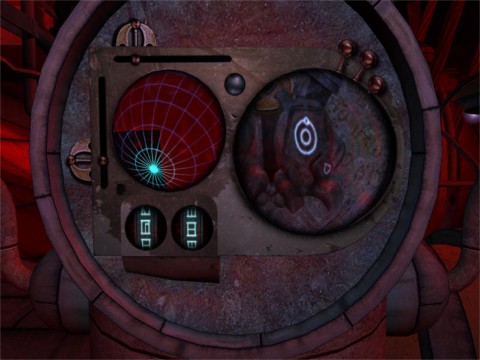
Enter the control room and climb up the red-lit stairs. Go to the right side of the controls and walk to the end. Turn to the left to see a control panel that is out of order. Move the left slider to the upper position and move the upper slider to the most right position. Press the green button. If you like you can look at the other control panel on this side. After that walk to the left side of the controls to see two other control panels. So in total there are four control panels of which one is out of use.
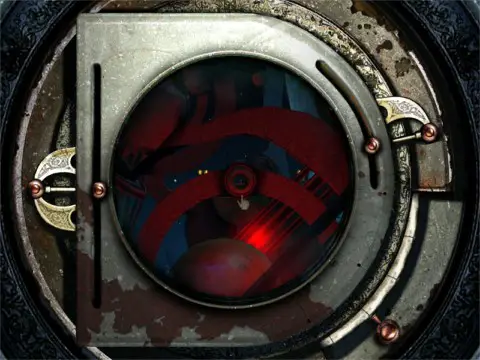
Exit the control room and climb up the stairs at your left side. Walk all the way up. When you reach the upper platform turn to the right. Walk to the huge telescope. Look through the telescope. Note that this telescope has three sliders. With the slider to the left you can move the telescope up and down. With the right top slider you can zoom in and zoom out. The right bottom slider is to move the telescope horizontally.
Notice the huge pillar you see through the scope right now. Zoom in carefully to see some kind of entrance. Move the scope a little to the left. Zoom in further to see some kind of signs beneath the entrance. Zoom in further until you can clearly see the signs to find out it is a set of coordinates that you saw earlier in the control room. Now you might think: hey... but the control panels have only two digits for coordinates and this one has three digits. That's correct but the first digit is to show the proper control panel. Study the control panels and look closely to the planet on the left topside to see what I mean. Exit the telescope.
The first set of coordinates
Step on the platform and walk to the outer rim of the platform. When you are standing at the left side of the huge cock wheel you'll see another pillar in the distance with light on it. Head back to the telescope and look through it once more. Zoom out and find the huge cock wheel through the telescope. When you zoom in you can barely see one of the light of that pillar in the distance. The huge cock wheel blocks your view to that pillar. Exit the telescope.
Sneaky!!!
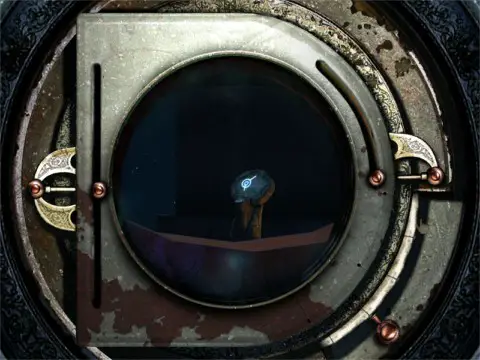
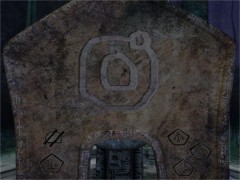
Walk to the center of the platform. Enter the little blue-lit building. Turn around and close the door by pressing the blue-lit button. Press the other blue-lit button on the wall. Turn to the right and go all the way down the stairs . Step outside and turn to the right. Pull down the center lever one time. Go back upstairs. Press the blue button on the door to open it. Step on the platform. Head back to the telescope. Look through the scope to see the two yellow lights on top of the pillar. Zoom in and to your surprise you'll see a blue-lit Bahro sign on top of the pillar. Make a note of this sign! Exit the telescope.
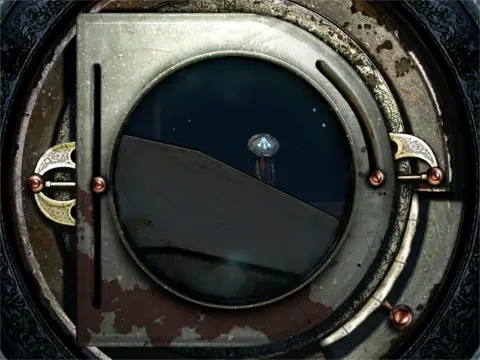
Gotcha!!!
Head back all the way down to the linking bubble. Enter the bubble and take the Slate from the pedestal. Use the Slate to make a drawing of the Bahro sign you just discovered. Exit the linking bubble and walk towards the stairs. When you hear the sound of the Bahro return to the linking bubble. Enter the bubble and notice the Bahro has added this new sign to the pedestal. Press that sign to get linked to the pillar.
Sigh... what a fine piece of art
Turn to the right twice and walk to the telescope. Look through the little telescope on this pillar. Move the right bottom slider up until you see a massive pillar with lots of lights. Zoom in to find out this is the pillar you just left. Zoom in on the sign high above the door of the control room to find the second set of coordinates. Make a note of these coordinates too! Exit the telescope.

The second set of coordinates
Walk to the pedestal and press the triangle shaped sign. Turn around and exit the linking bubble. Head back into the control room. Walk to the right side of the controls. Turn to the left. Set the first set of coordinates by using the sliders and press the green button. Notice on the little screen that another telescope will be set.
The first set
Turn to the left and walk to the front of the controls. Walk to the left side of the controls. Turn to the right and set the first control to the correct coordinates and press the green button. Notice on the little screen that another telescope will be set too. Turn to the right and head back to the linking bubble.
The second set
Enter the linking bubble and press the sign to get linked back to the pillar with the little telescope. Turn to the right twice and walk to the telescope. Look through the telescope. Zoom out and move the scope to the left until you see the other red blinking telescope. Zoom in on the lens above the red ball to find... another Bahro sign! Exit the telescope.
Sneaky again...
...but so clever!
Walk to the pedestal and take the Slate. Press the triangle shaped sign. While standing in the bubble use the Slate and make a drawing of the Bahro sign you just discovered. Drop the Slate on the ground and exit the bubble. Walk toward the stairs. Return to the linking bubble as soon as you hear the Bahro. Enter the bubble and press the newly added sign on the pedestal.
Nice...
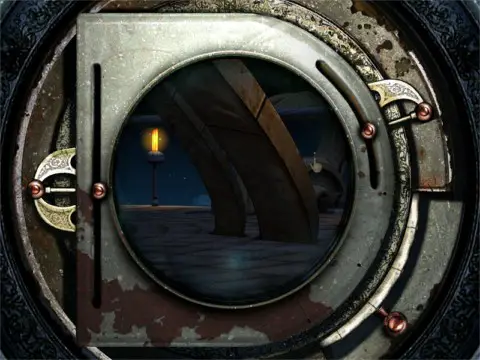
Walk down the stairs and try to step into the trolley that is hanging down. Alas... it is too far down to enter. Darn ... that must be because you lowered the whole thing earlier to get a view to the pillar through the telescope. Return to the pedestal. Press the triangle shaped sign. Exit the linking bubble. Turn to the left and go all the way up to the upper platform. Enter the little building at the center of the platform once more. Go all the way down and step outside. Turn to the right. Move the top lever to the left. Pull down the center level to move up the cable of the trolley.
Head all the way back into the linking bubble. Press the right most sign on the pedestal. Climb down the stairs. Notice that the trolley is a little higher in position now. Step on the trolley. Turn to the right and go one step forward. Turn to the left and climb down into the trolley.
Turn to the right and enter the building. Walk around the center column and climb up the next stairs. First you have to set power to this station too. Move the left lever up just above the center. Move the right lever also just past the center. As soon as the inner ring starts to rotate you have powered up the station. It is possible that you have to move these little levers to another position too. As I described before, this can differ in every game.
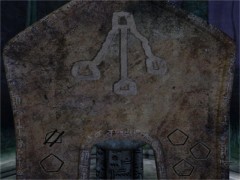
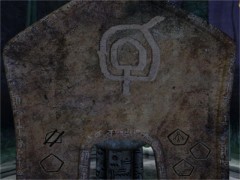
Turn to the right and climb up the next stairs. At the top of the stairs, go to the right, toward the closed door. Turn to the right. Press the blue-lit button to open the door. Turn to the left. Climb up the next stairs and notice a Bahro sign on the wall. Make a note of this sign! Open the door by pressing the blue button and go outside to have another meeting with Esher. Walk to the pedestal and take the Slate. Enter the building that you have just left. Go all the way down and step outside. Use the Slate to make a drawing of the Bahro sign you just saw on the wall. Drop the Slate on the floor.
Hmmm... the first real nice one
Walk forward and step into the trolley. Turn around and see how a Bahro picks up the Slate and starts a severe wind. Pull the large lever of the trolley to release the brakes. Enjoy your ride. At the first stop turn to the right to see the last coordinates you need! Make a note of these coordinates. Turn to the left. Pull the lever of the trolley once more for your final ride. Turn around. Enter the building and go all the way back to the control room.
Enter the control room and climb up the stairs. Go to the left controls. Walk to the last panel. Enter the new coordinates you just saw halfway on your free ride in the trolley. Press the green button. Press down the right most little knob above the little screen.
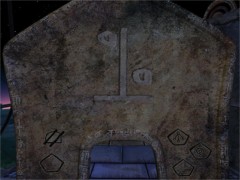
Go back to the linking bubble and pick up the Slate. Return to the control room and stand in front of the panel that you set a few moments ago (yep... the last one at the left side). Use the Slate and click on the bottom left sign to redraw the time symbol. Drop the Slate on the floor. Turn to the right and step forward until you hear and see the Bahro doing his job again. His job is... to align the planets as Esher told before! Return to the control panel and watch the little screen. When it's all over you'll see a new Bahro sign on the screen.
After the Bahro did his job
Make a note of this one also! Head back into the linking bubble and take the Slate. Use the Slate to draw the sign you just saw in the little screen. Drop the Slate on the ground. Exit the bubble once more and walk towards the stairs on the left.
The final piece of fine art. That is... for this Age!
When you hear the Bahro once more, enter the linking bubble again. Press the right most newly displayed sign on the pedestal. Meet a very excited Esher. Boy he does trust you to finish the job although you are only half way now. Turn around and go down the ladder. Walk around The Keep. You can enjoy the view if you like. Enter The Keep. Turn to the left and go forward twice. Turn to the right and press the blue-lit Slate to release it. Press the triangle shaped sign to return to the linking bubble on Todelmer. Press the Direbo sign on the center part of the pedestal to return to... Direbo.
Noloben