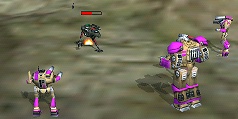
Seems poor Claymore, a Mechwarrior of the Scottish persuasion, is down
and your job is to go in and lead the poor lamb out. I mean really;
he has an ATLAS...*sigh*

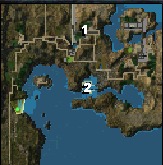
Just North of your Drop Zone is a small fuel depot. Go towards it, and you'll
be met by a friendly reception which includes a Fire
Ant, Urban Mech and various and sundry
ground units. Thankfully, there's also a lot of fuel, and a convenient cliff
from which to play pop-the-weasel.
Due East of this fuel depot, across the water, is an island that holds your
first Resource Building. You'll need a jump-enabled
mech to reach it.
Then keep heading North, up the cliffside ridge skirting the ocean, gaining
altitude and marching through the various Hetzers,
'Pedes and other minor obstructions, until you reach the upper plateau, from
which you'll be able to look down, god-like, upon a few lowly Fire
Ants and vehicles guarding another Resource Building
and a couple of SRM turrets. Smite them with
your holy fire and grab the RPs.
East of this installation, the road splits. One branch heads Southeast and
leads to another depot and an encounter with more Fire
Ants, Urbans and a handful of ground vehicles, as well as another Resource
Building. Take that branch, using the various ridges and valleys to
good effect. Clear the resistance out, then grab the turret controls and the
Resource Building.
From this hilltop, you (ch)own the first Airfield
This little pocket makes a nice nest to assault the first Bandit
Airport, just North of this position. The high ridge there, with the
circular turnaround, is a great place for long-range sniping with ER lasers
or LRMs. Get up on the ridge and jump down into the turret control area and
grab the turrets.
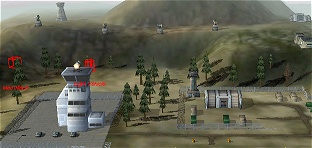
Bandit Airport North
Poke a little further inward and you should stir up a Starslayer
and a couple of Hunters, nasty tanks
with LRMs. Try to lure them into your turrets' fond embrace, and watch
out for the rear-ridge turrets. Destroy the Airport
Traffic Control. You might consider salvaging the Starslayer you just
discombobulated if it is not in too bad a condition.
From this airport, head due East, then swing South and link
up with Claymore's Atlas, hiding in the flooded installation; just
follow the broken road to the edge of the water. He'll make contact when you
get close and you'll have his Atlas at your command. You'll also get another
Objective: the second Bandit Airfield in the
Northeast.
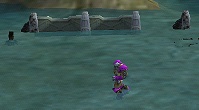
Claymore waits for you in fair Atlantis
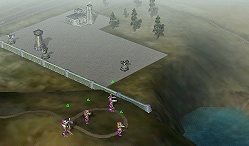
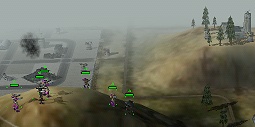
Just North of this position is a canyon, flanked by two high ridges. It's
a natural place for an ambush. Position your team at the mouth of this canyon,
behind the hill, then send someone up the left (Northwest) ridge to detroy
the Lookout Tower there. This will also stir
up the nest of Urbans, Ants
and Hunters on the right (NorthEast) ridge, who
will follow your decoy mech into the arms of your reception committee.
Who is knocking on my door? Could it be the lost Leanore?
Send someone up to grab the turrets protecting the canyon's mouth, which
will stir up some more Ants and vehicles and
another desireable mech, a Raven. You want this
puppy. Why? For its Guardian ECM and Advanced
Sensors, the same as those Men Shen you captured last mission (you
did, didn't you?) and several tonnes lighter. So be careful how much firepower
you use to bring it down or you'll only get scrap for your troubles.
High on a hilltop, click, click, click
The top of the right ridge, where the camp is, is a good place to take the
turrets and the last Resource Building to the
East, at the edge of the map, and also the 3 turret installations to the North,
on your side of the bridge. Especially handy are the turrets covering the
bridge.
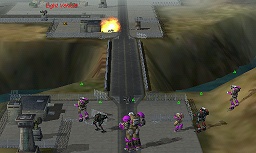
Where's that confounded bridge?
Now run across the bridge and grab the turret controls, wreaking havok on
the assembled Hunters and Harassers
and stirring up another Starslayer. Melt everyone
with your laser charms, then destroy Bandit Air Traffic
Control #2. You should have been able to do this mission with only
one Repair Vehicle, so grab that second Slayer and head towards Extract, picking
up an Urban Mech on your way out, making for a tasty profit, including Claymore's
Atlas.
Next Op