Here is another good mission to build a B Team and
push combat skills. Below is a table from another campaign, showing various
rankings at this point:
|
Pilot
|
Gunnery
|
Piloting
|
|
Longshot
|
80
|
74
|
|
Dagger
|
66
|
80
|
|
Flash
|
63
|
80
|
|
Shadow
|
61
|
80
|
|
Steel
|
65
|
69
|
|
Meat
|
63
|
61
|
|
Claymore
|
63
|
58
|
|
Jinx
|
57
|
80
|
As you see, four Pilots are perfect navigators but need
some gunnery practice, so I start using them in "Hold" formations.
Longshot needs some piloting to push her to Ace level. The rest of the team
needs practice at both. So I'd select among the B Team for this Op as ambush
shooters and Longshot and Shadow for the runners in this mission. Dagger
and Flash are a bit short on Gunnery and might not make Ace by Op 17, so
I'd push Longshot hard in order to have at least one Ace Sharpshooter by
the Honor Guards mission.
[You get no salvage on this mission
and no RPs so take mechs with max damage in mind. You do get access to several
Repair Bays though. You also get to face "brilliant Clan warriors"
so um... pretend to tremble or something so as not to hurt their feelings,
'k?]

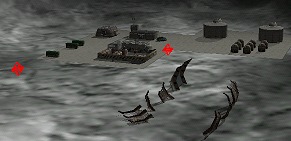
Head immediately Southeast until you see the slope rising up to the lunar
plateau. Go up it until you just reach the top. You'll see an Airstrip, with
several fuel pods at its' end. Approaching it, you'll hear the powerup of
two mechs - a Thor and a Ryoken;
you'll also hear the Clan blowhards on the vidcomm. It's almost idiotically
simple to use the fuel tanks sitting everywhere to cook these silly gooses.
Wait til they mindlessly charge you, get the fuel tanks between you, and let
'er rip. So much for "brilliant Clan Mechwarriors." You'll hear
a message from their ejection pods, and they become part of your team (i
am so thrilled)

"We are superior in every way to your... eek!"
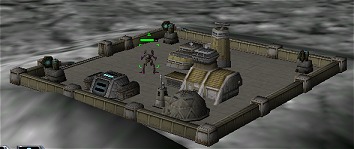
Grab the Repair Bay and the Weapons
Facility C, gaining Clan Gauss Rifle tech.
If the Davion Dropship wasn't cooked in your
encounter with the Clan mechs, destroy it now. Then grab the Sensor
controls for an excellent TacMap update.
Go back down off the planteau the way you came until you can see your Dropship.
From there, proceed North along the Shield Wall that divides you from The
Dark Side of the Moon, staying just outside sensor range of enemy units.
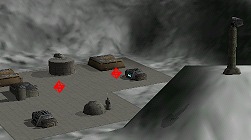
The Great Shield Wall
A pocket there in the Northeast, just outside the first
Gauss Turret installation, makes a perfect base-of-operations. It leads
behind the enormous Shield Wall and makes excellent cover for moving your
team North.
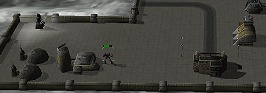
Arf, arf! Are you my new Master?!?!
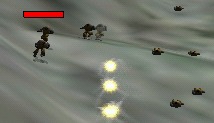
Now, play a game with the Uller and Partisan
patrols: send the Anubii racing to the turret controls before the Ullers can
turn back. There's nothing better than watching an Uller getting his own Gauss
fire back, unless it's watching the Ullers blow apart their own turrets! You
might use a Sha Yu or Wolfhound in this position for their heavier armor,
depending on how good you are at running and jumping, but nothing slower;
you must be faster than the Ullers (97 kph).
It also helps to approach the Gauss cannons at awkward angles to mess up their
aim. Warning: if several of them can hit an Anubis even once, it's bye-bye;
the only thing that helps is if you have a Light Mech Specialist to do the
running/capturing.
Would you believe... they put a mouse on the Moon?
Capture these four Turret Installations, curving
North. If your timing is right, you'll run into very little opposition (use
those captured sensors) and you will own the entire
Northwest side as a safe arena to do some serious carnage. You may
run into small patrols of Uller pairs; it all
depends on where they are in their patrol circuits when you start your run.
Generally, though, they are all on the other side of the craters and you are
shielded from their sensors.
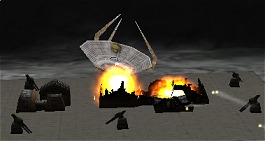
These generators must go
When you reach the end of this series, you'll see a Sensor Tower on top of
a deep crater. Inside the crater are two Wolfhounds
and two generators. Blow the Sensor Tower and the 'Hounds will probably run
out of the crater after you. You may also attract the attention of another
Uller team. When you have dealt with the mechs,
blow both generators, which power all the turrets protecting
the HPG-Uplink stations.
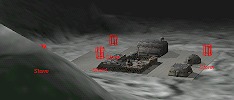
East Bay is a great place to vacation on the off-season
CIRCLE WAY
Circle Northeast and around this crater, or hop through it with jump mechs
and out the other side and capture the East Repair Bay installation, a handy
thing to have. Then go due west to the Relay Station at the edge of the crater
that holds the HPG-Uplinks. Depending on what
you find there, like an Enfield or two, deal
with it, then hop into the crater and destroy the HPG-Uplink
transmitters.
From this crater, you can choose to assault the Weapons
Facilities to the West and South of you. Your approach here all depends
on how you've dealt with all the Uller patrols and how many functioning captured
Gauss turret installations you have. If you take Facility B, then A, you can
hop the crater wall at the convenient rise and go right to your Dropship and
Extract.
BACKTRACK WAY
Take your team back along the crater rim past the last turrets you captured,
and you'll see a big ripple in the surface. Along this axis is a good place
to jump into the crater below. Depending on what you've encountered before,
you'll find various combinations of Enfields
and Ullers and some mean Storm
PPC tanks. Since Enfields and Ullers can't jump, they'll have to run
around to the entrances... which are covered by your captured Gauss turrets.
The Uplink is down; I repeat: the Uplink is down
Once things are firmly in hand, destroy the
HPG-Uplinks then get out of the crater and head
back along your original path on the NorthWest side of the crater complex,
keeping inside your captured Gauss turret cordon, until you are outside the
crater that holds the Weapon Facility A. Another
Enfield and a Storm will greet you. Say hello,
and capture the Facility for Clan LRM tech.
Weapons Facility A
Now jump into that crater, and follow the deep trenches South and East, past
the destroyed Uplink towers. By going this way and staying in the shadow of
the crater's rim, you avoid the other curve of Gauss
turret installations on the Southeast rim, which are harder to capture
from the outside. Follow the trench until you come to "the Bones of the
Whale" and Weapons Facility B, which grants
you Clan Ultra Autocannon tech. There's an Enfield
and a Jagermech there; when you tangle with them,
you'll probably stir up another patrol pair of Ullers
and a pair of Enfields, all depending on what
patrols you ran into on your Gauss turret expedition. The trenches become
your friend here, funneling enemies right into your waiting lasers.
Weapons Facility B
One thing to beware of: at this installation you will encounter at least
20 or so Powered Armor
units. They can seriously hurt you in this number if you don't pay
attention to them, so while most of your force is smiting Enfields,
Ullers and whatever, have at least one mech targeting
these vicious little curs.
More Power to them... eh heh heh
When it's all over, go back along your path once more, Northwest down the
trench and up the grade until you are outside the crater at Weapons Facility
A. Then just lope across the lunar surface back to your Drop Ship and the
Extract Zone, and buy the Thor and the Ryoken
when you get the chance. Enjoy your pretty Liao medal (ooo! shiny!)
[Jinx made Elite]
Next Op