DAY 45 - new mechwarriors join your team. Cyclops available.
You can fiddle around with light mech combinations
for this mission, but I have never truly missed the sensor abilities of the
Raven or even the Anubis here, and prefer to go with a heavy, fast mech with
jets - the good Doctor, of course, a quite-nasty Lao Hu mod (see it in the
Mech Bay). I
put Longshot in it because she needs the piloting points to achieve Ace and
get her Sharpshooter skill.

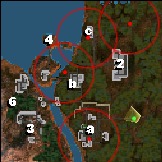
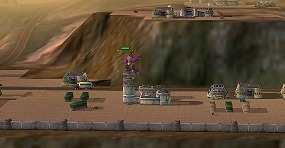
On Drop, head North to the Meeting Hall, and
smack the Razorback who tries to get in your
way. You'll receive a number of Primary and Secondary objectives. Your first
target should be SecObA - the Sensor
controls (or you can take them first, then return to the Meeting Hall).
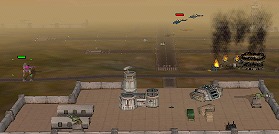
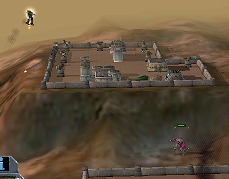
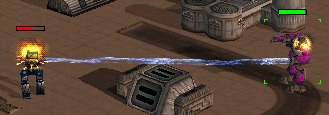
Invite some Attack Choppers to a barbeque
Head back South then turn sharply to the East when you see the opening in
the trees. You'll come out right in front of the forward turrets. Some Centipedes
will try to obstruct you. Destroy them and take control of the turrets. Bearing
right, run forward and grab the Sensor controls, which will trigger an assault
by several Attack Choppers, LRM
carriers and ground units. Your captured turrets come in handy here,
as does that big, beautiful fuel tank. Take care of business, then capture
the Repair Bay.
Now that you have sensors, life becomes much easier, at least on the East
side of the river, as you watch the enemy units make their rounds. But since
you are in good shape now, go West, young Mechwarrior! Behind the Repair Bay
area, the river narrows to a neck just barely jumpable - you'll have
to wade into the shadows to do it and fiddle around with landing spaces until
you get an OK from the cursor.
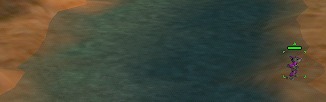
You'll have to wade and fiddle to make the jump across
Then jump across, and head North along the shore to the bridge. Capture both
sets of bridge turrets, West and East, to prevent any nosy groundhogs from
coming to ruin your surprise party. You may run into the Hollander
who comes from the Northeast to investigate.
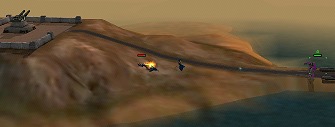
Shhh! We're hunting wabbits uh huhuhuhuh!
Here's where the fun part of this mission begins. A little North and East
of you is the lowest level of the mountain's defenses. Run towards the mountain,
and as soon as you are in range, jump and capture the lower turret controls.
But don't stop there! Jump again, up one level to the big power generator.
You'll start getting sensor pings so look around carefully... if it's clear,
jump up again, to Orbital Gun Beta. Then again,
to the top turret installation.
Leapin' Lizards!!!
Somewhere during this process you'll find out what those sensor pings were
announcing: a Hunchback on guard. By playing
hopscotch between the levels here, you can keep the Hunchback running after
you... and right into his own turrets! Ooh ho ho it's just so fun! When you're
done playing with the unfortunate idiot, destroy the Orbital Gun. If you need
to, hop across the river back to your Repair Bay, then return.
This Base has to go; it coveres your Extract Zone
Then head North towards the second installation on this side of the river.
This one has a better defense force: A Hollander,
a Fire Ant and a few Hetzers
and LRMs. If you were in bad shape after
the last sortie, you'd be wise to go across the river and heal up now. If
you managed to finesse the hopscotch game with the Hunchback, you should take
this Northern installation, which includes another Repair
Bay to patch you up again. You need to do it anyway; this installation
covers your Extract Zone.
Orbital Gun Gamma
North of this installation is a small land bridge across the water. Take
it, and swing around to the East, behind the small hill, avoiding the turret
fire and blowing away the Razorback that tries
to stop you. Continue on your course and you'll come upon a highway bridge
across to the Orbital Gun Gamma island. A pair
of Attack Choppers will try to stop you. Fat
chance. Kill them and the OG.
Your captured sensors come in handy, allowing you to see where the patrols
on the East side of the river are. Wait for an opportune moment, then leapfrog
islands until you hit the Eastern shore. Head up North to the SecOb
C, the Relay Station and capture it. There
are two autocannon turrets guarding it, and I've
never found the generator or controls for them, so beware, and kill them or
stay out of their range. During this operation, you may be accosted by some
Scimitars, Hetzers or even a Razorback,
all part of the circling patrols.
Once you've taken the Relay Station, slip into the woods North of your position
and head East. Watch the sensor contacts moving along the road and plink Centipedes
and Hetzers as they come. One of those contacts will be Mobile
Orbital Gun Omega (try watching for falling
trees). It isn't armed and can't harm you, so get close and melt it down.
It may be accompanied, depending on your previous encounters.
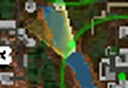
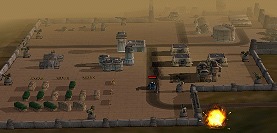
Approach Base Alpha from the Northwest
By now, you're probably somewhere North of Op Point #2, the Orbital
Gun Alpha. Either sit here and knock off the ground units that keep
patroling their loop, or take a run at the Northern turret controls. If you
capture them, you'll awaken a Hunchback. He should
be no problem with the ammo piles lying around and your captured turrets.
Then kill the Gun and capture the third Repair Bay
after disarming the rest of the turrets by grabbing the controls. Repair up.
Those old-fashioned perms can be murder....
Now head back West through the trees to SecOb #B,
the Fuel Tank Depot. Shoot at the Hetzers, Scimitars
and Centipedes that keep coming down the road til you get 'em all to complete
SecOb #D, Destroy All Enemy Units. Then
ice the fuel tanks; whee!
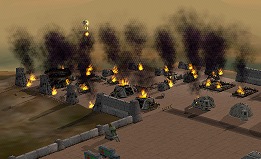
Tsk tsk, looks like another industrial accident
Head back West, hopping across the water and Extract.
Next Op