That Mandrissa, she is so nice! She compliments your fraggin' skills again,
which upsets her son. Then she hands you some more business. Luckily, you
don't have to work under her son (ewww!). This mission starts fast and stays
that way, so choose mechs with speed. Lao Hus are now available so pick up
a couple or three.

Immediately start to run North, hugging the curve of the lake and head West,
using the Partisan attack as cover. No matter what
you do, the Partisans suck and will call for your assistance anyway, so ignore
their radio broadcasts because you can't save their lame butts.
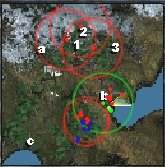
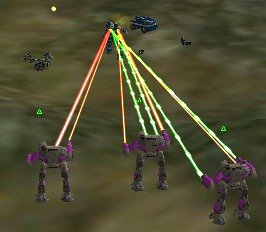
At SecOB#B you'll run smack-dab into its' beefy
defense force: several Storms, ground-huggers,
a Razorback and a Highlander.
Zowie! However, your team really shouldn't have too much trouble lighting
into them - take out the turret generator, then the fuel tanks. Whatever's
left over will quickly shrivel up to your force's attentions.
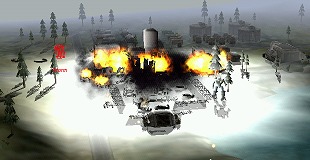
Hell of a town for a party, boys...
Problem is, right after you take care of them, down from the ridge to the
West come 2 Razorbacks. Ok, you'll repair afterwards...
except then two more Razorbacks and a Bushwacker
come from the same direction; usually they patrol your Extract Zone but the
fighting may draw them over the ridge. This firefight is fast and furious.
You also have to beware that the forces tangling with the Partisan attack
may also be on your trail; perhaps a Hollander,
Razorbacks or a Hunchback;
or Shootist - it all depends on what happens
in the Partisan battle, so pause and take a look over there once in awhile.
Let the Partisans lose their own battles
After this frenzy is over, you'll probably need repair. Grab the three Resource
Buildings and destroy the 2 Medium Factories.
Revive the Highlander if it's worth it; he is a nice addition to your team
strength in this mission, esp with his Gauss rifle (if he still has one).
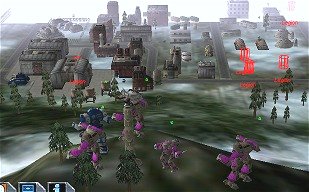
Then head East, up the hill to take the small installation and the critical
hilltop there. You'll meet whatever forces survived defeating the Partisan
attack. When you finally control this central hill, TacOps
will patch you through to the Partisans, who inform you that they'll be blowing
the Sensor grid soon. That will happen in a few minutes; you'll see
it go down on your Tac Map. Meanwhile, a couple of Razorbacks
from down the North side of the hill may charge up at your team. Silly piggies.
Baconize them.
The hills are alive with the sound of...
Slightly Northwest of this hill is a small road checkpoint, which is what
those Razorbacks are patroling. Look closely though; the place is lousy with
mines. Down the road to the East is an installation
you may wish to assault now, as it contains a Repair
Bay and is a central location. Just South of the installation is a
nice set of ridges to use as cover. At this installation, or on the way, you
may run into another Bushwacker/Razorback patrol
moving between this installation and the Factories at PriOb#1.
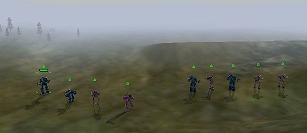
Inside the installation itself are a Bushwacker,
2 Hunchbacks and several Hetzers.
Use the ridges, stay cool and take opponents one by one.
The Charmed Ones in full flower
Due North of this centralized installation is SecOb#A,
the generators. When you approach them, a Shootist
will power up, along with several Hetzers. You know the drill. Then proceed
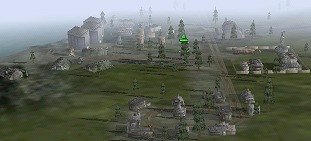
North and then swing East. You'll see a large mountain there. Get in the dip
behind the mountain. Then arrange your team to cover the city below; this
is a great place for Swarm LRMs and the Highlander's Gauss rifle. I like to
use the hilltop as Observation, with my LRM launchers on the blind side of
the ridge, behind my laser shooters.
Hey, dude! I can see your house from here!
Alternately, you can use those nice notched ridges south of Legion Town,
near where you took your target practice on those Hunchbacks and the Bushwhacker,
letting your captured turrets guard your west flank.
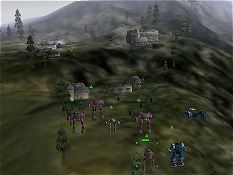
Now... you've heard that these Legions are something;
if you went to SecOb# C before, the Liao Operative
will tell you the Legion's weak spot is its' rear armor.
But I confess, by this time, with my pilots shooting well and mechs configured
for a proper sustained rate of fire, I've never really had much problem with
the Legions.
Here's a much more useful fact about Legions: they
are stone-cold dumb. Send one of your salvaged Hunchbacks forward until they
lock onto him. Then just jump him back behind your shooters. Keep him walking
straight backwards in a line with your Power Rangers. Then just blast the
Legions as they come down the road, all mindlessly locked onto the radar signature
of the Hunchback. (just goes to show you what government work is worth)
[If you really need help on this one, set up in the West lee of the hill.
The Legion tanks will have to climb the hill, slowly, then funnel over a narrow
groove; perfect for target practice. They can't use their Gauss rifles if
they can't see you either.]
"No, Lieutenant; your men are already dead."
Take them however; I don't usually have a problem here. If you do, then,
um, I heard the Kell Hounds were looking for some good people...
Ok, so the Dreaded Legion Legion is toast. Extract
is nearby; SecOb#C, Meet
the Liao Op, is far. Do you blow off the Secondary Objective? Not on my
watch, sister. Do you send all your slow mechs down there, waiting ages
for them to get there and back again? Nuh uh neither.
Send everyone but your fastest mech to Extract. If you meet that 'Whacker/Razorback
team on the way, knock them down. Have everyone wait at Extract.
Send that little mech (Sha Yu in this case) South, back to the installation
where you first came in, by the bay. On the way, salvage
some mechs and send them to Extract; by now, the land between them and the
Extract Zone should be free of Steiner vermin. Keep your scout mech
going South until you hit the bottom edge of the Bay, then swing West. Several
ridges and valleys there will shield you from various small installations
further to the North; no point in riling them up; there's
no more RPs :) You can also take the high forest ridge, which you can
see in the middle of the TacMap.
Won't you take me to... Liaospytown...
Approach SecOb#C carefully; the best place is
from the South ocean side. If you zip in and get close to the Meeting
Hall, the Liao Op will come on the radio, giving you all sorts of info
on the armor weakness of the Legions, which you don't need, because you've
already killed them. He'll also tell you an Aerospotter
is in the neighborhood. He's up on the North ridge, accompanied by some little
grounders and LRMs, and he'll start down the
mountain when you get the contact from the Liao Op.
Ugh! Aerospotters are pure evil! They spot for Shilone
Bombers. And you know that if you're spotted, you'll see a red target
form on the ground around your mech, and a countdown (4-5 seconds). RUN!!!
At the end of the countdown, you'll be spot-bombed, and it's a doozy. You
can lose a mech easily to this type of bombing, and fast. The Aerospotters
are also tough and require a lot of firepower to stop them.
Fortunately, they are slow. So don't stick around! Run
away, run away! That's why we brought the fast mech. Run back
East and through the valleys, then swing up North and run to Extract. They'll
never catch up, and you'll get paid for the Secondary. 'N
that's why Company B is rich, as
well as famous ^-^
[Longshot made Ace, finally]
Next Op