This is your last chance to push
for Aces before the penultimate Liao encounter, so choose your team
wisely. If you already have one Ace Sharpshooter, leave her behind; she'll
hog all the kills and prevent advancements. Or put her in a small but accurate
mech for sniper cover and emergencies. You also get to rub up against that
sexy Major Kelly's... elite forces. Try to control your enthusiasm.

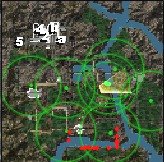
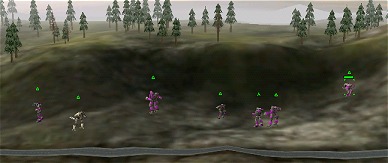
The place is virtually deserted when you Drop, so head straight North and
capture the Sensor controls, brushing aside the
Centipedes and Attack Chopper that try to stop
you. Then keep going North and take the turrets and the Resource
Building; remember the Repair Bay here.
Hi-ho, hi-ho, it's off to ambush we go...
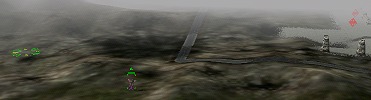
Now turn sharply East, capturing the second set of turrets on your way past.
By now you have noticed the first part of the convoy entering from the South;
keep running East though and you'll see a Sensor tower where the road splits;
beyond it is a small concrete patch. Take the small land bridge that crosses
the river there, south of the bridges. Across the river you'll find a turret
installation that covers the road, as well as two Resource
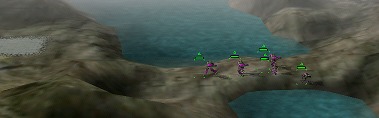
Buildings. This is the place to set up. Arrange your team in the mountains
to cover the narrow road gap, using the turrets to bolster your firepower.
Then just wait.
Get 'em in the groove, baybay
The convoy splits into two parts; one circles around at the South and then
heads North, being irritated somewhat by your captured turrets. It proceeds
to the Base. Fuggedaboudit. You'll get back to it :)
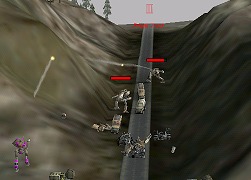
The first part of the other half of the convoy will come down your road.
In the lead are a Shadow Cat and a Jagermech;
get 'em! Let the turrets deal with the tanks and troop transports. Don't
let the mechs get close enough to recapture your turrets! You should
have just enough time to take care of business and jump back into hiding before
the second part comes. Led by a Storm tank, there
are several cargo trucks, a Resource Truck, and
two mechs - another Shadow Cat, and a Vulture.
Don't let the turrets blow up that Resource Truck!
(this will truly test your mettle and nerve, and will count highly in your
favor when we review your combat footage)
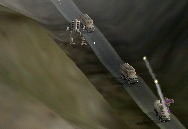
You'll have to jump into the action, like this fearless
little Sha Yu, in order to save the Resource
Truck
[Btw, there is a Repair Truck in the convoy but
you can't capture it no matter how hard you try so just frag it]
Now retrace your steps West, over the land bridge, and turn South, all the
way down along the road and then East, grabbing the turrets and Resource
Building in the South. Keep going up the road until you're back at
the original installation you took, and recapture it.
[This merry-go-round helped you cut the reinforcements
in half, gather all your resources, and grab a nice little Vulture to use
in your coming assault.]
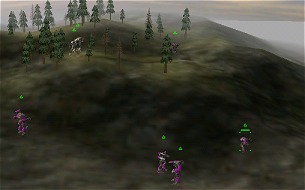
Head North from the Repair Bay, and you'll find an excellent hollow just
in front of the Base's West (right) side. It's screened by trees and makes
an excellent point to begin your foray against the Base and avoid LRM fire.
You'll notice your Extract marker slightly North, through the trees on the
left side of your position. This base was strategically
left out of the sensor grid so you'll need your Sensors Specialist here.
Prepare the barbeque pit with a liberal sprinkling of
hot mechs...
Begin your assault on the Base by having a mech approach it from the direction
of your Extract marker while your team waits in the hollow below. On this
side approach, you'll usually stir up some Centipedes,
Partisans, LRM carriers, a Wolfhound and
another Vulture. Yum! Lure them back through
the trees and into your prepared luau pit. Baste strenuously.
Approach Base Gemini from the southwest
Poking back a little farther (you may have to sneak your Raven in through
the mountain pass Northeast of your Extract marker to get a full picture of
this deep compound) may net you additional ground-crawlers as well as an Uller.
You might not see the other Uller, who is deep
in the back of the installation, but he's there. You'll get to him later.
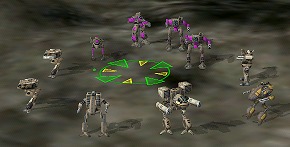
After thinning out the ranks of defenders from the West, move your team East
a bit along the back of the ridge, close to where the road turns North into
the Base, and set up on that side of the hill. Your sensors will pick up a
Wolfhound and a most valuable prize, a Mad
Cat (drool) patrolling the front wall. Swing a mech around the hill
and walk brazenly down the road until the mechs catch sight of you. Thumb
your nose at them and hustle around the hill; they'll follow, you'll slaughter
(since Longshot is now a Sharpshooter, I was able to take the Mad Cat with
two shots, damaging only the head and field-salvaging it, adding it to my
team).
I see dead people! Well... soon...
You should have no trouble taking the rest of the Base. Remember, you
get more C-bills if you capture the turret and gate controls than if you destroy
them so don't... No one said anything
about destroying annoying turrets though; you
can chew off a couple to reduce the LRM barrage
without losing the SecOb credit :)
Left in the Base are a couple of Hunters, LRM
carriers, a Shadow Cat, a Vulture
and that deep Uller. Since the front is clear
now, jump into the turret control area from the top of the hill and capture
those. The turrets on the right/East side of the base are damaged already.
Use the box-like structure of the Base's walls as cover to jump in and out
of areas, destroying willy-nilly and capturing the controls, Repair
Bay and Steiner HQ. Remember to salvage
before you head to Extract. It's possible you'll have
two shiny (well, sorta shiny) new Vultures to escort your new Mad Cat
:) Keep the Shadow Cats you can buy afterwards; they mix well with Sha Yu
as a quick assault team.
Tell 'em what they won, Johnny!
[ Meat made Elite]
Next Op