
All images in this walkthrough are property of Ubi Soft Entertainment™
All images in this walkthrough are property of Ubi Soft
Entertainment™
Walkthrough by Bert Jamin
© October 2004
Bert Jamin (www.gamesover.com)
This walkthrough may not be sold and may not be used for any commercial
purposes. Neither is it permitted to publish this walkthrough in any way without
the written permission of the author Bert Jamin (www.gamesover.com) and his E-mail address ([email protected]) are mentioned unchanged. For the most up to date walkthroughs always visit www.gamesover.com.
If you have any suggestions
to improve this walkthrough, let me know by sending me an email: [email protected].
Click on one of the books to go to that chapter,
 Tomahna |
 Spire |
 Serenia I |
 Haven |
Serenia II |
or click on the image at the bottom of this page to go to the next chapter.
Attention: I'm writing this walkthrough while playing the game for the very first time. Maybe I'll have to update this walkthrough during the game! So check often if there are any improvements... For the last time updated on: 10.30.2004 .
Chapter 3, Serenia - Part One
Turn around and notice that the linking book is lying on the ground. Zoom in on the pedestal where the linking book should be and click on the amulet. Zoom out and turn around. Cross the wooden bridge. Turn to the right and you can play with the soap bubbles if you wish. Turn to the left a little and go forward three times. Cross the next wooden bridge and see how Achenar runs off. Follow the same path and go forward two times.
Cross the four wooden planks on the water on the right. Turn to the left and go forward three times. Turn to the left and go forward two times. Now you'll meet Anya, a Protector of Serenia who gave Yeesha the amulet. Walk past the bell. Continue walking straight ahead past the crossing and walk past the stone arch. Climb down the stairs. Turn to the left and climb down the next stairs.
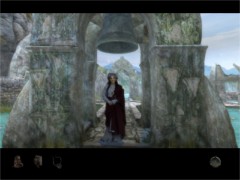
Your first meeting with Anya
When you approach the little pool some kind of diving device rises from the water. Notice that Sirrus is inside the vessel. So... this means that both of the brothers are at Serenia! Notice that he's picking up something from the floor in the vessel. Than he sees you through the window and runs off too, but not before he uses one of his bombs to destroy the diving device. Turn to the right and follow the path further to the left to end up at the backside of the vessel.
Zoom in on the hatch of the vessel that is lying on the floor and click on the amulet. Turn around and go forward one time. Turn to the right and go forward once more. Turn to the right and zoom in on the statue. Click on the amulet. Zoom out. Turn to the right and enter the Memory Chamber. Walk to the light-blue lit center of the chamber. Zoom in on the plant at the center. Notice that it beats like a heart.
Zoom out, turn around and go one step forward. Look around and notice some masks standing around. Walk toward one of the masks and click five times on one of the masks. Now you'll see that some memories of Yeesha have been kept imprisoned. They are, Sirrus holding some kind of blue egg and Achenar cutting something loose and taking it with him. Exit the Memory Chamber and walk straight ahead on the path leading up. Turn toward the stairs leading up and meet Yannin, one of the other Protectors.
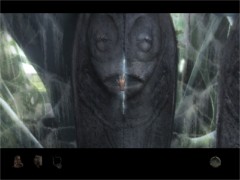
The memory masks
She is very upset about the broken vessel. It turns out to be a Harvester that was used to collect empty memory globes on the bottom below the Memory Chamber. She tells you to visit her sister in the Hall of Spirits and, if she has woken up, to ask for her advice. Instead of going there follow Yannin to the backside of the Harvester. She tells you that the damage to the Harvester is too severe to fix. She also tells you that the Harvester can be fixed by using parts of an older Harvester near the old Memory Chamber. Turn around and go down the path.

Meeting with Yannin
Go to the right and go forward until you reach the stairs leading up again. Turn to the right and zoom in on the broken Harvester. Click on the amulet. Zoom out and turn to the left. Climb up the two stairs. Go forward and on the crossing, go to the right. Now you are facing the Hall of Spirits. Climb up the stairs and enter the hall. Look around and notice that all three Protectors are asleep at the moment so exit the hall.
Climb down the stairs and walk straight forward into the opposite pavilion to meet Anya again. When Anya finishes talking to you, look at the mosaic floor. Zoom in and click on the amulet. Take a picture of the floor. Zoom out and walk back to the crossing. Turn to the right and walk past the arch once more. Climb down the stairs and go forward. Cross the wooden bridge at the end of the path.
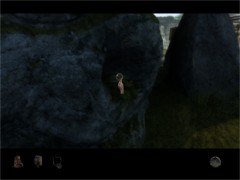
Go forward twice. Now you are facing the old Memory Chamber. Turn to the left and go forward. Zoom in on the pole and click on the amulet. Zoom out, turn around and climb up the stairs. Climb up the next stairs on the left side. You'll notice that Achenar is climbing up from the old Memory Chamber and that he's carrying some kind of artifact. Remember that you saw him steel this artifact in the Memory Chamber. He will tell you that he's only borrowing the artifact to help him prevent Sirrus from killing his father. He also asks you to prevent Atrus from coming to Serenia. The last thing he asks you is to find his Journal that he hid twenty years ago. And off he goes.
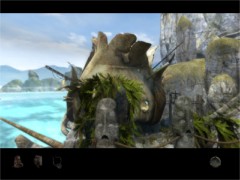
The old Memory Chamber
Zoom in on the broken bridge and click on the amulet. Zoom out. Turn to the left and notice a statue with a huge red tongue. Pull the red tongue. Turn to the left and climb down the stairs. Look down to the ground and notice an opened lid. Climb down the lid. Turn to the left and pull the red tongue to close the lid. Look around. At the right side of the ladder is a stone wall. Notice that on the left side all roots are dead and on the right side all roots look healthy. Go further down.
Zoom in on the now empty pedestal. Click on the amulet. Turn to the right to see some kind of primitive device. You can turn it if you wish. You have no idea of its use. Turn to the right and notice a crevice on the right side of the dead roots. Walk to the crevice and zoom in. Go forward to end up on the wooden gangway where Achenar took off. Follow the path until you face a little drawbridge.
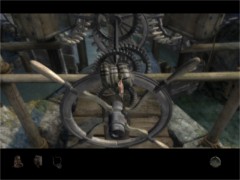
Turn to the left and climb all the way down the stairs. Now you are standing in front of the old Memory Chamber. Go forward one step. Turn to the left to see the door of the chamber. It's locked of course... Turn to the left and zoom in on the little platform. Click on the amulet and zoom out. Turn to the right and follow the path. Cross the wooden bridge. Turn to the left. Push the left lever all the way forward to raise the old Harvester. With the right lever you can open and close the hatch of the Harvester. Because it is open now, leave the right lever alone. Turn to the right and step on the wooden bridge. Turn to the left and enter the Harvester. Turn around, look up and notice the handle at the bottom of the hatch.
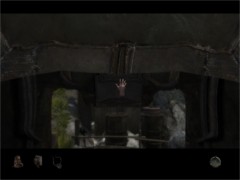
The hard to find handle
Pull down the handle to close the hatch. Turn around and face the window of the vessel. Pull down the bent metal pipe above the window to go down. On your way down, look through the window to see some kind of entrance beneath the surface. At the bottom you can see some empty Memory Globes. Pull down the bent pipe above the window to go back up. Turn around and pull up the handle to open the hatch. Exit the vessel.
Go to the right. Cross the next wooden bridge. Go forward twice and climb up the stairs. Cross the drawbridge on the left and go forward twice. Turn to the right and walk toward the circular water basin. Zoom in on the left part of the apparatus to see that one of the wooden gears is broken. Click on the amulet to see that Sirrus did this on purpose. Zoom out.
Turn to the right and cross the small wooden bridge. Turn to the left and go forward. Cross the next small wooden bridge. Cross the wooden bridge on your left. Go forward two times and cross the next wooden bridge. Turn to the right and walk toward the waterwheel. Push the wooden handle all the way to the right. Notice that the water at the left side stops flowing. Turn around and step down the wooden stairs.
Cross the wooden bridge on your left. Walk the left path. Go forward three times and step on the wooden bridge. Turn to the left and climb up the wooden ladder. Look down and pull the cart to the right. Walk to the backside of the cart. Notice a half gear with two wooden handles. Push the gear clockwise all the way. Step back to the front side of the cart. Move the cart all the way back to the left. Turn around and climb down the wooden ladder. Turn to the left and go forward one step. Turn to the left and pull down the handle that is hanging on a rope.
Turn around and go forward three times on the wooden planks. Cross the wooden bridge. Turn to the right and go forward four times. Turn to the left and go forward. Notice that the water has stopped flowing. Turn to the right and go forward. Turn to the left and go forward. Cross the little wooden bridge. Go forward one step. Turn to the left and zoom in on the wooden box hidden in the pillar that Achenar had told you about. Click on the amulet.
The even more hard to find Journal
Open the box and zoom in on the Journal. Click on the amulet and open the Journal. Look through the Journal. When finished reading zoom out. Turn to the right and go forward two times. Step on the wooden planks. Turn to the right. Go forward twice. Cross the wooden bridge. Turn to the left and go forward. Turn to the right and enter the square with the Hall of Spirits. Continue straight and climb down the stairs at the end of the square. Go forward twice. Cross the wooden bridge and climb down the stairs. Go forward. Turn to the right and climb up the stairs on the left.
Turn to the right and walk toward the waterwheels. Zoom in on the large wheel and notice something grey twisted around the wheel. Zoom in and click on the amulet. Hmmm... nothing but a vision of a jungle and some kind of animal. Because this thing blocks the wheel you are finished for now.
This grey thing twisted around the wheel...
Time to head back to Tomahna. To go back to the linking book you can walk all the way if you wish, but it is better to use the ZIP-modus of the game. Click on the circular image at the right bottom of your screen. Click on the first image to get to the linking book. Look around on the ground and click on the linking book to get linked to Tomahna.
Tomahna - Part 4
Turn to the left and walk to the bench. Turn to the left and zoom in on the bench. Click on the amulet. Zoom out. Turn to the right and go through the closed door. Go to the left side of the office. Zoom in on the left circular painting and click on the amulet. Zoom out and zoom in on the right circular painting. Click on the amulet. Zoom out. Turn to the right and walk toward the desk. Turn to the left and walk behind the desk. Turn to the left and zoom in on the Journal. Click on the amulet and look trough the Journal.
When finished reading zoom out. Zoom in on the feather next to the Journal. Click on the amulet. Turn to the right and notice a linking book to Serenia. No need to go there yet, but remember that you can find it here.
Turn around and walk toward the door. Exit the room. Go forward one step and turn to the left. Go through the opened door. Push down the doorknob of the next door. Hmmm... locked! Turn the star-shaped lock above the doorknob. Pull down the doorknob once more. Now you are back in Catherine's garden chamber.
Turn to the left and walk one step toward the wall with the lit bulbs. Turn around and open the left drawer of the desk. Zoom in on Catherine's Journal. Click on the amulet and look through the Journal. When finished reading zoom out. Turn around and go forward past the lit bulbs. Exit the garden chamber.
Turn to the left. Go forward and enter the greenhouse. Turn to the right and walk further through the greenhouse. When you reach the bucket filled with water, exit the greenhouse. Walk the wooden planks and head for the elevator. Pull the lever to call the elevator. Step in the elevator and move the lever to the bottom position.
Open the elevator. Climb up the blue-lit stairs to Atrus' and Catherine's bedroom. Enter the bedroom and step in the fireplace. Push the circular button to go down. Exit the elevator. Turn to the left and go forward. Climb up the stairs to the room with the two linking books. Pull the lever at the left all the way back and enter the room. Turn to the right and pull the little lever to the right. Click on the right linking book to get linked to Haven.